Access your Back Office at your fingertips.
Download the app now on Google Play Store.
Scan the QR code
You can also scan QR code with your phone to download the app.
How to require direct debit mandate creation during user onboarding
Updated
On this page
Some repayment failures are not about willingness to pay. A borrower who meant to repay misses the date because life got in the way. Others repay only when reminded, creating collections overhead for your team every cycle. Direct debit addresses both problems by automating collections from the borrower’s bank account on scheduled dates.
Lendsqr lets you go a step further by requiring every new borrower to create a direct debit mandate at signup, before they apply for anything. Your repayment infrastructure is ready from day one.
This guide covers mandatory versus optional mandate setup, the borrower experience during onboarding, how to handle delays or failures, and how to enable the setting.
Mandatory onboarding mandate versus post-loan mandate setup
Without this setting, borrowers create their direct debit mandate at the loan application stage. A borrower applies for a loan, signs a mandate as part of that application, and the loan sits in pending mandate approval until the bank acts on it.
Enabling mandatory onboarding mandate creation shifts this process earlier. Borrowers create their mandate when they first sign up, before applying for anything. By the time they submit a loan application, their repayment authorization is already active. This removes the mandated wait from your approval timeline and ensures every borrower arrives with authorization already in place.
When mandatory onboarding mandates work best: It suits lenders who use direct debit across all products and need a collection infrastructure that is always ready. It works especially well for salary advance products where the borrower’s bank account is central to both eligibility and repayment.
When to keep the mandate setup optional: If only some products use direct debit, or if short-tenure products make card charging more practical, an onboarding mandate may add unnecessary friction. In that case, collect it at the loan application stage instead. In that case, the mandate is better collected at the loan application stage for the products that need it.
What borrowers experience during mandatory mandate onboarding
With this setting on, new borrowers encounter the mandate creation step during signup. After KYC, they enter their bank account details and authorize a direct debit mandate.
On the web app, borrowers sign the mandate using a digital signature pad directly in the browser. On the mobile app, they receive an email with a link to a webpage where they complete the signature step.
Once the borrower submits the mandate, Lendsqr automatically routes it to their bank for activation. The borrower can continue using the app while the bank reviews it. Their mandate will show as pending until the bank activates it.
For borrowers who are less familiar with direct debit, this step can feel unfamiliar. Explaining it clearly during onboarding reduces support queries. A short in-app message explaining that the mandate covers repayments only, and only triggers when a loan is approved, helps reduce confusion.
What happens when a mandate is delayed or fails during onboarding
Most banks activate mandates within 24 to 72 hours. During this window, the mandate shows as pending. Borrowers cannot apply for loans on products that require an active mandate.
If a mandate stays pending beyond this window, the borrower should call their bank and quote the mandate reference number to request follow-up. This reference number is visible in their account on the Lendsqr platform.
Banks decline mandates for a few common reasons. A dormant account cannot support a mandate. The borrower must reactivate it at their branch before trying again. A signature mismatch between what the borrower submits and the bank’s records on file will also cause a decline. Sometimes the bank has an outdated contact number for the borrower and cannot confirm the authorization.
A declined mandate means the borrower needs to start the process over with corrected information. Advise borrowers to use their formal bank signature and confirm their contact details are current at their bank before trying again.
How to enable mandatory mandate creation during onboarding
Here are the steps to enable this requirement in the admin console:
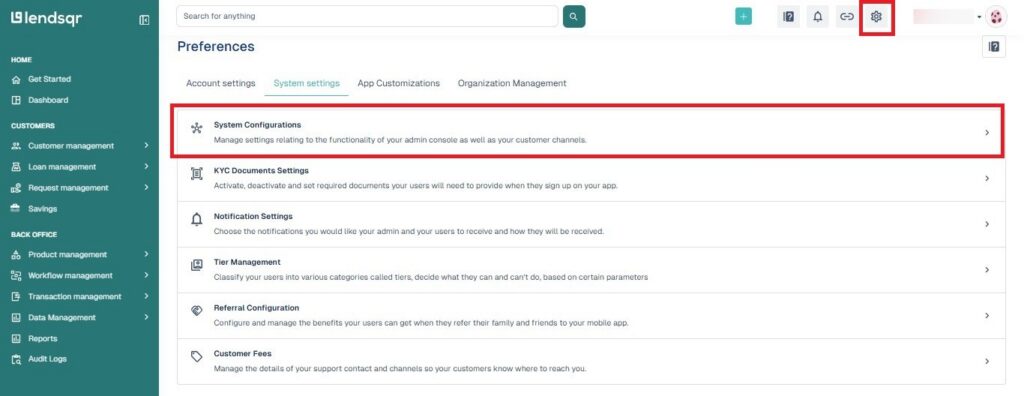
Log in to the Lendsqr admin console. Click on Preferences by clicking the Settings icon at the top right of the page.
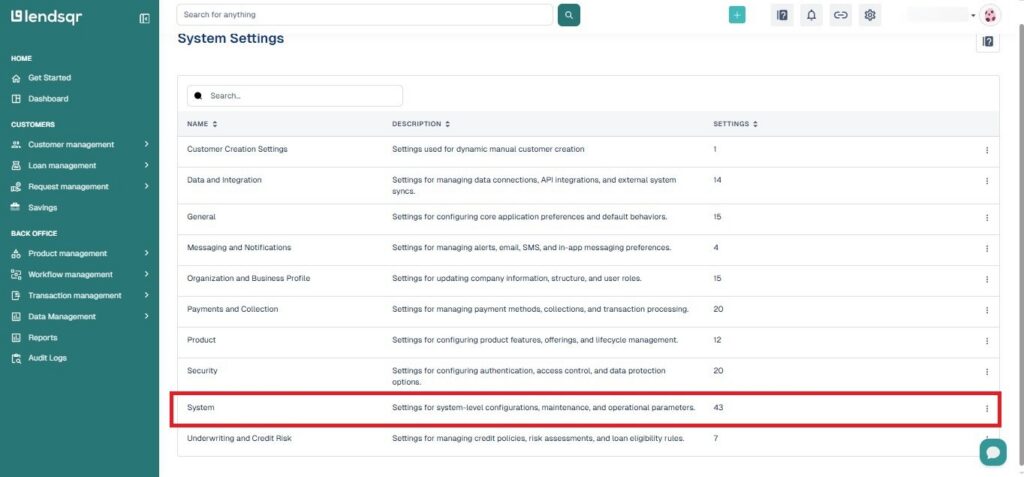
Click the System Settings tab, then select System Configurations on the resulting page.
On the System Configurations page, click System from the available categories.
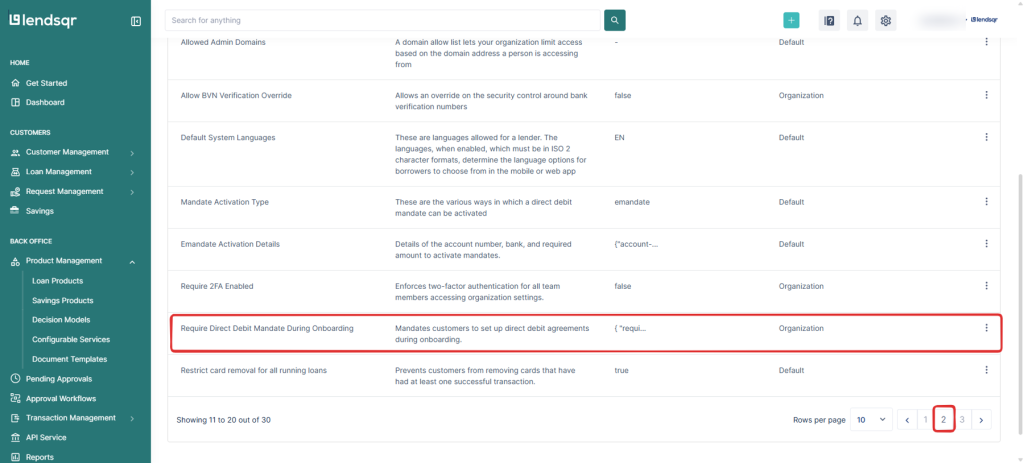
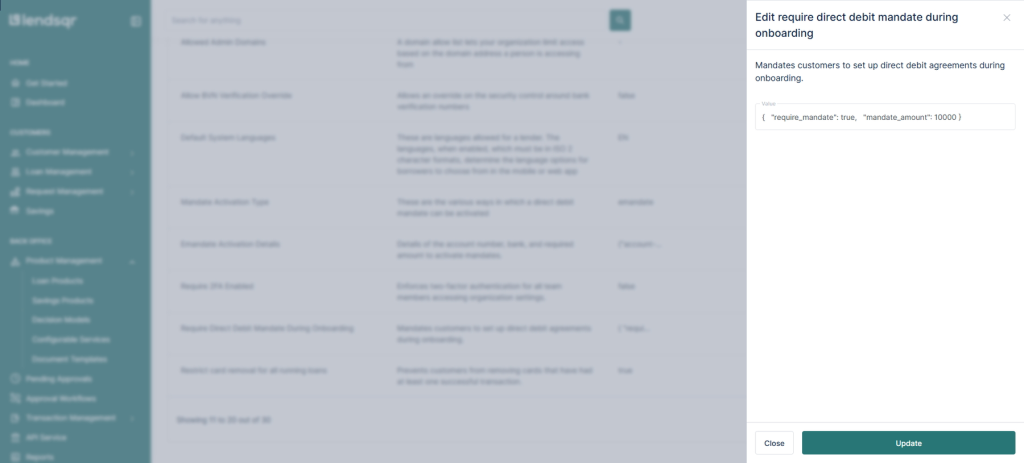
Scroll down and locate Require Direct Debit Mandate During Onboarding. Click the More options icon to edit or view the setting value.
This will open up the setting’s value, which is a JSON object: