Access your Back Office at your fingertips.
Download the app now on Google Play Store.
Scan the QR code
You can also scan QR code with your phone to download the app.
How to book loans with custom form questions in Lendsqr
Updated
On this page
Standard loan applications capture the basics: BVN, income, and account details. Depending on your product and borrower segment, you may need information beyond what a default form captures. Your loan type, borrower segment, or internal underwriting criteria may require data unique to your context.
Lendsqr’s custom form builder lets you define exactly what additional information your loan officers collect when manually booking a loan. You define the questions, mark which fields are mandatory, and attach the form to a specific loan product. When an agent books a loan manually, the custom fields appear in the form, and the agent must complete them before proceeding.
This guide covers why lenders use custom questions, common data types they collect, and how to configure the feature.
Why lenders collect specific customer borrower data
A default loan application form tells you who the borrower is. A well-designed custom form tells you whether they qualify for your specific product. Here are some examples:
Employment verification for salary loans: A salary advance lender may require the borrower’s employer name, staff ID, and HR contact number for verification.
Business details for SME loans: Business lenders need data that a personal onboarding form does not capture: business name, registration number, address, monthly revenue, and sector.
Collateral information for secured loans. If your product requires a pledged asset, the custom form is where your agent records collateral details. This includes asset type, estimated value, vehicle registration number, or land title reference.
Product-specific eligibility checks: For cooperative or group loan products, agents may need to confirm product-specific conditions. Custom questions can make these checks a required step.
What the custom form looks like in practice
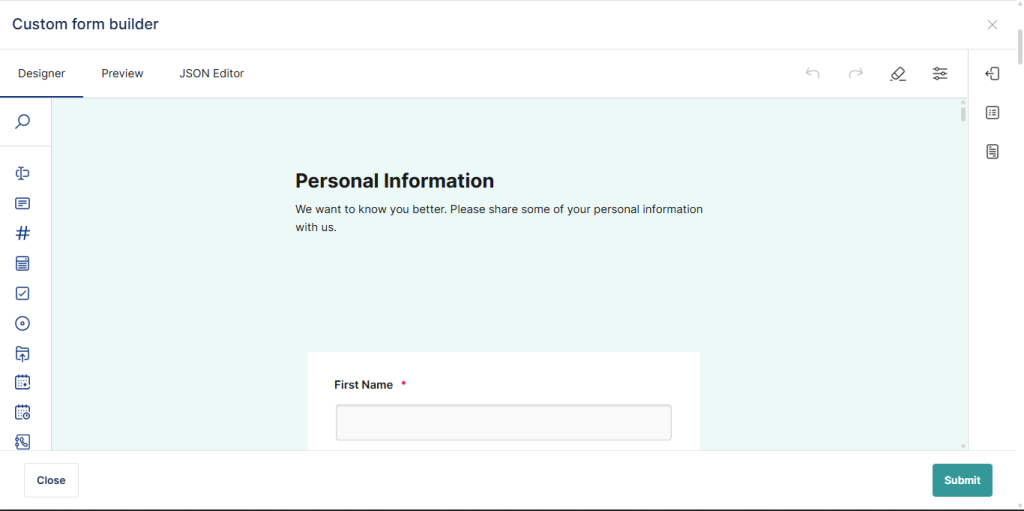
A custom form is built in JSON format and attached to the Custom Form Builder attribute on a loan product. Each form can have multiple pages, and each page can have multiple sections. Within each section, you define the individual fields: short text, number, phone, dropdown select, and so on.
Below is an example showing two pages of a form, each with different field types:
{"meta": {"name":"<org name>","description":"This is a customized loan application flow for <org name>","version":"1.0","url":"https://www.example.com","status":"active"},"pages": [{"name":"Page 1","title":"Page 1 Details","description":"Sample description","actions": [{"type":"continue","label":"Continue"},{"type":"cancel","label":"Cancel","message":"Are you sure you want to cancel this loan request?"} ],"sections": [{"name":"Section 1","description":"Section 1 description","fields": [{"id":"short_text_field","name":"Short Text field","type":"short_text","label":"Short Text field","description":"Short Text field Description","validation":{"required":true,"minimum_length":1,"maximum_length":256}},{"id":"select_field","name":"Select Field","type":"select","label":"Select Field","description":"Select Field Description","validation":{"required":true,"multi_select":false},"options": [{"label":"Option A","value":"Option A"},{"label":"Option B","value":"Option B"},{"label":"Option C","value":"Option C"} ]} ]} ]},{"name":"Page 2","title":"Page 2 details","description":"Sample description","actions": [{"type":"submit","label":"Submit"},{"type":"cancel","label":"Cancel","message":"If you cancel this, all the information you have provided will be discarded. Are you sure you want to do this?"} ],"sections": [{"name":"Section 1 in Page 2","description":"Sample Description","fields": [{"id":"phone","name":"Phone","type":"phone","label":"Phone","description":"Details","validation":{"required":true}},{"id":"number","name":"number","type":"number","label":"text number field","description":"description","validation":{"required":true,"minimum":10,"maximum":9999999999}} ]} ]} ]}
Replace the placeholder field labels and descriptions with the actual questions relevant to your loan product. Agents must complete each field marked "required": true before submitting the form.
How to configure custom form questions on a loan product
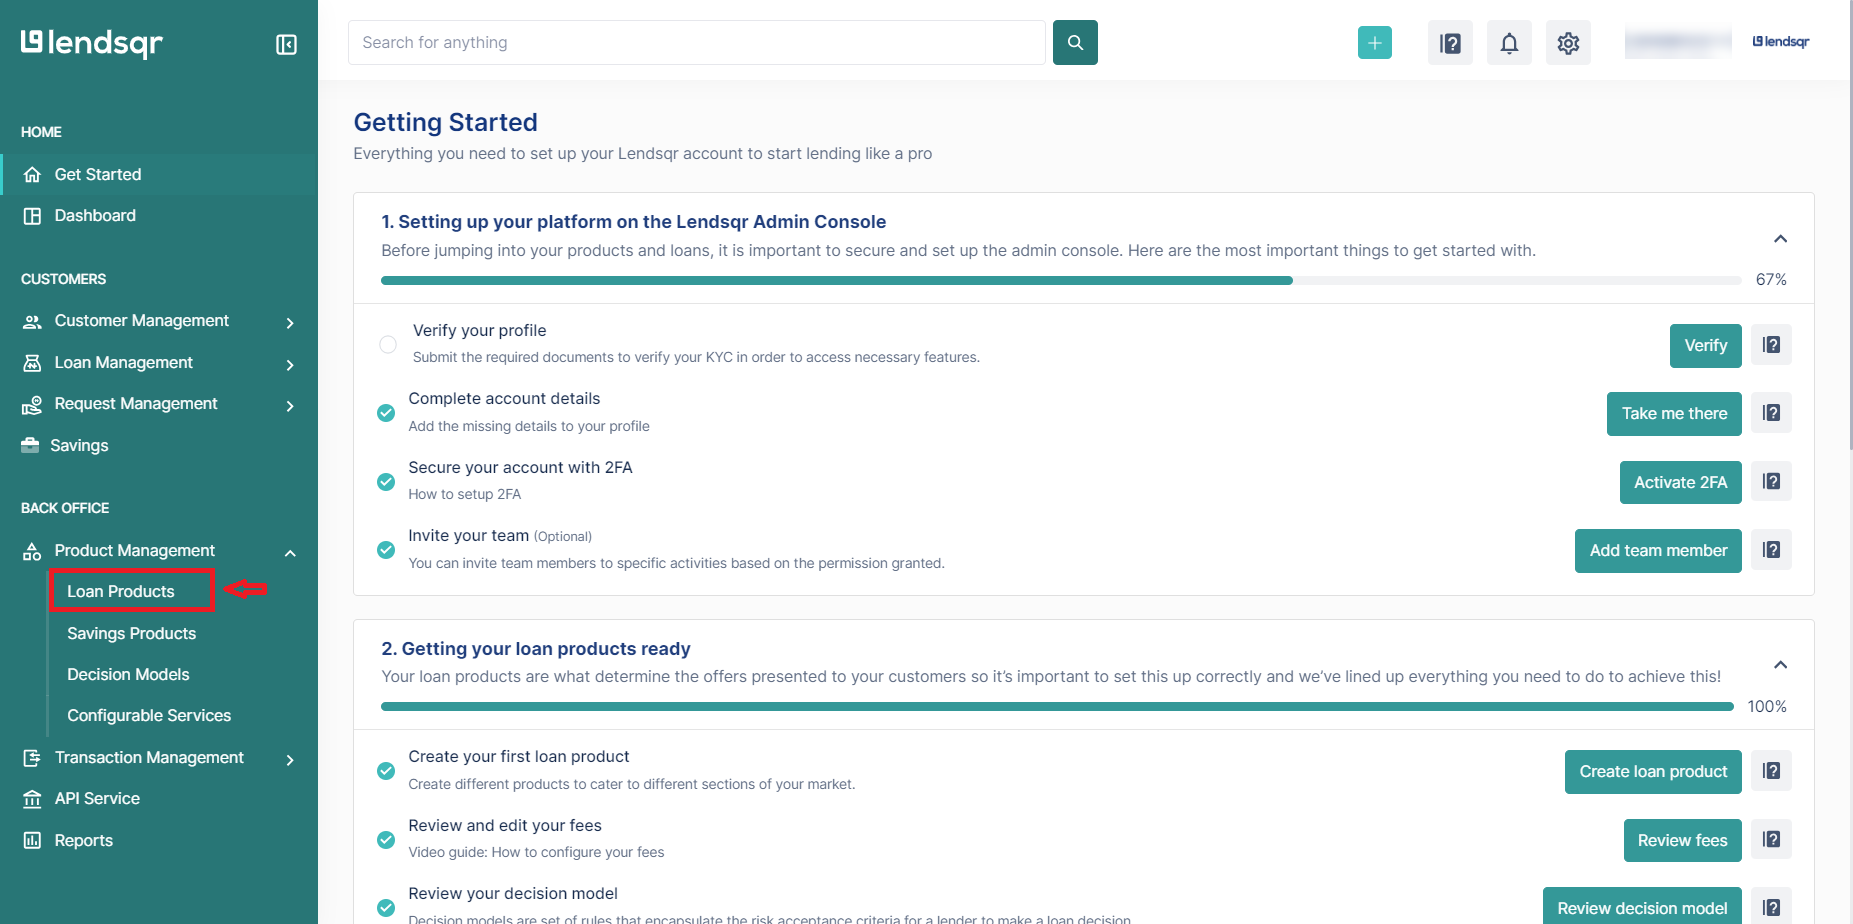
Login to the admin console and navigate to “Loan Products” under “Product Management“. Once logged in, locate the side navigation and click on “Product Management.” After that, in the dropdown menu, select “Loan Products.“
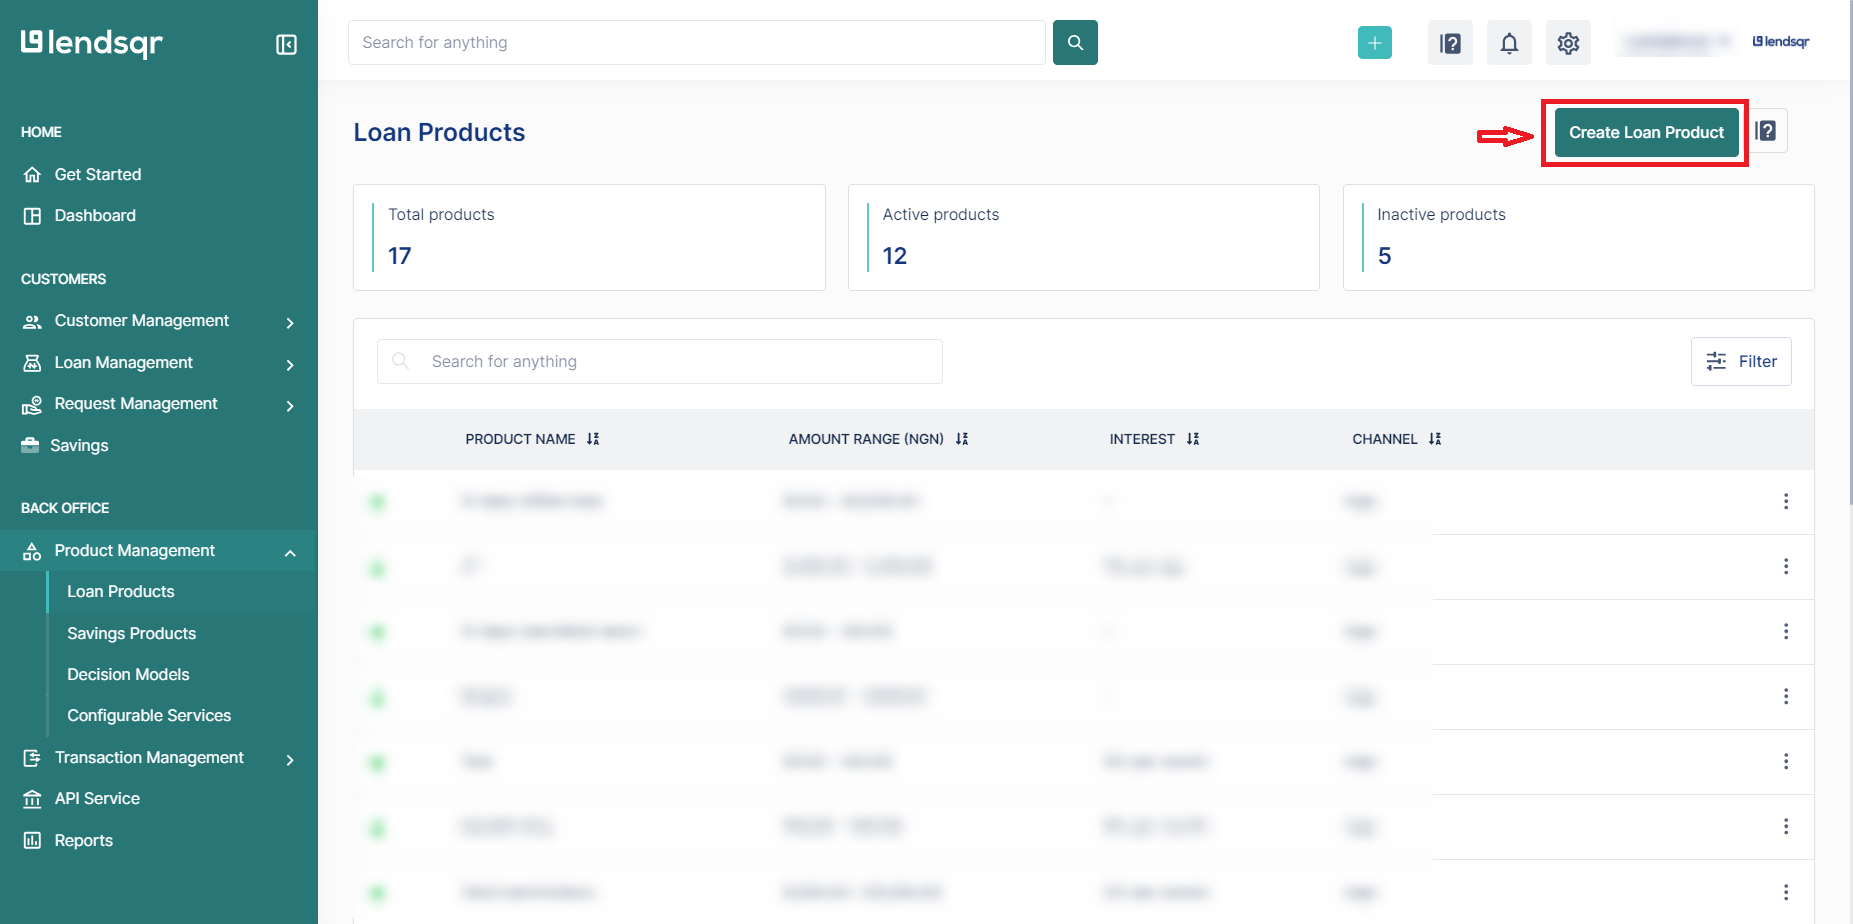
To create a new loan product, first, click on the “Create Loan Product” button.
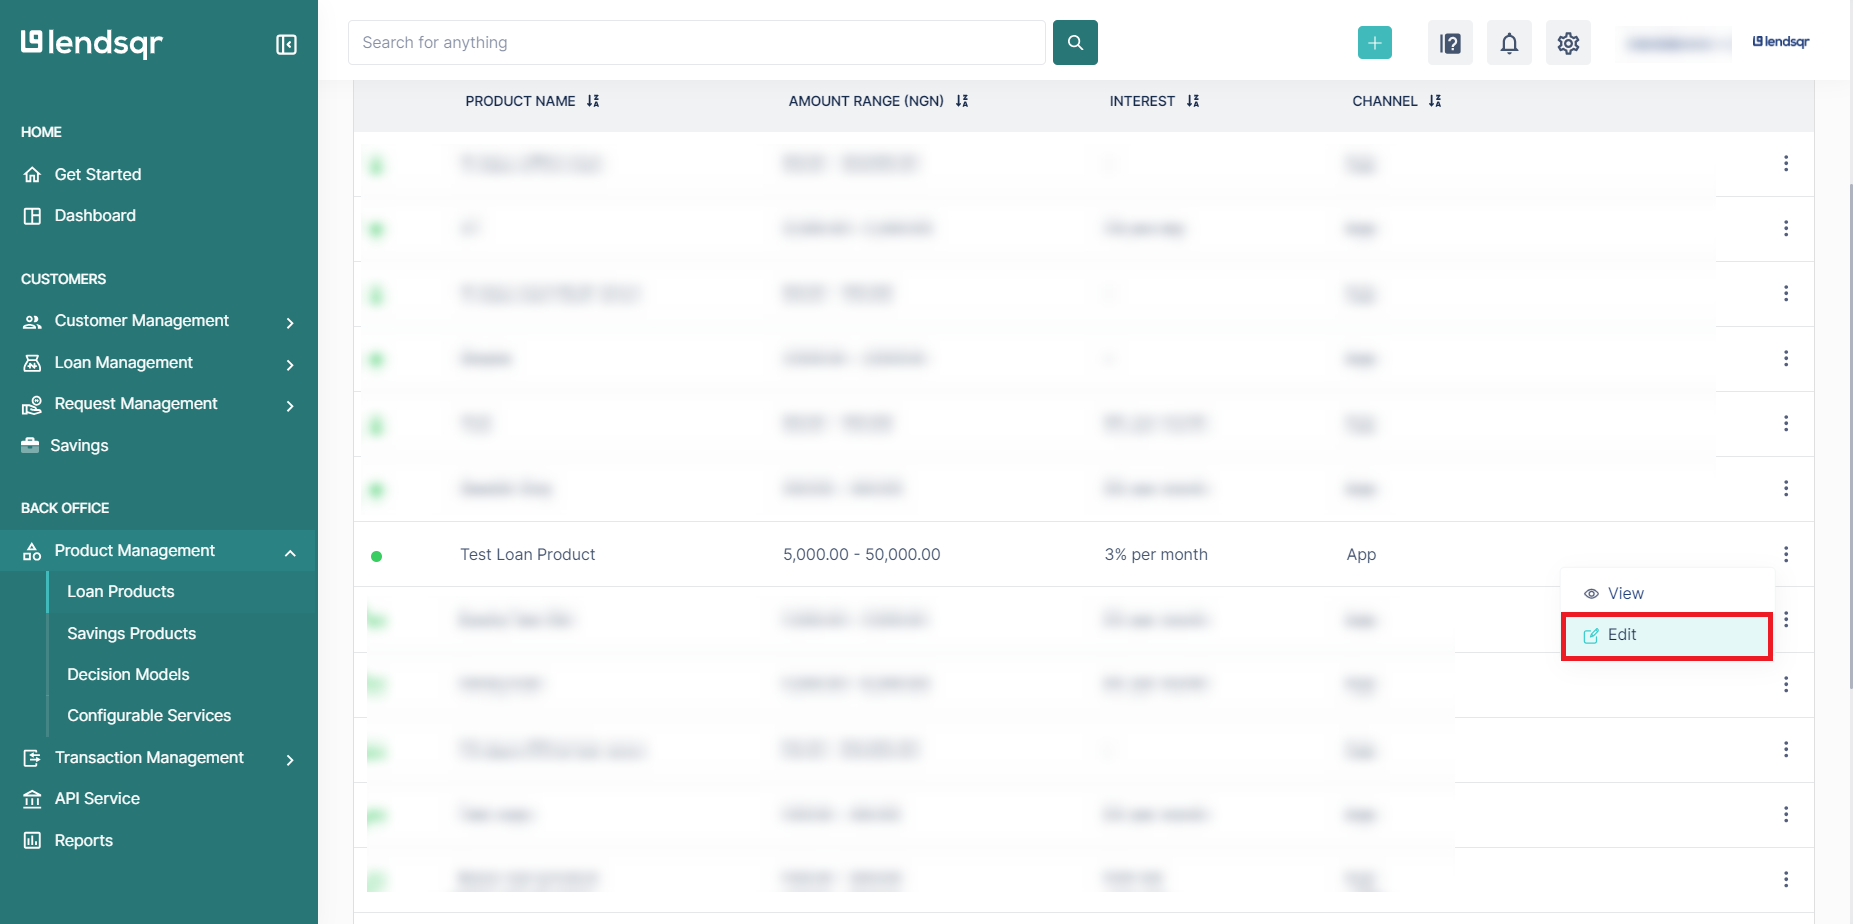
To update an existing product, find the product in the list and click on the “Edit” button next to it.
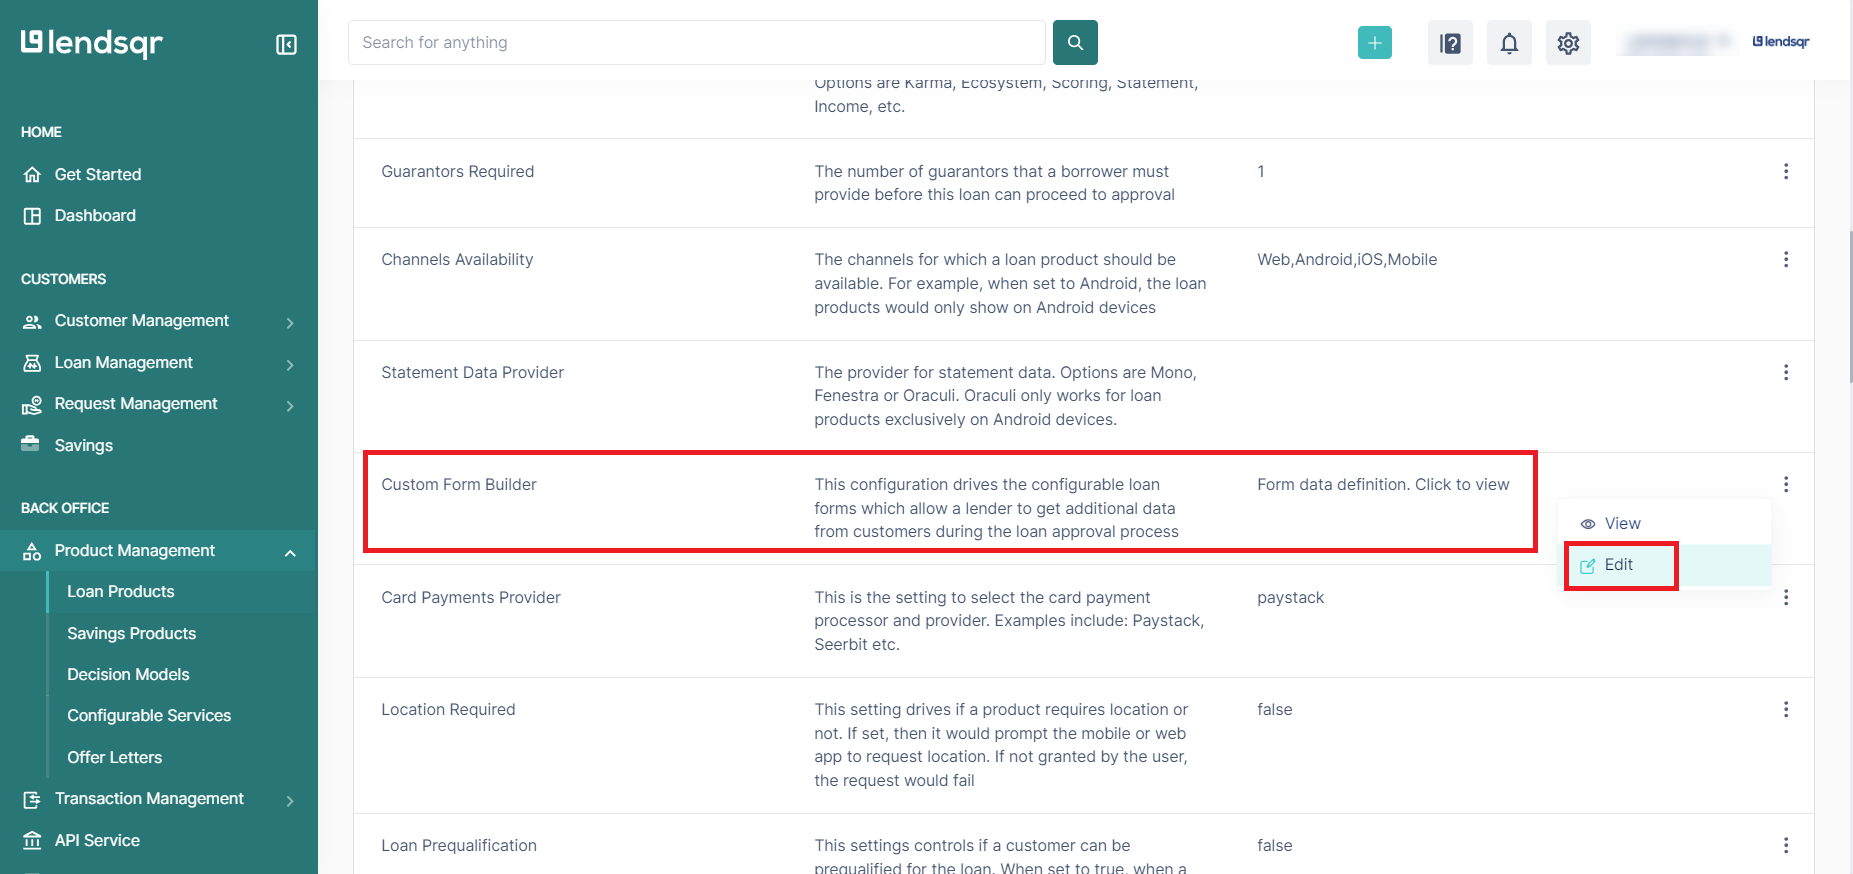
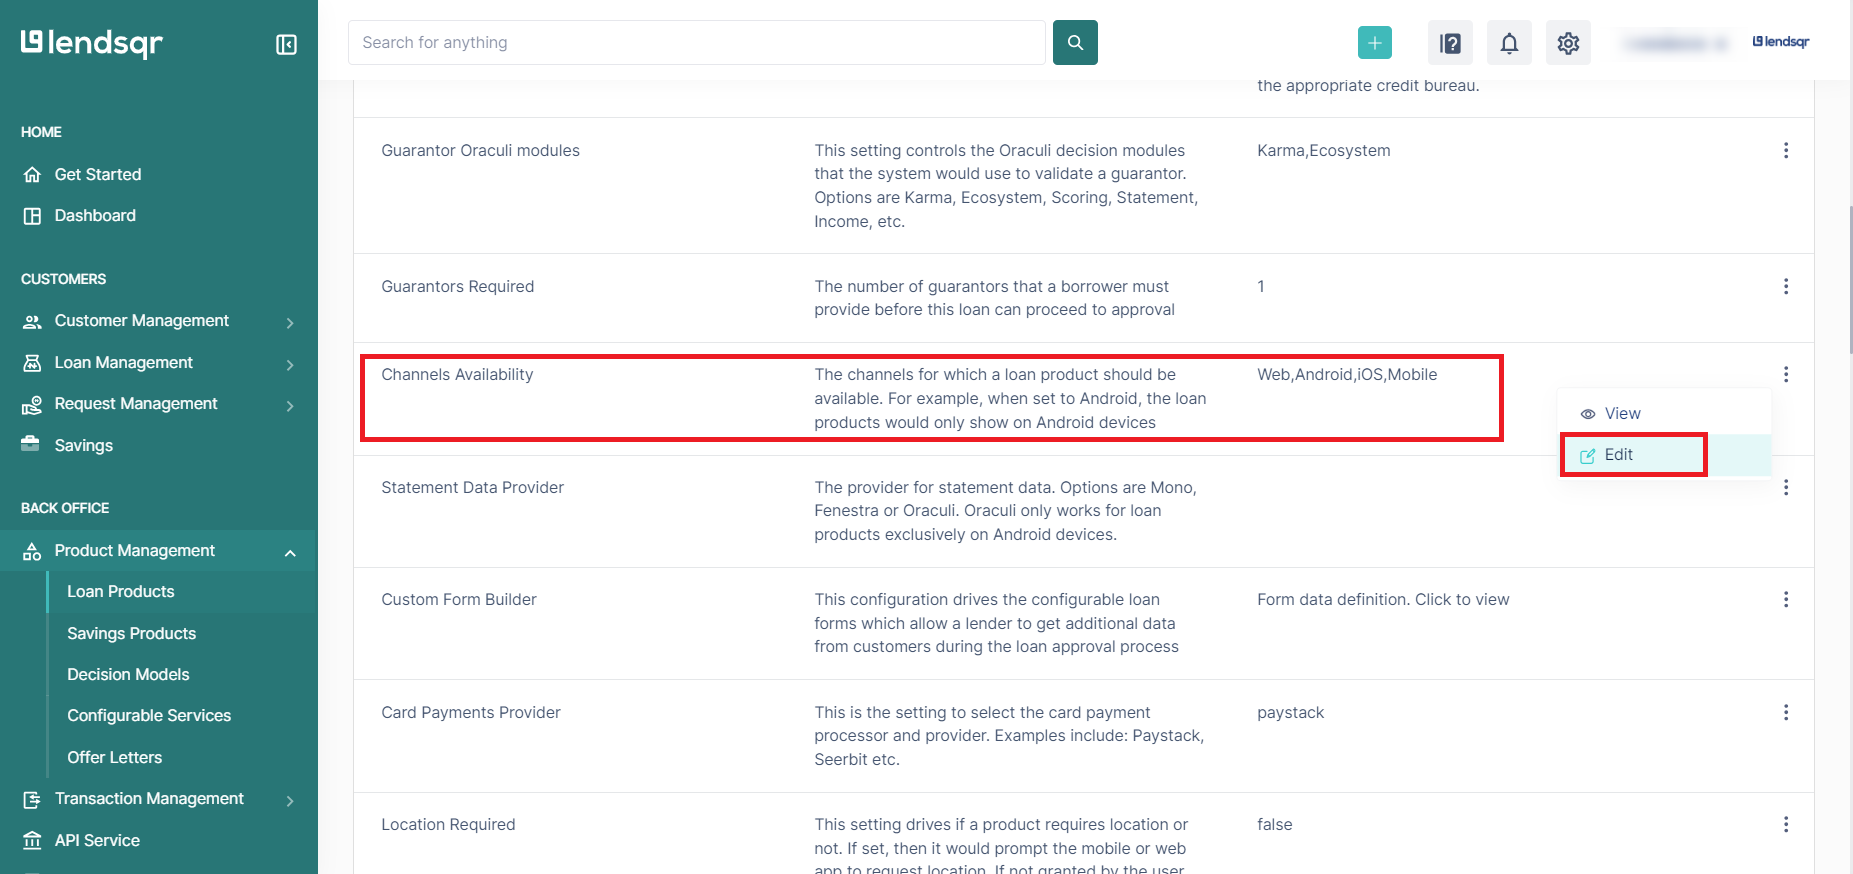
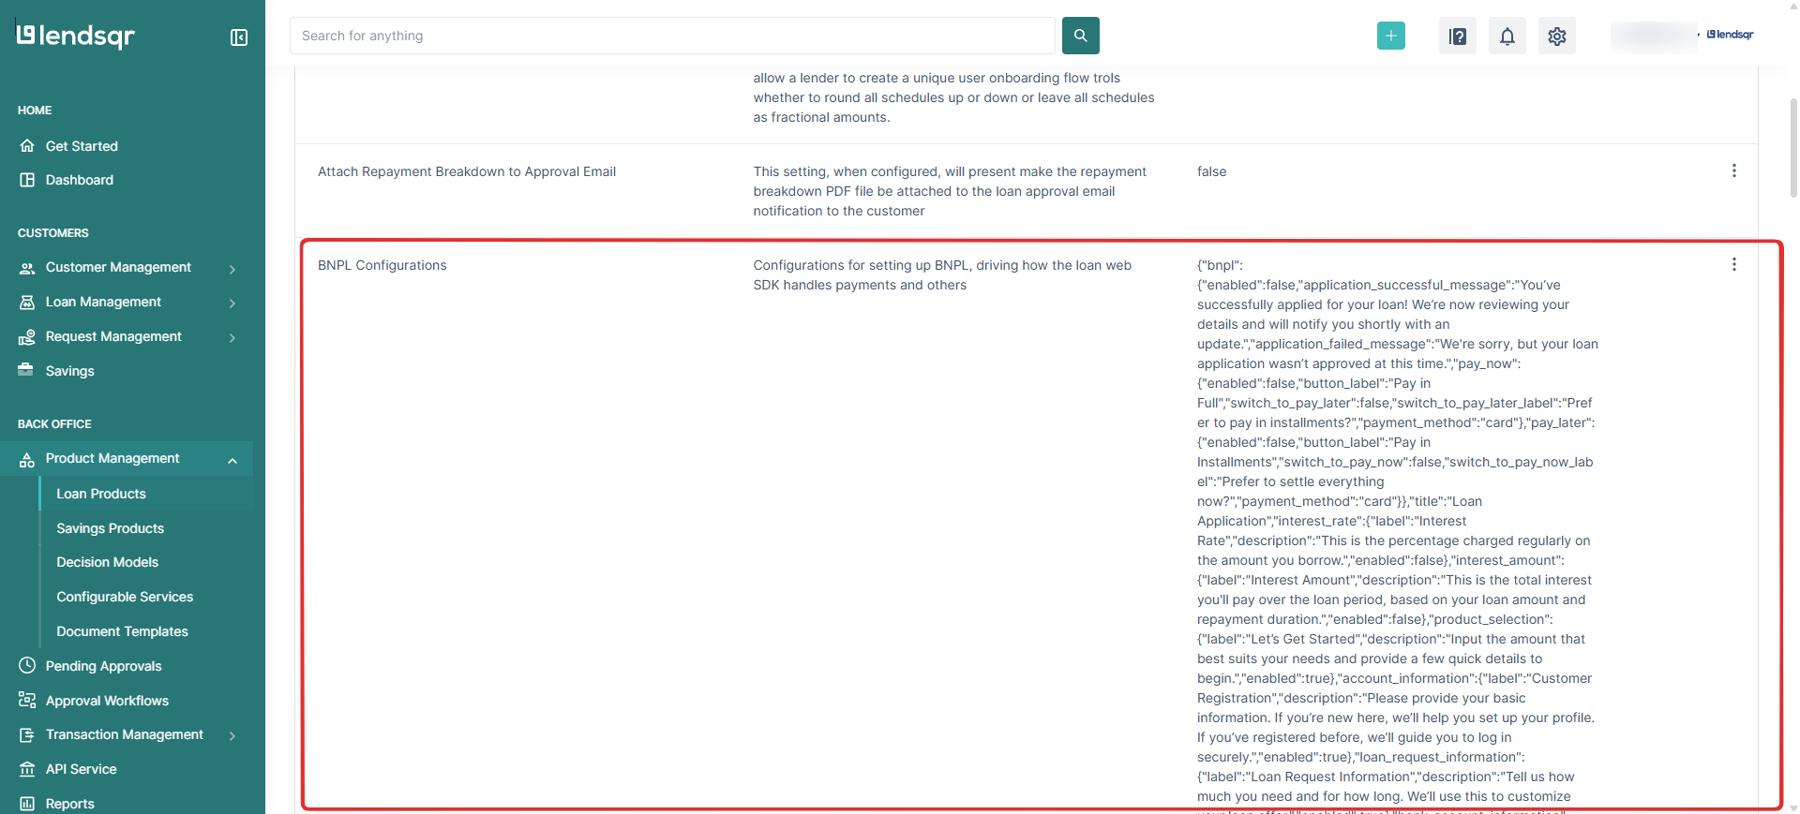
Locate the “Custom Form Builder” attribute and then click the “Edit” button. Copy and paste your custom questions in JSON format into the code editor and then save your changes.
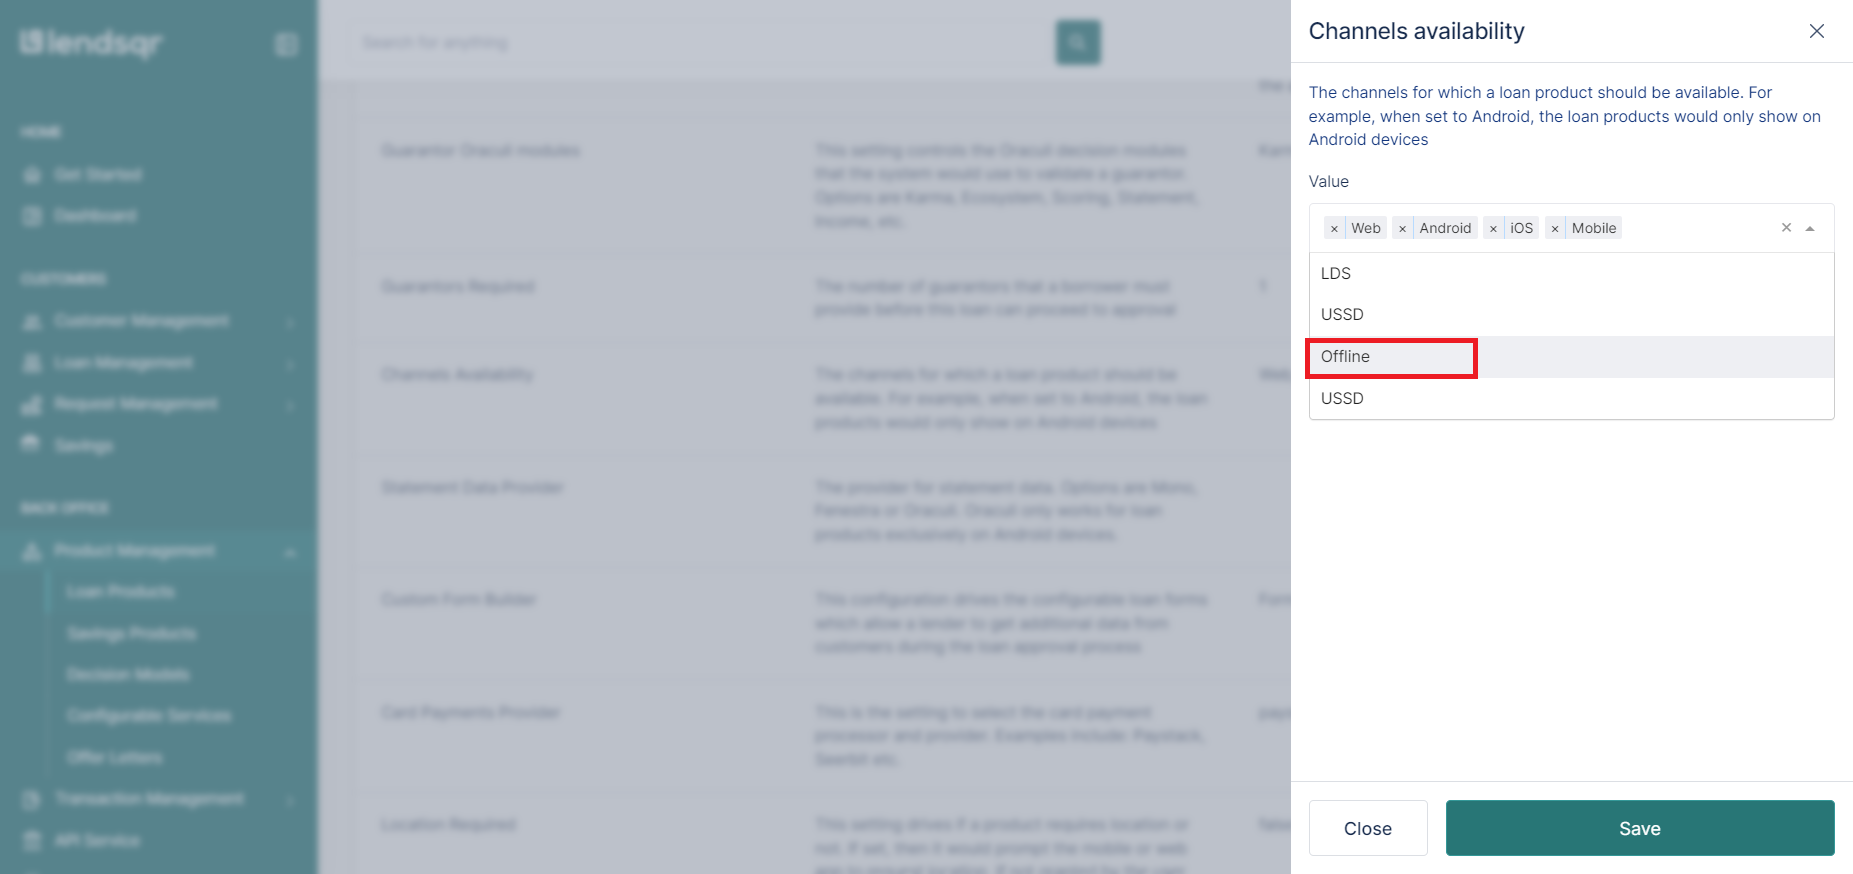
Find the “Channel Availability” attribute and click “Edit“. Now, add “Offline” to the list of channels and save your changes.
Step-by-step guide on booking a loan with custom form questions
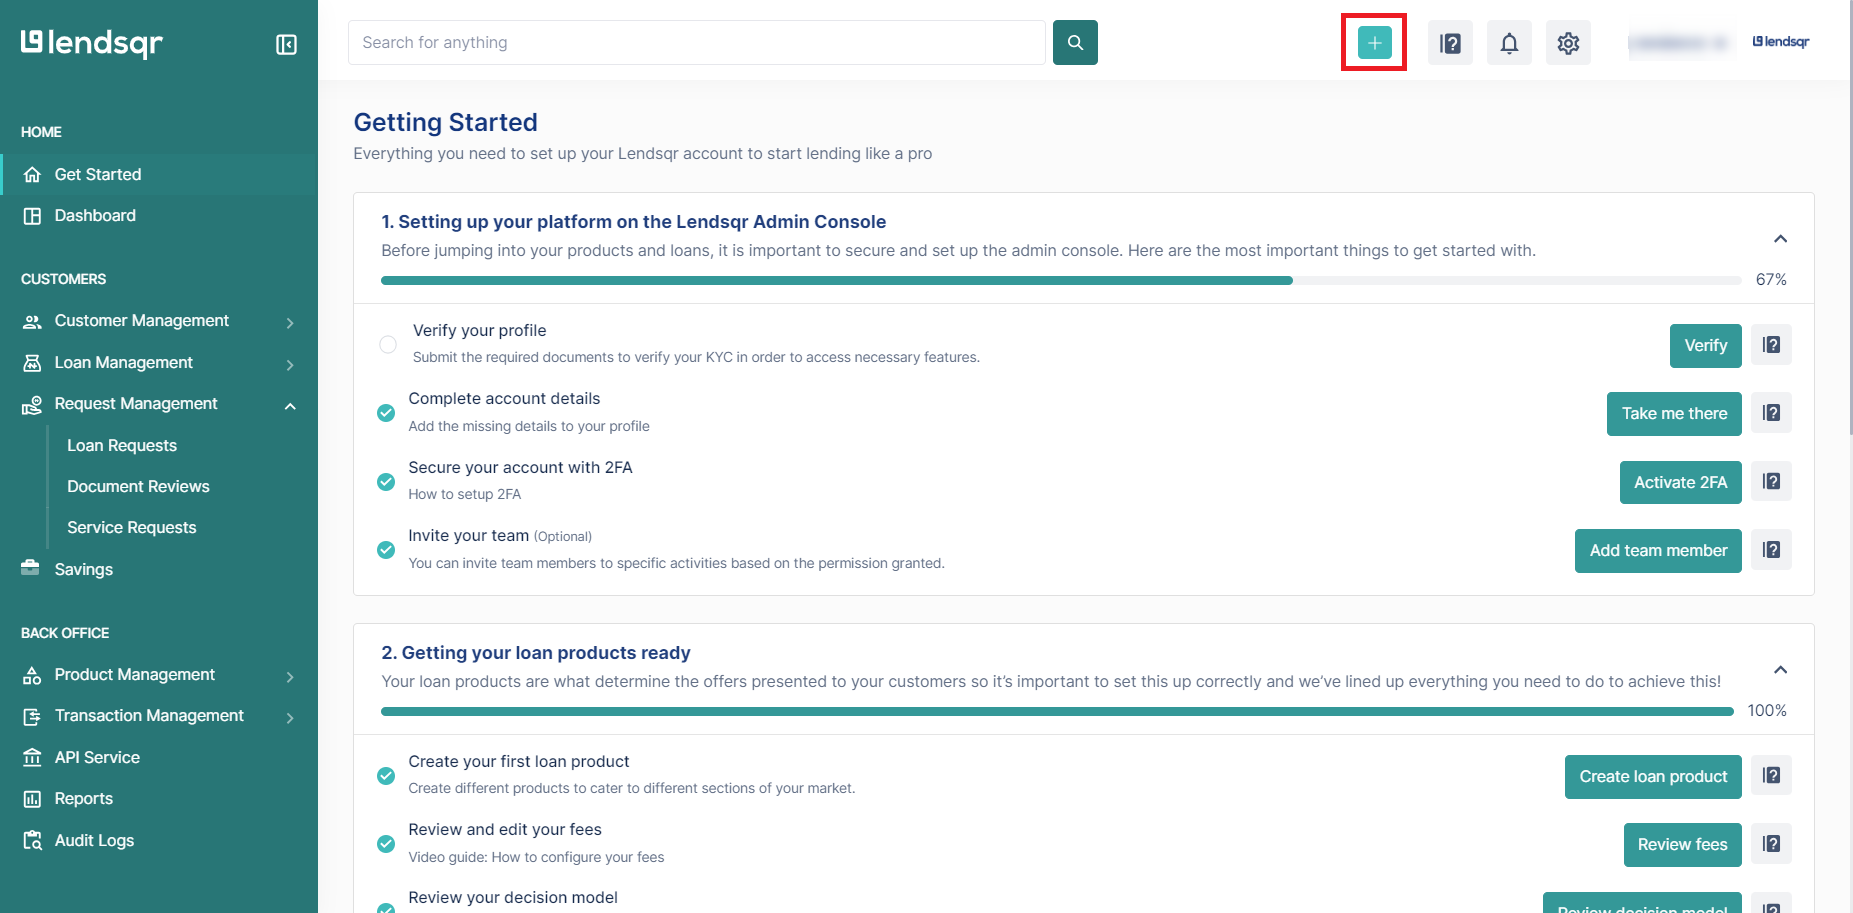
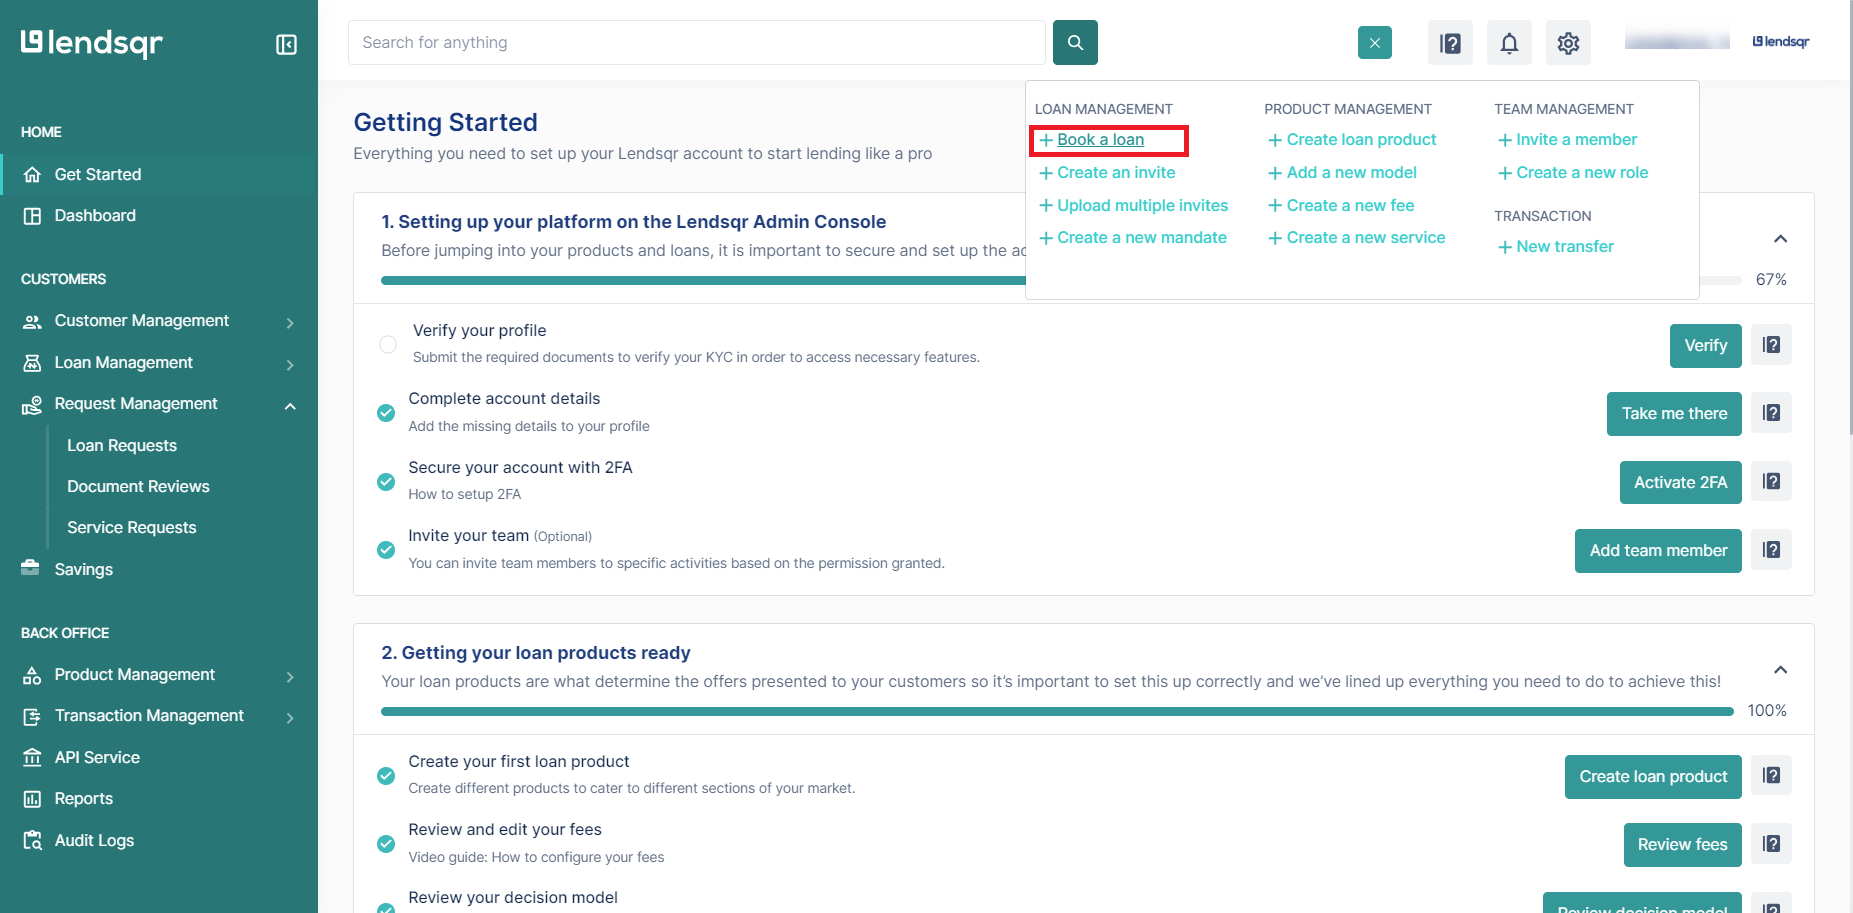
Firstly, initiate a new loan booking and click on the “Quick Create (+)” button on the top navigation pane. After that, select “Book a Loan.”
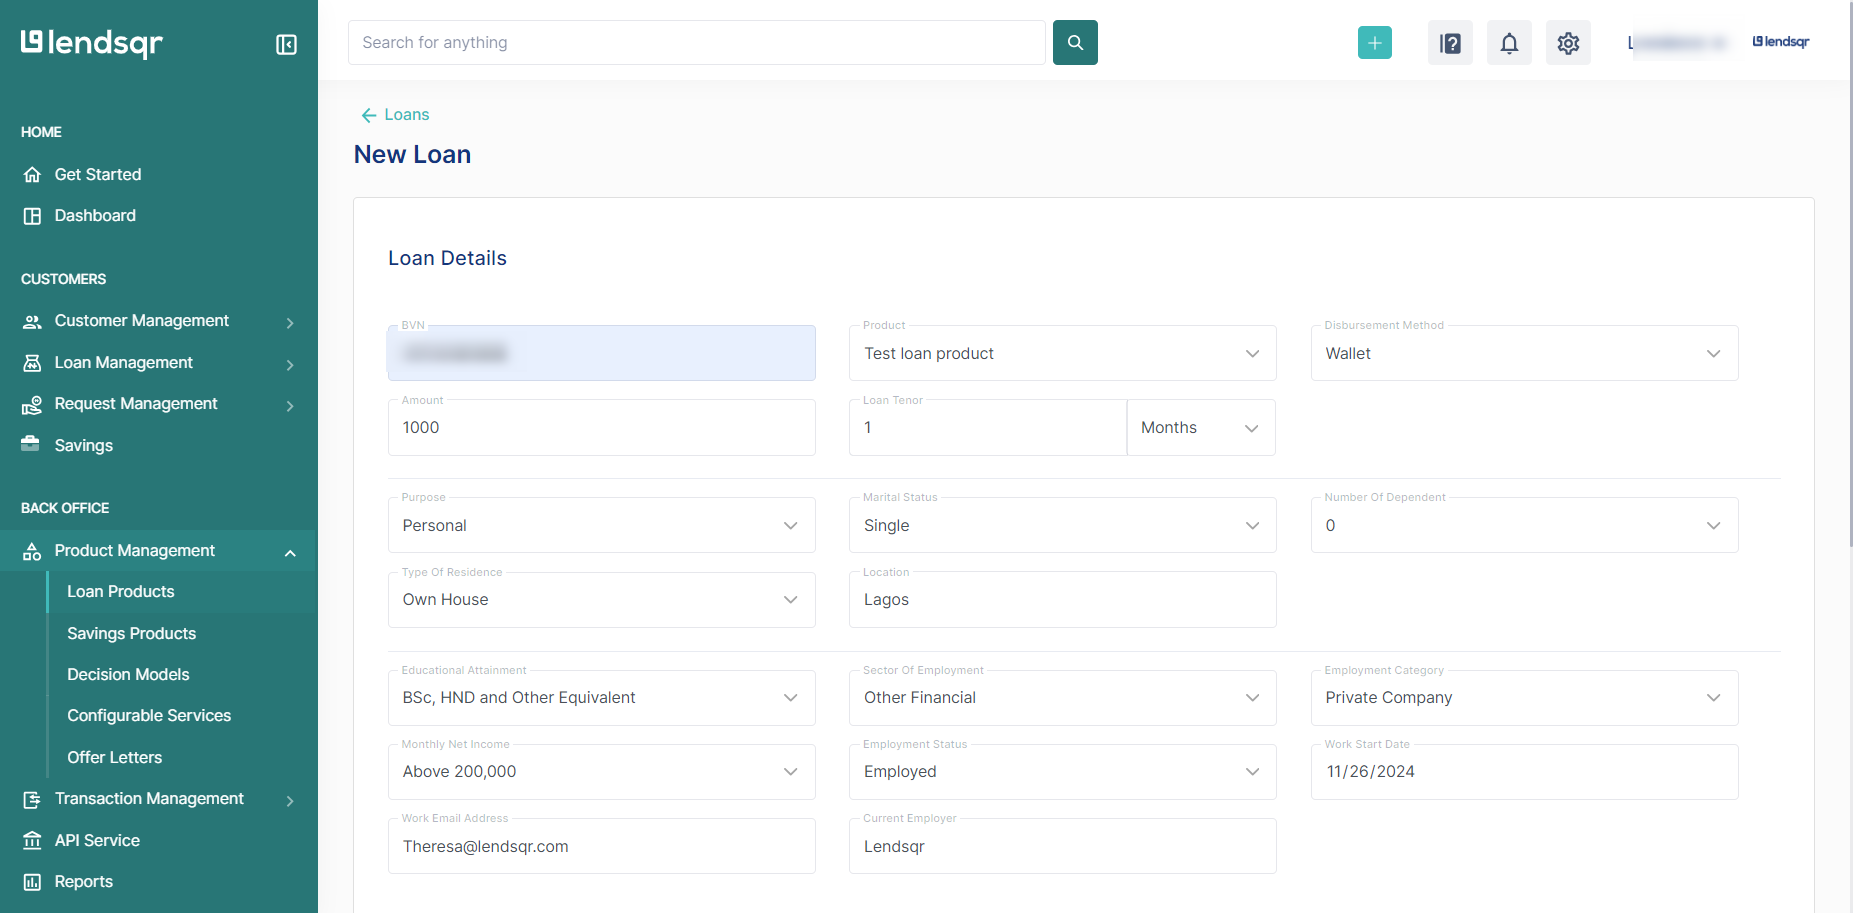
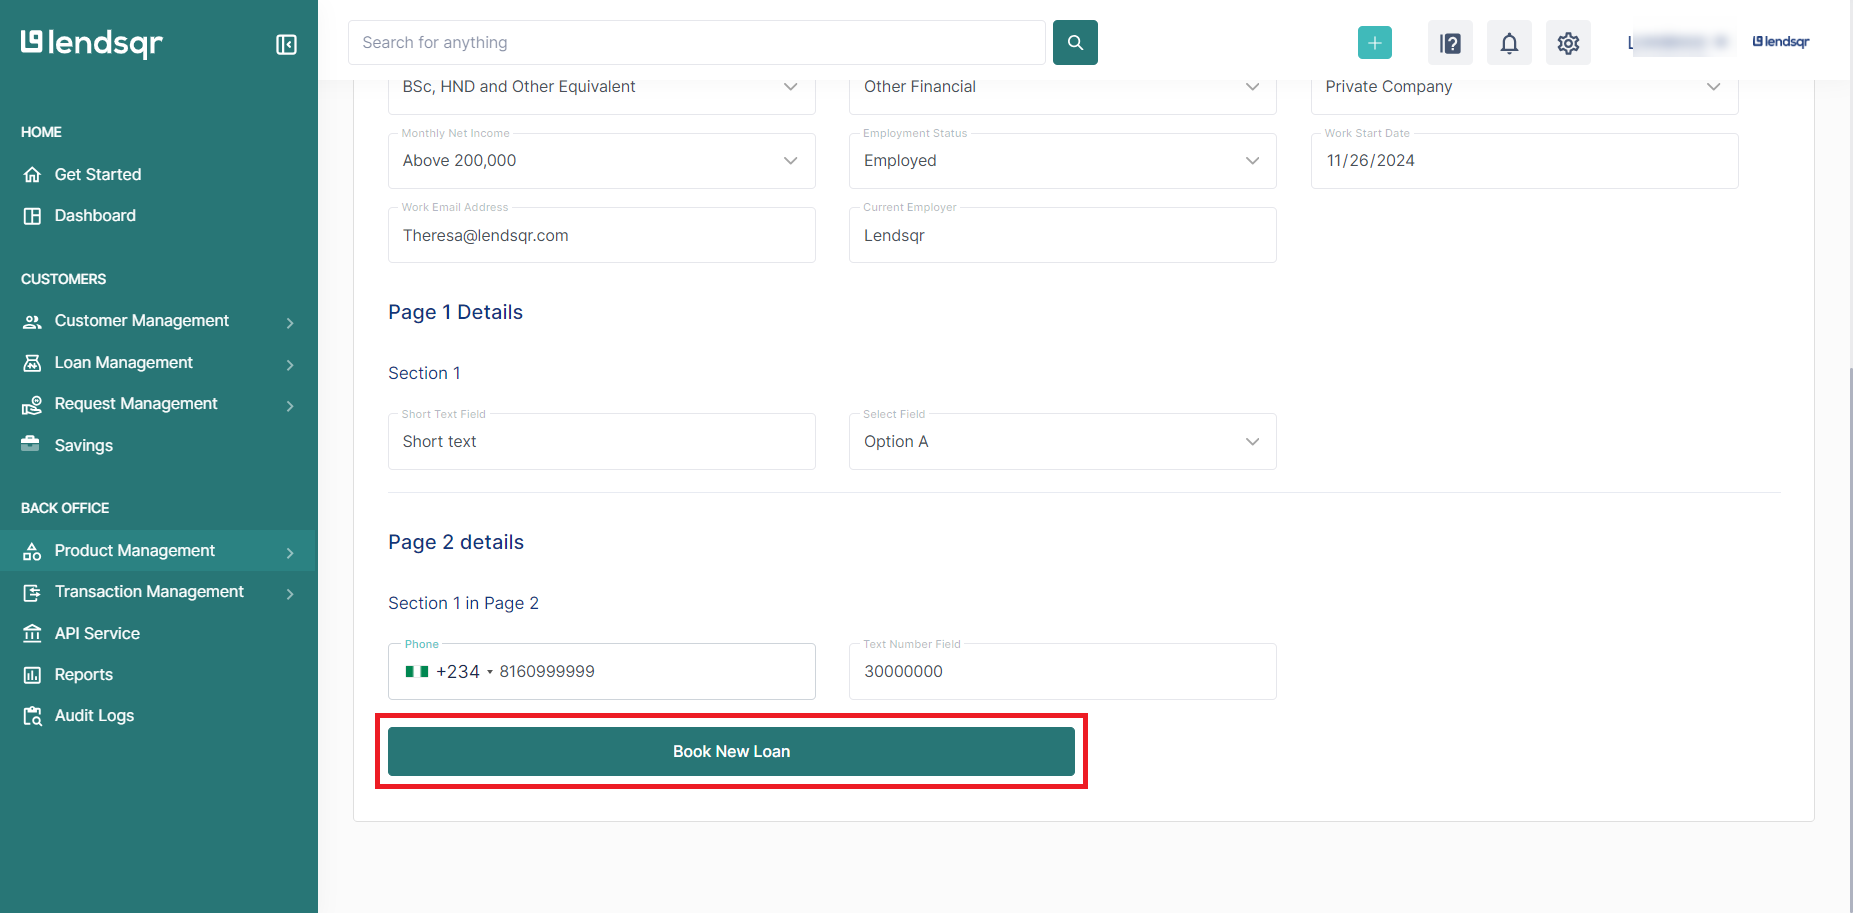
Enter the user’s BVN and select the previously configured product. However, the form will autofill with the additional questions. Complete all fields and click “Book New Loan.”
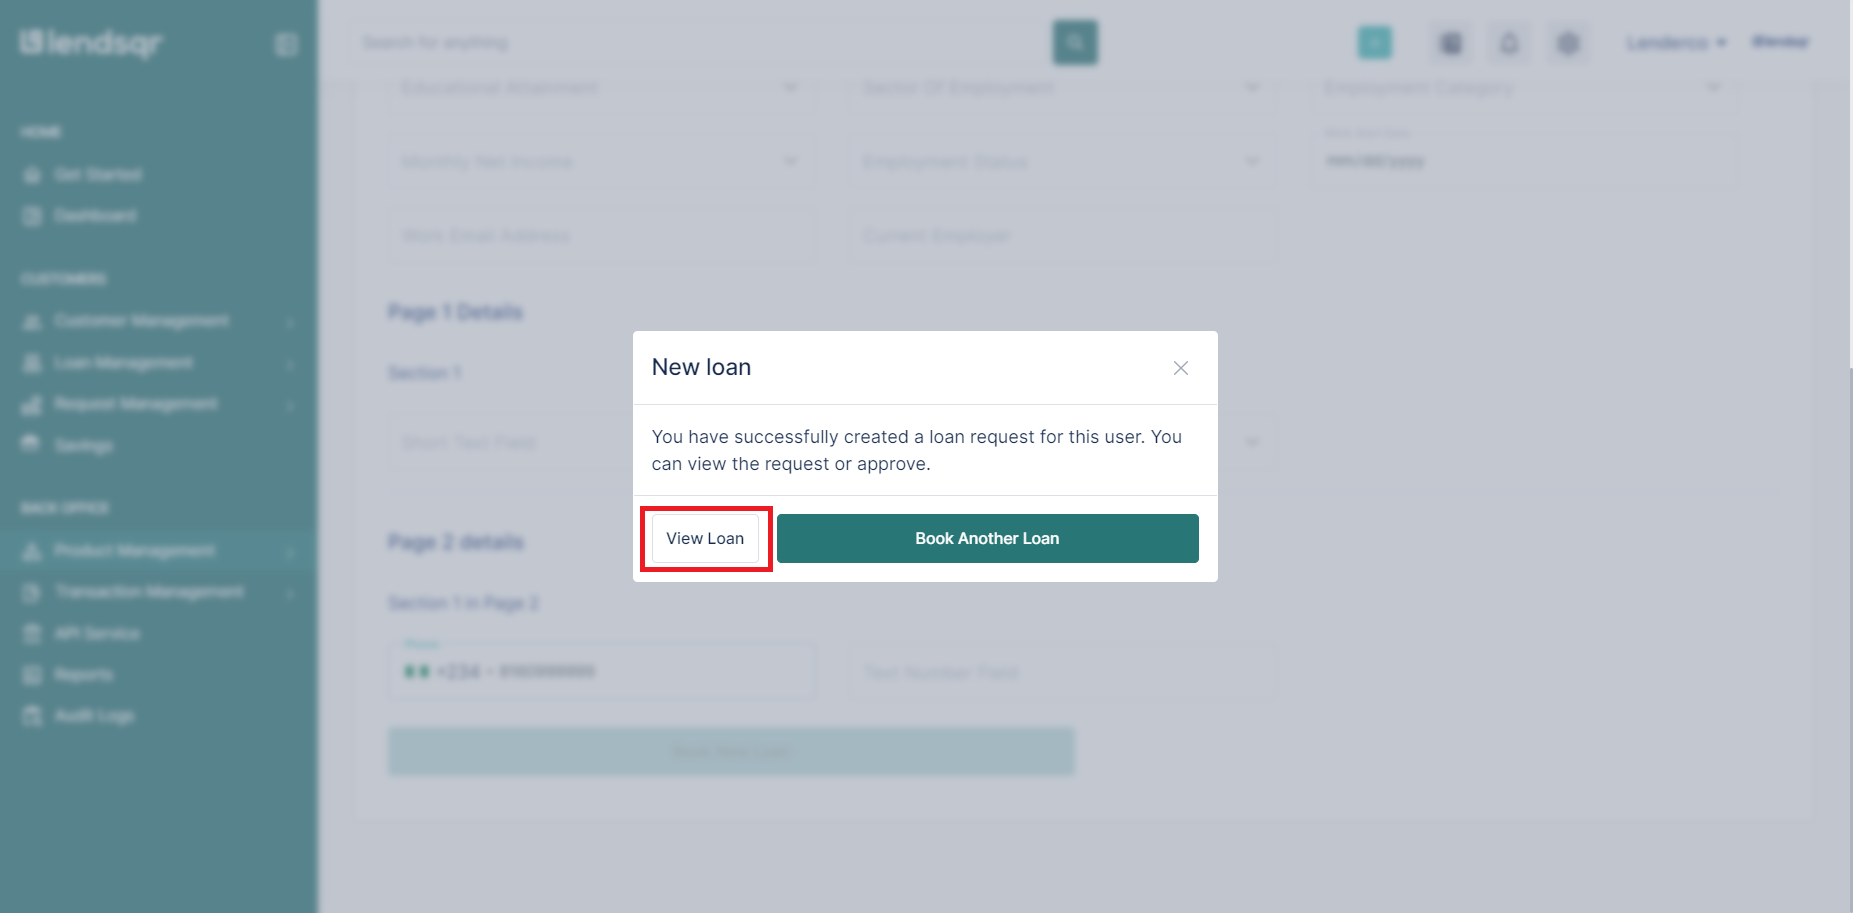
Click on the “View Loan” button to view loan details.
As a result of this feature, agents can avoid errors during loan setup and ensure every application meets the lender’s criteria. Furthermore, this speeds up the review process because complete information allows for quicker decision-making.
In addition, the update improves accuracy, reduces delays, and enhances the overall customer experience. Ultimately, these enhancements make the loan booking process smoother, faster, and more reliable for both agents and customers.
Supporting your underwriting process with custom form data
After booking, the custom form data attaches to the loan record, and your review team can see it immediately. A loan officer can see employer details, business information, or collateral data without chasing the booking agent for it.
This closes a common gap in agent-assisted lending. Field-collected data often disappears into emails or calls rather than reaching the loan record. A well-designed custom form makes agent-collected data part of your formal loan record from booking.