Access your Back Office at your fingertips.
Download the app now on Google Play Store.
Scan the QR code
You can also scan QR code with your phone to download the app.
How to create an approval workflow
Updated
On this page
What is an Approval Workflow?
Imagine your lending team processes dozens of loan requests every day. Without a clear sign-off process, smaller loans might get approved without any review, and high-value disbursements could bypass your compliance officer entirely. An approval workflow fixes this.
An approval workflow is a structured set of rules that determines how many people need to review and approve a loan request before it is processed. It ensures that every disbursement goes through the right level of scrutiny no matter who submits the request.
On Lendsqr, approval workflows are currently available for loan management. You can create multiple workflows and apply different ones to different loan products based on amount, risk level, or team structure.
Why lenders use approval workflows
Approval workflows exist to protect lenders from internal errors and fraud. In large organizations, a single approval is rarely enough. A loan of $500 may only need one officer’s sign-off, while a loan of $50,000 might require your risk manager, compliance lead, and a director to all confirm before funds move.
A well-configured workflow also creates an audit trail. Every approval decision is logged — who approved, when, and under what conditions. This is critical for regulatory compliance and resolving disputes.
Available workflow types
You can create approval workflows for the following processes:
Loan Management – Approve loan applications and disbursements.
Savings – Authorize savings account withdrawal.
Bulk Disbursement – Review and approve multiple disbursements at once
Make sure you have admin access to your Lendsqr admin console. You will also need at least one active admin role configured in your organization before you can assign approvers to a rule.
How to create an approval workflow on Lendsqr
Follow these steps to set up your first approval workflow:
1. Open your web browser and log into the Lendsqr admin console with your credentials.
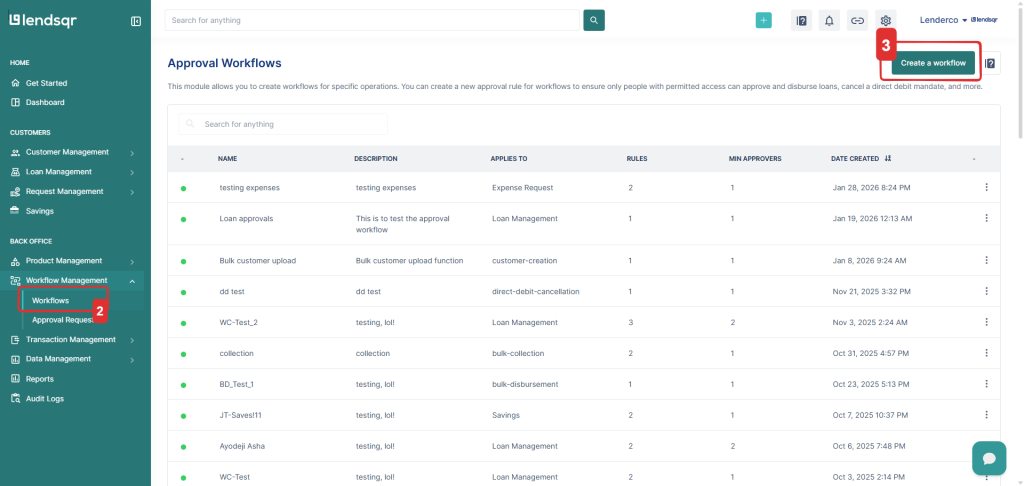
2. In the left navigation menu, scroll to the Back Office section.
3. Navigate to “Workflows” module in the menu under “Workflow Management“.
4. Click on “Create a workflow” at the top right of the page to create a new workflow.
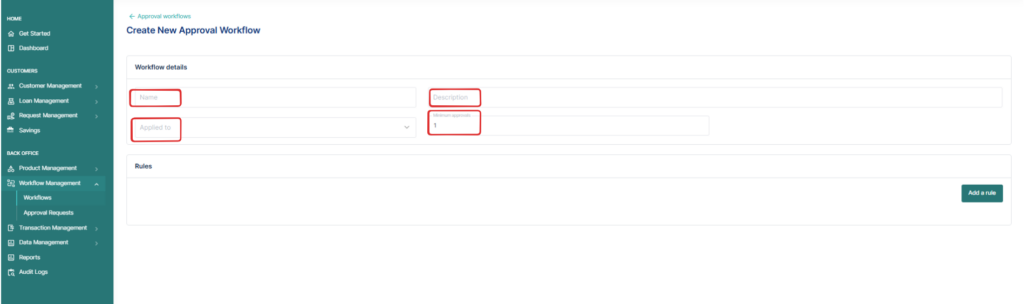
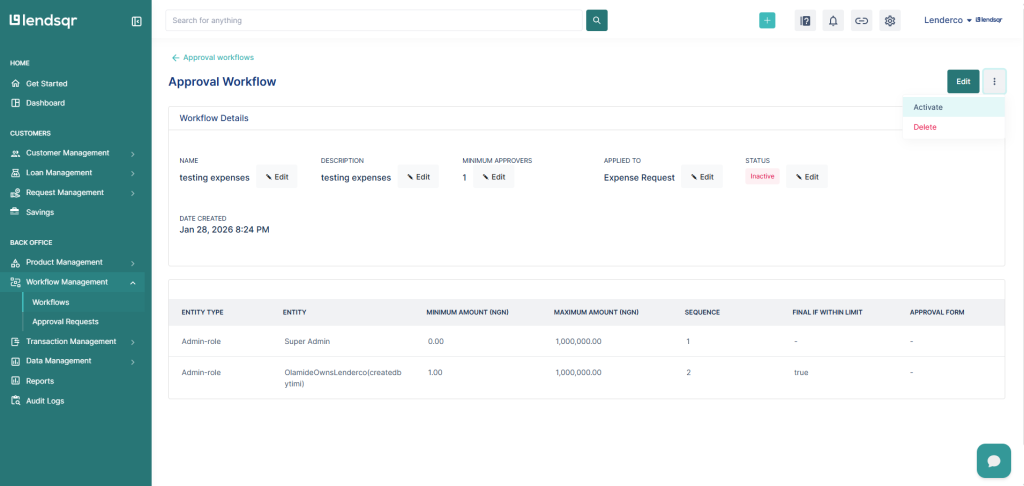
5. Fill the workflow details.
Name: Enter a unique name that clearly describes this workflow (e.g., “High-value loan approval” or “SME disbursement review”).
Description: Briefly explain what this workflow is for and when it applies.
Applied To: Select the entity this workflow covers. At the moment, this is Loan management.
Minimum Approvals: Set the minimum number of approvers that must sign off before the request moves forward.
Note: The number of approval rules you add must not be less than the Minimum Approvals number you set.
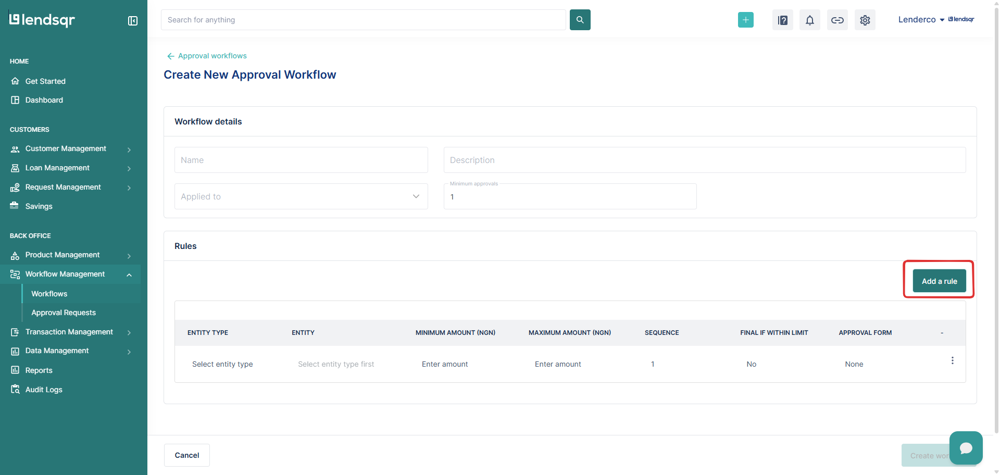
6. Click “Add a rule” to define your first approval condition.
For each rule, you will configure:
Select Entity Type: Choose whether this rule applies to an admin role (e.g., Super Admin, Admin) or a specific admin user.
Enter Minimum Amount: The lowest amount this approval rule applies to.
Enter Maximum Amount: The highest amount this rule covers. For example: You could create a rule that requires a Super Admin to approve any loan between $10,000 and $100,000, and a separate rule for an Admin to approve loans under $10,000.
Sequence: Defines the order of approvals. Example: A sequence set to 1 means this rule must be approved first before moving to the next step.
Final if within limit: If enabled, this approver’s decision is final as long as the amount is within the set range.
Approval form: Select what form of verification is to be done alongside approvals.
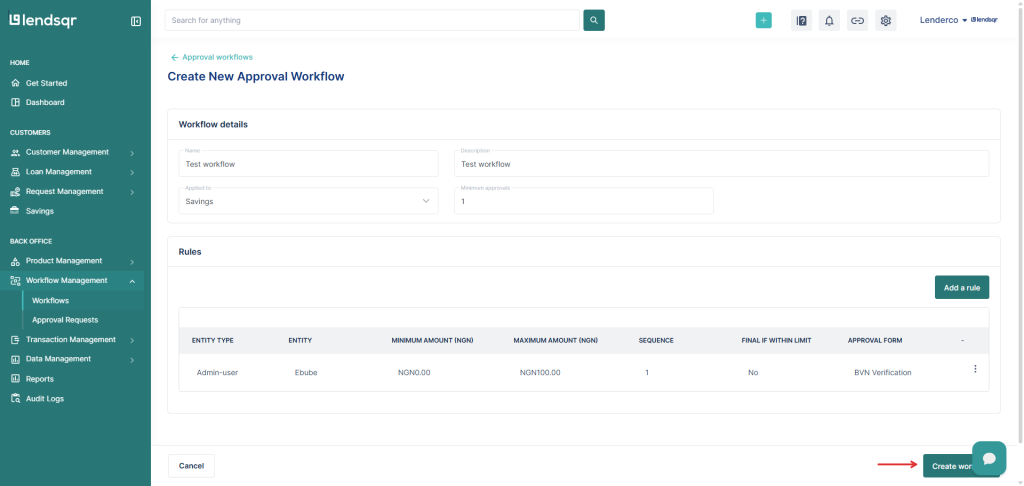
7. Add as many rules as your credit policy requires, then click “Create workflow” to create the workflow.
8. By default, the workflow is set to “Inactive.” You need to activate the workflow to make it available in order to be able to add it to a request.
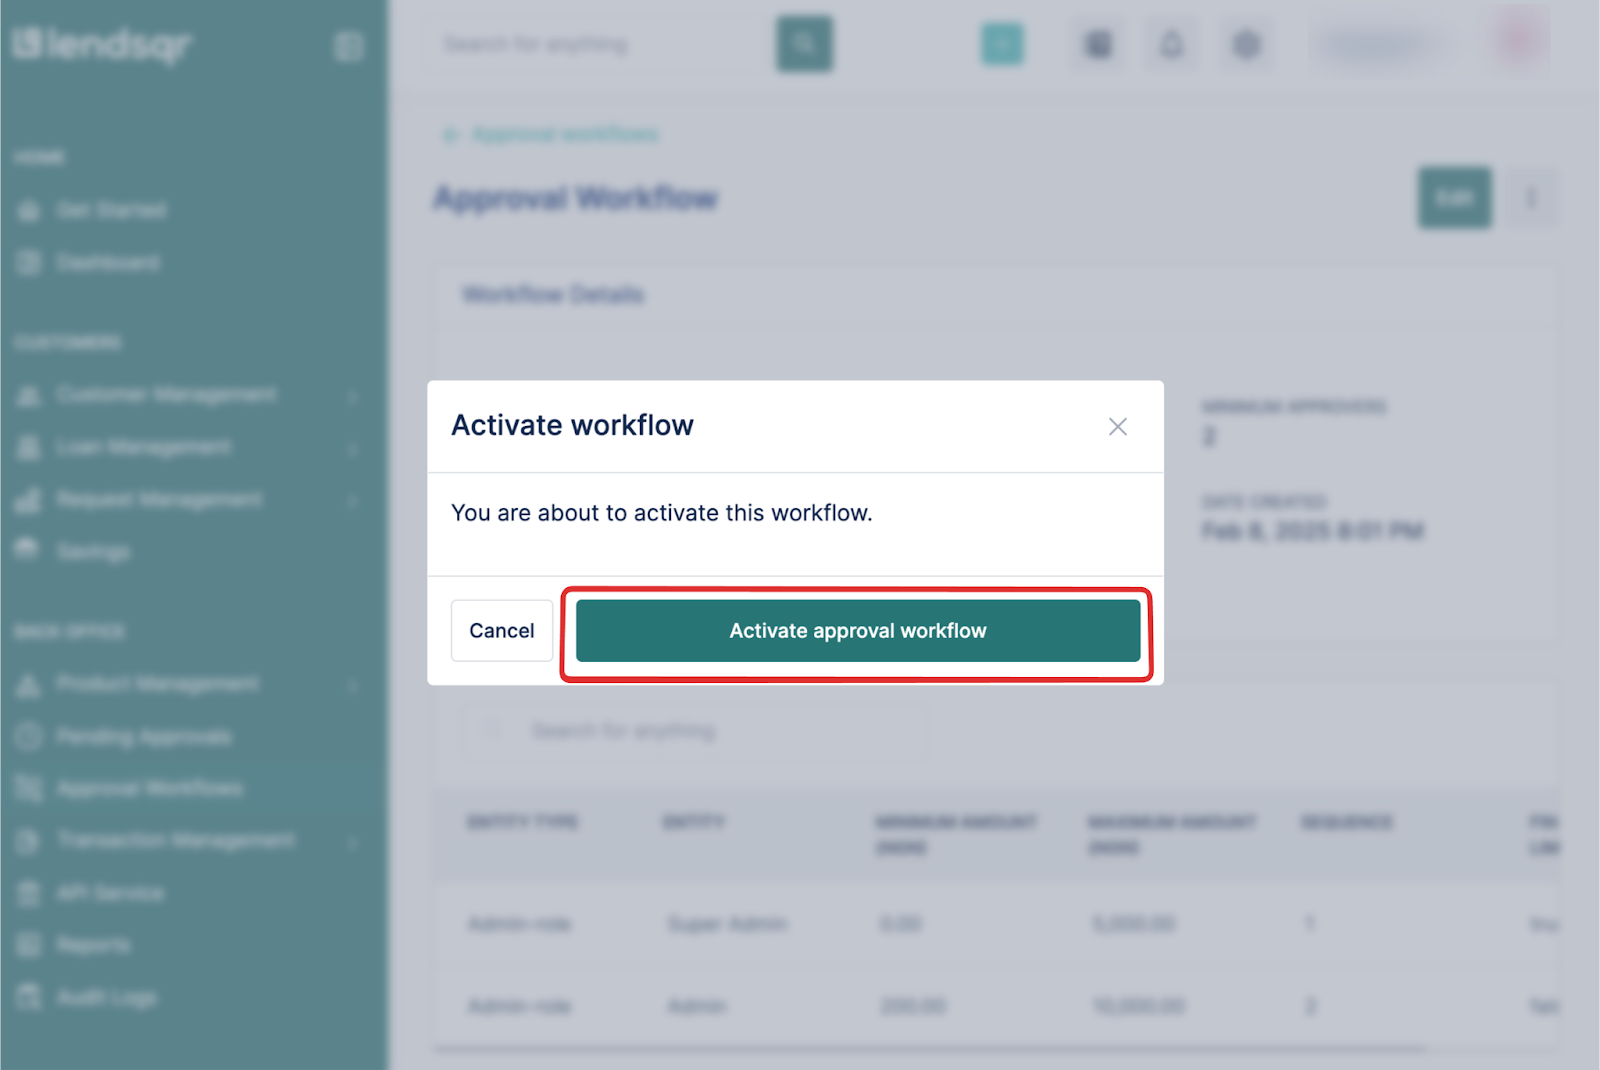
To activate the workflow, click on the three-dot menu (...) at the top right and select “Activate”.
9. When you click “Activate”, A confirmation prompt will appear. Confirm the activation to complete the process.
What happens after activation?
Once your workflow is active, you can attach it to a loan product. When a borrower submits an application for that product, the workflow kicks in automatically. Each approver in the chain receives a notification and must take action before the loan moves to the next stage.
If you need to make changes later, you can edit the workflow at any time — though changes will only apply to new loan requests, not those already in progress.
Frequently asked questions
Can I create more than one approval workflow?
Yes. Lendsqr lets you create multiple workflows. You might have one for short-term consumer loans, another for payroll-backed products, and a third for SME financing. Each can have its own rules and approver chain.
What happens if an approver is unavailable?
If an approver does not act within the configured timeframe, you may need to reassign the task or escalate it manually. For this reason, it is good practice to assign roles rather than specific individuals where possible — so any member of that role can step in.
Can I deactivate a workflow without deleting it?
Yes. Use the three-dot menu on the workflow card and select Deactivate. The workflow will remain saved and can be reactivated when needed.