Access your Back Office at your fingertips.
Download the app now on Google Play Store.
Scan the QR code
You can also scan QR code with your phone to download the app.
How to configure and customize loan offer letters in Lendsqr
Updated
On this page
When you approve a loan, the borrower needs a clear, professional document that outlines the exact terms, repayment schedule, and conditions. A well-designed offer letter builds trust, reduces misunderstandings, and creates a professional first impression.
Lendsqr makes it easy to configure and customize offer letters directly in the admin console. You can add your logo, company details, personalized borrower information, and specific loan terms so every letter looks consistent and branded.
This guide explains why offer letters matter in lending, when to use them, what you can customize, and how to configure them step by step in Lendsqr.
Why offer letters matter in lending
A professional offer letter serves several important purposes:
Builds trust by presenting clear and transparent loan terms
Reduces disputes by documenting exactly what the borrower is agreeing to
Improves borrower experience with a polished, branded document
Supports regulatory compliance by including required disclosures and disclaimers
Speeds up the disbursement process because borrowers understand their obligations upfront
Without a proper offer letter, lenders often face confusion, delayed sign-offs, or disputes later in the loan lifecycle.
When should you configure and use offer letters?
Configure your offer letter template once, then use it for every approved loan. You will typically generate and send offer letters:
Immediately after loan approval but before disbursement
During the final confirmation stage with the borrower
For every new loan, whether it is a salary advance, personal loan, or group facility
When updating terms for loan renewals or top-ups
For example, a salary advance lender in Nigeria can send a quick, branded offer letter via email or WhatsApp so the borrower can review payroll deduction terms and sign off rapidly. A microfinance institution might use customized offer letters for group loans to clearly list each member’s responsibilities and repayment schedule.
What you can customize in an offer letter
Lendsqr allows you to personalize the following elements:
Company logo and branding
Company name, address, and contact details
Borrower personal information and loan reference number
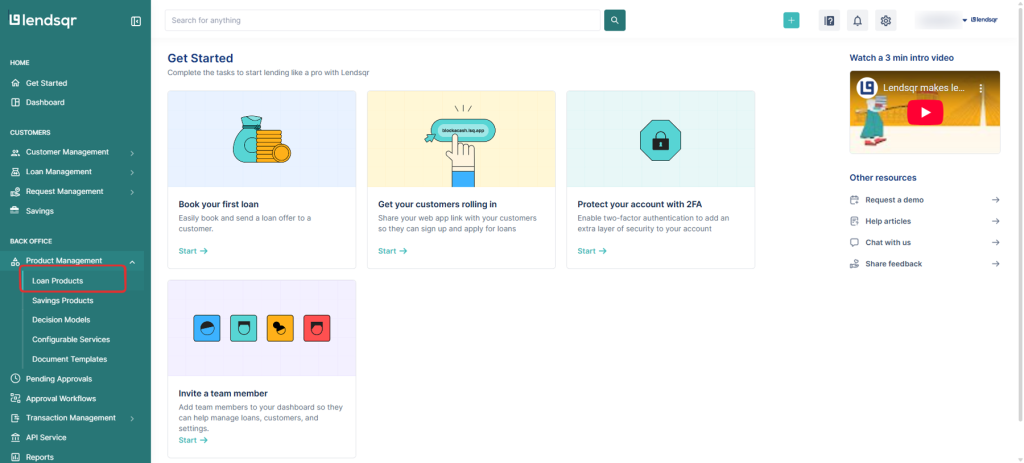
Open your web browser and log into the Lendsqr admin console with your credentials.
2. Click on “Document Templates” under Product Management
From the main dashboard, go to Product Management and select Document Templates. This will display a list of all the templates you have created.
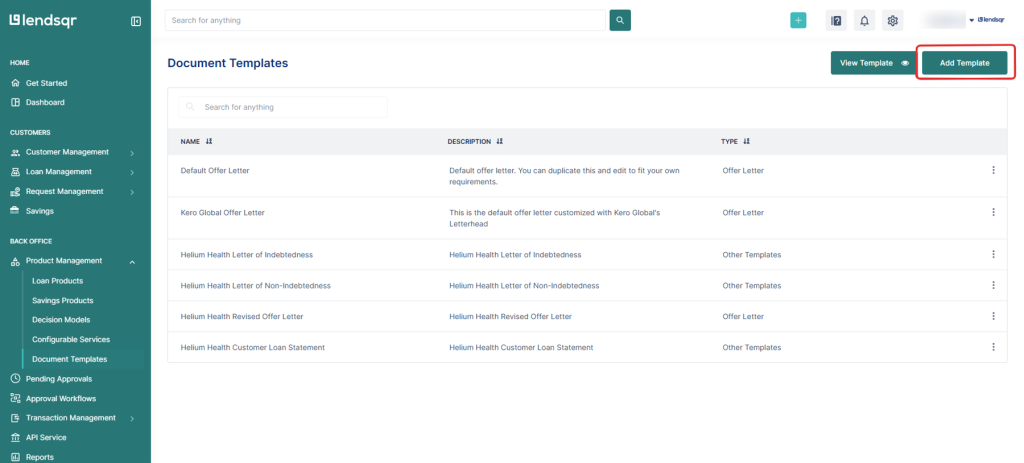
3. Add a Template To add a template:
Click the Add Template button.
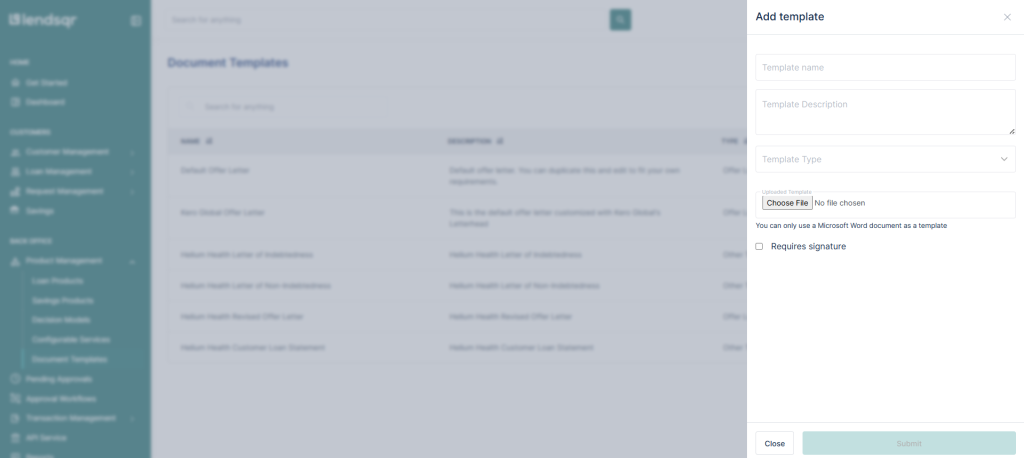
Upload your pre-created Microsoft Word document (.doc or .docx), or start from Lendsqr’s default offer letter template and modify it to suit your business needs. Curly braces represent system-defined variables.
Fill in the required fields:
Template name (e.g., “Loan Offer Letter”, “Repayment Schedule”)
Template description (optional, to help you identify its use)
Uploaded Template (.doc or .docx format)
Template Type (Offer letter, Other Templates)
4. Configure signature requirement
If the document requires borrower acceptance or authorization, enable Requires Signature. When this option is selected, additional signature configuration options become available.
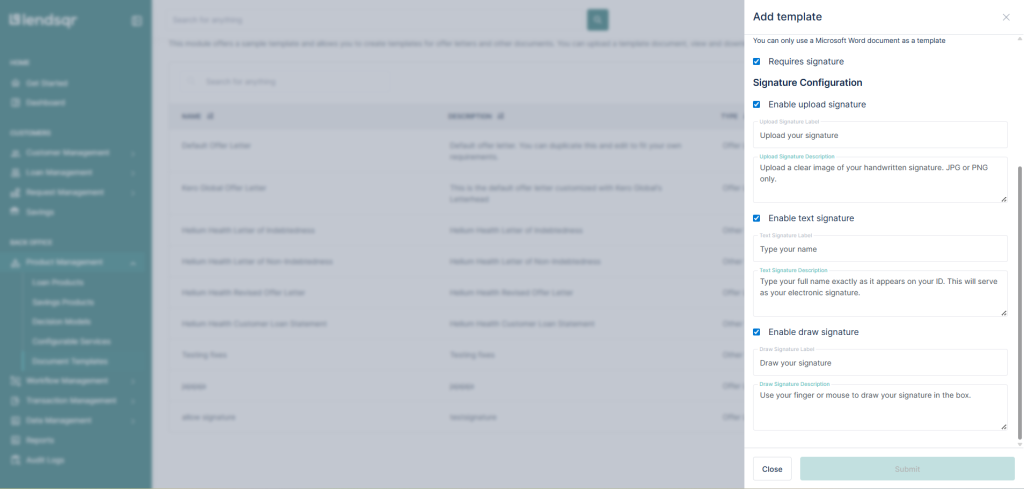
You can enable one or more of the following signature methods:
Upload Signature
Allows the borrower to upload an image of their handwritten signature.
Supported formats are JPG and PNG.
Text Signature
Allows the borrower to type their full name exactly as it appears on their valid ID.
The typed name serves as the borrower’s electronic signature.
Draw Signature
Allows the borrower to draw their signature directly on the screen using a mouse or touch input.
NB: Your uploaded template must have the variables {borrower_name} to represent the text signature and {%signature_image} for the uploaded or drawn signature.
Once all fields and signature options are configured, click Submit to successfully add the template.
The configured template will now be used automatically when you generate offer letters for approved loans.
Tip: Always preview the template with sample borrower data to ensure everything appears correctly
Configuring the offer letter for your loan product
1. Log in to the Admin Console
Open your web browser and log in to the Lendsqr admin console with your credentials.
2. Click on “Loan Products” under Product Management
From the main dashboard, go to Product Management and select Loan Products. This will display a list of all the loan products you have created.
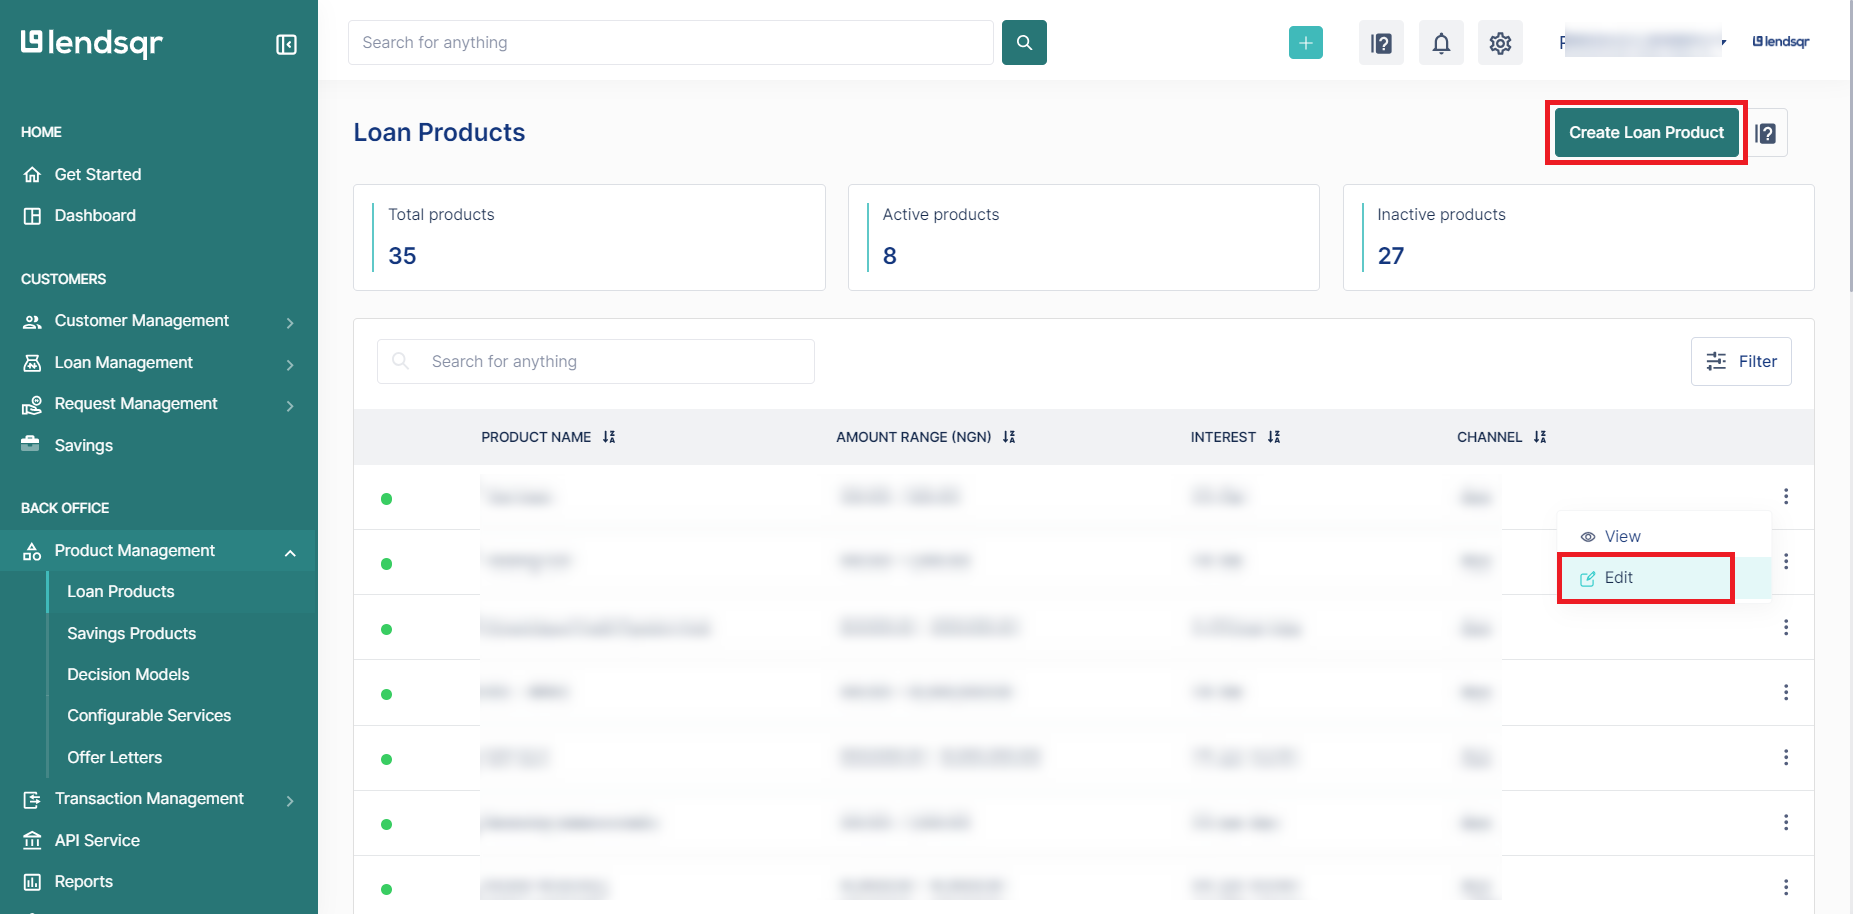
3. Create or Edit a Loan Product
To create a new loan product, click Create.
To edit an existing loan product, click the Edit button in the options menu for that product.
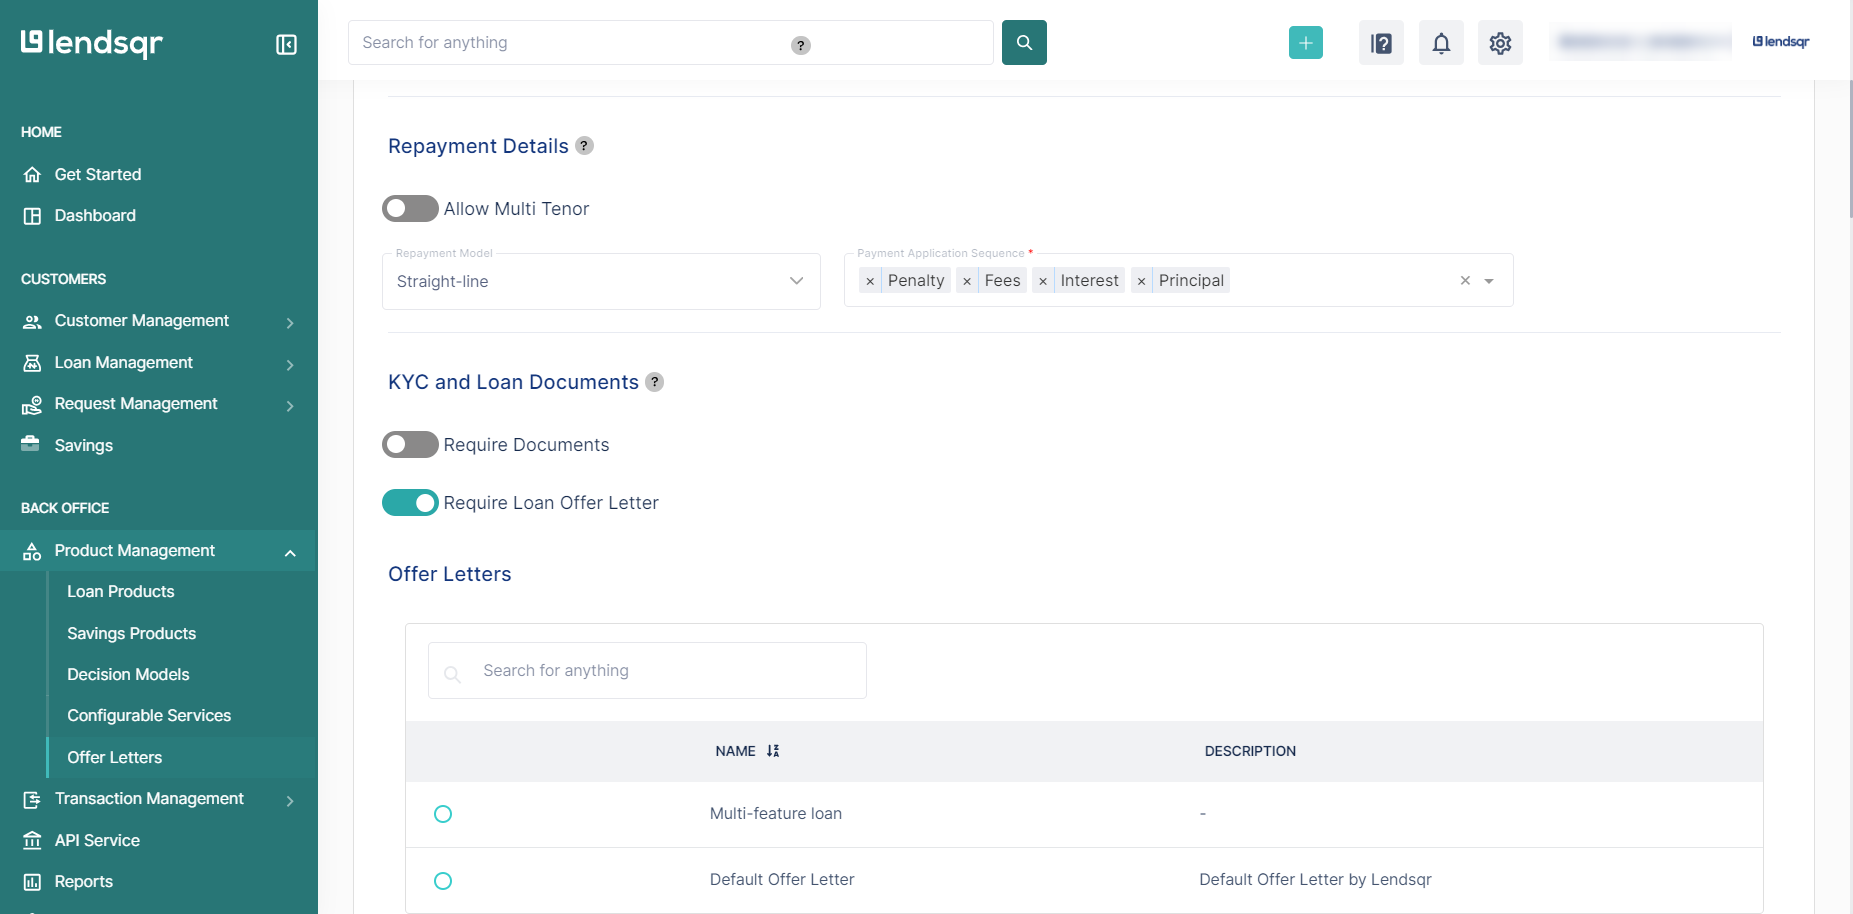
Scroll down to the KYC and Loan Documents section on the loan product creation or edit page.
Toggle the switch labeled Require Loan Offer Letter to the right, then select your offer letter from the offer letter table.
5. Save Your Changes or Create a Loan Product.
After making the necessary configurations, click SaveChanges to apply the changes to the loan product or Create Loan Product.
What happens after configuration
Once saved, every approved loan in lendsqr will automatically generate a customized offer letter using your template. You can download, email, or share the PDF directly with the borrower from the loan details page.
The borrower receives a clear, branded document that they can review, print, or sign digitally. This streamlines the approval-to-disbursement workflow and creates a consistent experience for all your customers.
What this enables in your lending operations
With easy offer letter configuration in the lendsqr admin console, you can create professional, branded documents for every borrower. This helps you communicate clearly, build trust, reduce disputes, and streamline your lending process in one secure place.
Many lenders rely on this feature to maintain professionalism while saving time on manual document creation.
Next steps
Train your team on how to generate and send offer letters during the approval process.
Review and update your offer letter template whenever your branding or terms change.
Test the generated offer letter on a sample loan before rolling it out to all borrowers.
Combine offer letters with your customized borrower web app for a fully branded customer journey.


 feature")