Introduction
After a loan application has been reviewed and approved, there are certain documents you may need to generate and share with the customer. These include:
- Offer Letters – formalizing the agreed loan terms the customer must sign before disbursement.
- Statements or Notices – additional documents that may need to be shared during or after approval.
- Other Custom Templates – documents specific to your institution’s processes (e.g., repayment schedule notices, fee disclosures, etc.).
These documents ensure the loan agreement is clear, legally binding, and transparent for both you and the customer.
Use Case Example
A customer applies for ₦8M but is approved for ₦6.5M after review. The initial offer letter no longer reflects the final decision. You can quickly generate a new offer letter from the Admin Console and send it to the customer for signing.
In another scenario, you may also need to share a repayment schedule statement alongside the offer letter. By using the document templates feature, you can download or send both documents directly from the loan details page, ensuring the borrower has all required documentation at once.
Important note: You can only send offer letters and other document templates if they are tied to the loan or loan request. This means the document must have been linked to the loan product at the time of loan application. If a template was not configured against the product during setup, it will not appear in the Offer Letters and Templates list for that loan.
Steps to download and send offer letters
Step 1: Locate the loan or loan request
- Log in to the Admin Console.
- Navigate to Request management > Loan Requests, or to the loan itself under Loan management if it has already been disbursed.
- Select the specific loan or loan request you want to generate a document for.
Step 2: Open the Offer Letters and Templates section
On the loan or loan request’s detail page, scroll down to the Offer Letters and Templates section and expand it. This lists every document template that has been configured against the loan product, each tagged as either an Offer Letter or an Other Template.
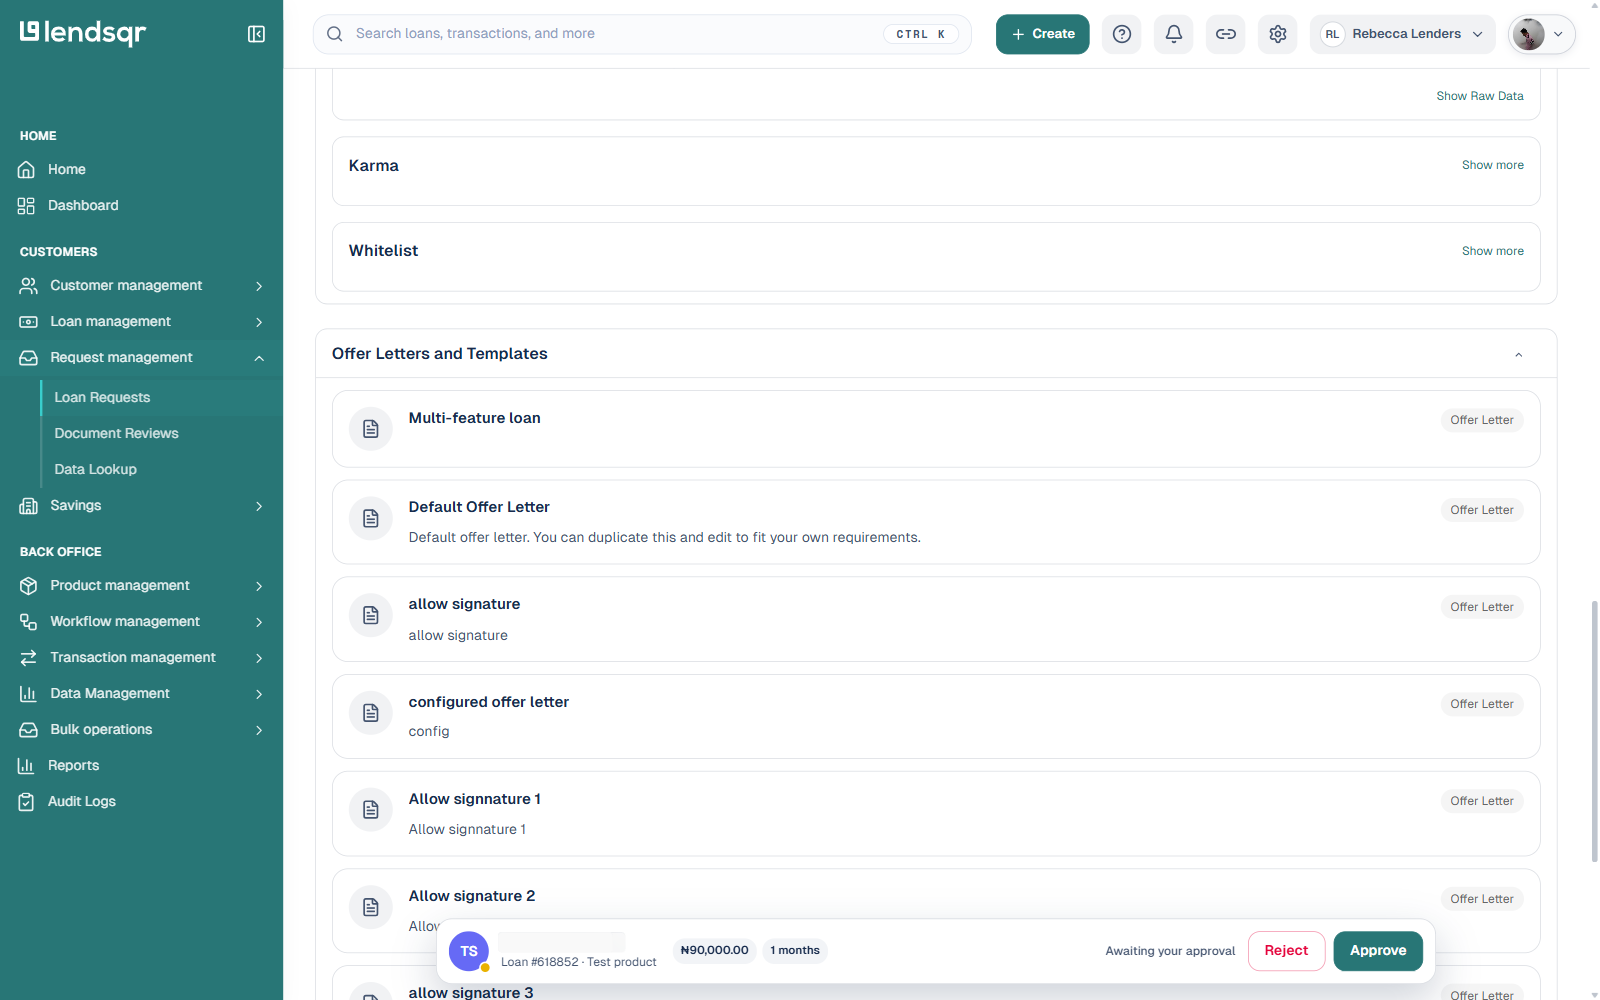
Click the specific template you want to generate. This opens a dialog and the system begins generating the document, automatically filling in the borrower’s details, the loan terms, and any other variables the template requires (amount, tenor, repayment schedule, and so on).
Step 3: Preview and download the document
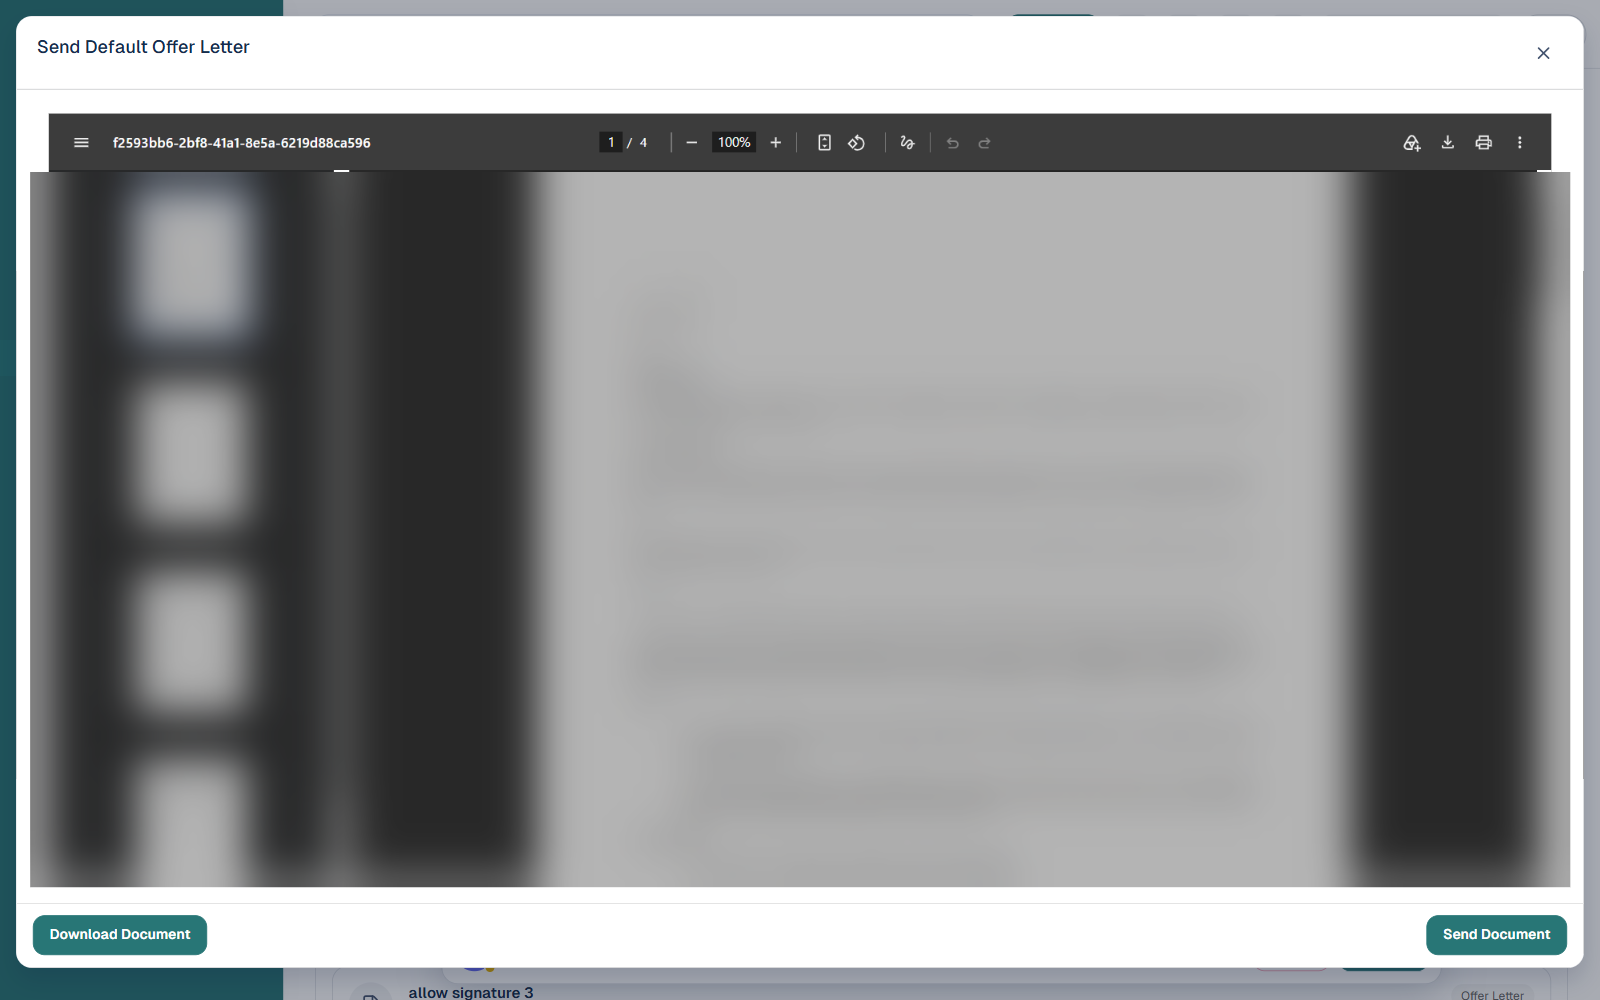
Once generated, the document opens in a preview pane inside the dialog, with page thumbnails on the left and a page-by-page viewer on the right. Review it to confirm the loan terms, customer details, and repayment information are correct before sending anything to the customer.
Click Download Document if you just need a local copy, for example to review internally or attach elsewhere.
Step 4: Send the document via email
Once you’ve verified the preview, click Send Document. This dispatches the document to the customer’s registered email address immediately, so only click it once you’re sure the document is correct. The customer receives a link to review the document, and for offer letters, to sign it.
Step 5: Customer action, and how signed offer letters are tracked
- The customer opens the link from their email.
- They review the loan terms and sign, where applicable, by entering their name or a digital signature.
- Once signed, that interaction is recorded on the loan’s Comments and Notes, the same notes panel covered in how to add notes and comments to a record on the admin console. This gives you a record of when a document was sent and signed without needing to check your email separately.