Access your Back Office at your fingertips.
Download the app now on Google Play Store.
Scan the QR code
You can also scan QR code with your phone to download the app.
How to configure equity contribution on your loan product
Updated
On this page
Introduction to equity contribution
Equity contribution is an upfront payment a borrower makes before a loan is disbursed. Think of it as a deposit or down payment that reduces the total loan amount the lender needs to provide.
Lenders typically require equity contribution for a few practical reasons:
Risk reduction: When a borrower has made an upfront financial commitment, they are less likely to default. The equity acts as a financial cushion for the lender, ensuring that even if a borrower stops repaying, the outstanding balance is lower and easier to recover.
Loan amount control: By collecting part of the financing upfront, lenders reduce their exposure on high-value or long-tenure loans. This is especially common in asset financing, mortgage-style products, and business loans where the amounts involved are significant.
Borrower commitment: It filters out low-intent applicants and ensures borrowers are financially prepared for the repayment journey. A borrower who can raise an equity contribution has already demonstrated a basic level of financial discipline.
Example: If a borrower needs ₦5,000,000 to purchase an asset, and your loan product requires a 20% equity contribution, the borrower pays ₦1,000,000 upfront. The lender then finances the remaining ₦4,000,000. This means the repayment schedule, interest calculations, and monthly installments are all based on ₦4,000,000, not the full ₦5,000,000.
How equity contribution affects the loan
Once equity contribution is configured and activated on a loan product, it changes the borrower experience in the following ways:
Upfront collection during application: Borrowers applying for the product will be prompted to provide their equity contribution before the loan is approved or disbursed. This happens as part of the application flow, so the borrower knows what is expected before they proceed.
Reduced loan principal: The disbursed amount reflects only the lender’s portion after the borrower’s contribution is deducted. For example, on a ₦5,000,000 loan with a 20% equity contribution, the lender only disburses ₦4,000,000. The borrower’s repayment obligations are calculated on that figure alone.
Adjusted repayment schedule: Since the principal is lower, monthly repayments and total interest charged are recalculated accordingly. Borrowers benefit from smaller installments or a shorter loan tenure depending on how the product is structured. This also means the total cost of the loan to the borrower is reduced.
Step-by-step configuration
To configure equity contribution on your loan product in the Lendsqr admin console, follow these steps:
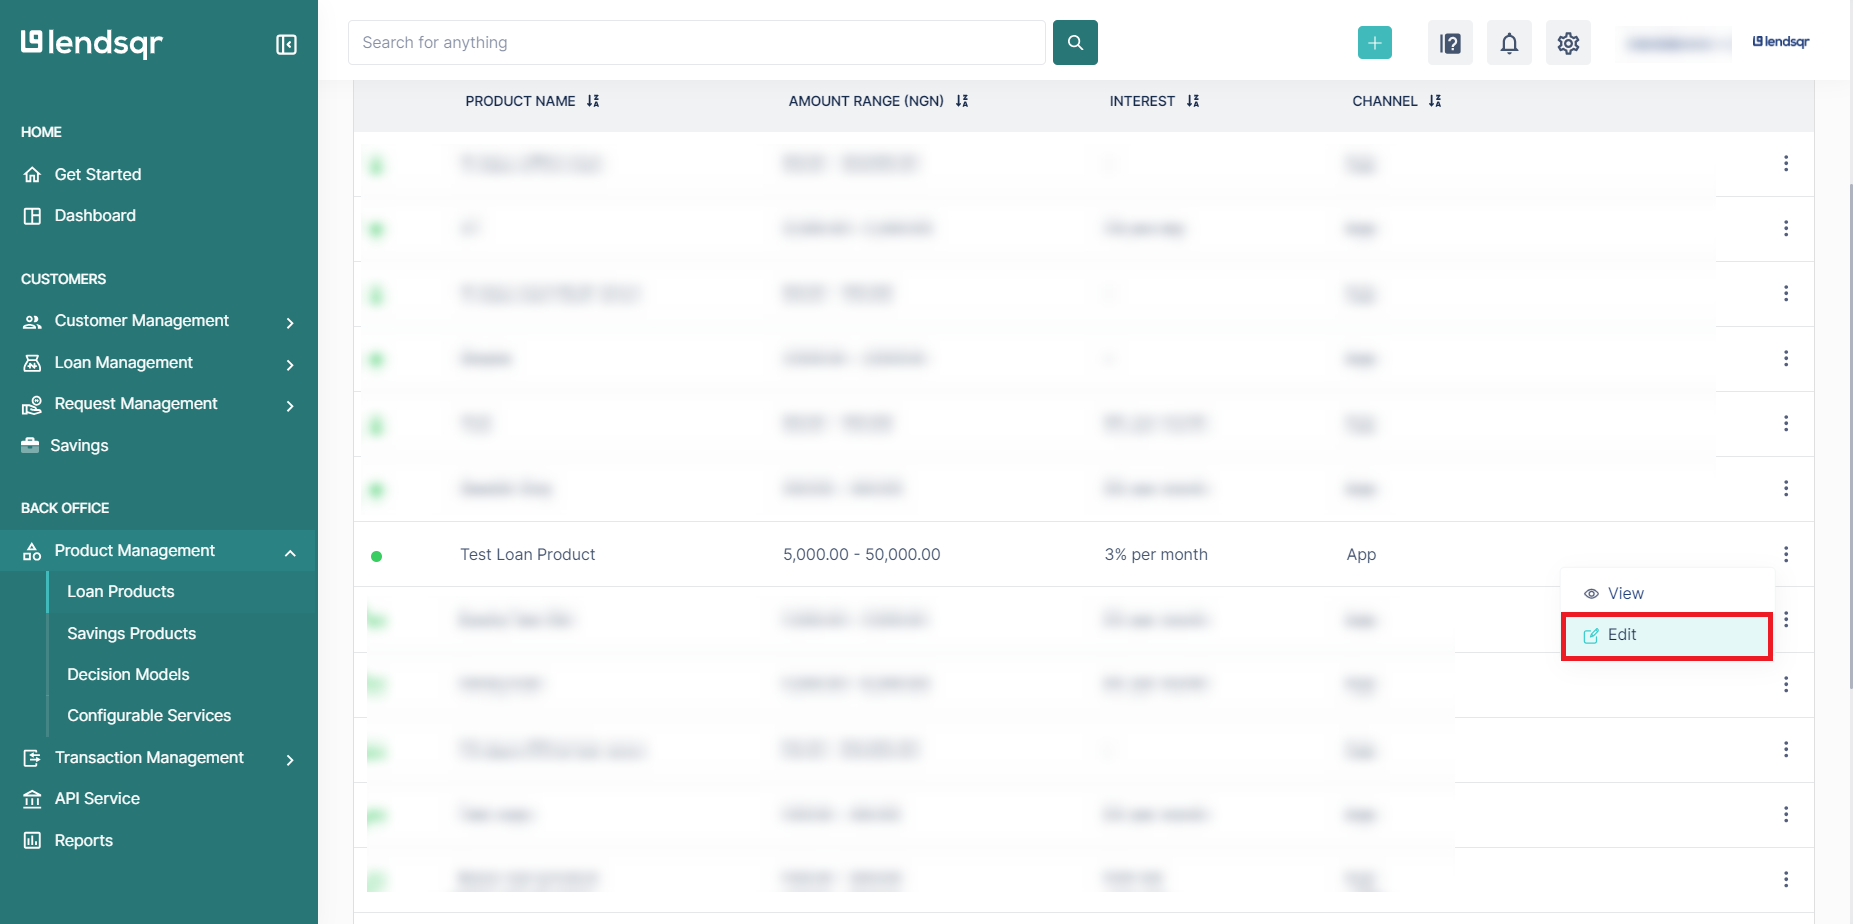
From the side navigation, click Product Management, then select Loan Products from the dropdown.
3. Create or update a loan product
To create a new loan product, click on the “Create Loan Product” button.
To update an existing product, find the product in the list and click on the “Edit” button next to it.
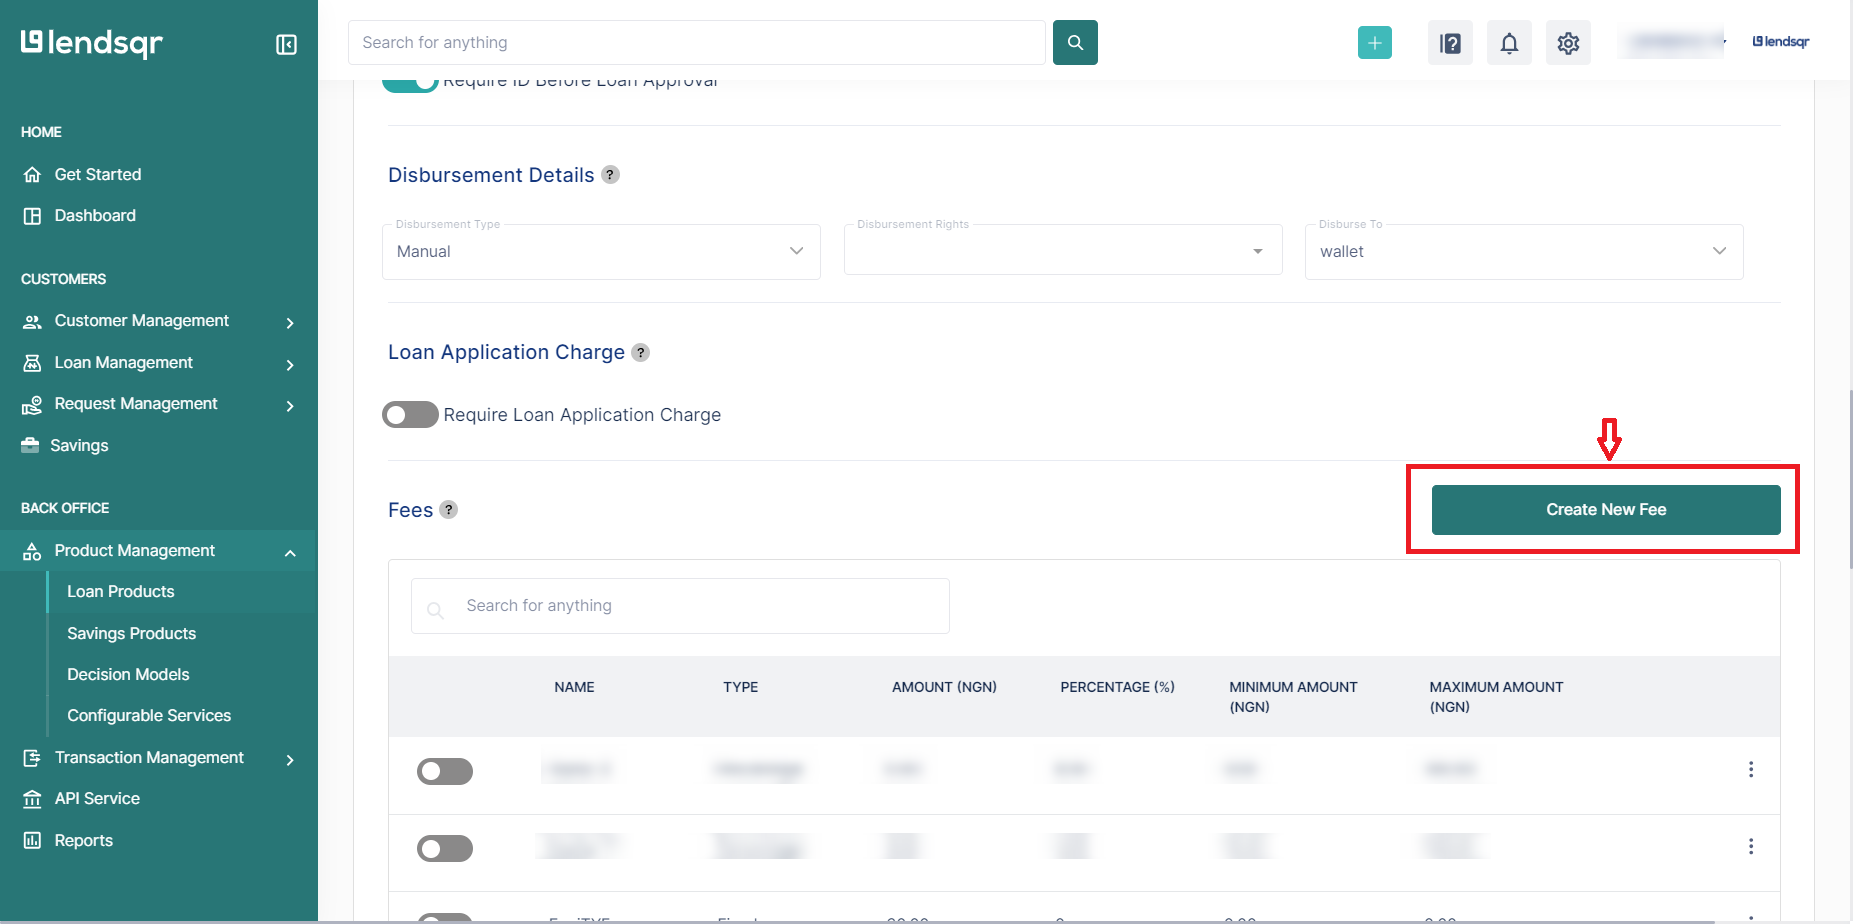
4. Access the Fees section
Scroll down to the Fees section of the loan product form and click Create New Fee to open the fee modal.
5. Select equity contribution and fill in the fee details
In the modal, choose Equity contribution from the list of fee types. You will then need to fill in three fields:
Field
Description
Name
A label for the fee (e.g., “Equity contribution” or “Down payment”). This is visible to other admins.
Charge Type
Choose Percentage if the contribution is calculated as a fraction of the loan amount (e.g., 20%), or Fixed Amount if it is a flat figure (e.g., ₦50,000).
Amount
The value of the contribution. Enter a number based on the charge type you select.
Note: Lendsqr validates that the amount field is not empty and that a charge type is selected before saving. If either is missing, the form will return an error, and the fee will not be created.
6. Save the fee
Click Create Fee to save. The modal will close and return you to the loan product form.
7. Activate the equity contribution
In the Fees section, find the newly added equity contribution and toggle the switch to activate it. A fee that has been created but not activated will not be applied to loan applications, so this step is required.
8. Save the loan product
Scroll to the bottom of the form and click Save to apply all changes.
Post-configuration checklist
Before going live with a loan product with an equity contribution, run through these checks to confirm equity contribution is set up correctly:
The fee appears in the Fees section of the loan product
The toggle is switched on (active)
The charge type (percentage or fixed) reflects your intended configuration
The loan product has been saved successfully
Test the product by simulating a loan application
Testing the configuration
Once you have saved the loan product, simulate a loan application using the product to verify the setup end-to-end. During the application, confirm that the equity contribution prompt appears at the appropriate step and that the amount displayed matches your configuration. After submission, check the loan summary to confirm that the principal shown is the post-contribution figure, not the full requested amount. Also, verify that the generated repayment schedule reflects the reduced principal. If anything looks off, return to the loan product, review the fee settings, and ensure the toggle is active before saving again.


 feature")

