Access your Back Office at your fingertips.
Download the app now on Google Play Store.
Scan the QR code
You can also scan QR code with your phone to download the app.
Creating a single whitelist entry
The Whitelist feature allows admins to grant selected users access to special loan terms that may not be available to the general public. This is especially useful when you want to offer promotional loan products, fast-track certain users, or maintain trusted borrower groups. In some lending operations, not all customers follow the same loan journey. There are situations where certain borrowers like employees of a partner company, loyal repeat borrowers, or individuals vetted through alternative channels, should receive more favorable loan terms.
For example, imagine you’re launching a new salary-backed loan product exclusive to employees of a large corporate partner. Instead of making the product publicly available, you whitelist their verified staff using their BVNs. You can then offer them a lower interest rate, longer tenors, and zero transaction fees. This ensures that only the intended group receives these benefits, while you retain full control over eligibility through the admin console.
How to create a whitelist entry
To create a whitelist entry:
1. Log into the Admin Portal Navigate to the landing page of the admin console and sign in with your credentials.
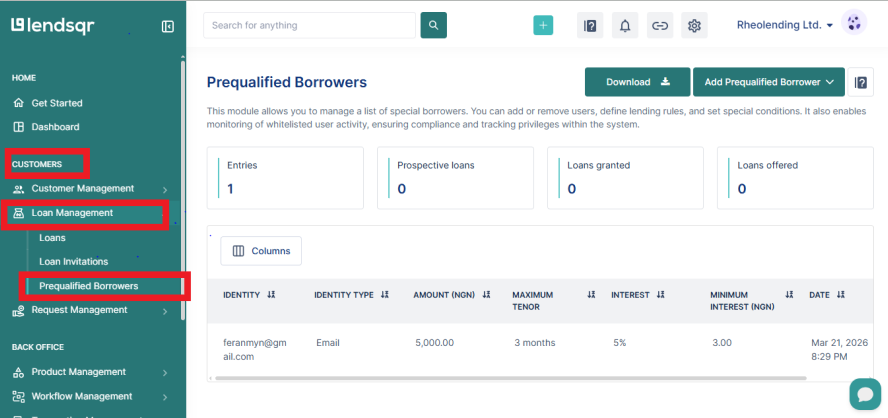
2. Navigate to Prequalified Borrowers: Using the left navigation panel,
Go to Customers
Click Loan Management
Select Prequalified Borrowers
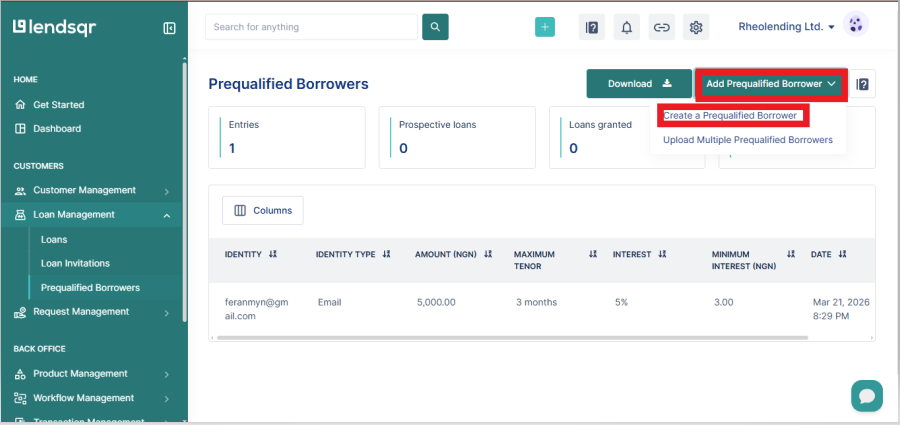
3. Add a Single Prequalified Borrower
Click on the drop down “Add Prequalified Borrower” on the top right corner of the page.
In the drop down menu provided, select “Create a Prequalified Borrower”
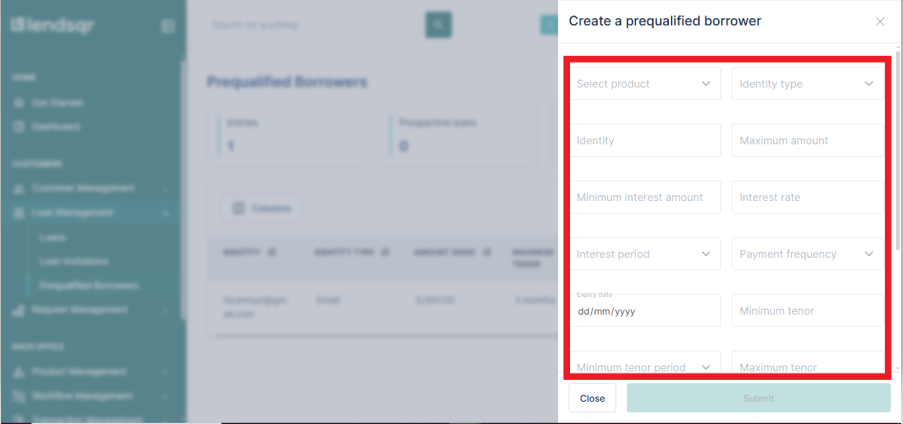
4. Specify Loan Product Details: In the form that comes up, input the details of the particular loan product being offered to this borrower.
Maximum Amount: This defines the highest loan amount the user can access under the customized terms.
Minimum Interest Amount: This defines the lowest interest charge applicable to the loan, regardless of the calculated value.
Interest Rate and Loan Period: This defines the applicable interest rate and the duration within which the loan must be repaid.
Expiry Date: This defines how long the whitelist entry remains valid. After this date, the user will no longer have access to the customized loan terms unless re-whitelisted.
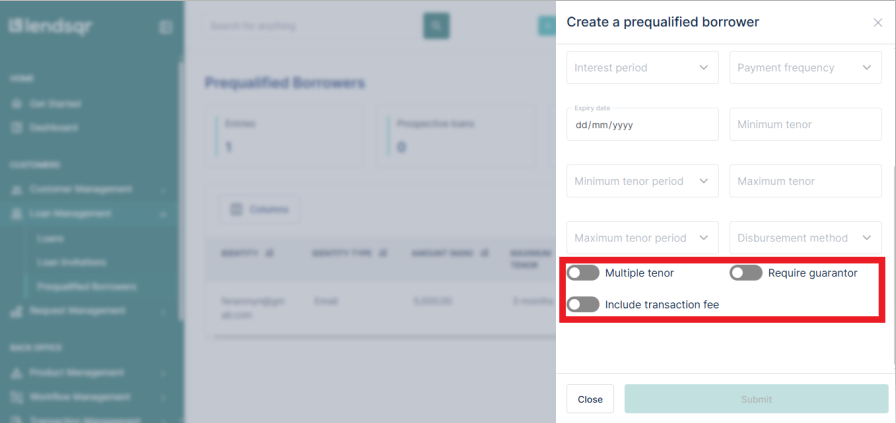
5. Configure Additional Options (if needed):
Multiple Tenors: Offer more flexibility in repayment durations.
Require Guarantors: Enforce extra security measures for specific users.
Transaction Fees: Choose whether a fee applies to this product.
6. Click “Submit”:
Once all details are filled correctly, click the Submit button.
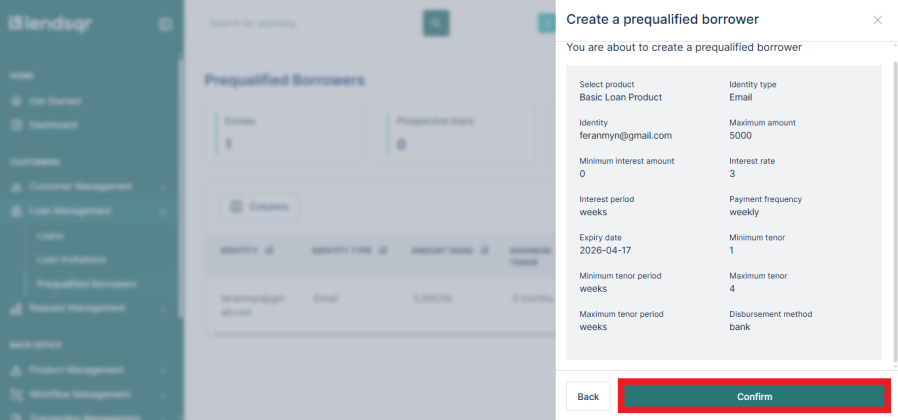
7. Confirm the terms
After clicking submit, a page will pop-up with a summary of the terms specified. Click confirm if you’re satisfied with them.


 feature")


