Access your Back Office at your fingertips.
Download the app now on Google Play Store.
Scan the QR code
You can also scan QR code with your phone to download the app.
What are permissions?
Updated
On this page
If you run a lending business, you probably have more than one person working on your admin console. There is the loan officer who reviews applications, the finance team member who handles disbursements, and the support agent who manages customer queries. The problem is, not everyone should have access to everything. Permissions solve this. They let you decide exactly what each person on your team can see and do inside the Lendsqr admin console, so that sensitive actions like approving loans or editing financial settings are only available to the right people.
Why permissions matter for lenders
Imagine a support agent accidentally approving a loan they were only supposed to review. Or a new team member gaining access to transaction records they should never have seen. These are not hypothetical problems; they are real risks that poorly configured access could create.
With permissions, you define what each role on your team is allowed to do. This keeps your operations clean, reduces the risk of unauthorized changes, and gives you a clear audit trail of who did what on your platform. On Lendsqr, permissions are assigned to roles, and roles are assigned to team members. This allows you to use them to shape what an entire role can do across the console.
How permissions are organized on Lendsqr
Permissions on the Lendsqr admin console are grouped into operational units. Each unit covers a specific area of your lending operations. Here are some of the vital ones and what they control:
Users: Controls whether a team member can activate, deactivate, delete, or blacklist borrowers.
Loans: This determines who can approve, decline, or disburse loans. This is one of the most important units to configure carefully.
Loan Products: These permissions cover creating, editing, and activating the loan products your borrowers apply for.
Audit: This grants the ability to view and download audit logs, which track all activity on your admin console.
Team and Roles: This controls who can add new team members, create roles, and assign permissions to others.
Transactions: This grants access to view and download transaction records across your platform.
Whitelist: This manages who can create, edit, or download your borrower whitelist.
Settlement: This grants access to view and download settlement data.
Guarantors: This controls who can view and manage guarantor information tied to loan applications.
Dashboard: This determines which team members can view the main dashboard overview.
Documents: This manages access to borrower documents uploaded during the KYC process.
Savings: This controls who can manage savings accounts and related activity on your platform.
Savings Products: This grants the ability to create, edit, and activate savings products.
Decision Models: This allows a team member to configure and manage the automated credit risk rules used to evaluate loan applications. (This unit is still labeled “Decision Models” in the permissions list, even though the rest of the product now calls this feature “Credit Risk Rules.”)
Disbursements: This covers who can view and initiate loan disbursements from your disbursement account.
Adjutor: This manages access to your Adjutor API services, including generating API keys and updating app configurations.
Services: This controls who can manage configurable services set up on your platform.
Fees: This controls who can view and manage fee configurations.
Where permissions show up in real lending workflows
Permissions are not just an administrative setting you configure once and forget. They shape what your team can do at every stage of the lending lifecycle, from the moment a borrower submits an application to when a loan is repaid or settled.
Here are three common scenarios that show how permissions work in practice.
Scenario 1: A borrower applies for a loan
When a borrower submits a loan application, your loan officer needs to open the application, review the borrower’s details, and make a decision. For this to work, the loan officer needs permissions from the Loans unit (to view and action loan requests) and the Users unit (to access the borrower’s profile). Without these two, they cannot complete their job.
However, that same loan officer does not need access to Loan Products. Giving them that permission would mean they could accidentally modify the interest rate on a product or change eligibility rules, which creates operational risk.
Scenario 2: A finance officer processes disbursements
After a loan is approved, someone needs to confirm and push the disbursement. This requires permissions from the Disbursements unit. Your finance officer may also need access to Transactions to reconcile payments. But they likely should not have access to Decision Models or Team and Roles, which belong to more senior administrators.
Scenario 3: A compliance officer runs an audit
Your compliance team needs to review what happened on the platform over a given period. They need the Audit unit to view and download audit logs, and the Reports unit to pull loan and transaction reports. They do not need to approve loans or manage customers. Limiting their access to read-only audit and reporting permissions protects your data without blocking their work.
How to configure roles with permissions on Lendsqr
Say you are onboarding a new loan officer. They need the permissions to review loan applications and approve or decline them; however, they should not be able to edit loan products or access financial settings.
Here is how you would achieve this on the Admin Console:
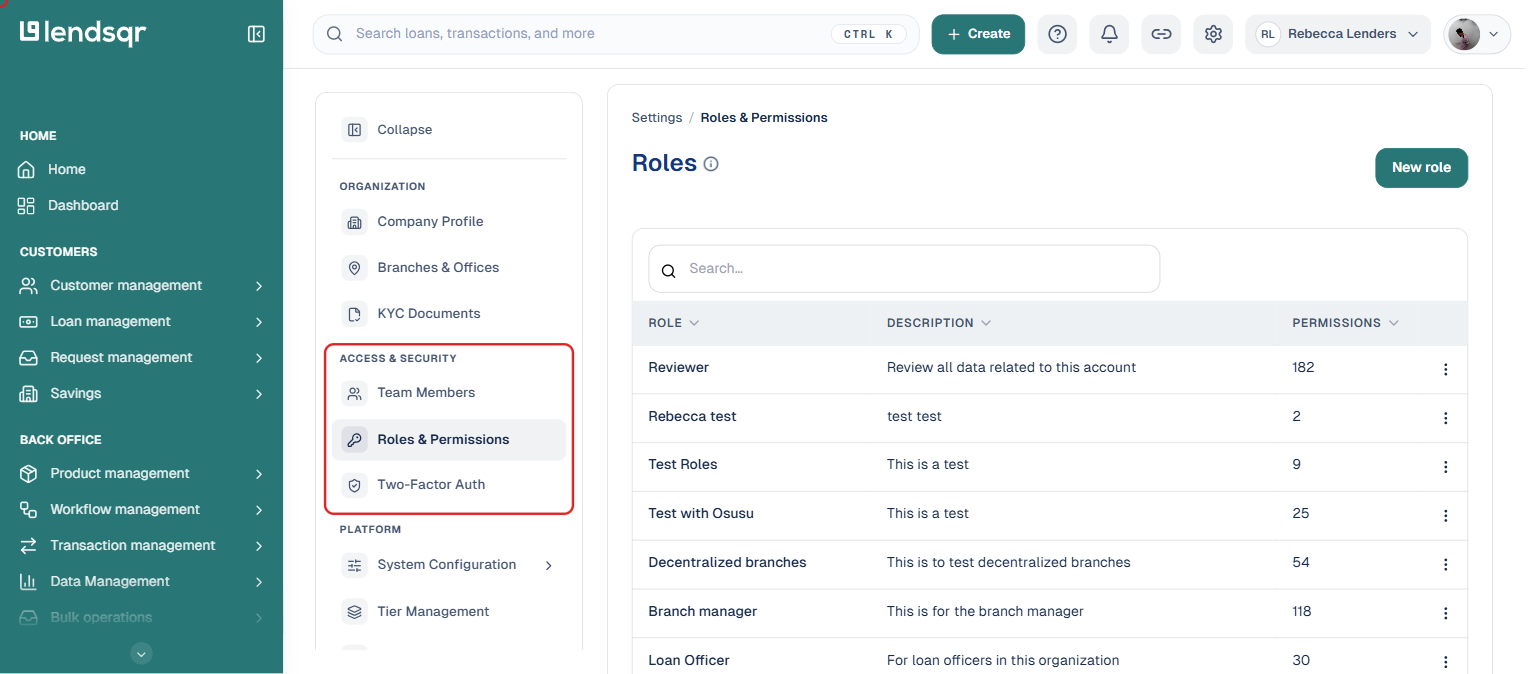
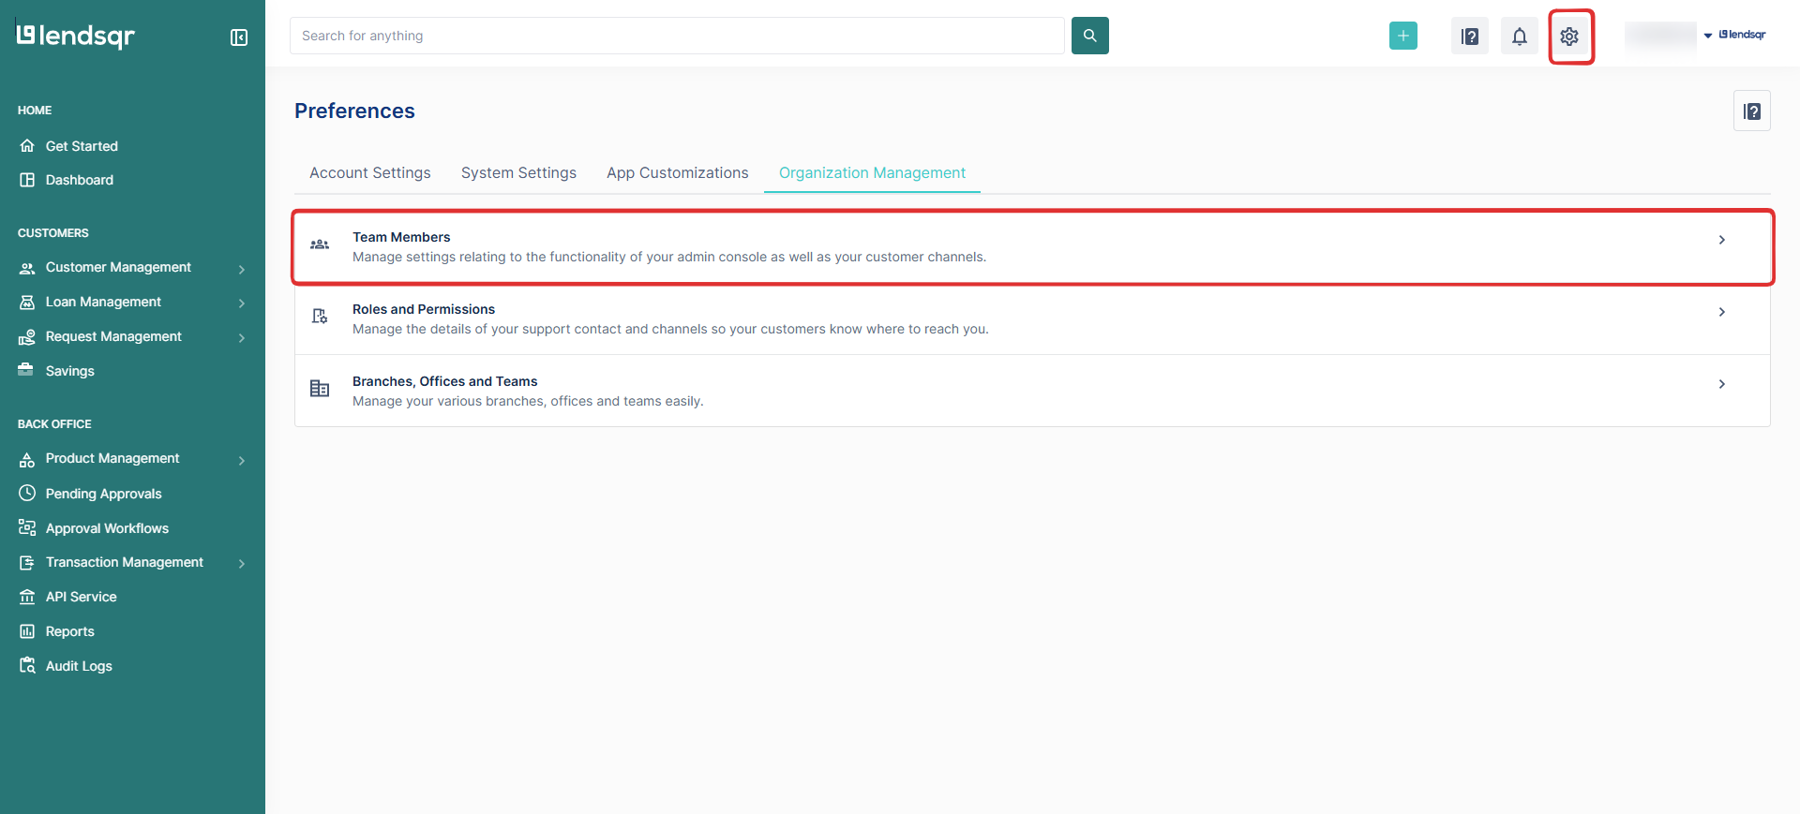
Click the Settings (gear) icon in the top navigation, then under “Access & Security“, select “Roles & Permissions“.
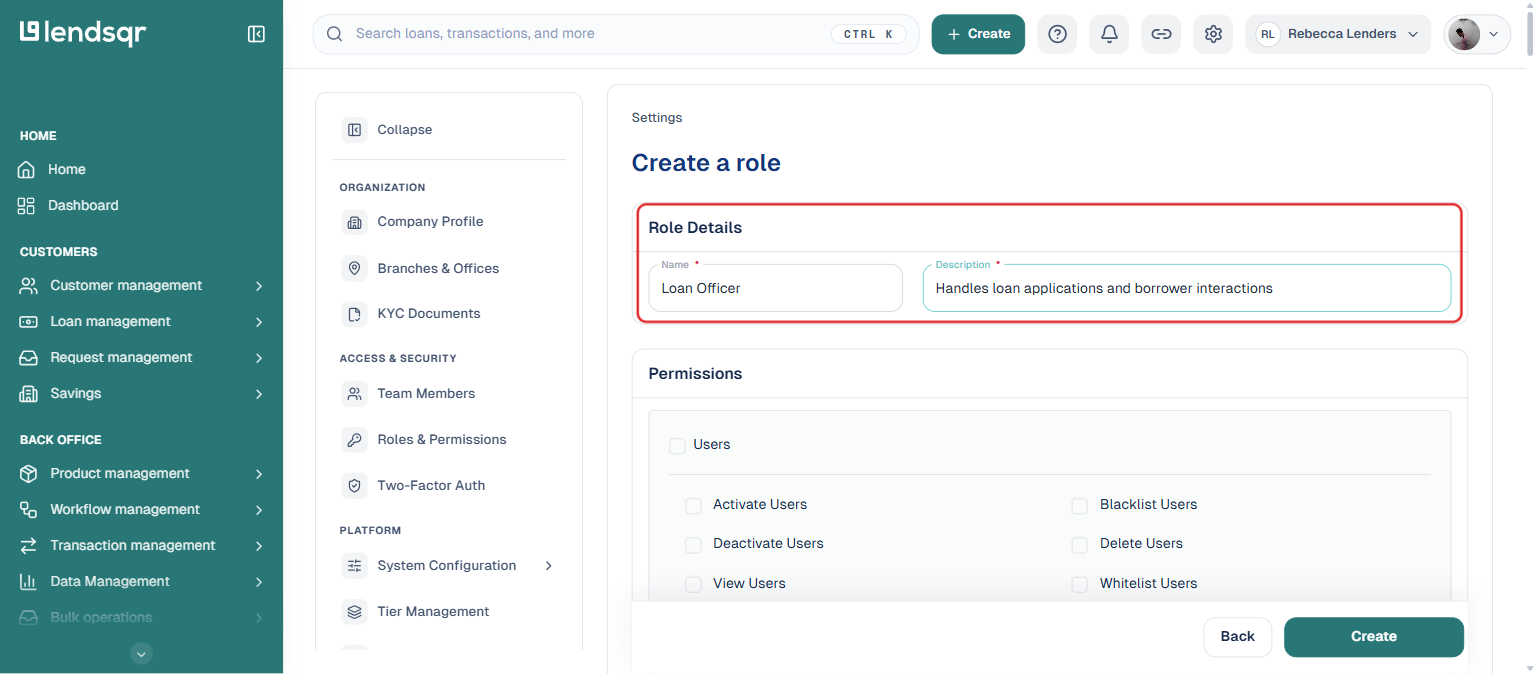
Click “New role” and give it a name and description, e.g. “Loan Officer”.
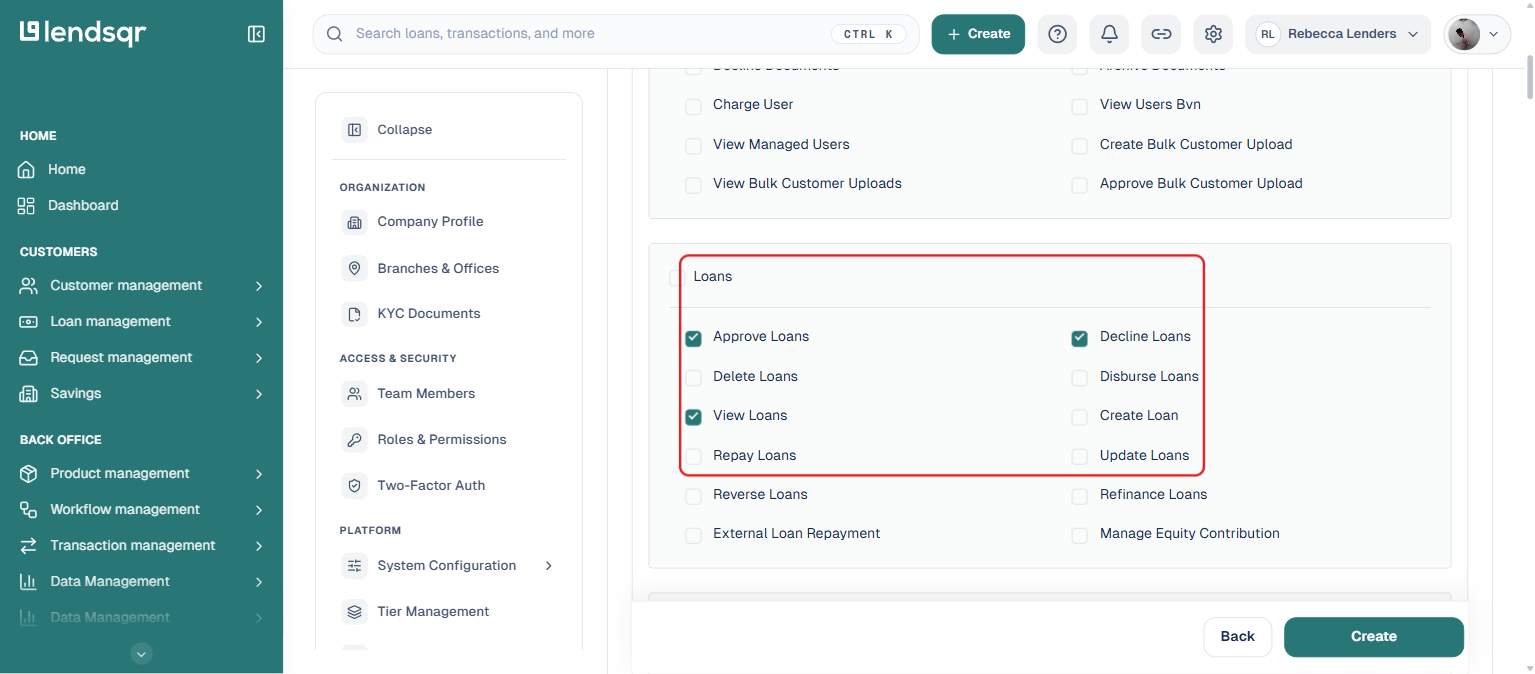
Scroll to the Loans permission category and check only the specific actions this role needs (e.g. View Loans, Approve Loans, Decline Loans) — checking a category’s own top-level checkbox selects every action underneath it, so pick individual actions if you want a narrower role.
Leave every other category’s boxes unchecked, including Loan Products, Decision Models, and Disbursements.
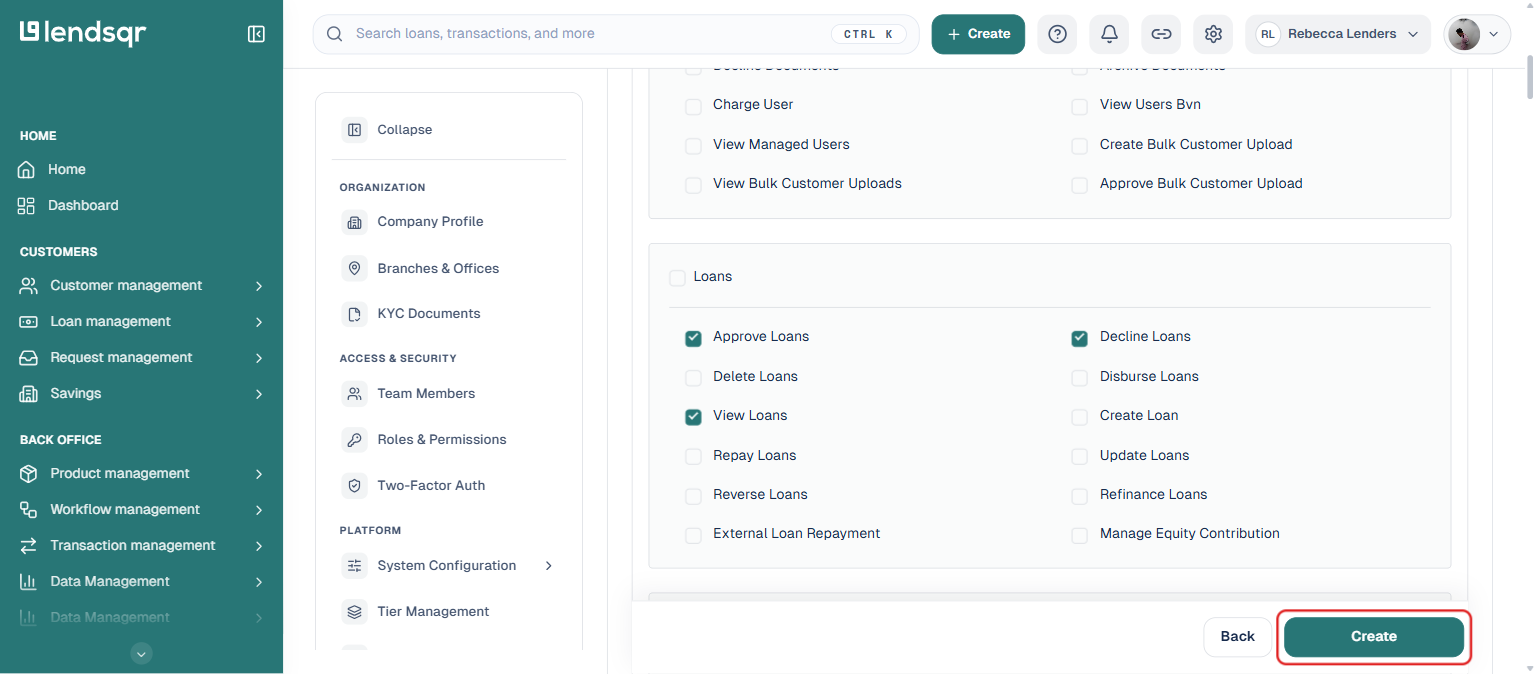
Click “Create” to save the role, then invite your team member (or edit an existing one) and assign them the new role.
From that point on, when that team member logs in, they will only see and do what you have authorized.
Common role configurations and the permissions they need
The table below shows how permissions map to typical roles on a lending team. Use it as a starting point when building out your own access structure.
These are not rigid categories. Your organization may structure roles differently. The point is to match each role to only the permissions it genuinely needs.
How permissions connect to roles
Permissions on the Lendsqr Admin console do not work in isolation. On Lendsqr, you assign permissions to roles, and roles are assigned to people. This makes it easy to manage a team at scale. For example, if you need to change what a loan officer can do, you can update the role once, and it applies to every team member holding that role.
The best part is that Lendsqr already has a set of default roles when you first set up your admin console, so you do not have to start assigning permissions from scratch. You can use these default roles or build your own custom roles based on how your organization is structured.