Access your Back Office at your fingertips.
Download the app now on Google Play Store.
Scan the QR code
You can also scan QR code with your phone to download the app.
How to add a loan and savings product to a group
Updated
On this page
A cooperative lender manages several distinct borrower segments: salaried employees, small business owners, and rural farmers. Each group has access to a different loan product tailored to their repayment capacity and risk profile. Rather than making all products available to all users, the lender assigns each product to the relevant borrower group, so salaried employees only see the salary advance product, and farmers only see the agricultural loan product.
Assigning loan and savings products to specific groups gives lenders precise control over which borrowers can access which products. This is particularly useful for lenders who segment their customer base, whether by employer, geography, risk tier, or membership type, and want each segment to only see the products relevant to them. This article explains what it means to assign a product to a group, and walks you through the steps to add both loan and savings products to an existing group on the Lendsqr admin console.
What are groups in Lendsqr?
In Lendsqr, a group represents both a segmentation of borrowers and a collective lending structure. It is used to organize borrowers who participate together in group savings or act as mutual guarantors in group loan guarantees. Adding a loan or savings product to a group means the product is linked to that group’s lending or savings activities, but does not become exclusive; these products remain available platform-wide while being associated with the group. Borrowers can belong to more than one group, allowing them to participate in multiple collective arrangements. Similarly, a loan or savings product can be linked to multiple groups at the same time, supporting diverse group configurations and lending workflows.
Assigning products to groups lets lenders tailor their product offering to different borrower segments without creating entirely separate platforms. Here are two common ways lenders use this:
A payroll lender partners with several employers and creates one group per employer. Each group is linked only to the loan product configured for that employer’s salary range and repayment structure, so employees from Company A never see products designed for Company B.
A microfinance institution offers a savings product exclusively to members of their cooperative group. By linking the savings product to the cooperative group, only members can see and enrol in the product, keeping the offering targeted and reducing administrative overhead.
Part 1: How to add a loan product to a group
Follow these steps to link an existing loan product to an existing group. You will need admin access to the Groups section.
1. Log in to the Lendsqr admin console and navigate to “Customer Management“, then select “Groups”.
2. From the list of existing groups, click the More Options (⋮) menu next to the group you want to update, and choose “View Details“.
3. Click “Add New“, then select “Add Loan Product” from the dropdown.
4. A panel will appear on the right displaying the available loan products. Select your preferred loan product, then click “Submit“.
5. A success message will appear. Click “Finish” to complete the process.
6. To confirm the loan product was added successfully, click on the “Loan Products” tab within the group details page. The product you added should appear in the list.
Part 2: How to add a savings product to a group
The process for adding a savings product is identical to adding a loan product. From the same group details page:
7. Click “Add New“, then select “Add Savings Product“.
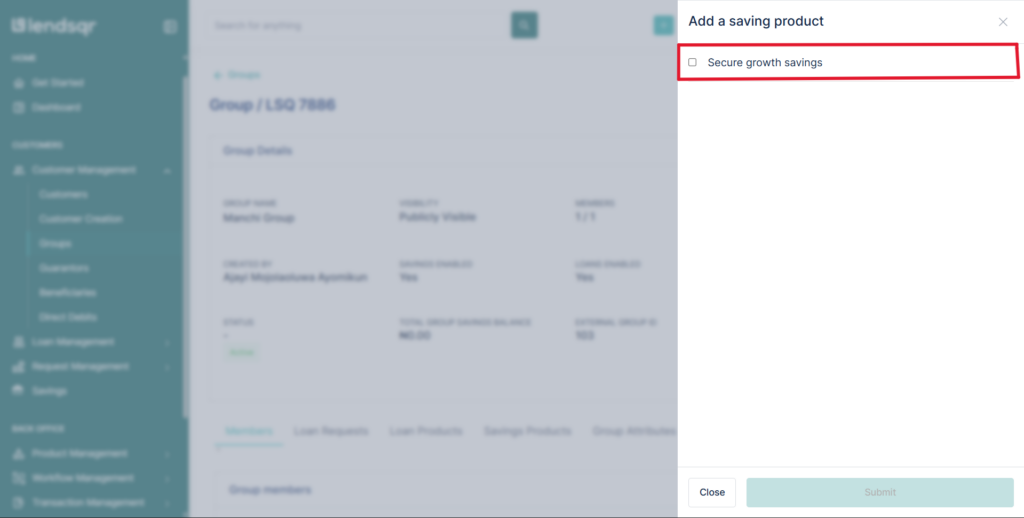
8. A panel will appear on the right displaying the available savings products. Select your preferred savings product, then click “Submit“.
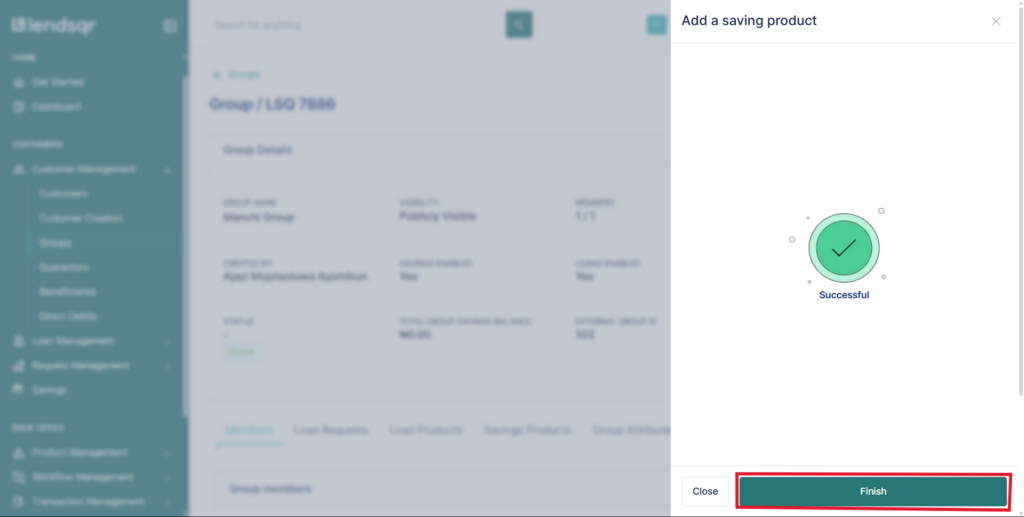
9. A success message will appear. Click “Finish” to complete the process.
To confirm the savings product was added successfully, click on the Savings Products tab within the group details page. The product you added should appear in the list.
Frequently asked questions
Does a loan product need to be active before it can be added to a group?
Yes, a loan or savings product must be in an active/published state before it can be linked to a group.
Can the same product be added to more than one group?
Yes, a single loan or savings product can be linked to multiple groups simultaneously
Can a product be removed from a group after it has been added?
Yes, a product can be removed from a group by reversing the steps used to add the product to the group.
Do I need to create a group before I can add products to it?
Yes. The group must exist before you can assign products to it. If you have not yet created a group, follow the steps in How to create a customer group on the admin console first, then return to the steps above.