Access your Back Office at your fingertips.
Download the app now on Google Play Store.
Scan the QR code
You can also scan QR code with your phone to download the app.
Adding a team member to an office, branch, or team
Updated
On this page
Introduction
You run a microfinance operation with branches in Lagos, Abuja, and Port Harcourt. Your Lagos loan officers should only see Lagos customer records. Your Abuja team should only see Abuja activity. A new hire should not stumble into settings that could affect the entire platform.
Without proper branch and team assignments, all of this breaks down. Team members see records they should not. Data bleeds across locations. And managing a growing operation becomes messier with every new hire.
Lendsqr solves this by letting you assign each team member to a specific office, branch, or team the moment you invite them. Their access is scoped correctly from day one. No manual cleanup needed after the fact.
This guide explains why branch assignments matter for your lending operation and walks you through exactly how to add a team member on the Lendsqr admin console.
Why branch and team assignments matter
In a lending operation, information access is a risk management decision. A customer support agent in one branch does not need visibility into another branch’s borrower profiles. A field officer assigned to SME loans does not need access to the retail lending queue.
Branch and team assignments on Lendsqr enforce this separation automatically. When you assign a team member to a specific branch, they only see the customers, loans, and activity that belong to that branch. Everything else stays out of reach.
This matters in three practical ways.
Data protection. Limiting what each team member can see reduces the risk of accidental data exposure. A loan officer who cannot access records outside their branch cannot accidentally edit or share data they have no business touching.
Operational clarity. When every team member is assigned to the right branch or team, your reporting stays clean. Branch-level performance data reflects actual activity from the right people. You can compare branch performance accurately and identify where support is needed.
Compliance. Many regulatory frameworks require lenders to demonstrate that access to customer data is controlled and documented. Branch assignments give you a clear, auditable structure that shows who had access to what and when.
What you need before you start
For lenders running agent networks, multiple city offices, or separate business units such as a retail desk and an SME portfolio, branch assignments give you this control without needing to build complex custom permission structures from scratch.
Before inviting a team member, confirm the following.
You have either a Super Admin or Admin role on the admin console. Only these roles can invite new team members and assign them to branches or offices.
You have already created the office, branch, or team you want to assign the new member to. If the branch does not exist yet, create it first under your organizational settings before sending the invite.
You have the team member’s email address ready. This is what Lendsqr uses to send its invitation.
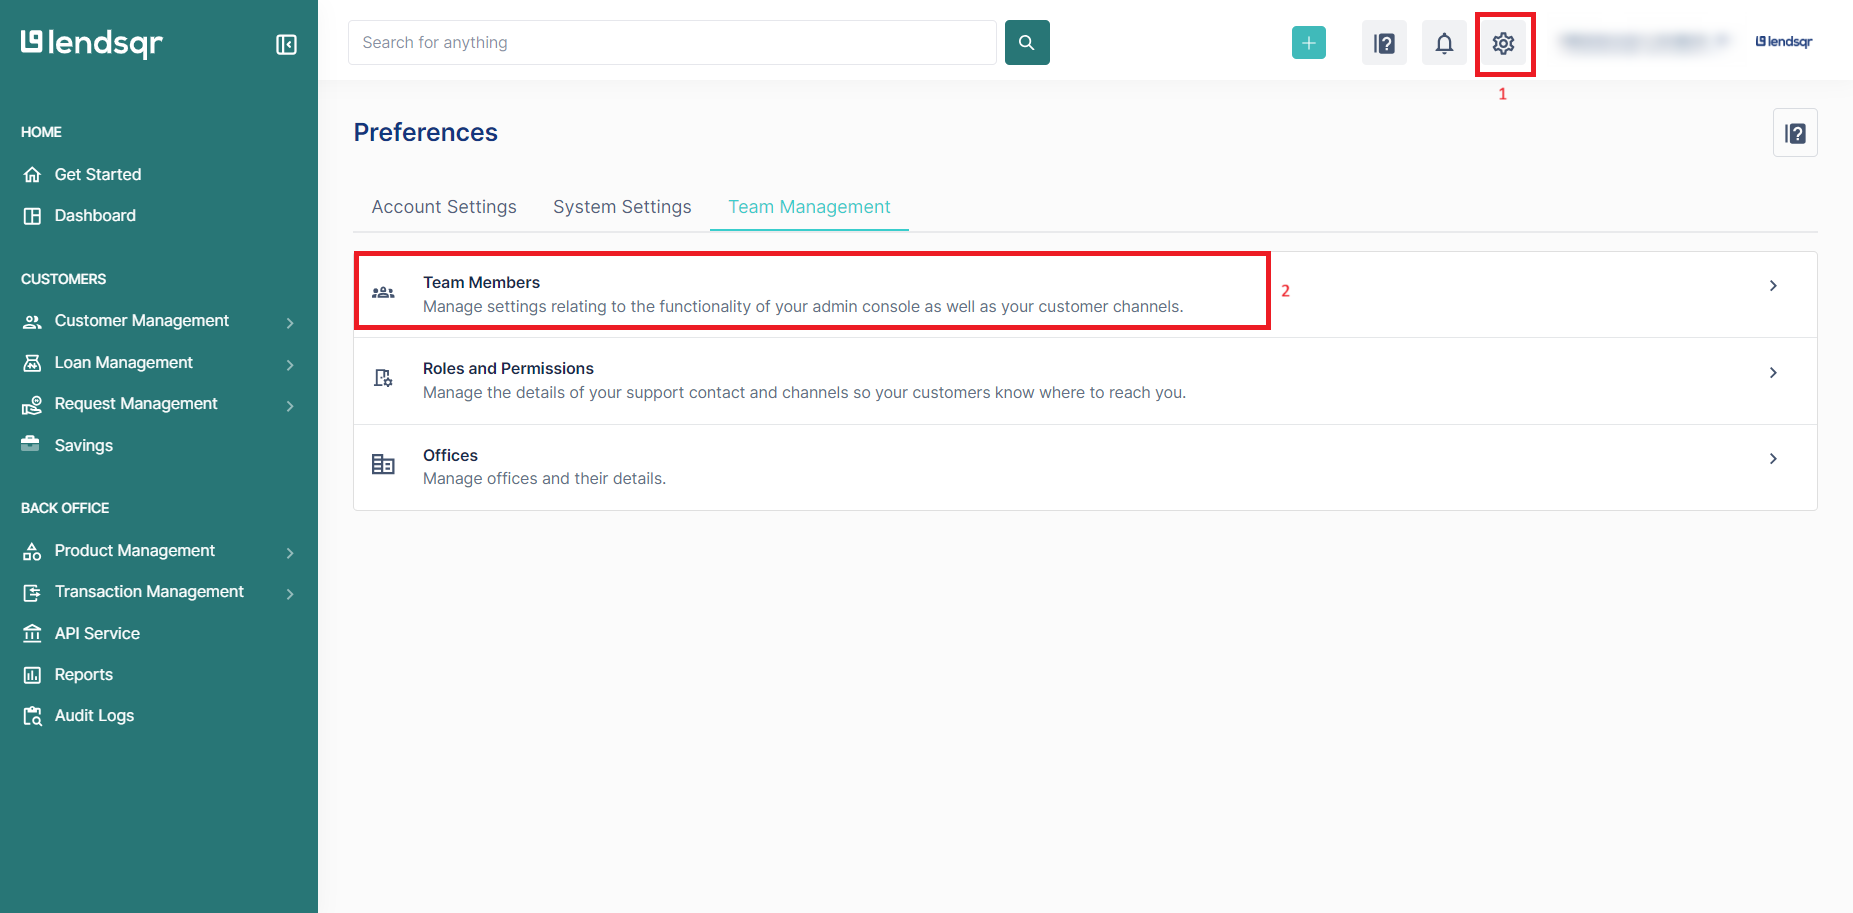
2. Go to organizational settings through the settings icon at the top right of the page in the Lendsqr admin console.
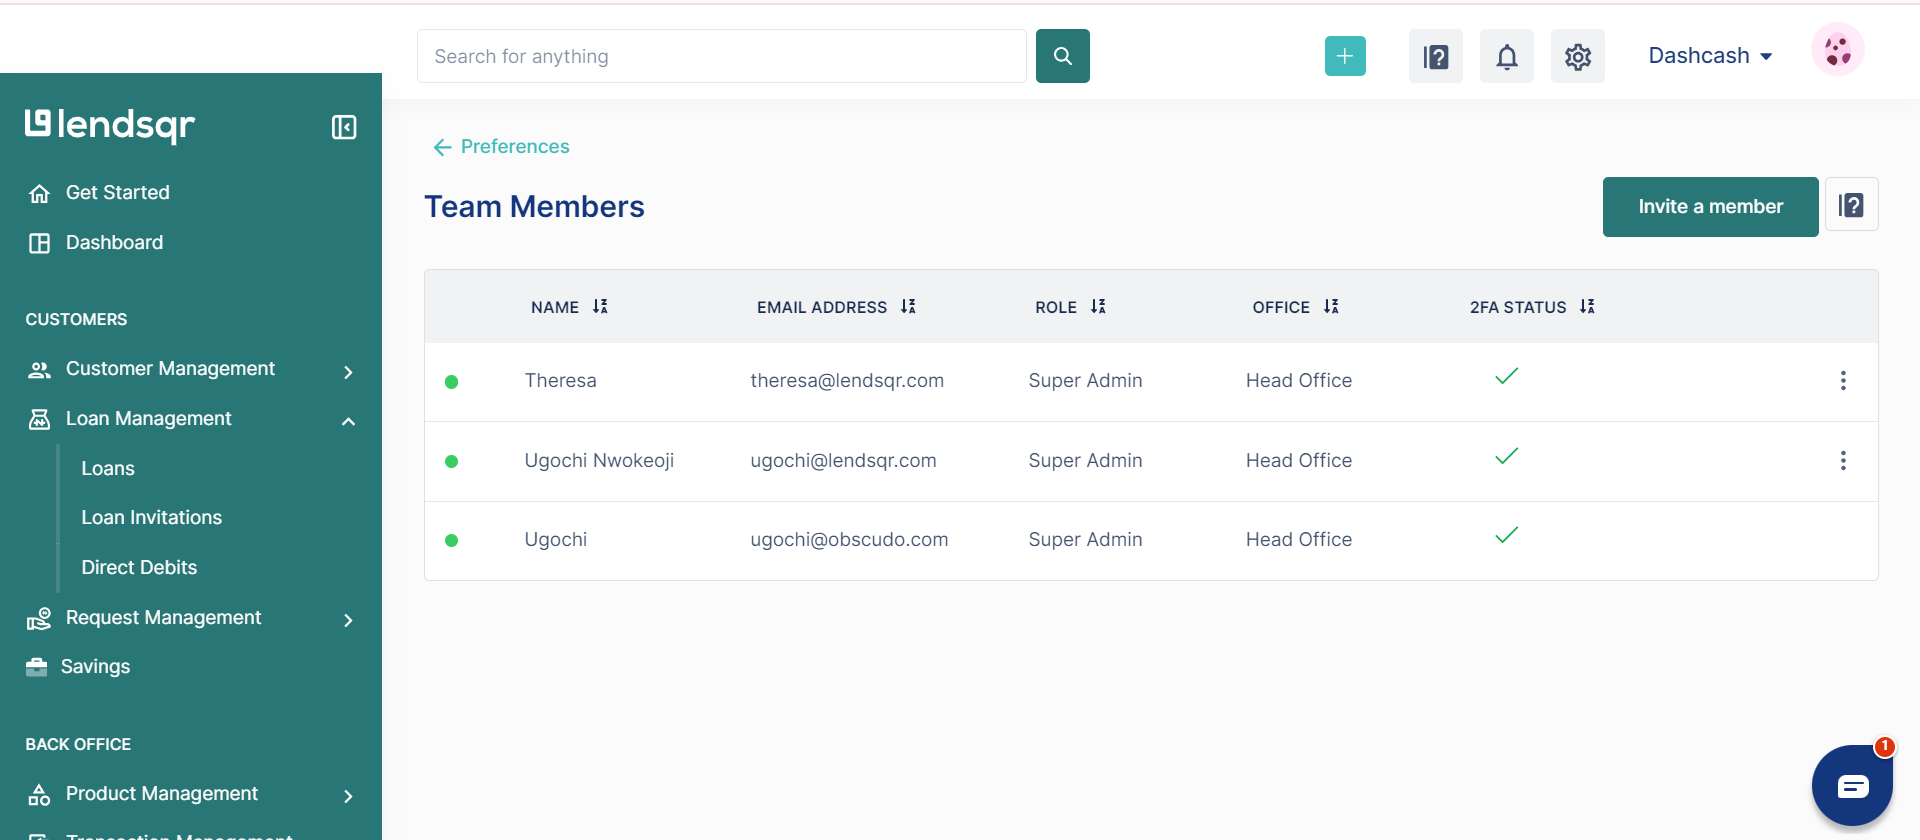
3. Select Team Members to view all current team members in your organization.
4. Then click “invite a member” to open up the input modal.
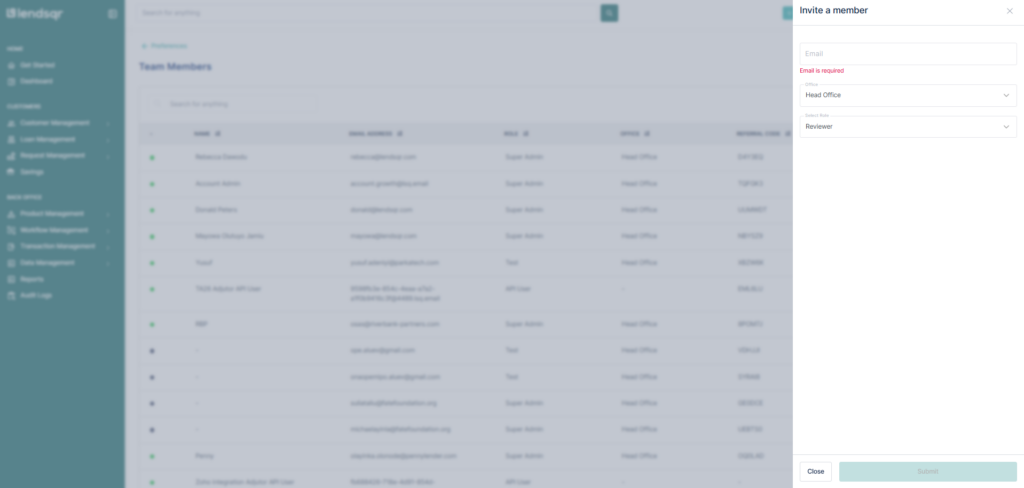
5. Enter the team member’s email address, select their role, and choose their office or branch.
5. Once you have finished inputting all the information, submit, and when the invited user has created their account, they will then be added to the specified office.
Note: The team member won’t appear in your organization until they accept the invite and complete their account setup.
What happens after you send the invite
Once the team member accepts their invite and creates their account, three things happen automatically.
First, they appear in your Team Members list under the correct office or branch. Second, their access is immediately scoped to that branch. They can only see customers, loans, and activity assigned to that location. Third, their role permissions are activated. A team member assigned the Team role can process loan applications within their branch, but cannot create users or modify platform settings.
You do not need to do anything else. The setup is complete the moment they log in.
How Lendsqr makes multi-branch management practical
Managing teams across multiple locations is one of the biggest operational challenges for growing lenders. Without a system that enforces access boundaries automatically, you end up relying on manual processes and team discipline to keep data clean. That breaks down as the team grows.
Lendsqr’s branch and team assignment feature handles this at the platform level. When you assign a team member to a branch, the system enforces the boundary. You do not need to remind people not to look at records that do not belong to them. The platform does not show those records.
For lenders operating across multiple cities, countries, or business units, this makes scaling a lending operation significantly more manageable. Each branch operates as its own contained unit while still feeding into your organization-wide reporting and management dashboard.
Updating a team member’s branch or role
Circumstances change. A loan officer transfers to a new branch. A team member gets promoted and needs a different role. Lendsqr lets you update both at any time from the Team Members section of your organizational settings.
Changes take effect immediately. You do not need to re-invite the team member or ask them to log out and back in. Their updated access applies the next time they interact with the platform.
Troubleshooting
The team member did not receive their invitation email. Ask them to check their spam or junk folder first. If the email is not there, confirm that you entered the correct email address during the invite process. You can resend the invite from the Team Members section if needed.
The office or branch I want to assign is not appearing in the dropdown. The branch may not have been created yet. Navigate to your organizational settings and create the branch before returning to complete the invite.
I cannot see the “Invite a Member” button. Confirm that your role includes the permissions required to invite team members. Only Super Admin and Admin users can send invitations. If your role appears correct but the button is still missing, contact Lendsqr support.
The team member accepted the invite, but is not appearing in the correct branch. Refresh the Team Members page. If they are still showing under the wrong branch or no branch after refreshing, contact Lendsqr support with the team member’s email address and the branch they should belong to.
Frequently asked questions
Can I assign a team member to more than one branch? Each team member is assigned to one branch at a time. If a team member needs access across multiple branches, consider whether an Admin role, which carries broader platform access, better fits their function.
Can I change a team member’s branch after they have been added? Yes. Visit the Team Members section in your organizational settings at any time to update their branch assignment. Changes take effect immediately.
What roles can I assign when inviting a team member? You can assign any available role in your organization including the three default roles: Super Admin, Admin, and Team. If you have created custom roles, those are also available during the invite process.
What happens if I send an invite to the wrong email address? You can manage and cancel pending invitations from the Team Members section. Cancel the incorrect invite and send a new one to the correct address.
Does the team member need to download anything to accept the invite? No. The invitation link takes them to a web-based account setup flow. They complete the process in their browser without downloading any software.