Access your Back Office at your fingertips.
Download the app now on Google Play Store.
Scan the QR code
You can also scan QR code with your phone to download the app.
How to configure multiple mandates creation on your loan product
Updated
On this page
Loan repayment failures are one of the most common operational challenges lenders face, and one of the most preventable. A borrower may have sufficient income to repay their loan but receive payments across multiple bank accounts from different clients or employers. If a direct debit is attempted on only one of those accounts and that account has insufficient funds at the time of the debit, the repayment fails, even though the borrower has money elsewhere.
The multiple mandates feature on the Lendsqr admin console addresses this directly. It allows you to configure a loan product so that borrowers are required to link more than one bank account when setting up their direct debit mandate. When a repayment is due, the system can attempt to debit across multiple accounts, significantly increasing the chances of a successful collection and reducing the likelihood of default caused by low balance in a single account.
This guide walks you through when and why to use this feature, how to configure it step by step, the key settings to understand, and how to monitor performance after enabling it.
Why multiple mandates matter
For lenders working with borrowers who have variable or irregular income streams such as freelancers, small business owners, market traders, or gig economy workers, a single direct debit mandate is often insufficient. These borrowers may receive income into different accounts at different times of the month, making it difficult to predict which account will have sufficient funds on any given repayment date.
By requiring borrowers to link multiple accounts, lenders gain more flexibility in how and when they attempt repayment collection. This benefits both sides: lenders experience fewer failed debits and lower default rates, while borrowers avoid penalties or missed repayments caused by timing mismatches between their income and their repayment schedule.
Real-world example — freelance borrower A graphic designer in Lagos takes out a ₦300,000 business loan. She receives payments from clients into three different bank accounts depending on the client and payment method. By linking all three accounts to her loan mandate, her lender can attempt collection from whichever account has sufficient funds on the repayment date, rather than failing if her primary account happens to be empty that day.
Real-world example — small business owner A shop owner in Accra takes out a GHS 5,000 working capital loan. His business receives revenue into two accounts: one for wholesale transactions and one for retail sales. By linking both accounts, the lender increases the likelihood of successful repayment collection regardless of which account the shop owner’s customers paid into that month.
Before you start
Before configuring the multiple mandates setting, confirm the following:
Roles and permissions To configure product attributes on a loan product, a team member must be assigned a role that includes the general Loan Products permission. This grants them the rights to manage, edit, create, and activate loan products on the admin console, including configuring product attributes. To review or update roles and permissions, navigate to Settings and select “Roles and Permissions”.
Decide on your configuration values before opening the admin console Before making changes, decide on the following:
How many accounts you want to require borrowers to link (the total accounts required)
The minimum number of accounts a borrower must link to proceed with the application
Whether you want to enable “Continue on Failure” for borrowers who do not meet the minimum accounts required
The label and description text you want to display to borrowers during the application process
Having these decisions made in advance will make the configuration process faster and reduce the risk of saving incorrect values.
Consider your borrower profile The right configuration values depend on the type of borrowers you serve. For borrowers with stable, single-source income, requiring multiple accounts may create unnecessary friction in the application process. For borrowers with variable or multi-source income, requiring two or more accounts is a meaningful way to protect your portfolio. Configure this setting based on the specific loan product and the borrowers it is designed for.
Step-by-step: how to configure the multiple mandates setting
1. Login to the Admin Console
Open your web browser and log in to your Lendsqr admin console using your work email address and password.
2. Click on “Loan Products” under Product Management
On the left navigation pane, locate the Back Office section, expand “Product Management”, and select “Loan Products”. This will display a list of all the loan products you have created.
3. Create a Loan Product or Open an Existing One
If you want to configure the multiple mandates setting on an existing loan product, click on the product name to open it. If you need to create a new loan product first, click the “Create” button and complete the product setup before proceeding.
4. Click on the “Product Attributes” Tab on the Product Page
On the loan product page, click the “Product Attributes” tab. This tab displays all the configurable attributes available for that loan product, including the Multiple Mandate Setting.
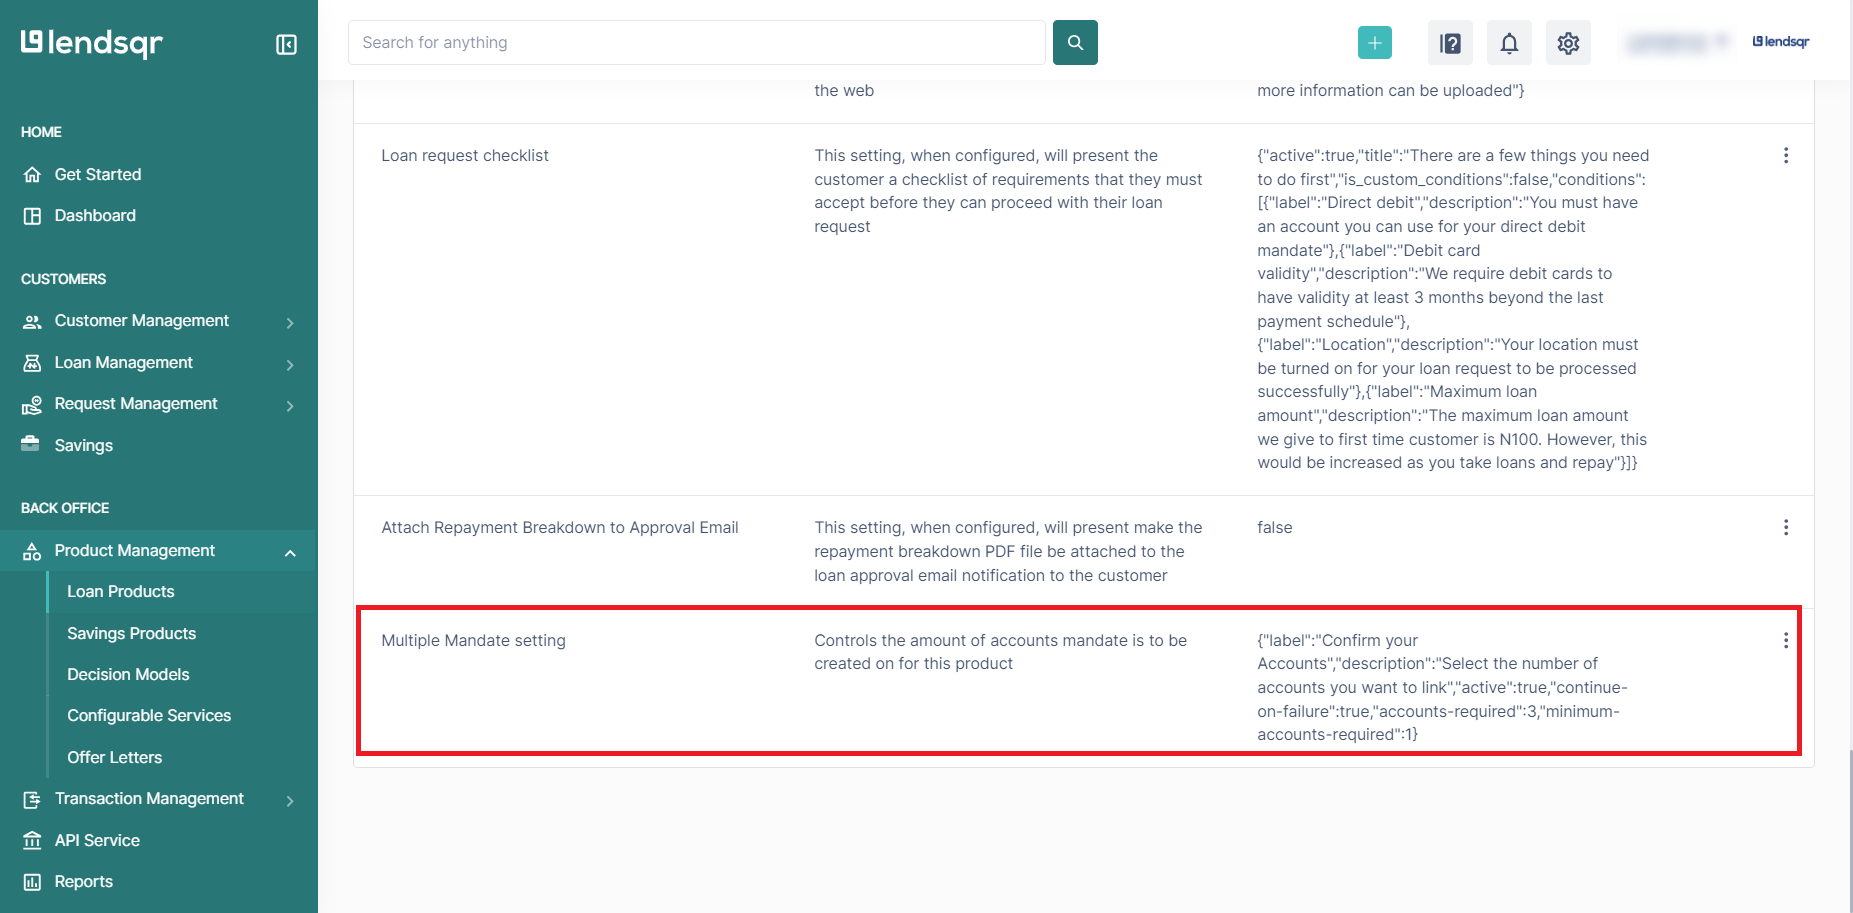
5. Locate the “Multiple Mandate Setting” Attribute
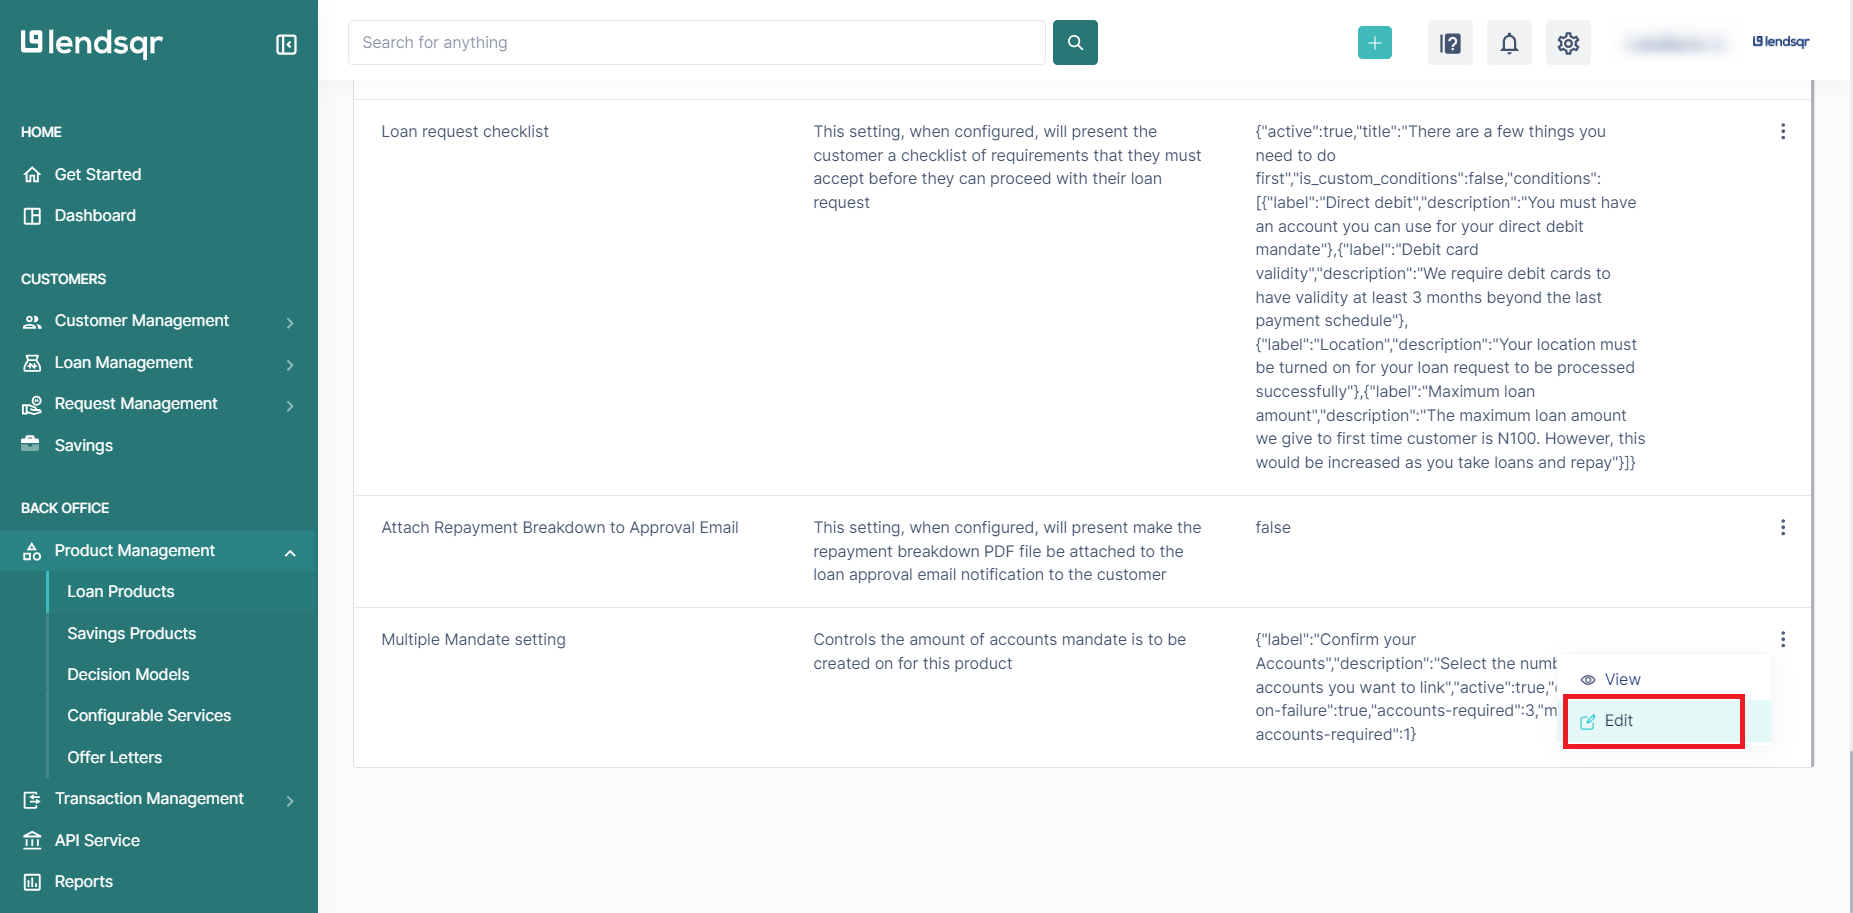
Scroll through the list of attributes until you find the “Multiple Mandate Setting” attribute. Click the more options button next to it and select “Edit”. This will open the configuration panel for the multiple mandates setting.
6. Update the “Multiple Mandate Setting” Attribute
By default, the multiple mandates setting is inactive, with accounts required set to 1 and minimum accounts required set to 1. To enable and configure it, make the following adjustments:
Activate the settingCheck the box beside “Active” to enable the multiple mandates feature for this loan product. When inactive, the setting has no effect and borrowers will only be required to link one account.
Set the number of accounts requiredIncrease the value of “Accounts Required” to the total number of bank accounts you want borrowers to link during the application process. Set this based on your borrower profile and the level of repayment flexibility you want to build into the product.
Set the minimum accounts requiredSet the “Minimum Accounts Required” value to the lowest number of accounts a borrower must link to be eligible to proceed with the application. This should be equal to or less than the total accounts required value.
Configure Continue on Failure The “Continue on Failure” setting determines what happens when a borrower does not meet the minimum accounts required during the application process:
When disabled: If a borrower fails to link the minimum number of required accounts, the application stops and the borrower is deemed ineligible to proceed. This is the stricter option and is recommended when account linking is a hard requirement for your loan product.
When enabled: Even if a borrower does not meet the minimum accounts required, the system will bypass the standard halt and allow the borrower to continue with the application. This is useful when you want to encourage account linking without making it a mandatory condition for all borrowers.
Only enable “Continue on Failure” if you want borrowers to be able to complete their application even if they do not meet the minimum accounts required. If account linking is a firm requirement for your product, leave this disabled.
Customise the label and description You can also edit the label and description text that borrowers see during the application process when they are prompted to link their bank accounts. Make sure the language is clear, simple, and relevant to your borrower base. If you serve borrowers across multiple markets, consider whether the description needs to be adapted for different languages or regional contexts.
7. Save your changes
Once you have reviewed and confirmed all your settings, click “Save” to apply the configuration. The multiple mandates setting will now be active on the loan product
Recommended configuration values
The right values for your multiple mandates configuration depend on your borrower profile and lending model. Here are some general guidelines:
For borrowers with variable or multi-source income such as freelancers, small business owners, or gig economy workers, consider requiring two to three accounts with a minimum of two. This gives you meaningful coverage across different income streams without creating excessive friction in the application.
For borrowers with stable, single-source income such as salaried employees paid into one account, requiring multiple accounts may not add significant value and could increase application drop-off. Consider whether this setting is necessary for products designed for this borrower type.
For higher-risk loan products where default prevention is a priority, set the minimum accounts required equal to the total accounts required and keep “Continue on Failure” disabled. This ensures every borrower on this product links the required number of accounts before proceeding.
For lower-risk or introductory products where you want to encourage account linking without making it mandatory, enable “Continue on Failure” so borrowers who cannot link multiple accounts are not blocked from completing their application.
What to expect after enabling multiple mandates
Once the setting is active and borrowers begin applying for the loan product, the following will happen:
Borrowers will be prompted during the application process to link the required number of bank accounts for direct debit mandate creation
Borrowers who meet the minimum account requirements will be able to proceed with the application
Borrowers who do not meet the minimum account requirements will either be blocked from proceeding or allowed to continue, depending on whether “Continue on Failure” is enabled
When a repayment is due, the system will attempt to collect from the linked accounts, increasing the chances of a successful debit