Access your Back Office at your fingertips.
Download the app now on Google Play Store.
Scan the QR code
You can also scan QR code with your phone to download the app.
How to check why a user’s loan request failed
Updated
On this page
In lending operations, not every loan application results in approval. Borrowers may be declined for several reasons, including failing to meet eligibility criteria, having a low credit score, exceeding exposure limits, or already having active loans. Understanding exactly why a loan was rejected is critical for improving credit decisions, refining risk models, and providing transparency to both lenders and internal teams.
Lendsqr provides a structured way to diagnose failed loan applications using Decision Data. This allows lenders to inspect the exact reason a loan request did not pass the evaluation stage and identify which rule or condition triggered the failure.
This guide explains how to access decision failure information, where to find it in the admin console, and how to interpret the results effectively.
Understanding loan decision outcomes
Every loan application processed in Lendsqr goes through a decisioning system that evaluates the borrower against a set of predefined rules. These rules may include credit scoring thresholds, repayment history, income verification, blacklist checks, or exposure limits.
When a loan is approved, it means the borrower passed all configured checks. However, when a loan fails, the system records detailed information about the decision path, including which rule caused the rejection.
This is important because loan rejection is not random. It is the result of structured evaluation logic designed to ensure responsible lending.
For example, a borrower may be declined because their credit score is below the required threshold, because they already have an active loan, or because their transaction history does not meet the lender’s minimum requirements. Each of these outcomes is captured in the decision data for review.
Why reviewing loan failure reasons matters
Understanding why a loan request failed is essential for improving lending performance and customer experience.
From a risk management perspective, it helps lenders validate whether their credit rules are functioning as intended. If too many good-quality borrowers are being rejected, it may indicate that the rules are too strict or incorrectly configured.
From a customer experience standpoint, clear rejection reasoning helps support teams explain outcomes to borrowers and reduce confusion or frustration.
It also supports model optimization. By analyzing failure patterns, lenders can refine decision models, adjust thresholds, and improve approval rates without increasing risk exposure.
Finally, it strengthens transparency and auditability. Every decision is traceable, making it easier to review historical loan outcomes when needed.
Step 1: Log into the admin console
Begin by logging into the Lendsqr Admin Console using your authorized credentials.
Once logged in, you will have access to customer management, loan tracking, and decision analytics features depending on your assigned role permissions.
Ensure you are accessing the correct environment before proceeding, especially if your organization manages multiple lending products.
Step 2: Open the customer profile
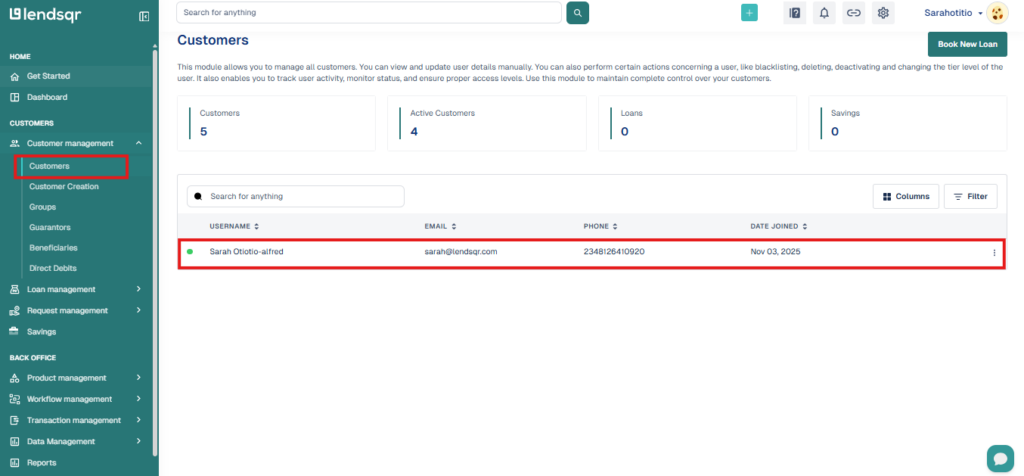
From the main dashboard, navigate to the Customer Management section.
Within this section, search for and select the specific customer whose loan request you want to investigate.
This will open the customer profile page, where all related financial activity, loan history, and account details are displayed.
Each customer profile acts as a central record of all lending interactions associated with that borrower.
Step 3: Go to the Loans tab
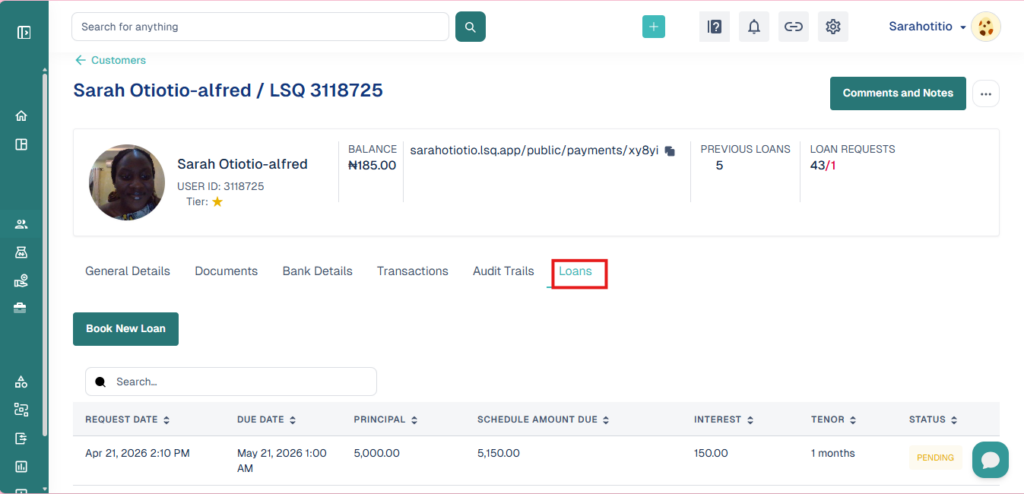
On the customer profile page, locate the Loans tab.
This tab contains a list of all loan applications associated with the customer, including active loans, completed loans, and failed requests.
Select the specific loan request that you want to review. This will open the detailed view of that loan application.
At this stage, you can see key information such as loan amount, application date, status, and decision outcome.
Step 4: Open loan details
Once you have selected the loan request, navigate into its detailed view.
This page contains the full breakdown of how the loan was processed by the system. It includes application data, scoring results, rule evaluations, and final decision outcomes.
This is where lenders can begin analyzing why the loan was not approved.
Step 5: Review Decision Data
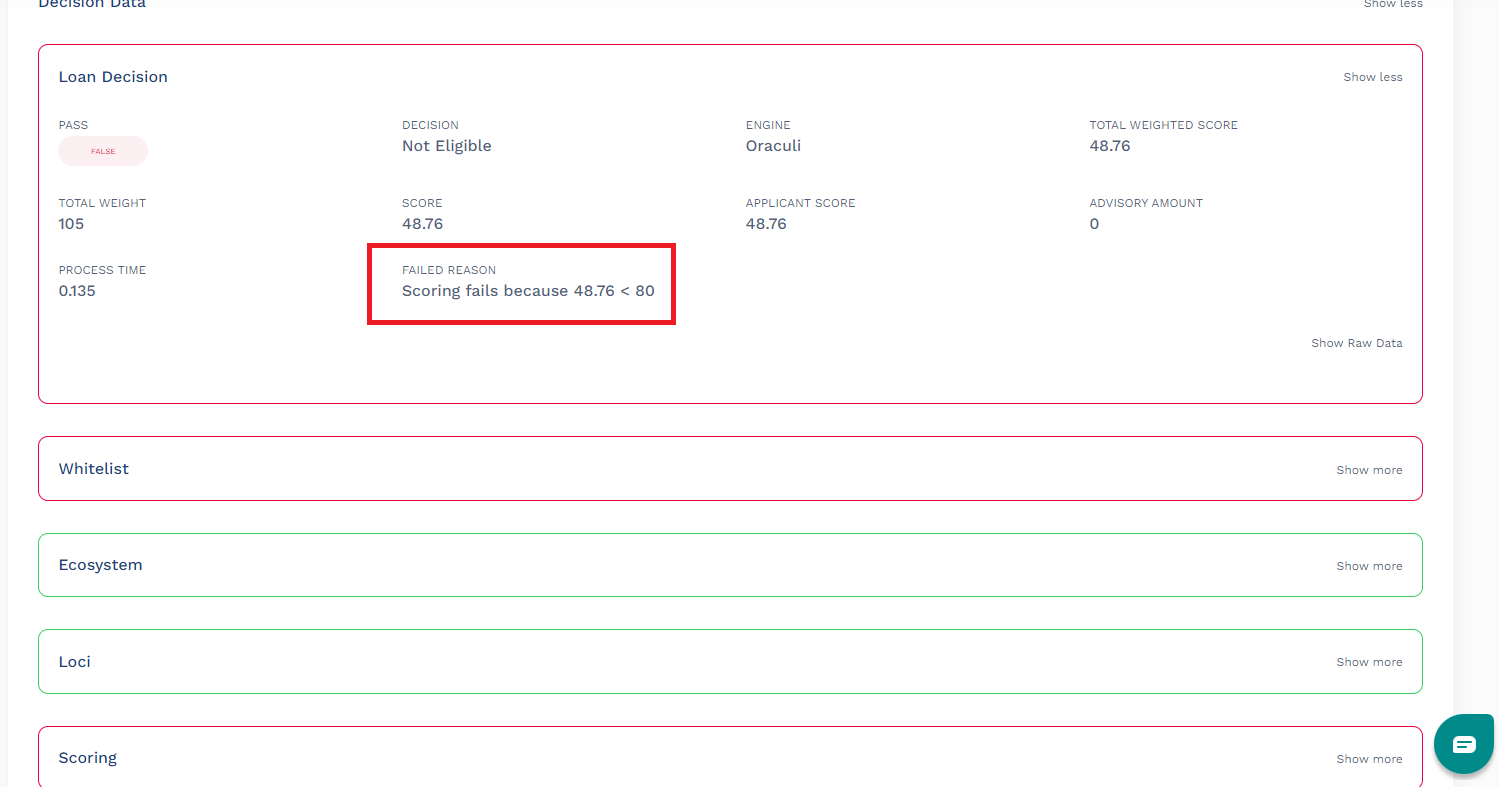
Scroll down to locate the Decision Data section within the loan details page.
This section contains the structured output of the decisioning engine that evaluated the loan request.
Within Decision Data, you will find detailed information explaining how the loan was processed, including which modules were triggered and which conditions passed or failed.
If a loan was unsuccessful, this section will clearly indicate the reason for failure. For example, it may show that the borrower did not meet credit score requirements, exceeded active loan limits, or failed a specific eligibility rule.
Lenders can expand the decision data view to see deeper layers of evaluation logic. This helps identify exactly which part of the decision process caused the rejection.
Loan failure reasons are structured to reflect the decision path taken by the system.
A common reason may indicate that the borrower failed a credit score threshold. In this case, the system is signaling that the borrower’s risk profile did not meet minimum requirements.
Another common reason is overlapping loan exposure, where a borrower is already servicing another active loan. This helps prevent over-lending and reduces default risk.
Some failures may come from custom rules configured by the lender, such as employment verification failures or income mismatches.
By interpreting these results correctly, lenders can distinguish between system configuration issues and genuine borrower risk.
Common mistakes when reviewing decision data
One common mistake is focusing only on the final rejection without reviewing the full decision path. Decision Data often contains multiple layers, and understanding the full context is important.
Another issue is assuming all rejection reasons are static. In reality, decision rules may evolve over time, so lenders should always check the current configuration when analyzing outcomes.
Lenders should also avoid using failure reasons in isolation without considering broader borrower history or portfolio trends.
Conclusion
Checking why a loan request was not successful is a critical part of managing a healthy lending operation. Lendsqr’s Decision Data feature provides full visibility into the evaluation process, allowing lenders to understand exactly why a borrower was declined.
By reviewing loan failure reasons through the admin console, lenders can improve credit policies, enhance decision models, and ensure more accurate lending outcomes over time.
When used effectively, this feature not only improves operational transparency but also helps lenders build smarter, more adaptive credit systems that balance risk and customer experience.