Access your Back Office at your fingertips.
Download the app now on Google Play Store.
Scan the QR code
You can also scan QR code with your phone to download the app.
How to configure email verification for your users
Updated
On this page
A digital lender launching a consumer loan product found that a portion of early sign-ups used invalid or disposable email addresses, making it impossible to reach those users for repayment reminders or OTP messages. By enabling email verification at the point of onboarding, the lender ensured that every borrower on their platform had a confirmed, working email address before they could proceed.
Email verification is one of the foundational onboarding controls Lendsqr gives lenders. When enabled, borrowers must verify their email address before they can access your platform, confirming their identity, ensuring you have accurate contact details for communications, and reducing the risk of fraudulent or throwaway accounts.
This article explains what email verification does on the Lendsqr admin console, what the borrower experiences when it is enabled, and walks you through exactly how to turn it on from the admin console.
What email verification does
Here’s how the email verification works when enabled on the platform:
When a new borrower signs up via the mobile or web app, they must verify their official email address before their loan can proceed. This step is mainly used by lenders to confirm employment and prevent fraud, especially for salary-backed loans.
The borrower receives a verification email immediately after signing up, containing a link they must click to complete verification.
The borrower is effectively blocked from applying for or moving forward with a loan until they verify their email. The loan status stays at “pending” until verification is done, and the lender cannot approve or decline the loan before that.
Email verification addresses a specific vulnerability in digital lending: the ease with which someone can create an account using an email address they do not own or control.
Without verification, a borrower could sign up with a misspelled email, a temporary address, or someone else’s address entirely. This makes it harder to send OTP messages for login, reach borrowers about upcoming repayments, or communicate about loan status changes. Enabling this setting ensures that every borrower who progresses to a loan application has access to a working email inbox, which in turn supports your communication strategy and reduces the risk of unreachable borrowers.
How to enable email verification
Follow these steps from the Lendsqr admin console. You will need admin access to System configurations to complete this.
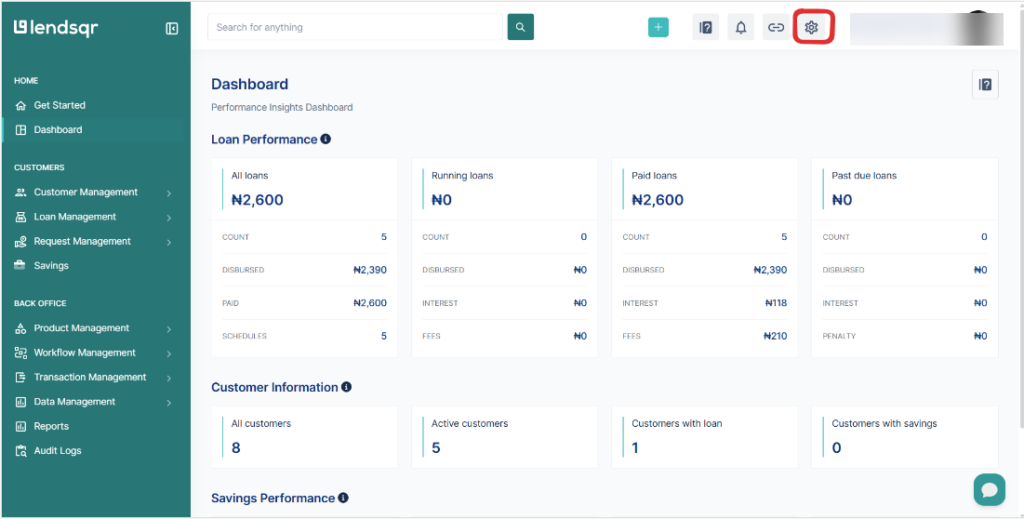
Click the Settings icon located at the top right corner of the navigation bar.
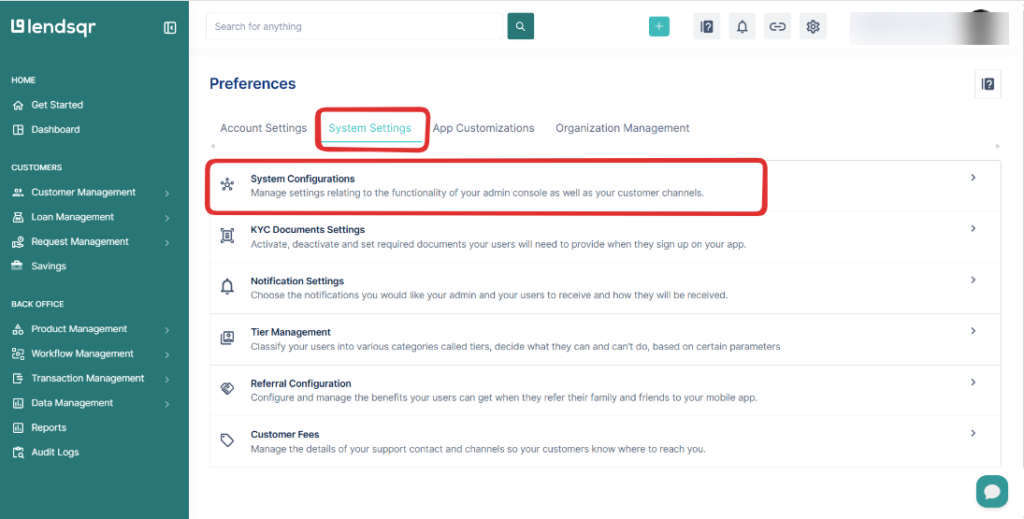
From the menu displayed, click on “System configurations” under the “System settings” page.
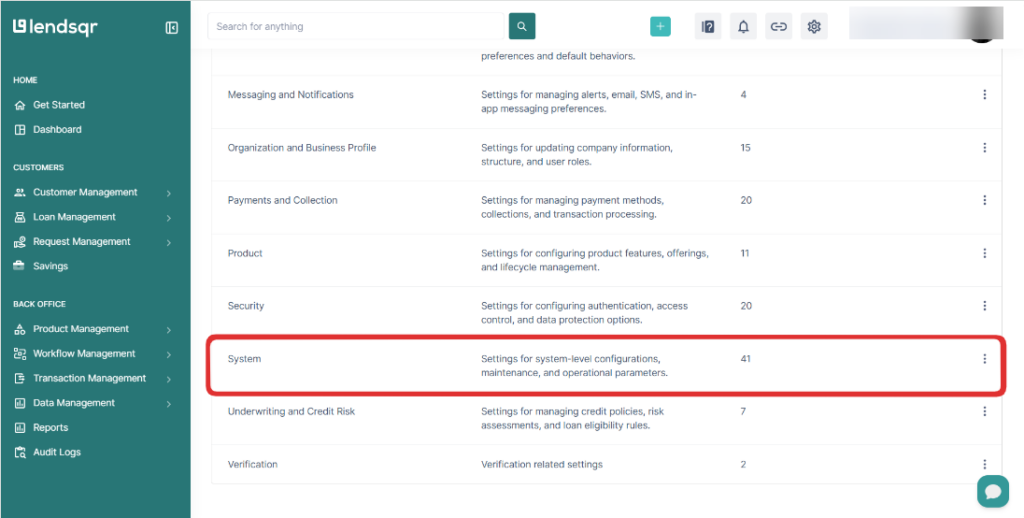
On the resulting page, select “System“.
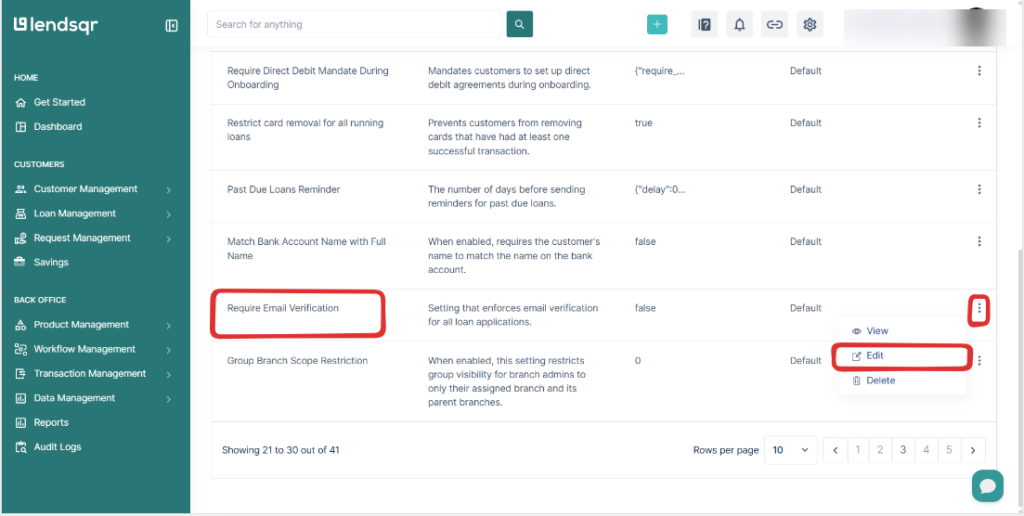
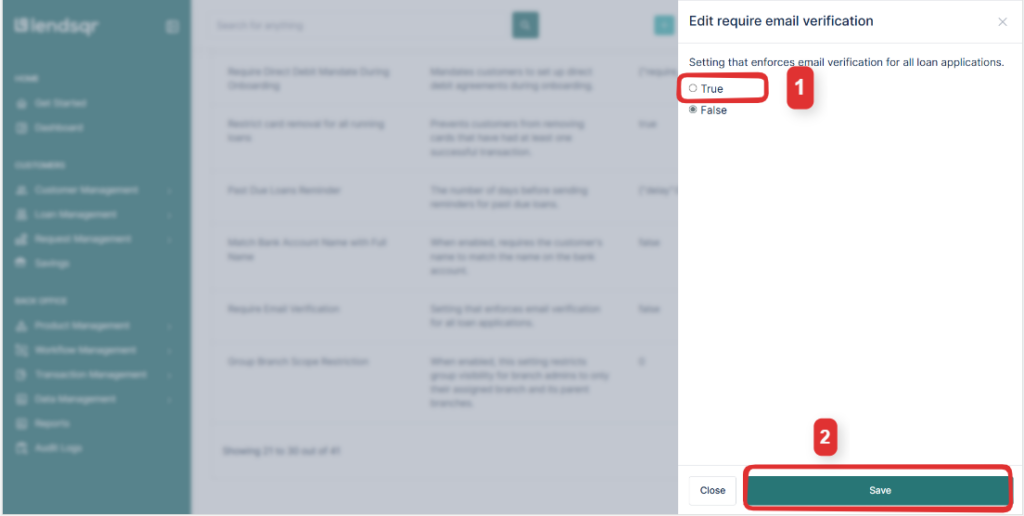
Scroll to the bottom of the page and navigate to page 3 using the pagination controls. Locate the setting labelled “Require Email Verification” and click to edit it.
Select “True” and then click “Save” to apply the setting. Email verification is now enabled for your platform.
How to disable email verification
If you need to turn email verification off, follow the same steps above but select “False” in step 6 instead of True, then click “Save“.


 feature")