Access your Back Office at your fingertips.
Download the app now on Google Play Store.
Scan the QR code
You can also scan QR code with your phone to download the app.
How to create custom roles and permissions for your lending team
Updated
On this page
Imagine a microfinance lender with a growing team. The head of credit wants her loan officers to approve or decline applications, but she does not want them to change loan product settings, access the disbursement dashboard, or see organisation-level reports. Without a way to separate what each team member can do, either access gets restricted too broadly, or sensitive areas of the platform are left open to everyone.
This is exactly the problem that roles and permissions on the Lendsqr admin console solve. As a lender, you can create as many custom roles as your team structure requires, each with a precise set of permissions, so every team member only accesses what their job demands. This article explains what roles and permissions are, why they matter for lending operations, and shows you step by step how to create a new role on the Lendsqr admin console.
What are roles and permissions in Lendsqr?
A role is a named set of permissions that you assign to a team member. When a team member logs into the Lendsqr admin console, they can only see and interact with the parts of the platform that their role allows. Permissions define specific actions — for example, the ability to activate a user, approve a document, view reports, or upload customers in bulk. By grouping permissions into roles, you can give each team member exactly the access they need without exposing sensitive areas they should not touch.
Lendsqr includes a set of default roles when your organisation is first set up.
In a lending operation, different team members carry out very different tasks. A collections officer should be able to record repayments, but should not be able to reverse a loan. A customer support agent might need to view a borrower’s profile without being able to approve their application. Clear role boundaries also reduce the risk of accidental changes. When a team member only has access to what their job requires, the chances of an unintended action affecting a loan product, a customer record, or a financial transaction are significantly lower. For lenders operating across multiple countries or with teams in different locations, role management is also a basic compliance requirement. It creates an auditable record of who had access to what, and when.
How to create a new role in the Lendsqradmin console
Follow these steps to create a custom role from the Lendsqr admin console. You will need admin-level access to complete this process.
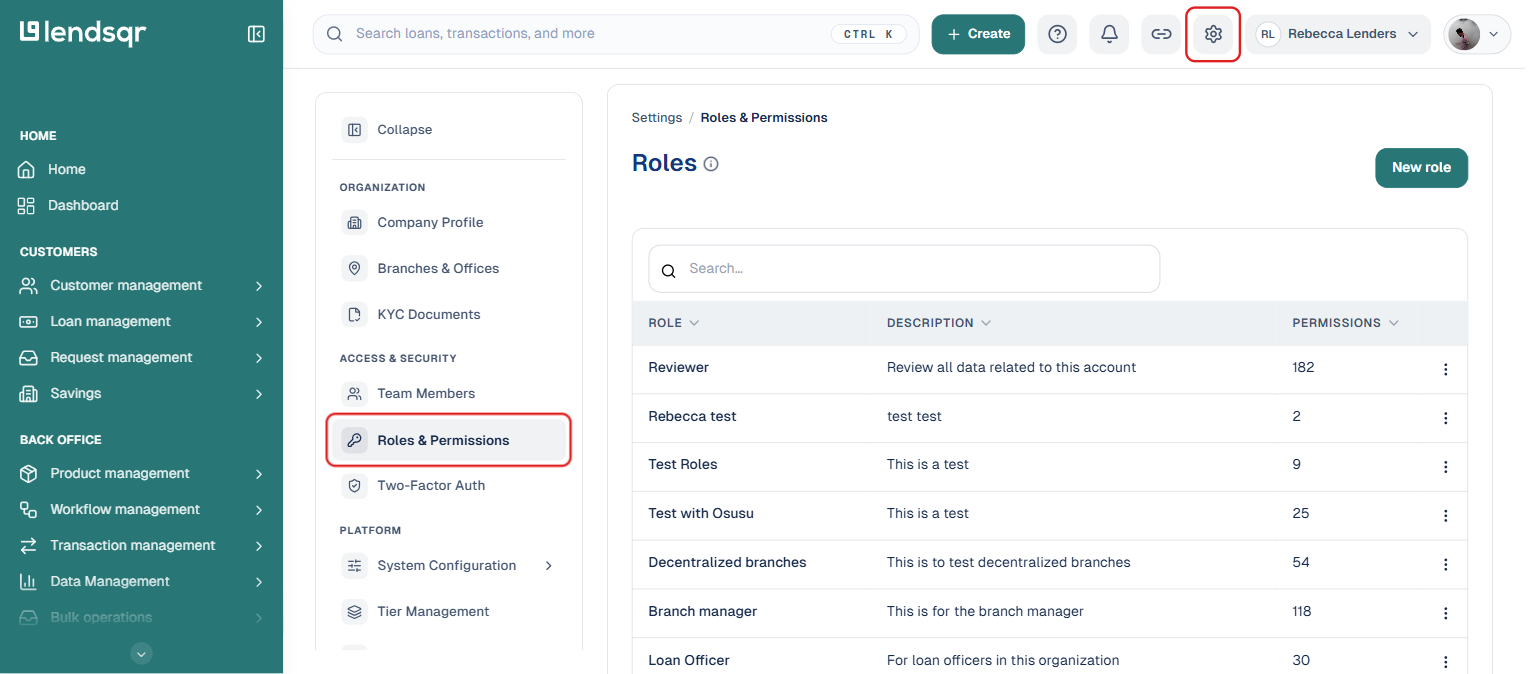
Click the “Settings” (gear) icon in the top navigation area.
Under “Access & Security” in the Settings menu, select “Roles & Permissions“.
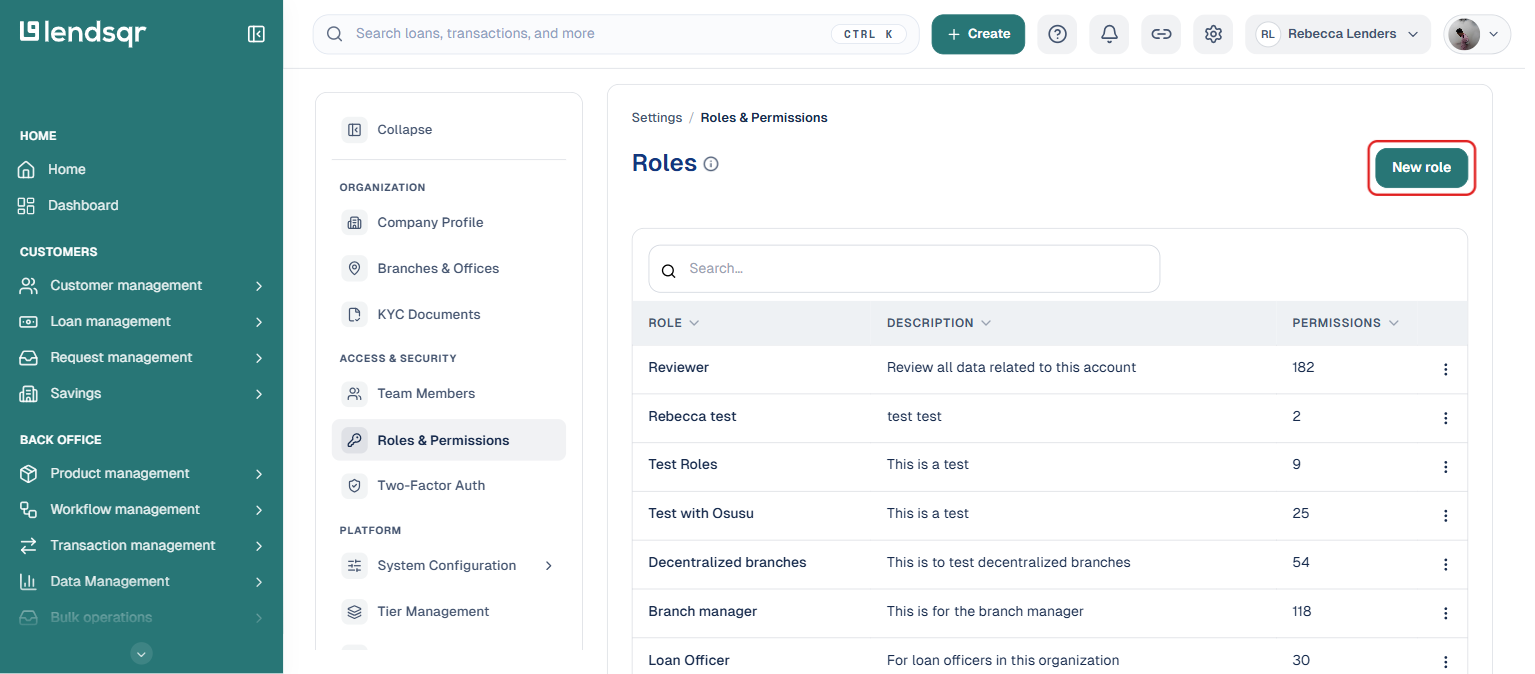
Click the “New role” button in the top-right corner of the page.
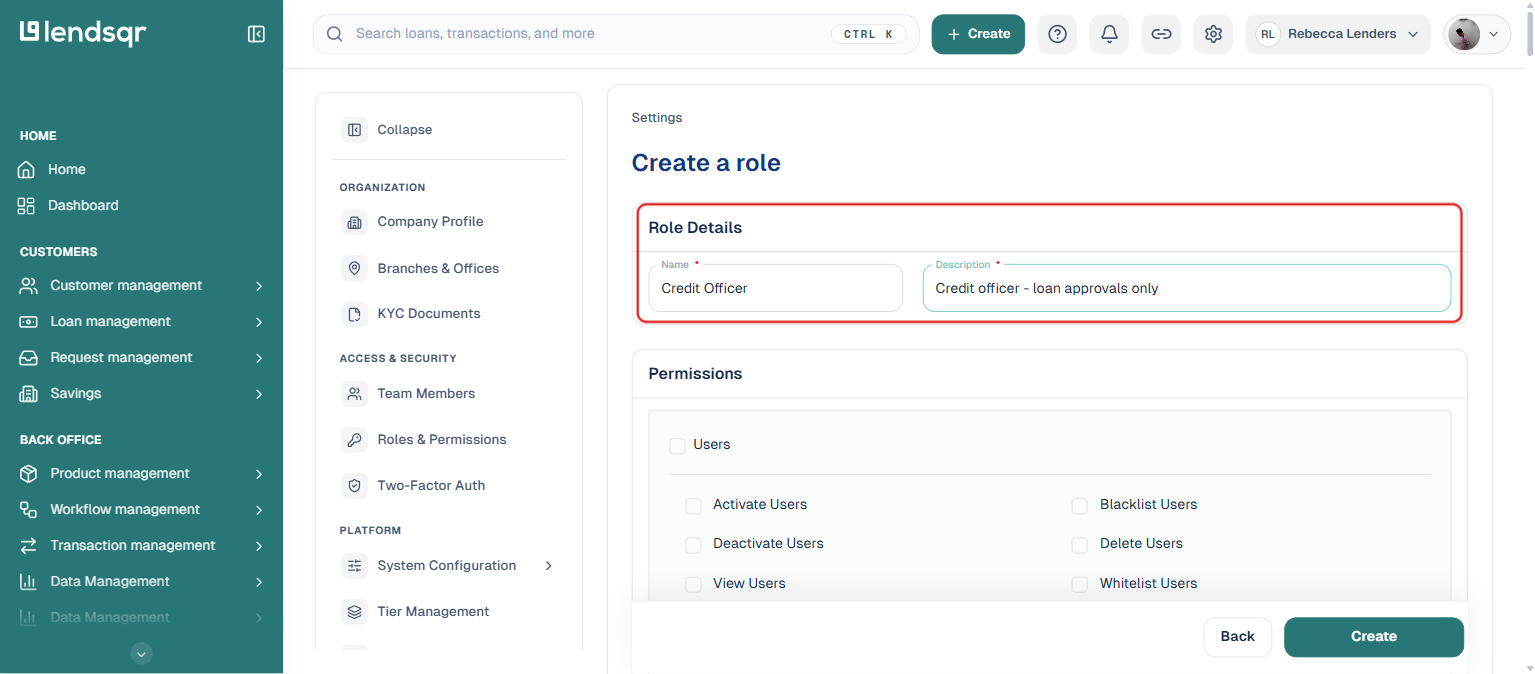
On the “Create a role” page, enter a name for the role and a short description that explains its purpose. For example, “Credit Officer” with the description “Credit officer – loan approvals only”.
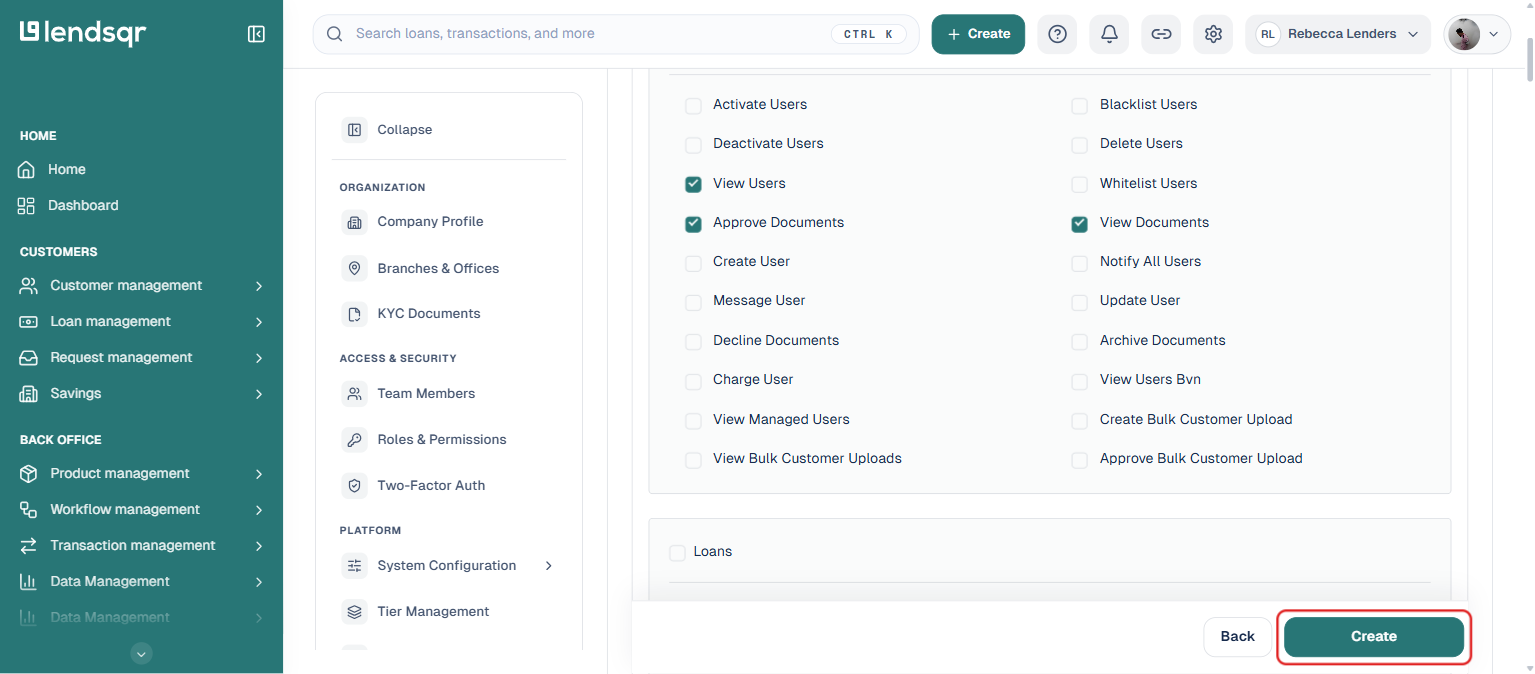
Below Role Details, check the permissions you want this role to have. Permissions are grouped by category (Users, Loans, Transactions, and more) — expand each category and select only what the role actually needs.
Click “Create” at the bottom of the page to save the role.
Once the role is saved, you can assign it to any team member from Settings > Team Members.