Access your Back Office at your fingertips.
Download the app now on Google Play Store.
Scan the QR code
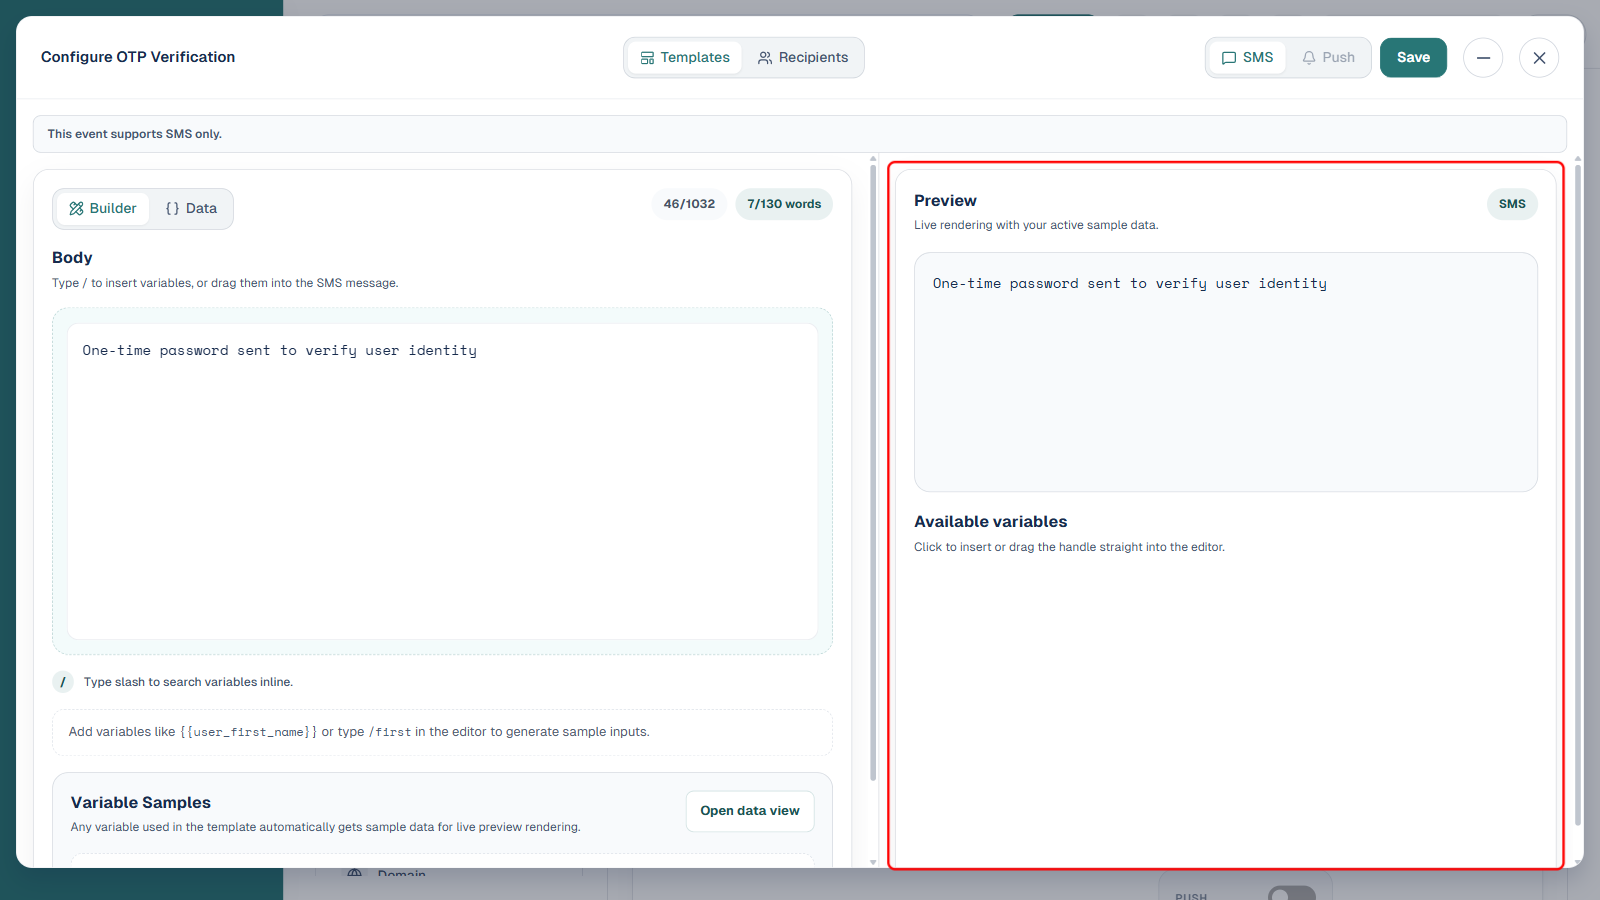
You can also scan QR code with your phone to download the app.
Customising SMS notification content
Updated
On this page
Clear communication builds trust, improves customer experience, and ensures that important information reaches your borrowers exactly the way you intend. Previously, the SMS content sent for notification events was fixed, meaning any changes to wording, tone, or structure required involvement from technical support or a product update cycle. You can now edit and customise SMS notification content directly from the admin console, giving your team full control over how your brand communicates with customers without raising a support request or waiting on a release.
Understanding SMS template customisation
Not all notification events support SMS delivery. When an event does support it, the Templates tab inside the configuration panel will display an SMS editor alongside any other supported channels such as Push. Events that support SMS only will show a banner stating “This event supports SMS only,” and the Push tab will be greyed out and inaccessible.
This distinction matters because it determines what customisation options are available to you. Before editing, confirm that the event you are configuring has SMS listed as an active delivery channel on the main notifications list.
Navigating to the SMS template editor
To access the SMS editor for a notification event:
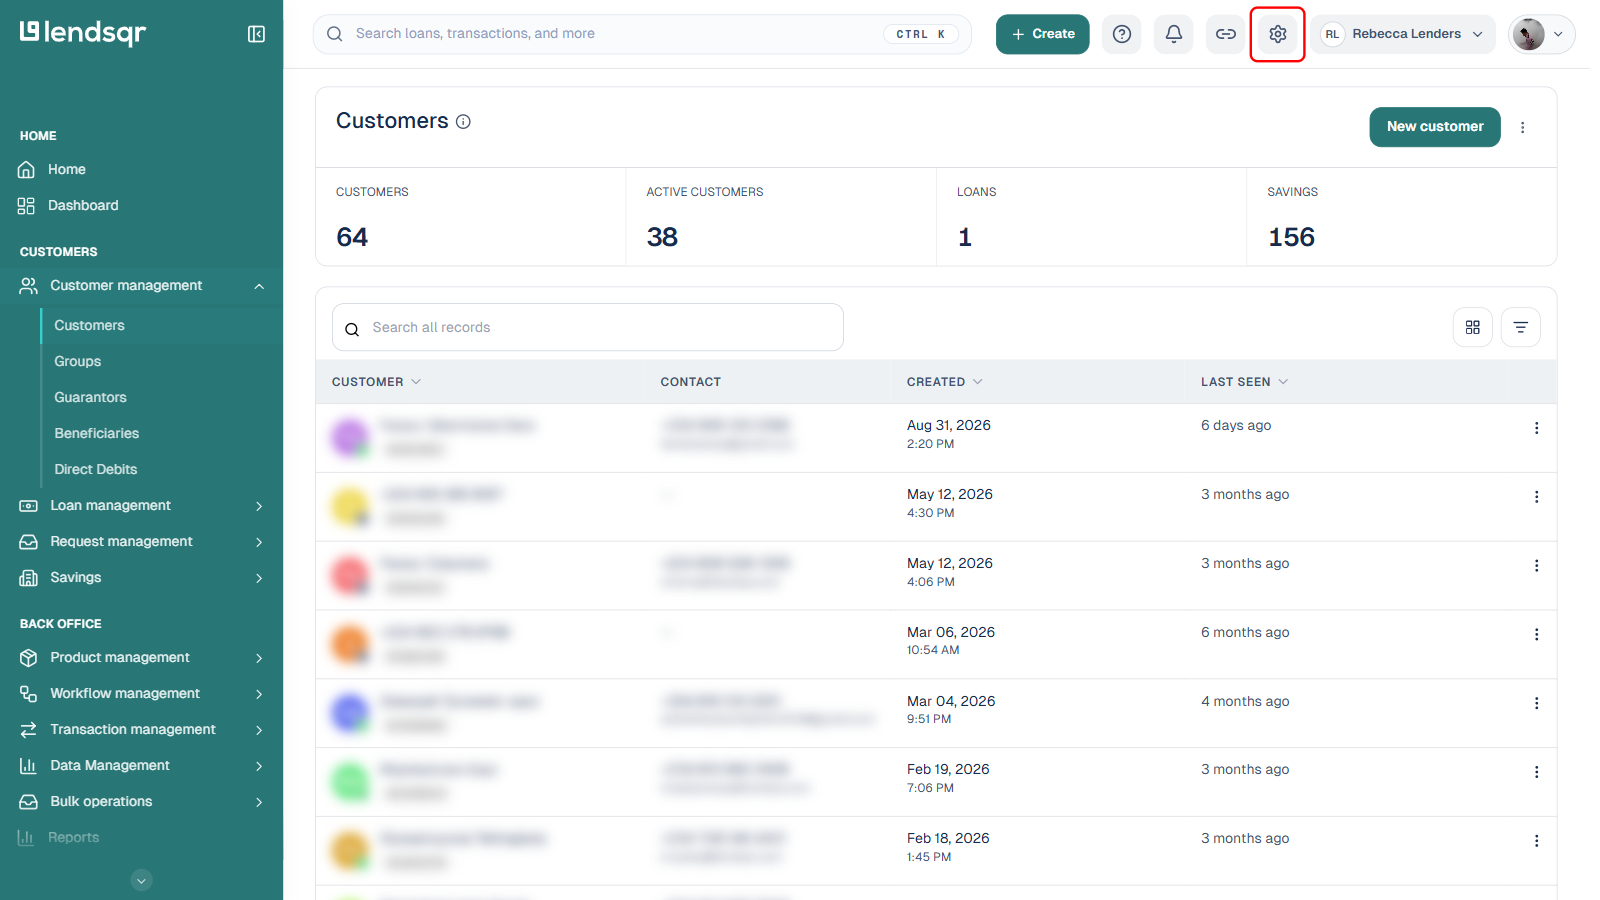
Go to Settings (gear icon) > Notifications and locate the event you want to customise.
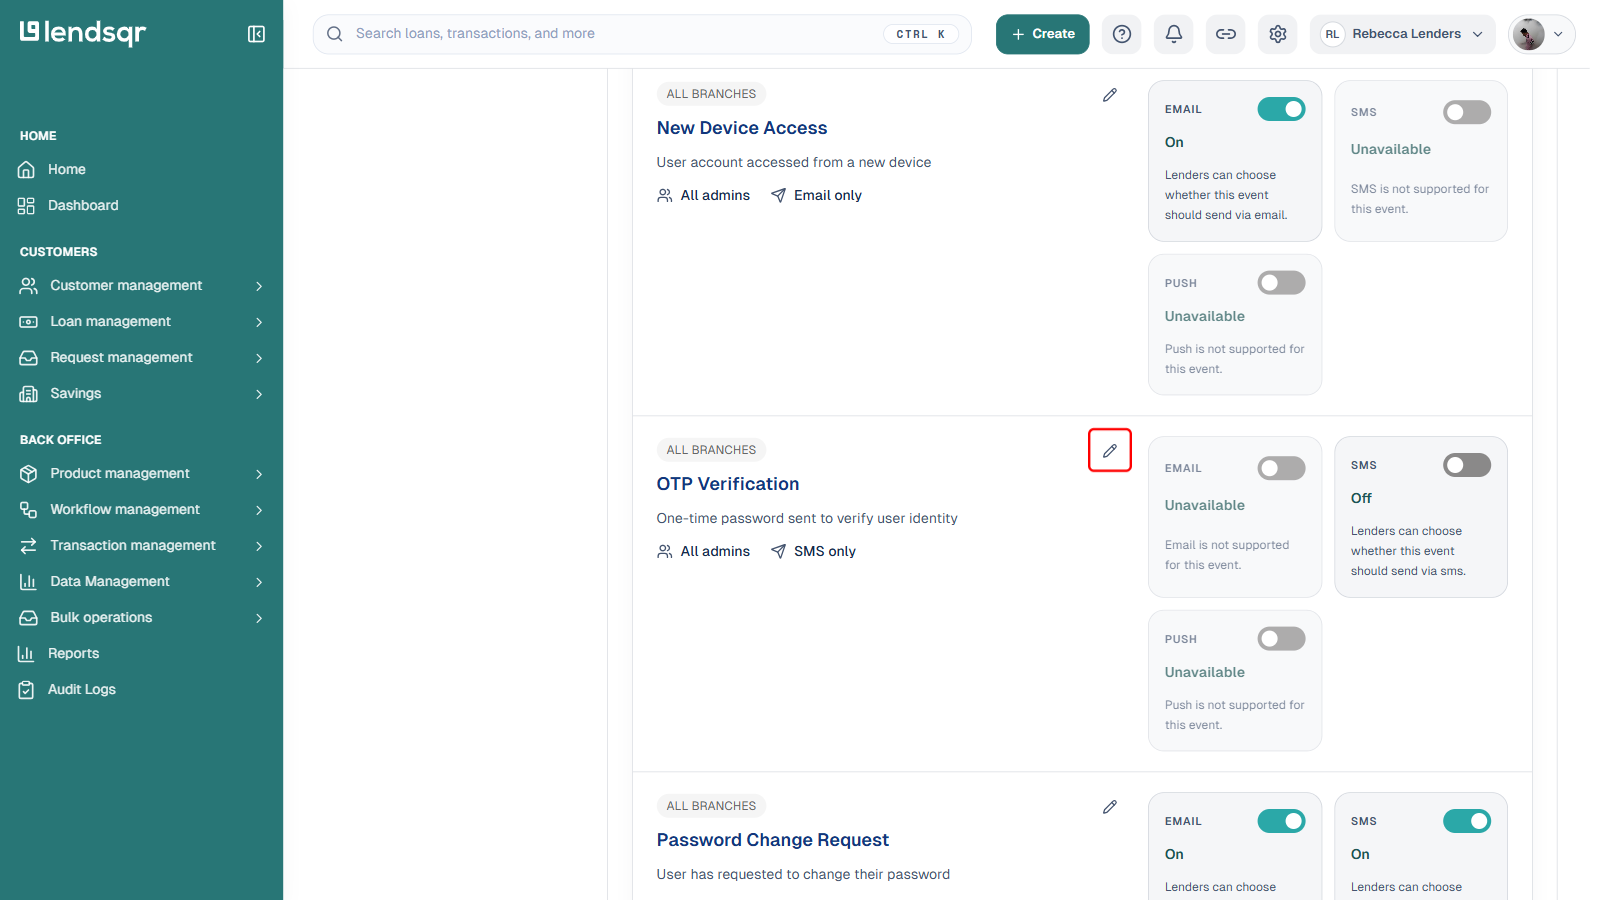
Click the pencil (edit) icon in the top-right corner of that event’s card. This opens the Configure panel for the event.
The event shown above (OTP Verification) supports SMS only, which you can tell from the “SMS only” label under its title and from the Email channel card showing “Unavailable” in the list view.
In the Configure panel, make sure the Templates tab is selected (this is the default).
Select the SMS channel tab if multiple channels are available for the event.
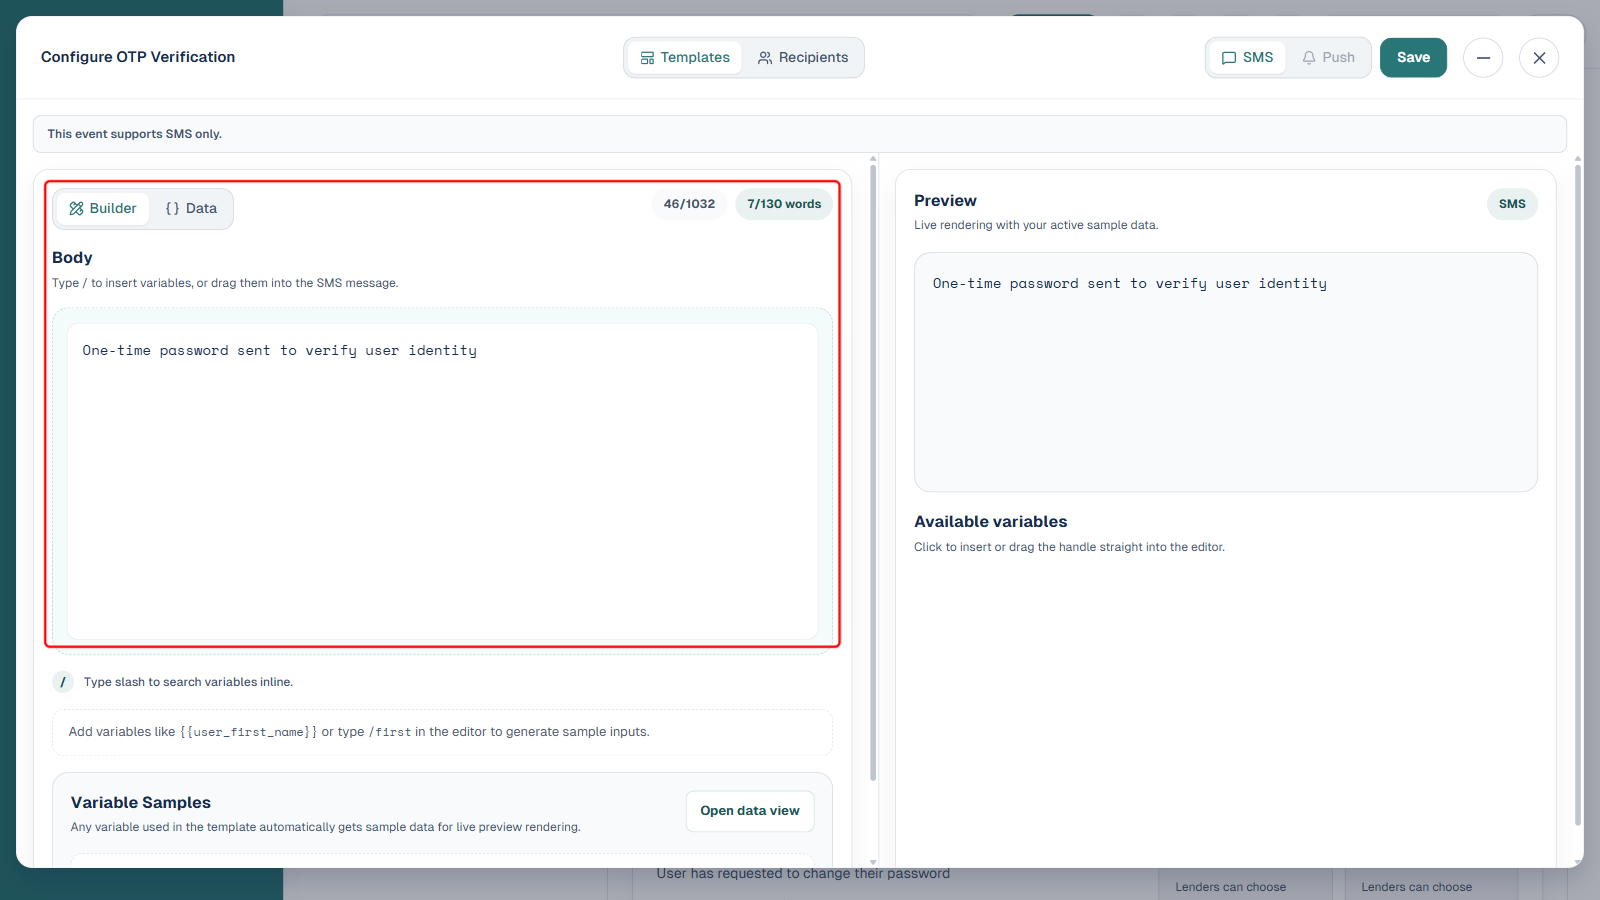
Ensure you are on the Builder view, not the Data view. Both are visible in the top-left of the editor pane, boxed below along with the character and word counters and the Body field itself.
The Builder view is where you compose and edit the message body. The Data view shows the underlying variable data used for live preview rendering.
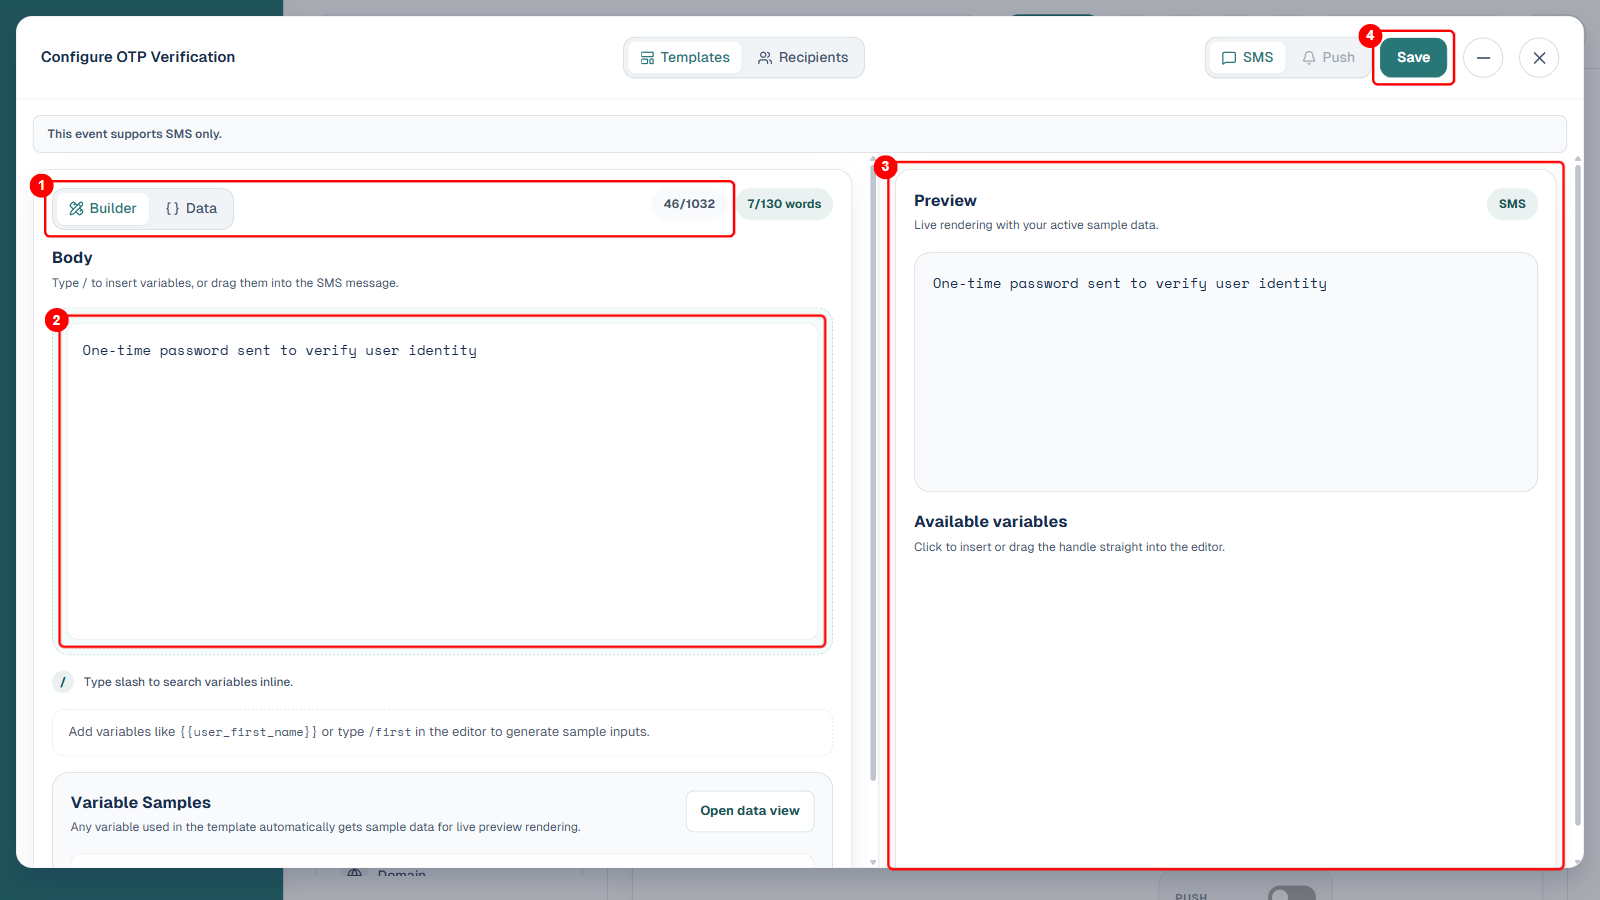
Here is a closer look at the full Configure panel and what each numbered area controls:
1. Builder/Data toggle and counters, switches between the Builder and Data views, and shows the live character and word counts for the message you are composing.
2. Body field, the main text area where you write or edit the SMS content, including any dynamic variables.
3. Preview panel and Available variables, renders a live preview of the message using sample data, and lists every variable the event supports for you to insert.
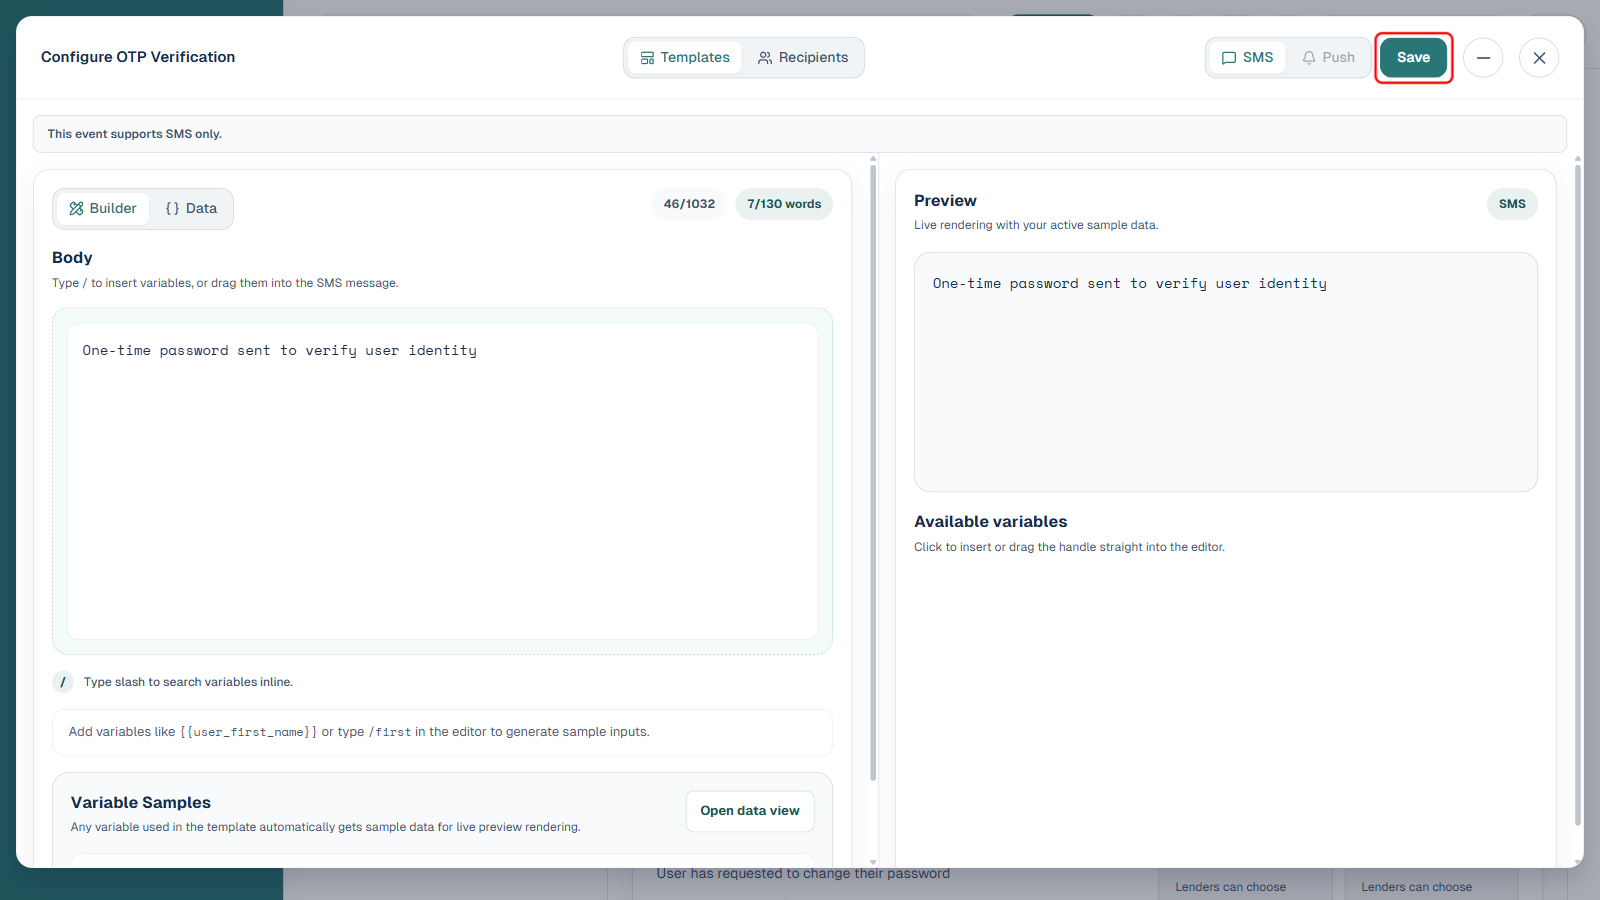
4. Save button, applies your edits to the template so they take effect for future deliveries of the event.
Working in the SMS builder
Editing the message body
The Body field is the main composition area where you write or modify your SMS content. It displays your current template, including any dynamic variables already in use. You can type directly into this field to adjust wording, restructure sentences, or add new instructions.
Two counters at the top of the editor help you stay within limits:
The character counter (for example, 46/1032) shows how many characters you have used against the maximum allowed
The word counter (for example, 7/130 words) shows your current word count against the word limit
Keeping an eye on both counters is important because SMS messages have character constraints that affect delivery. Exceeding limits may result in the message being split across multiple SMS segments, which can affect the customer experience. Both counters are visible at the top of the Builder view, next to the Builder and Data toggle (see the screenshot above).
Inserting variables
Variables allow you to personalise SMS content dynamically by pulling in real data at the point of delivery. For example, {{otp}} inserts the customer’s one-time passcode, {{dateTime}} inserts the expiry time, and {{sender_prefix}} inserts your configured sender identifier.
You can insert variables in two ways:
Type a forward slash (/) anywhere in the body field to trigger an inline variable search, then select the variable you want to insert
Click the drag handle on any variable pill in the Available variables panel on the right, and drag it directly into your desired position in the editor
The Available variables panel displays all variables supported by the event. Each variable is shown with its template syntax (for example, {{otp}}) alongside its plain name for easy reference. Only variables listed in this panel are valid for the event you are editing. Inserting unsupported variables may cause rendering errors in the delivered message.
Not every event has variables defined. If the Available variables panel is empty for the event you are configuring, typing a forward slash in the Body field will not bring up any suggestions, since there is nothing to insert, and only the plain message text can be edited.
Inserting from the Available variables panel
If you want to include a variable that is not already present in the body, click it directly in the Available variables panel on the right, or drag its handle into your desired position in the editor.
Previewing your changes
The Preview panel on the right side of the editor renders a live version of your SMS using active sample data. As you make edits in the body field, the preview updates in near real time so you can see exactly how the message will appear to the recipient before saving.
Variable samples are listed in the Variable Samples section below the editor. Each variable used in your template automatically receives placeholder sample data for preview purposes. You can click Open data view to review or update those sample values if you want the preview to reflect more realistic content.
Saving and resetting your changes
Once you are satisfied with your edits, click Save in the top-right of the panel to apply the updated template. The new content will be used for all future deliveries of that event. There is no separate Reset button in the current console; to discard your edits instead, close the panel with the X in the top-right and confirm the “Discard changes?” prompt that appears.
Best practices for SMS content
Well-crafted SMS notifications reduce confusion and build borrower confidence. Keep the following in mind when editing your templates:
Keep messages concise and focused on a single action or piece of information, as SMS is most effective when it is brief and direct
Always include the relevant variable for the event, such as {{otp}} for one-time passcodes or {{dateTime}} for time-sensitive actions, so the message is meaningful to the recipient
Use the sender prefix variable to clearly identify your organisation at the start of the message, particularly for security-related notifications
Review the live preview with realistic sample data before saving to catch formatting issues or awkward phrasing
Avoid including sensitive information beyond what is necessary, and ensure that any dynamic content aligns with your data privacy obligations