Access your Back Office at your fingertips.
Download the app now on Google Play Store.
Scan the QR code
You can also scan QR code with your phone to download the app.
How to view customers’ documents
Updated
On this page
When a borrower applies for a loan, the information they enter on the application is only part of the picture. Lenders still need supporting documents to confirm identity, verify income, and reduce the risk of fraud or default. These documents are a core part of Know Your Customer (KYC) checks and are often the difference between a safe approval and a risky one.
On Lendsqr, you can view all uploaded customer documents from the customer’s profile, or review pending ones across every customer at once from a dedicated queue.
Why customer documents matter in lending decisions
Documents help lenders move from assumption-based decisions to evidence-based decisions. Without them, a lender is relying entirely on self-reported information, which can be incomplete or misleading. With them, you can validate key claims before disbursing funds.
Lenders typically use customer documents to:
Confirm identity and prevent impersonation
Validate residential address
Verify income stability and employment status
Cross-check declared information against real evidence
Meet regulatory KYC and compliance requirements
For example, if a borrower claims to earn a fixed monthly salary, a payslip or bank statement can confirm whether the income aligns with what was declared in the application. If there is a mismatch, the lender may pause or decline the application.
Option 1: From a customer’s profile
Use this when you already know which customer you’re reviewing. If you are not yet familiar with finding a specific customer on the admin console, see Locating users’ profile page first.
On the side navigation, go to Customer management under Customers, then select Customers.
Find the customer using the filter panel or search box, then open their profile.
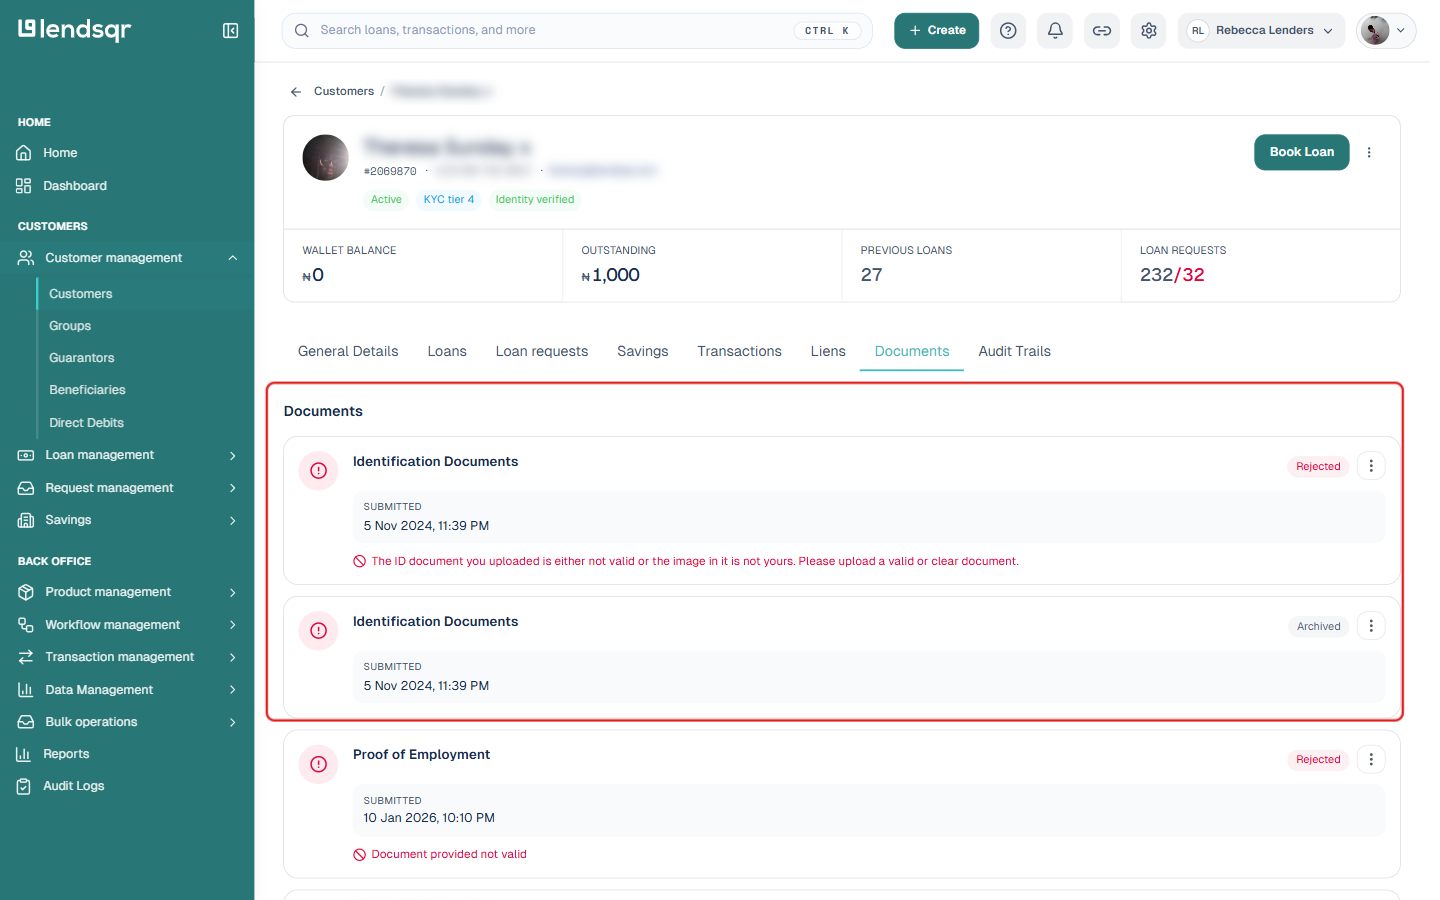
Click the Documents tab. This tab only appears if the customer has submitted at least one document; if they haven’t, the tab is simply not there.
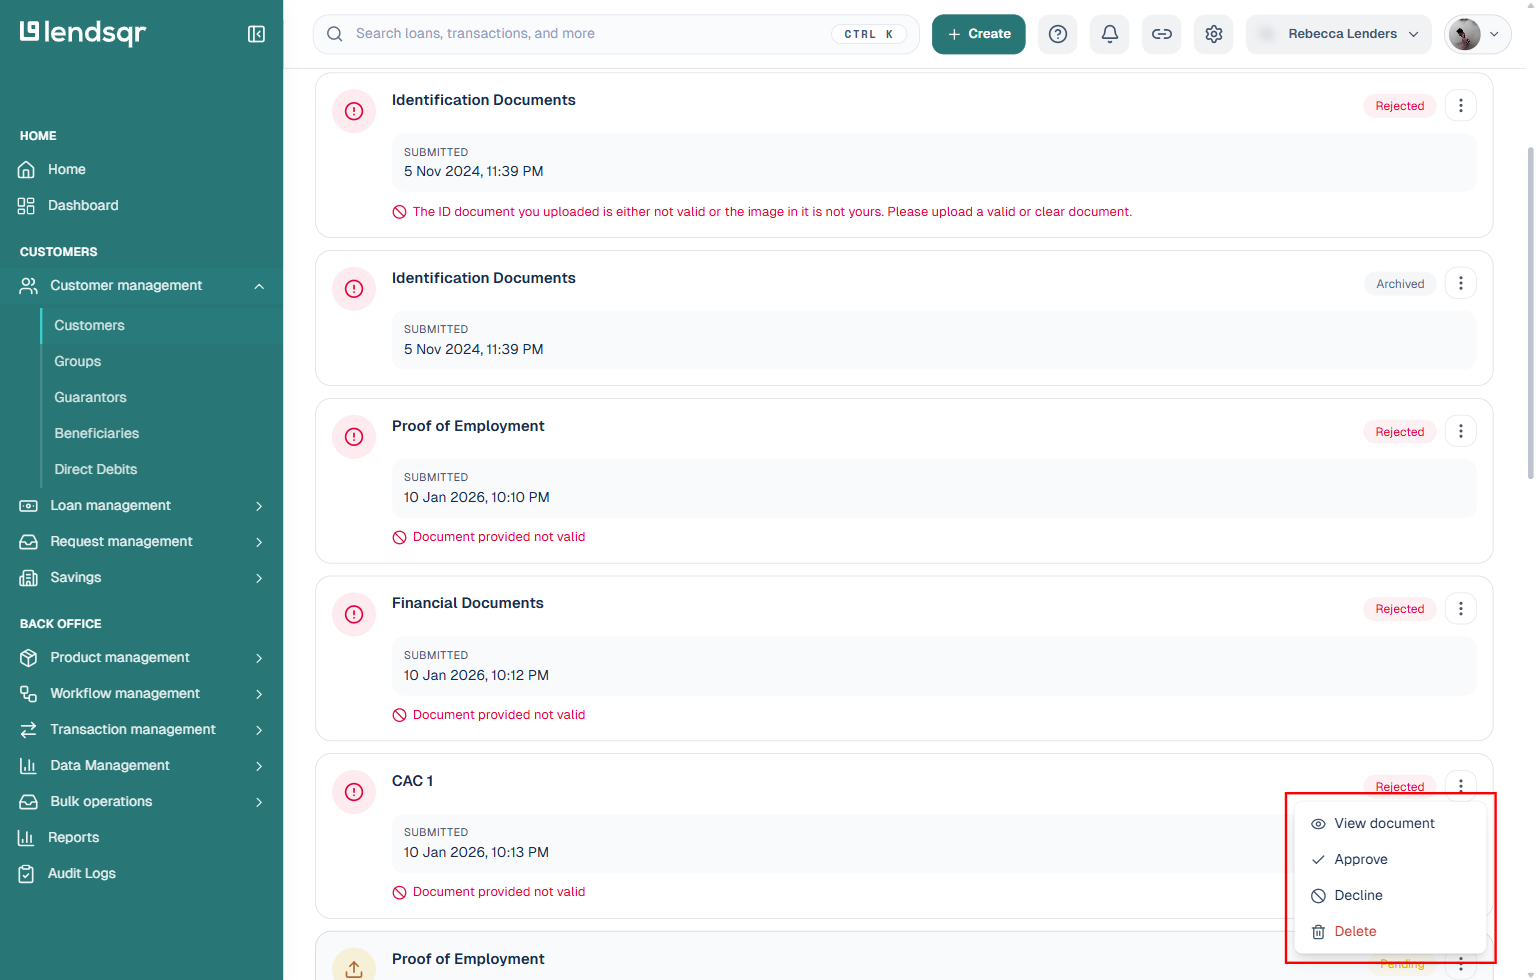
Each document shows its type (such as Identification Documents, Proof of Employment, Financial Documents, or a company registration document), when it was submitted, and its current status. Click the three-dot menu on a document to View document, Approve, Decline, or Delete it.
Option 2: Review documents across all customers
Use this when you want to work through everything waiting on review, rather than checking customers one at a time.
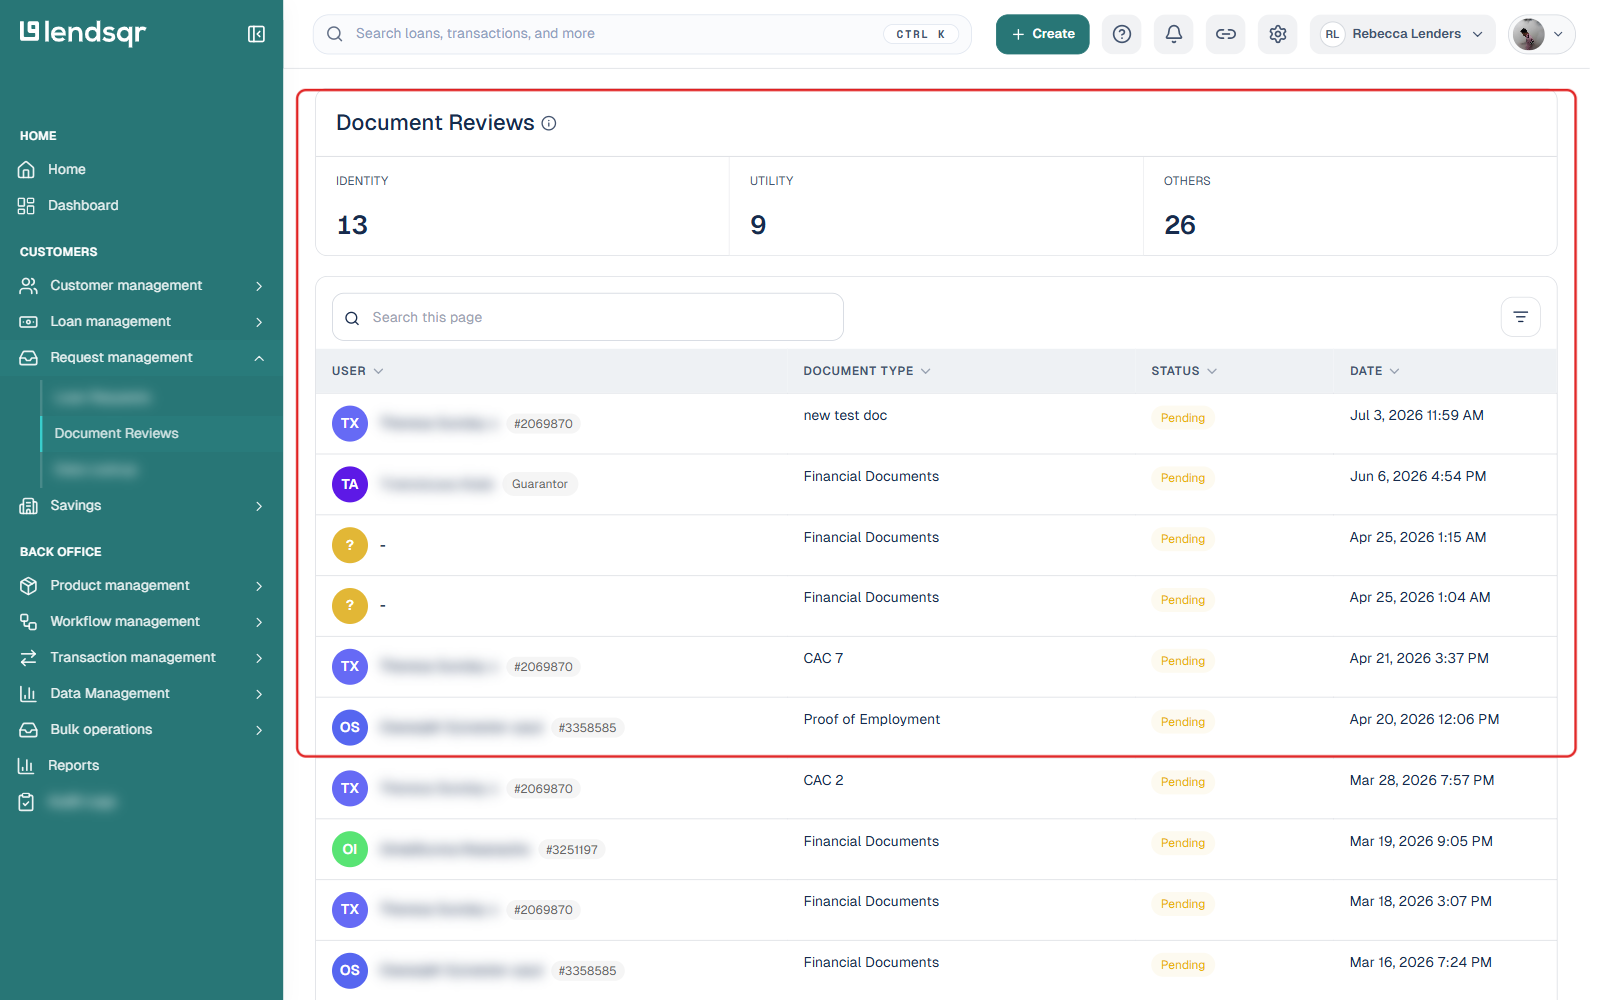
On the side navigation, go to Request management, then select Document Reviews.
The page opens with totals by category (Identity, Utility, Others) followed by a table of every submitted document across all customers and guarantors, with User, Document Type, Status, and Date columns.
Use the search box or Filter icon to narrow the list, or click a row to open and act on that document.
Option 3: From a specific loan or loan request
Use this when you are already reviewing a specific loan or loan request and want to see the documents tied to it, rather than all of that customer’s documents.
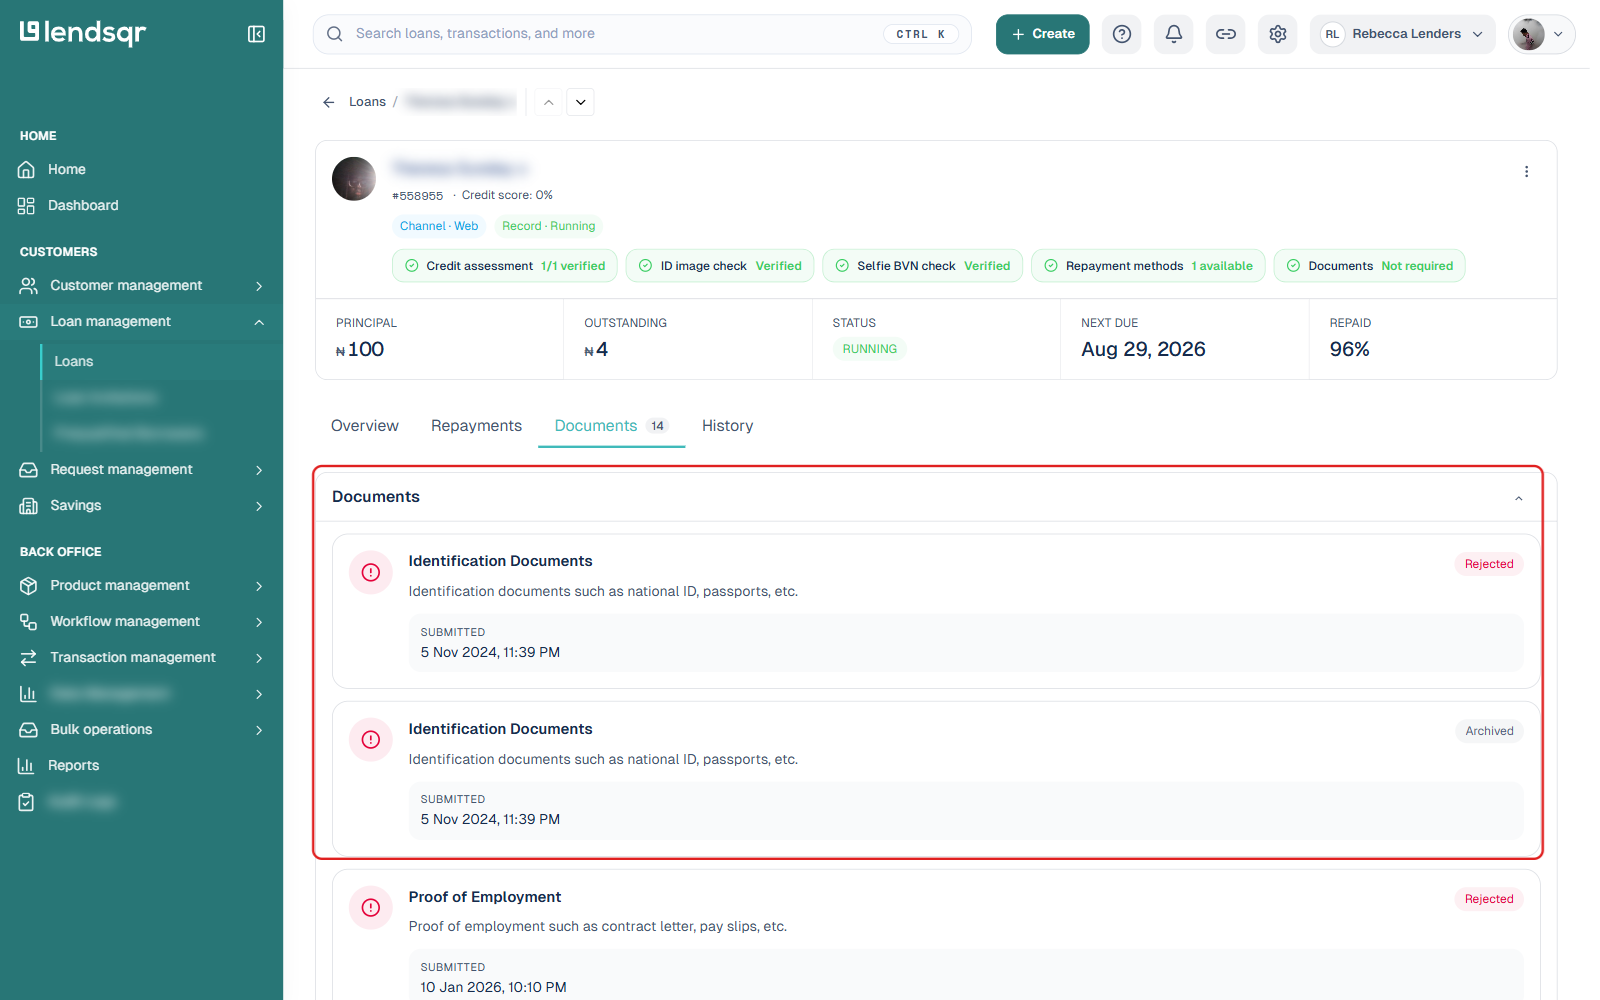
Open the customer’s profile, then click the Loans or Loan requests tab and click on the specific loan or request. Both open the same kind of detail page.
Click the Documents tab on that loan or loan request. Like the customer’s own Documents tab, this only appears if at least one document has been submitted for that specific loan or request.
This is useful when a document was submitted specifically to support one loan application rather than the customer’s general profile, since it keeps the document in the context of the request it relates to.
Understanding document statuses
Each uploaded document is assigned a status that reflects its current stage in the review lifecycle:
Pending: the document has been uploaded but not yet reviewed.
Rejected: the document was declined, usually with a stated reason such as poor image quality, a mismatch with other information on file, or a note that it looks invalid.
Archived: an older version of a document that has been superseded, for example after a customer re-submits the same document type.
Approving a pending document (via the Approve action described above) clears it off the review queue; there isn’t a separate “Approved” badge shown afterward, the document simply stops appearing among the customer’s pending items.
What to check during document review
When reviewing documents, lenders typically focus on both authenticity and consistency. Key checks include:
Whether the document is readable and complete
Whether names match across all submitted files
Whether dates and expiry information are valid
Whether the document aligns with declared income or identity
Whether there are signs of editing or manipulation
A consistent review process reduces subjectivity and ensures fairness across all applications. Because documents sit alongside loan history, repayments, and transaction data on the same profile, you can evaluate them in the context of everything else you know about the customer.
Learn how to activate required documents here, and read more about the wider KYC process in Introduction to KYC.