Access your Back Office at your fingertips.
Download the app now on Google Play Store.
Scan the QR code
You can also scan QR code with your phone to download the app.
Ability to mark a customer’s address as “Verified”
Updated
On this page
As part of the Know Your Customer (KYC) process, you may need to manually verify a customer’s address. This is useful when a customer’s proof of address document has been reviewed and confirmed, and you need to update their verification status accordingly.
This guide shows you how to manually set a customer’s address verification status to Verified on the admin console.
Before you begin
Ensure you have the necessary admin permissions to update customer KYC information.
Have your two-factor authentication (2FA) method ready, as this action requires an extra layer of security.
Follow these steps to manually verify a customer’s address:
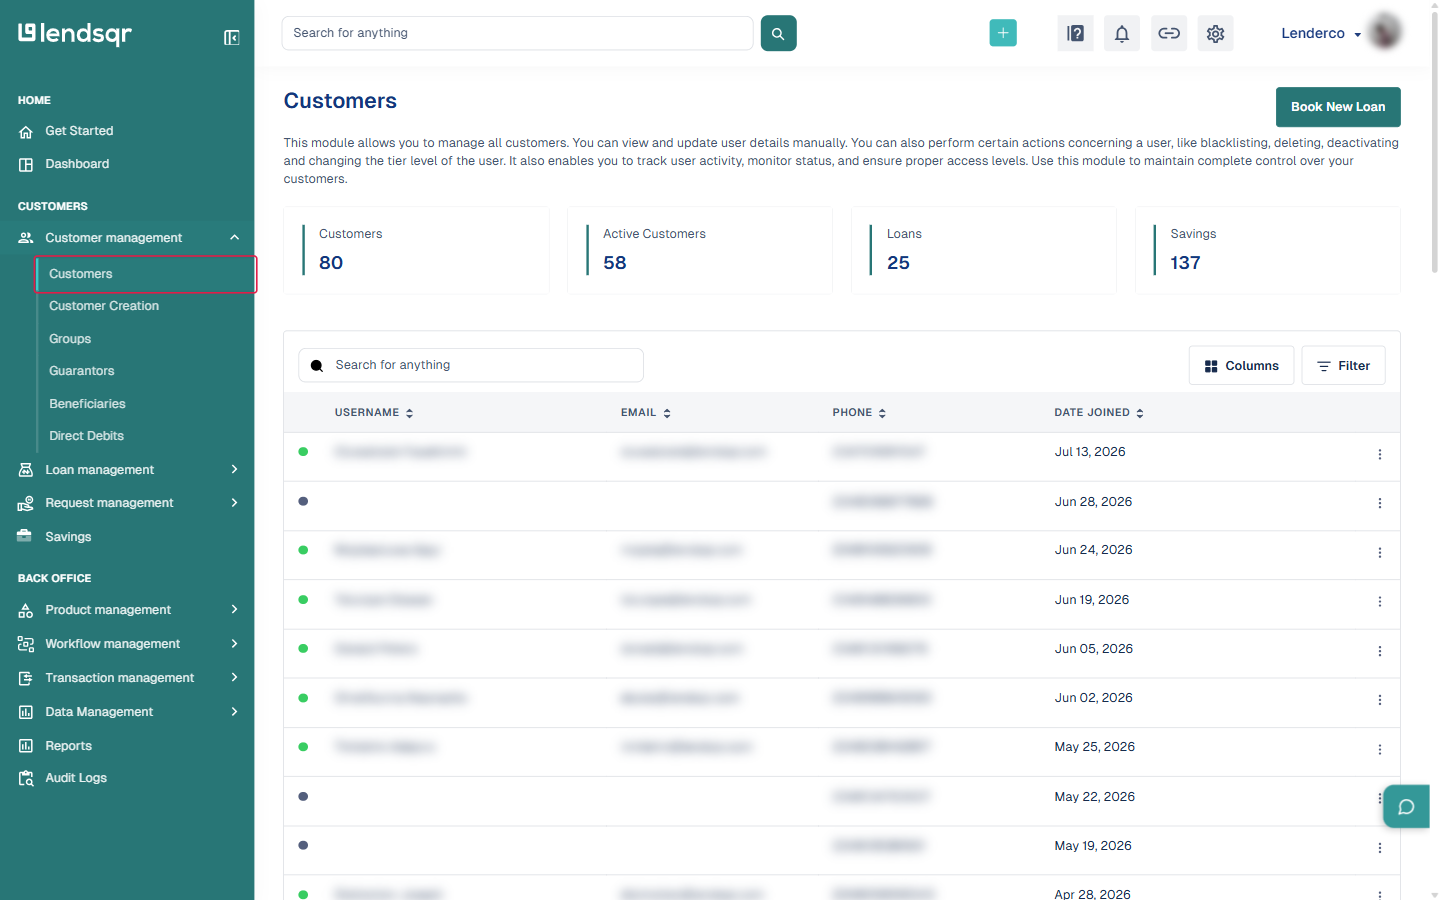
Go to Customer Management On the Lendsqr admin console, navigate to Customer Management from the side menu.
2. Select a customer profile Find and click on the customer whose address you want to verify. This will open their profile page.
For detailed steps on locating a customer and viewing their uploaded documents, refer to the guide on: How to view customers documents
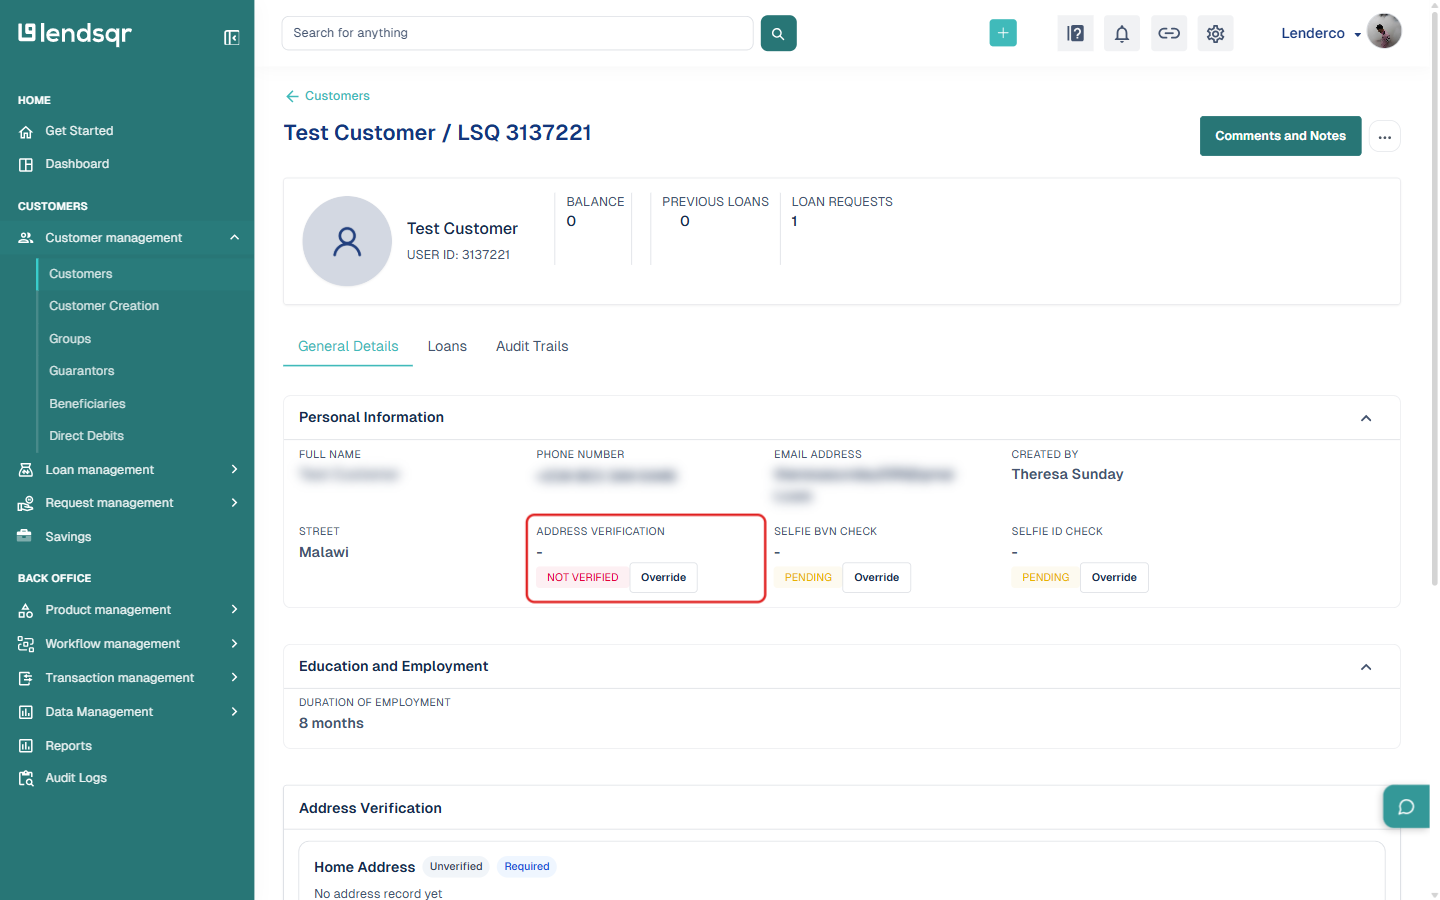
3. Locate the Address Verification section In the customer’s General Details tab, scroll down to the Address Verification field. Click the OVERRIDE button next to the Address Verification status.
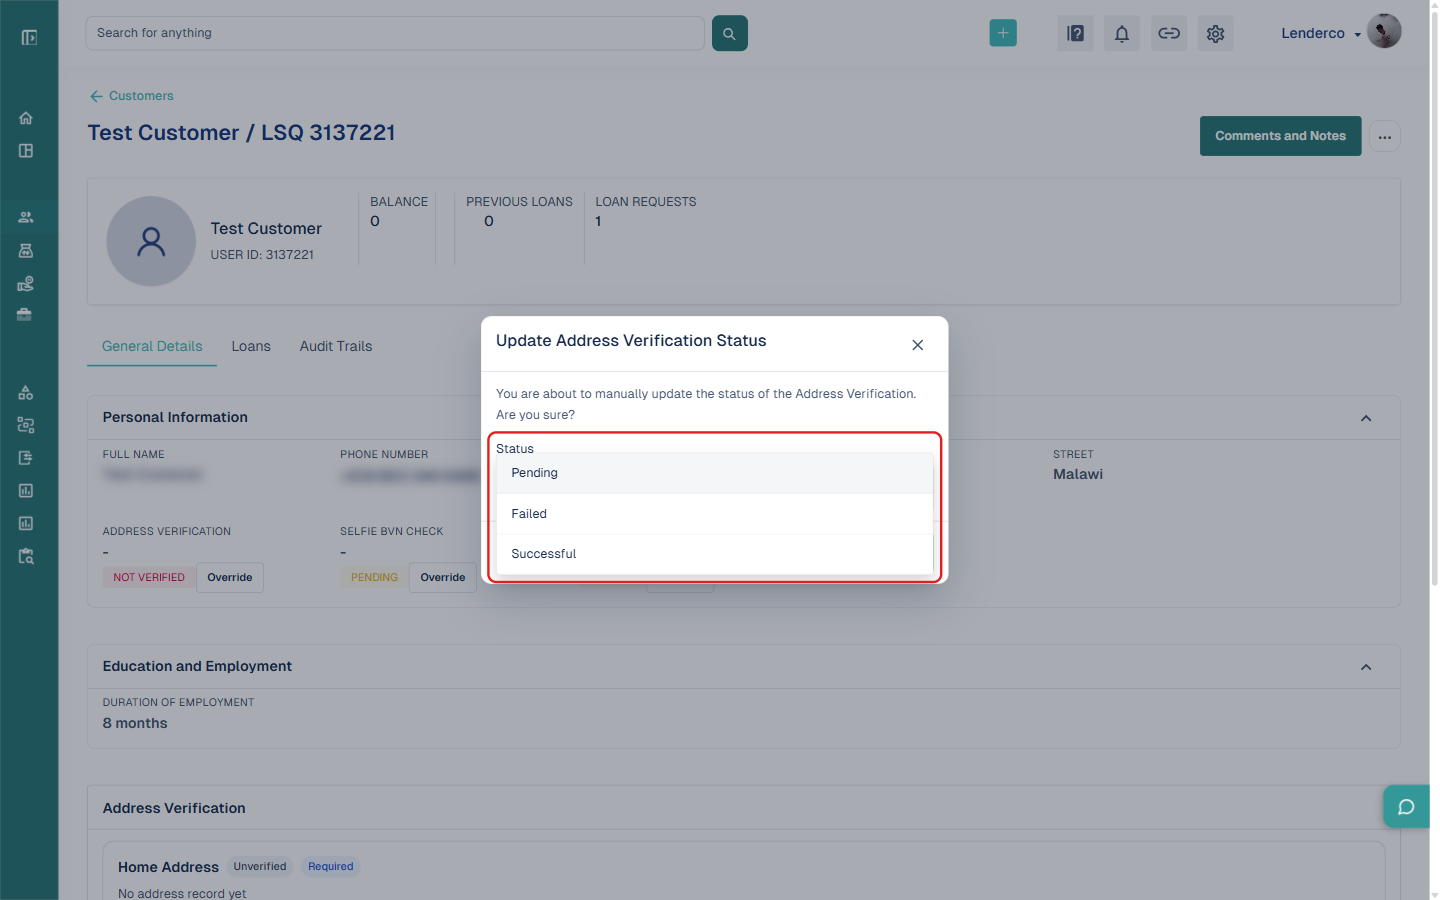
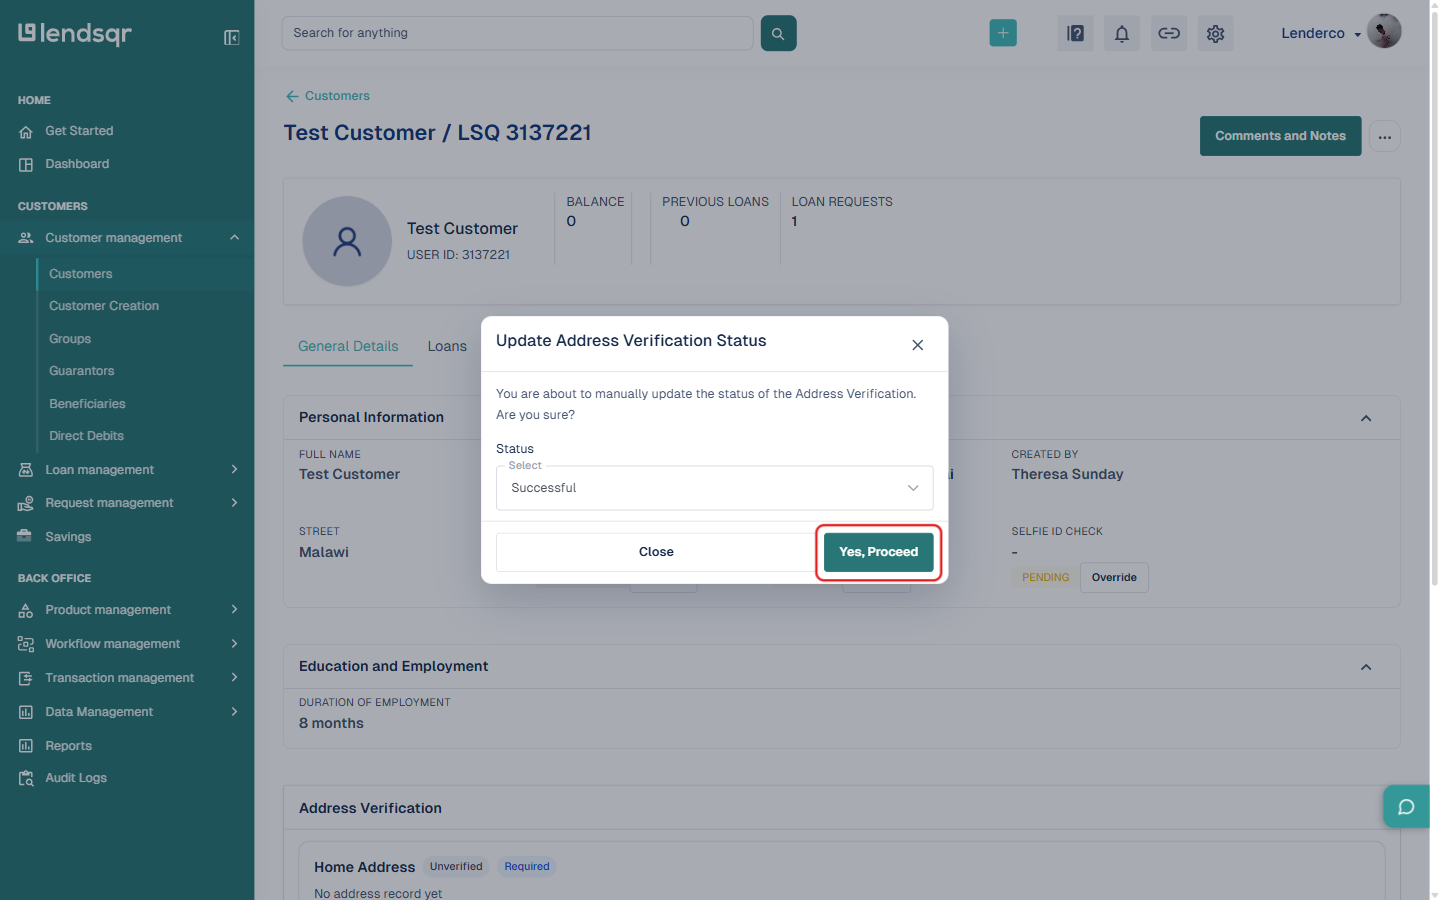
Confirm the action A confirmation dialogue box will appear. Select Successful from the Status dropdown, then click Yes, Proceed to continue.
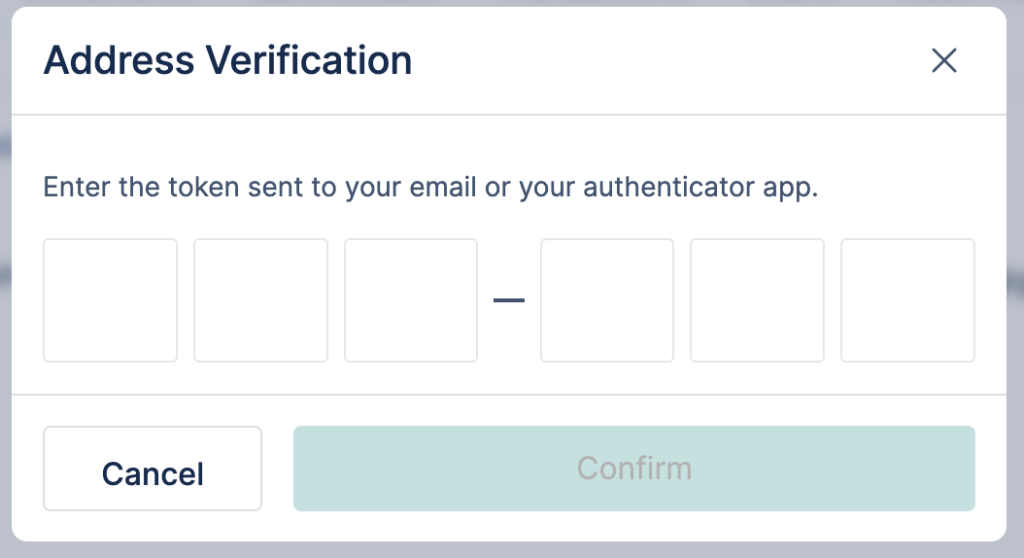
5. Complete the 2FA verification You will be prompted to complete the action using your two-factor authentication (2FA) app. Enter the token from your authenticator app to confirm the change.
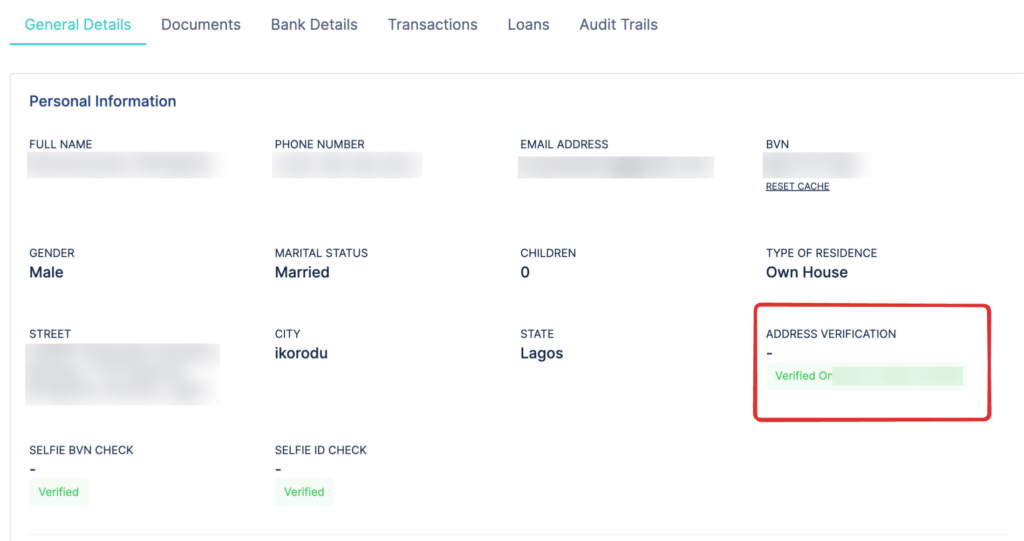
6. Verification complete Once the token is confirmed, a success message will be displayed. The customer’s Address Verification status will now show as Verified on their profile.
A fully verified address will appear in the customer’s Personal Information section alongside other verified KYC data.