Access your Back Office at your fingertips.
Download the app now on Google Play Store.
Scan the QR code
You can also scan QR code with your phone to download the app.
How to activate or deactivate a customer
Updated
On this page
The ability to activate and deactivate customers is a key function that allows lenders to manage user access and engagement effectively. Whether you are responding to suspicious activity, a policy violation, or a customer’s own request, this feature gives you direct control over who can interact with your platform, without losing any of their data in the process.
It enables lenders to enforce rules, safeguard the platform, and prevent unauthorized activity, all while keeping the customer’s data intact for potential future reactivation or auditing purposes. For instance, if a customer repeatedly defaults on payments or engages in suspicious behavior, an admin may choose to deactivate the account to prevent further risk to the organization.
On the other hand, if the issue is later resolved, such as settling debts or providing missing documentation, the same customer can be reactivated without needing to start a new registration process. This flexibility ensures operational efficiency, helps maintain platform integrity, and allows for a better-managed customer lifecycle.
This guide walks you through when to use this feature, who can use it, exactly how to do it, and what happens to the customer’s account afterwards.
Overview
When you deactivate a customer on Lendsqr, their access to the platform is suspended. They can no longer log in, apply for loans, or carry out transactions. However, their profile, loan history, documents, and data remain intact in the system. This means that if the reason for deactivation is resolved, you can reactivate the account without the customer needing to go through registration again.
This flexibility is important for lenders managing a large and diverse borrower base across different markets. A customer in Kenya who temporarily loses access due to missing documentation can be reactivated the moment they provide it, just as easily as a customer in Nigeria whose account was flagged for unusual activity can be suspended while the issue is investigated.
When to use this feature
There are several situations where activating or deactivating a customer is the right course of action.
Deactivate a customer when:
The customer repeatedly defaults on loan repayments and poses a risk to your portfolio
Suspicious or fraudulent activity is detected on the account
The customer has violated your platform’s terms and conditions
The customer requests that their account be suspended temporarily
Regulatory or compliance requirements in your region require you to restrict access pending a review
Activate a customer when:
A previously deactivated customer has resolved the issue that led to their suspension, such as settling outstanding debts or submitting required documents
A new customer has completed registration and needs their account enabled for the first time
A customer’s account was deactivated in error and needs to be restored.
Prerequisites
Before you proceed, confirm the following:
Admin role and permissions: Only admins with the appropriate role can activate or deactivate customers. If you do not see the activate or deactivate option when following the steps below, contact your system administrator to confirm your access level.
Review active loans: Before deactivating a customer, check whether they have any active or ongoing loans. Deactivating a customer does not automatically cancel or pause their loans. Any outstanding repayments will still be due and will continue to appear in your reports.
Document your reason: It is good practice to note the reason for deactivation, particularly if it relates to fraud or a compliance issue.
Step-by-step: how to activate or deactivate a customer
Step 1 — Find the customer
Log in to your Lendsqr admin console using your work email address and password.
Navigate to the Customers section via the left sidebar and select “Request Management”, then click “Users”.
To find the specific customer, search for them by filtering using either their email address or their phone number. Once you have found the customer, click on their profile to open their details page, where you can view their general information, bank and card details, transactions, and uploaded documents.
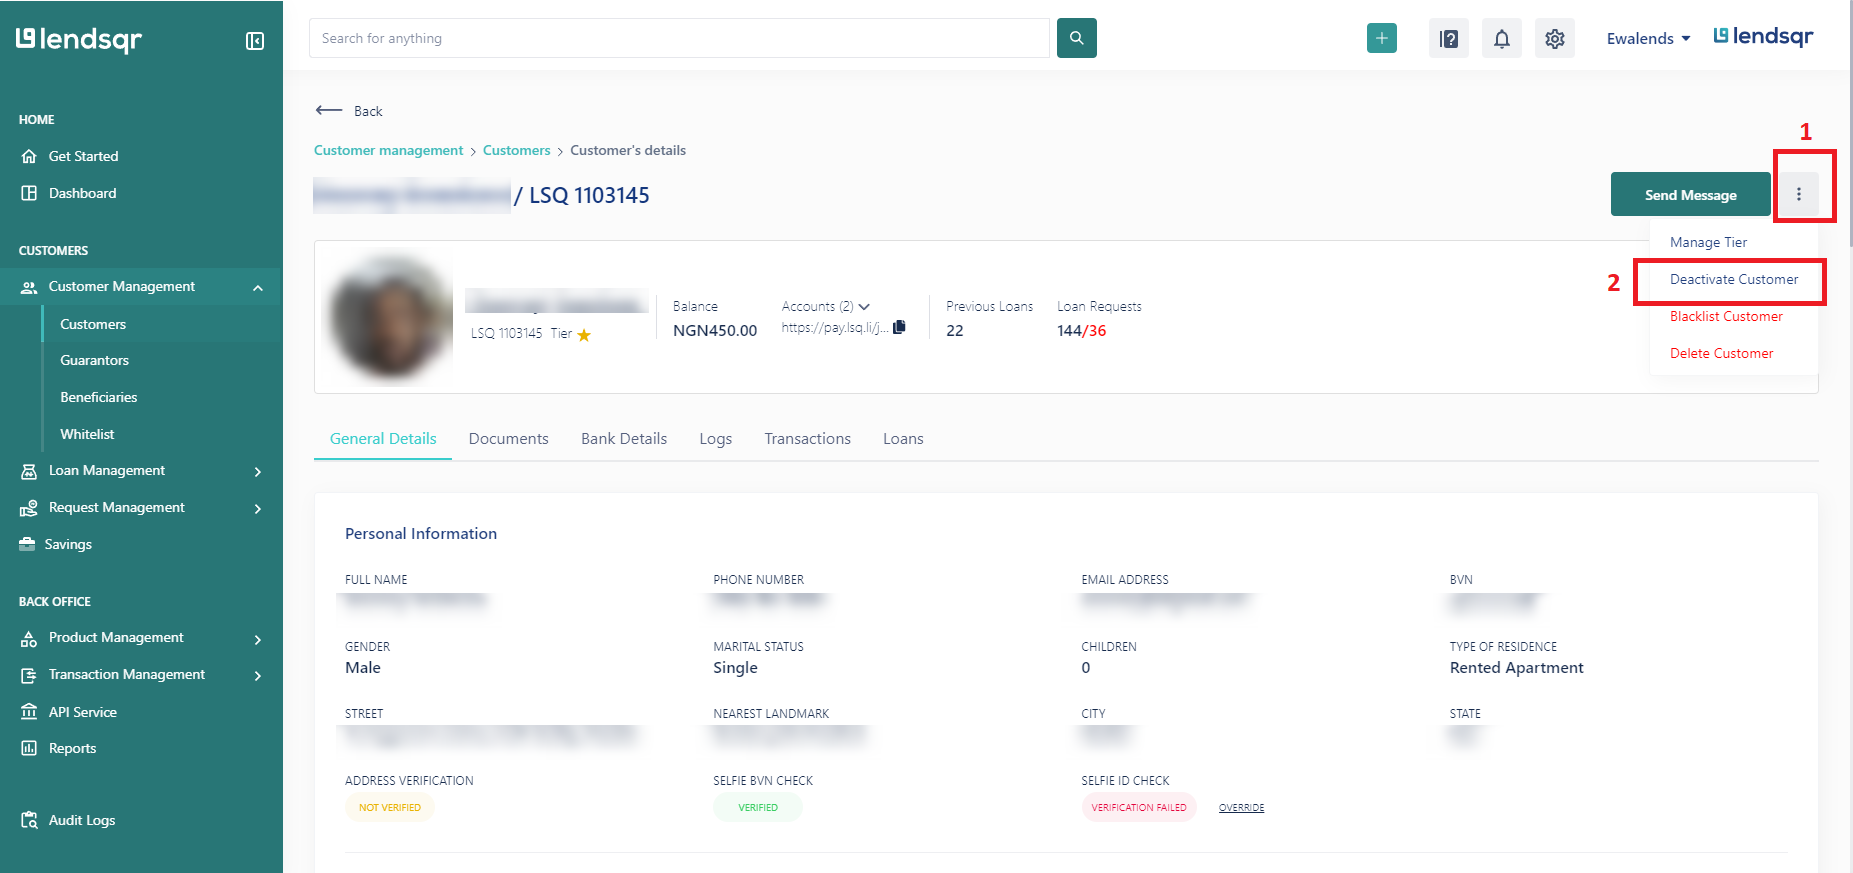
Step 2 — Open the action menu
Once you are on the customer’s profile details page, click the three dots icon at the top right corner of their profile. A dropdown menu will appear with available actions for that account.
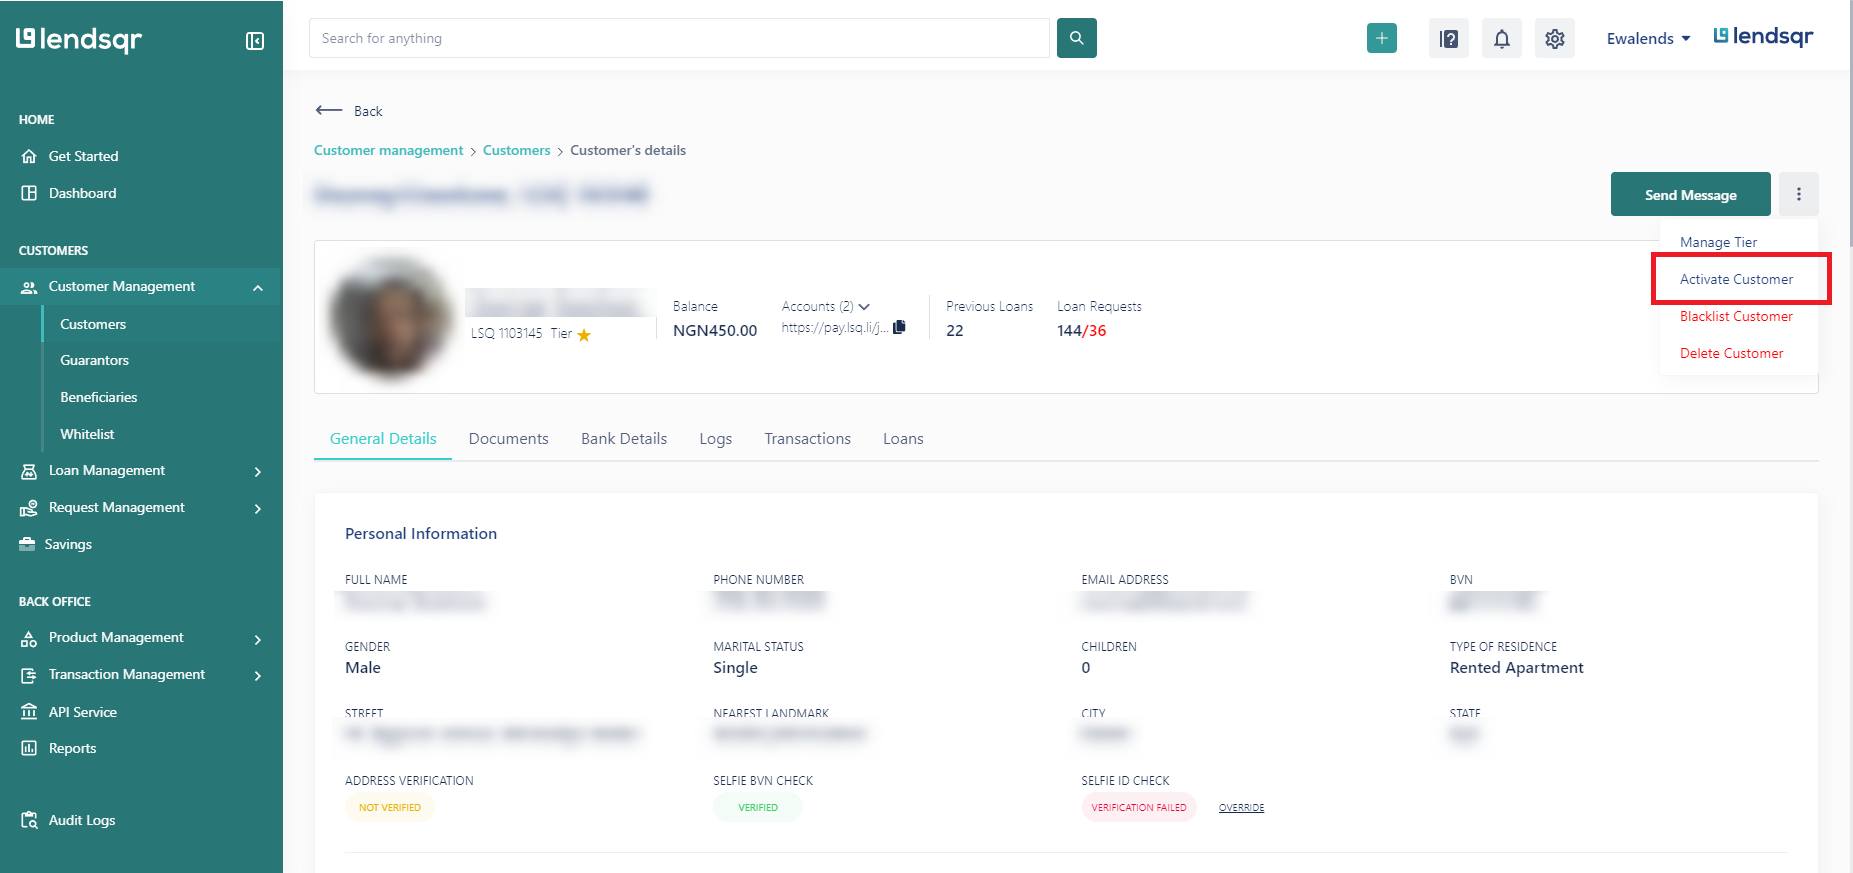
Step 3 — Activate or deactivate the customer
From the dropdown menu, click “Activate Customer” or “Deactivate Customer” depending on the action you need to take.
Note the following:
If the customer is currently active, you will see “Deactivate Customer” in the menu.
If the customer is currently inactive, you will see “Activate Customer” in the menu.
Deactivating a Customer
Activating a Customer
What happens after
Understanding the effects of each action helps you use this feature responsibly and avoid unintended consequences.
After deactivating a customer:
The customer loses access to the platform immediately and can no longer log in or carry out transactions
Any active loans linked to the account remain active. Repayments are still due and will continue to appear in your reports
The customer’s profile, documents, and loan history remain fully intact in the system
The action is recorded in the audit log with a timestamp and the admin who performed it
Depending on your notification settings, the customer may receive an email or SMS informing them of the change. To review notification settings, navigate to Settings and select “System Settings”
After activating a customer:
The activation is recorded in the audit log
The customer regains full access to the platform immediately
Their previous profile, loan history, and documents are restored exactly as they were