Access your Back Office at your fingertips.
Download the app now on Google Play Store.
Scan the QR code
You can also scan QR code with your phone to download the app.
Understanding your lender microsite
Updated
On this page
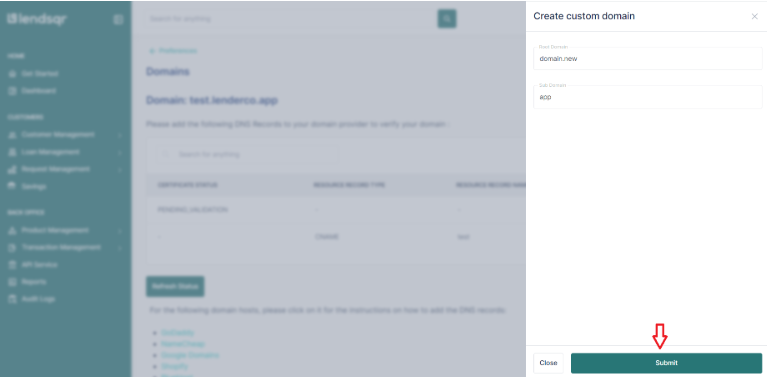
Your lender microsite is the public homepage borrowers land on before they sign in, usually at your own branded URL (for example, yourlender.lsq.app, or a custom domain if you’ve set one up). It’s where many customers first encounter your products, check what they’d qualify for, and start an application. This article walks through everything that appears on it, section by section.
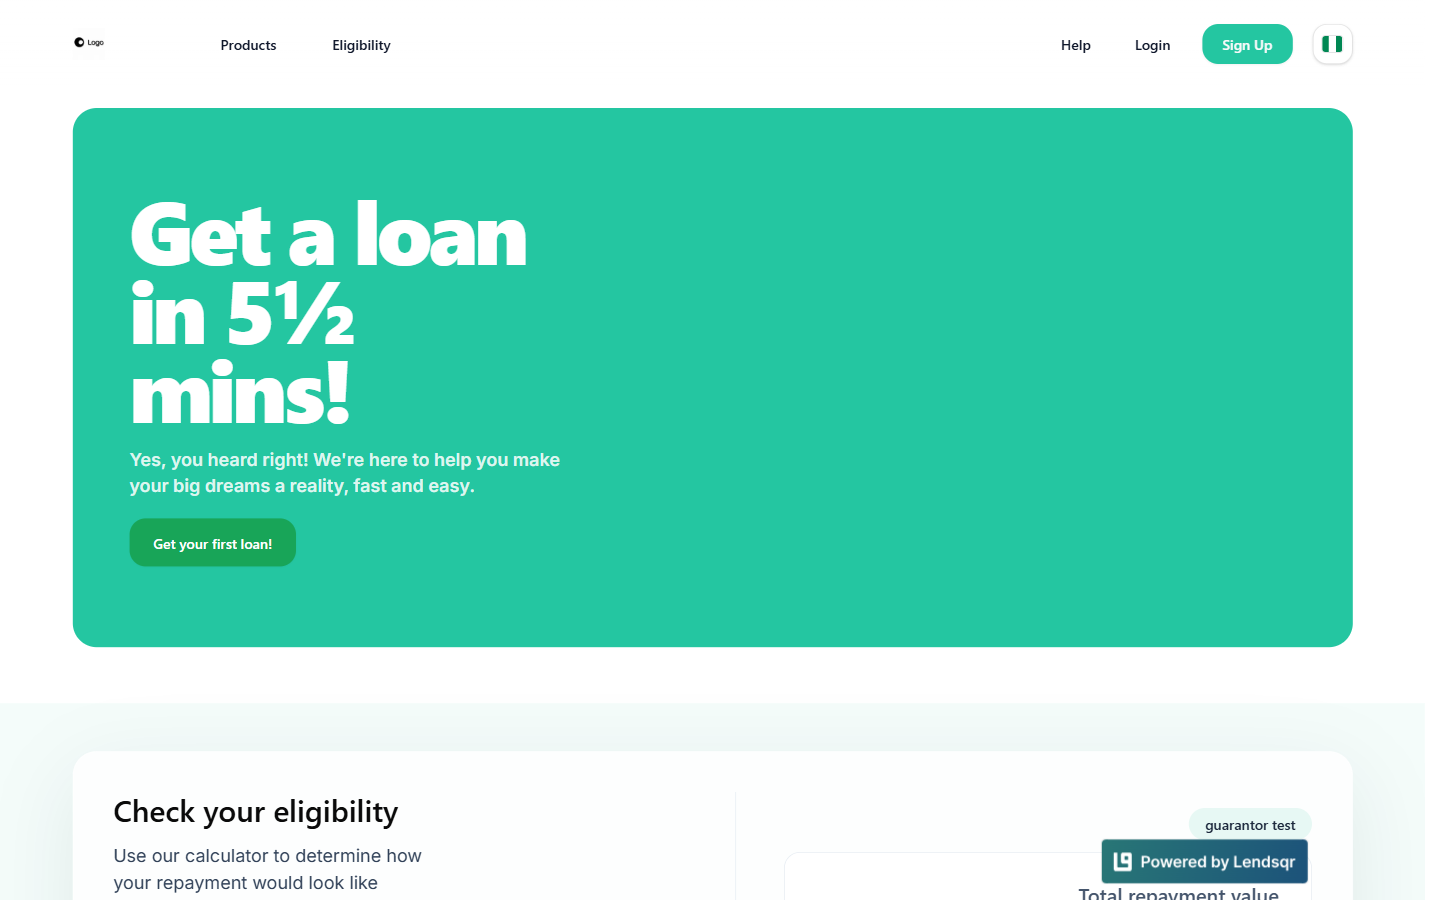
At the top of the page, a top navigation bar links to the Products and Eligibility sections further down the page, along with Help, Login, and Sign Up. Below it, a hero banner carries your headline, a short supporting line, and a primary call-to-action button that takes a visitor into the loan application flow.
Eligibility calculator
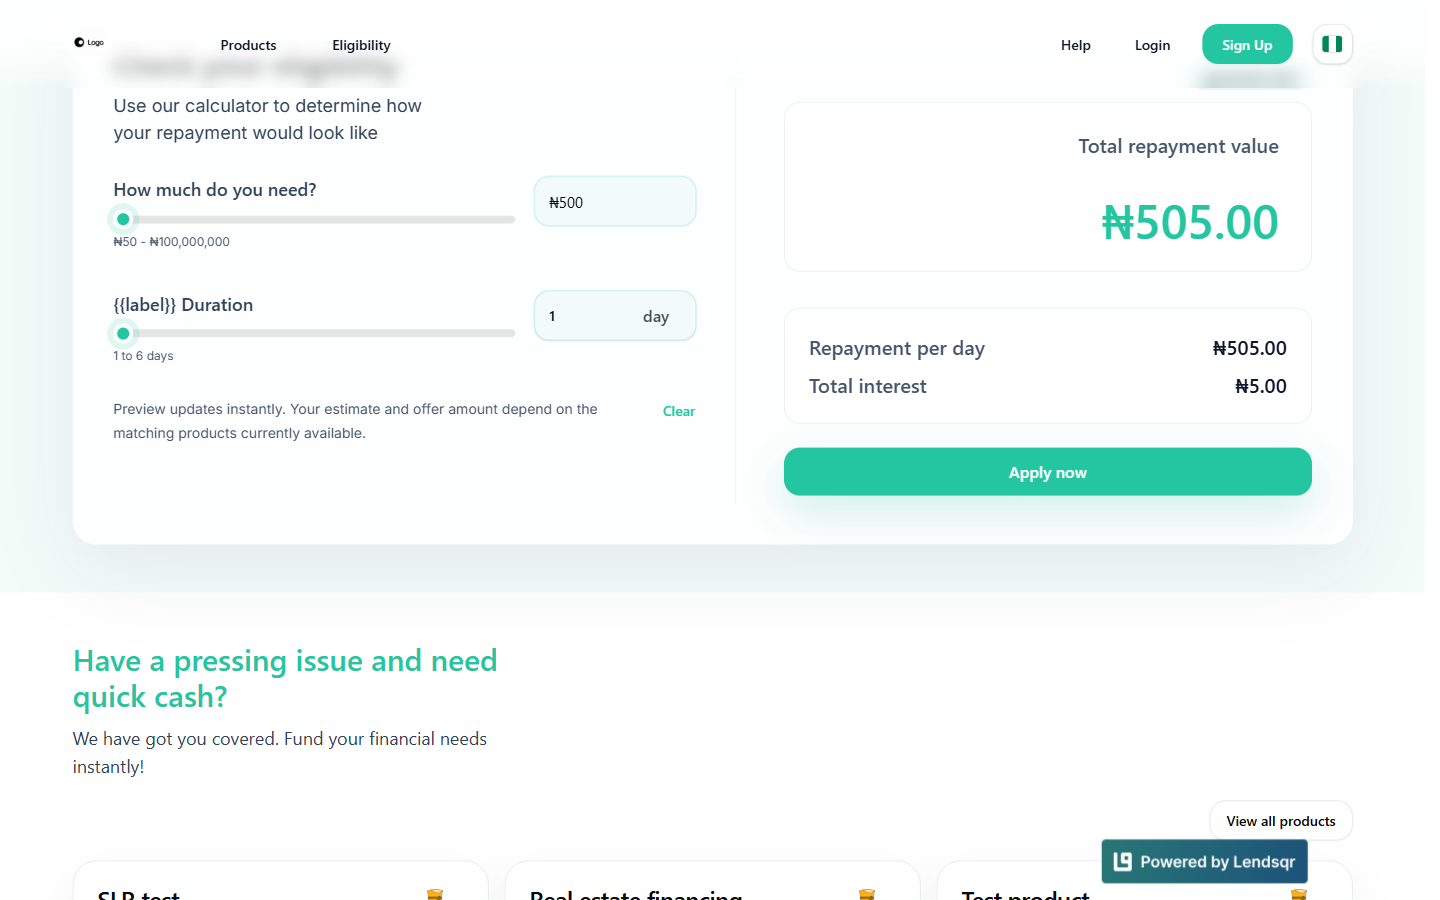
The “Check your eligibility” section lets a visitor estimate their repayment before applying. They set how much they need and a repayment duration using two sliders (or by typing an amount directly), and a live preview on the right updates instantly with the total repayment value, repayment per period, and total interest, based on your currently configured loan products. From there, they can click “Apply now” to start a loan request with those terms pre-filled.
If no configured loan product matches the amount and duration entered, the calculator shows “No matching offer for this amount and repayment period yet” instead of a preview. This reflects your actual loan product configuration, so a mismatch here usually means a product’s amount or tenor limits need adjusting in Product Management, not a fault with the calculator itself.
Loan products
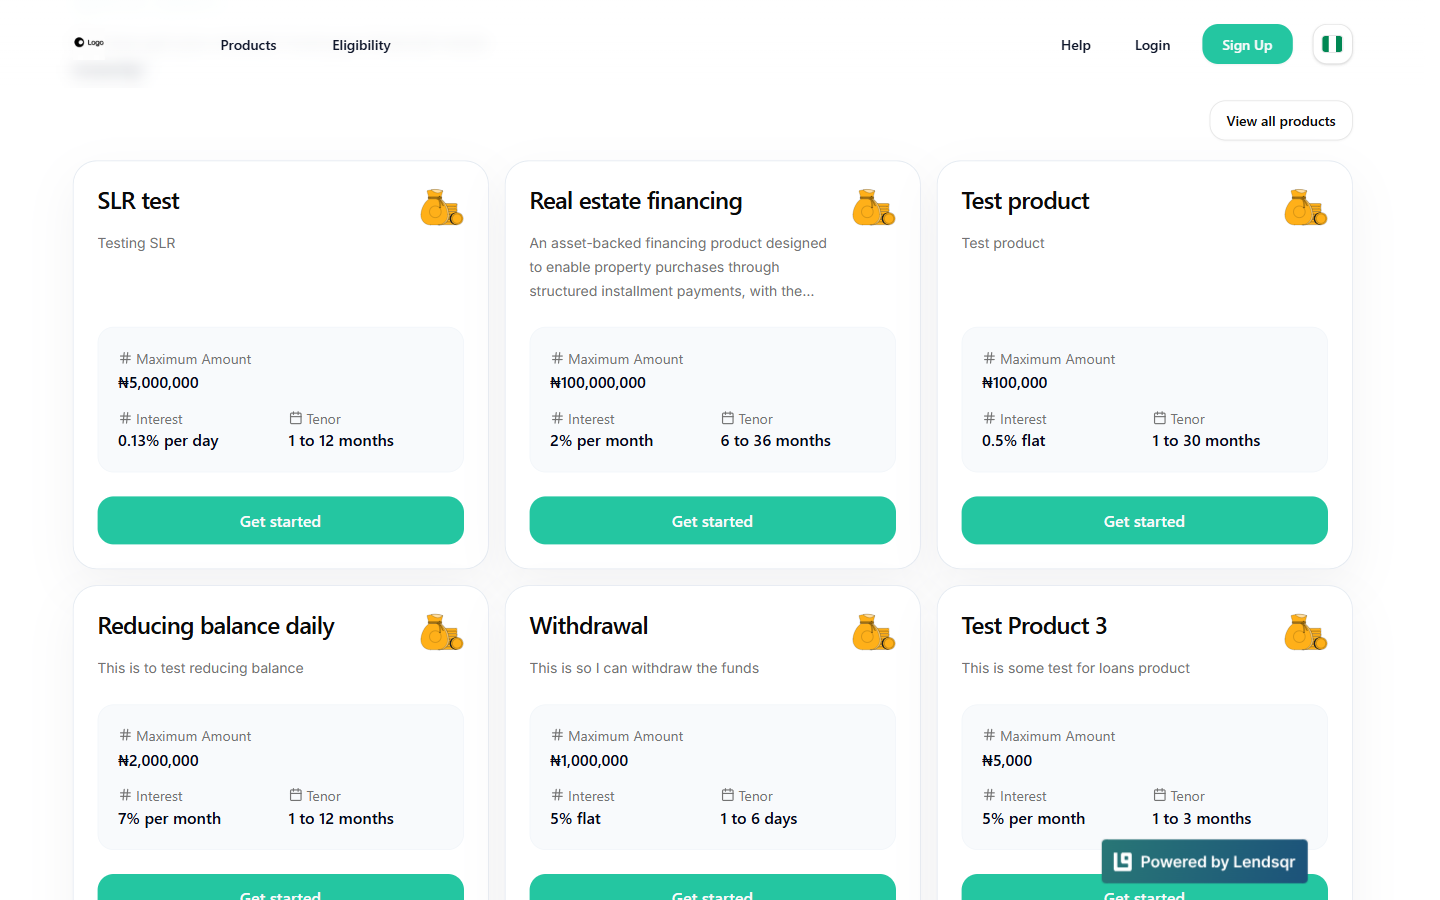
Beneath the eligibility calculator, your loan products are listed as individual cards, each showing the product’s name, a short description, its maximum amount, interest rate, and tenor, with a “Get started” button. A “View all products” link opens the full list if you have more products than fit in the preview row.
These cards are generated directly from your loan products in Product Management > Loan Products. There is no separate step to publish a product to the microsite. Any loan product visible there, with its name, description, and configured limits, is what borrowers see listed here, so keep that in mind when naming and describing a product internally.
Savings products
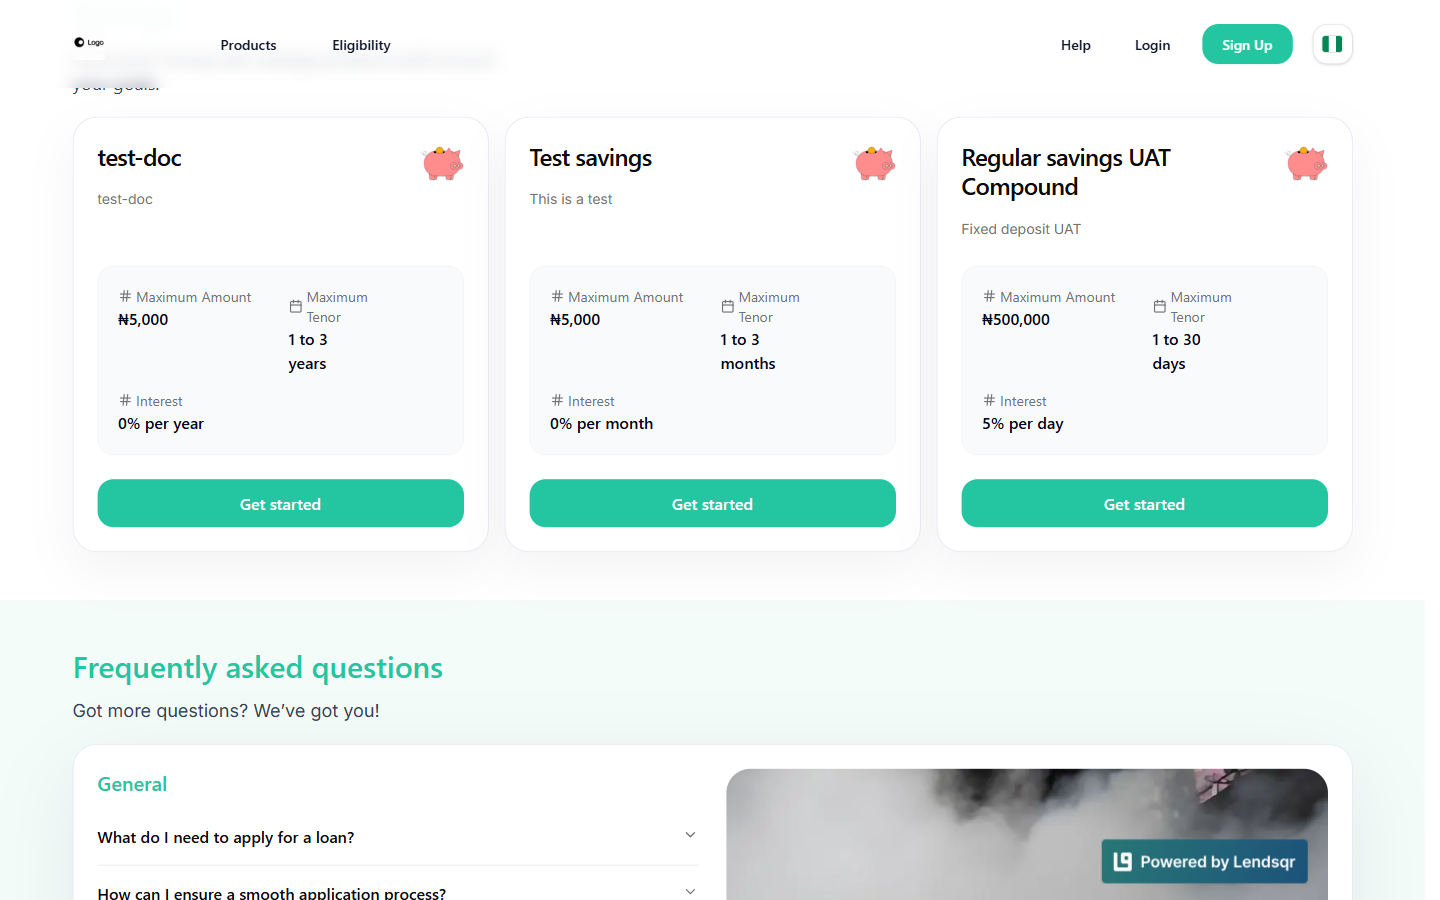
Below your loan products, a “Savings” section lists your savings products the same way, with the heading “Grow your money with savings products built around your goals.” Each savings product appears as its own card with its maximum amount, maximum tenor, interest rate, and a “Get started” button.
This section appears automatically once your organization has at least one savings product configured; there is no separate setting to turn it on or off. To add, edit, or remove what appears here, manage your savings products from Product Management > Savings Products in the admin console, the same way you manage loan products. Since a savings product’s maximum amount, tenor, and interest are pulled directly from its configuration, review those details before publishing a new one, since they’re what borrowers see on your public-facing microsite.
Frequently asked questions
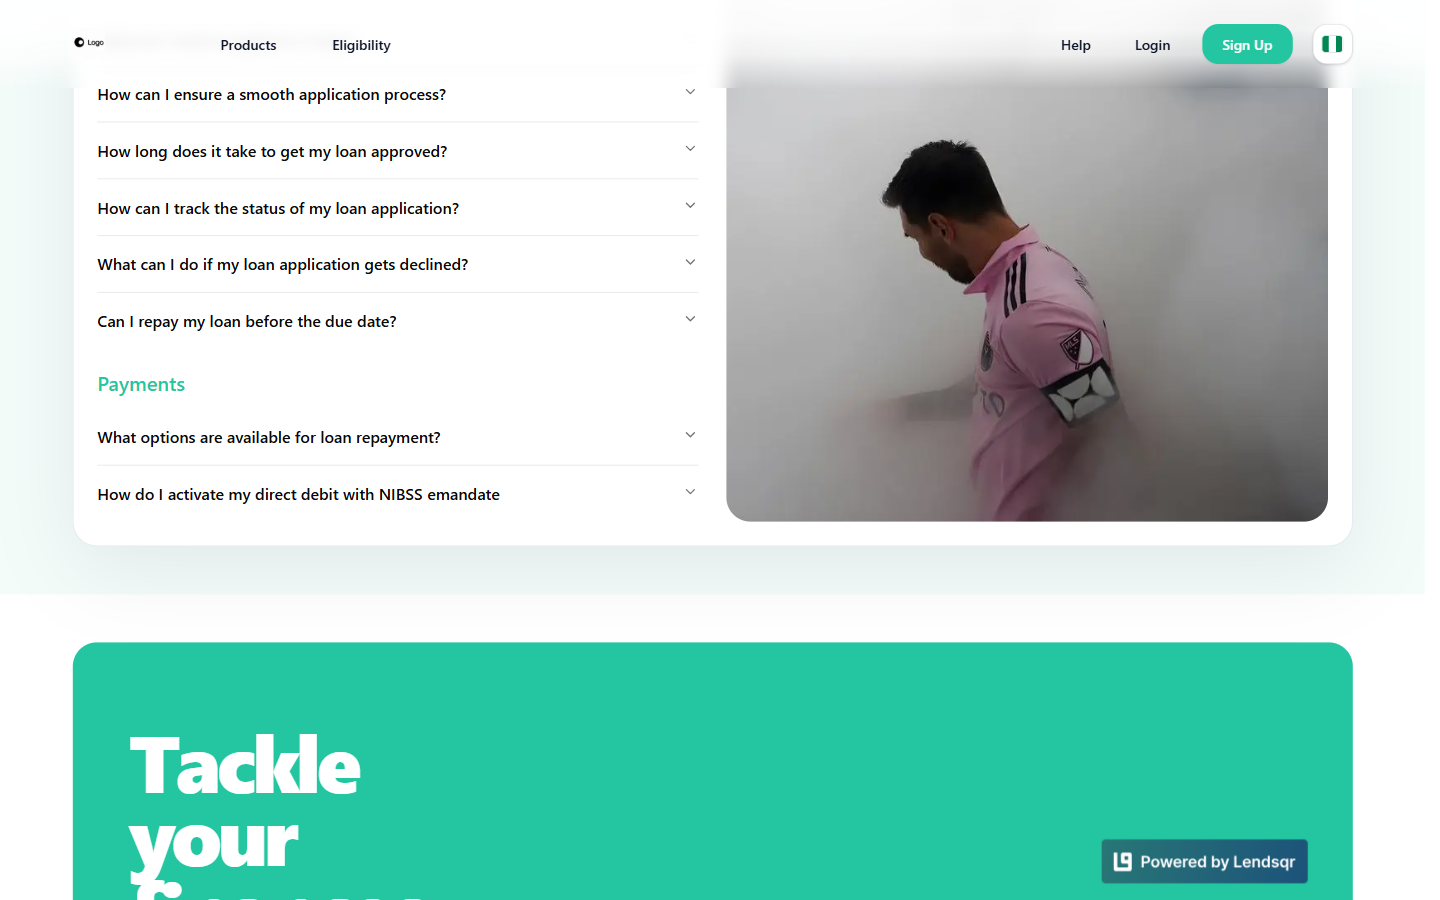
Further down, an FAQ section groups common questions under categories such as General (covering things like application requirements, approval times, tracking a request, and repaying early) and Payments (repayment options and activating direct debit). Each question expands in place when clicked.
Footer and closing call-to-action
The page closes with a second call-to-action banner encouraging visitors to get started, followed by a footer with your organization’s logo, a copyright line, and a link to your Terms of Service.
All of the content on this page, your loan products, savings products, and their configured amounts, tenors, and interest rates, comes from what you’ve set up in Product Management. Reviewing your products there is the most direct way to control what a prospective borrower sees before they even sign up.