Access your Back Office at your fingertips.
Download the app now on Google Play Store.
Scan the QR code
You can also scan QR code with your phone to download the app.
How to add an approval workflow to a loan product
Consider a digital lender offering both small emergency loans and larger business financing. The emergency loan product is fast-moving, and a single credit officer can approve it in minutes. But the business loan involves more risk, so the lender needs a branch manager to review the application after the credit officer, and a final sign-off from the head of credit before any funds are released. Without a way to attach different approval chains to different products, the lender either slows everything down with the same heavy process or takes on unnecessary risk by skipping reviews for the larger product.
This is exactly what approval workflows on the Lendsqr admin console are built for. You can attach a specific approval workflow to any loan product, so that every application for that product automatically follows the review chain you have defined, whether that is one approver or several.
This article explains what an approval workflow is, why lenders use product-level workflows, and walks you through the steps to link one to a loan product on the Lendsqr admin console.
What is an approval workflow?
An approval workflow is a structured sequence of review steps that a loan application must pass through before it can be approved and disbursed. Each step in the workflow is assigned to a specific team member or role. The application moves from one step to the next only after the previous reviewer has taken action.
Here’s how the approval workflow mechanics work on the Lendsqr admin console:
A workflow can have multiple approvers arranged in a sequence of steps. Each approval rule defines the approver(s) and their order, so you can have as many steps or approvers as needed, depending on your organization’s complexity and risk policies.
When an approver approves at their step, the workflow automatically moves to the next step in the sequence for further approval, until the minimum number of required approvals is reached.
If an approver declines, the workflow does not immediately fail or approve the loan. Instead, depending on your internal setup, it can either mark the loan for review or rejection. The system supports tailored workflows, so declined requests can be routed back for re-evaluation rather than outright failure.
The borrower only gets notified when the workflow approves the loan and the loan is disbursed.
Approval workflows in Lendsqr are created separately and then linked to loan products. This means you can build a workflow once and reuse it across multiple products, or create dedicated workflows for products that have unique risk requirements.
Why attach an approval workflow to a specific loan product?
Different loan products carry different levels of risk. A short-term consumer loan for a small amount may only need a single reviewer, while a salary advance for a large amount or a business loan for a first-time borrower might require two or three levels of sign-off.
By attaching workflows at the product level, lenders ensure that the approval process is always proportional to the risk of the product, without having to manually route every application.
Here are two examples of how lenders use this in practice:
A microfinance lender offering group loans requires each application to be reviewed by a field agent and then confirmed by a regional manager before disbursement. They attach a two-step workflow to their group loan product to enforce this automatically.
A payroll lender with two products, a standard salary advance and a top-up loan for existing customers, uses a single-approver workflow for the standard product but a two-approver workflow for top-ups, since those carry higher credit exposure.
Before you begin
You will need an approval workflow already created in the Lendsqr admin console before you can attach it to a loan product. If you have not yet built your workflow, follow the steps in How to create an approval workflow first, then return here. You will also need admin-level access to the Lendsqr admin console to edit loan products.
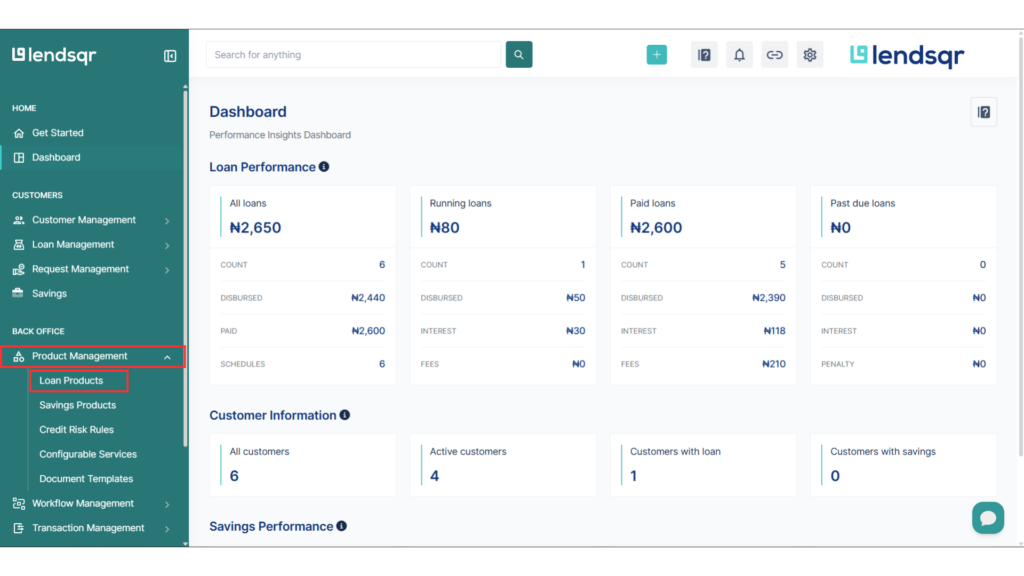
How to add an approval workflow to a loan product.
From the main dashboard, navigate to “Product Management” and select “Loan Products.“
Step 3: Open the loan product you want to update
If you need to create a new loan product, click the “Create Loan Product” button at the top-right corner of the page. To update an existing product, click on the product name to open it.
Step 4: Open the edit menu
Click the three-dot menu (…) in the top-right corner of the Loan product page and select Edit product.
Step 5: Find the “Approval workflows” section
Scroll through the product settings page until you reach the Approval workflows section. Click the workflow you want to attach to this loan product. If you have not yet created a workflow, select How to create an approval workflow to build one first, then return to this step.
Step 6: Save your changes
Scroll to the bottom of the page and click “Save changes“. The workflow is now linked to the loan product. All new applications submitted for this product will follow the approval chain you selected.
What happens after you link an approval workflow?
Once a workflow is attached to a loan product, every new loan application submitted for that product is automatically routed through the approval chain you defined. If you add a workflow to an existing loan product, it affects only new loan applications submitted after the change. Applications already in progress continue through the process established when they were submitted. This setup helps ensure clear tracking and timely decision-making for every loan application.
You can update or remove the workflow from a loan product at any time by returning to the Edit product screen and making changes in the Approval workflows section.


 feature")


