Access your Back Office at your fingertips.
Download the app now on Google Play Store.
Scan the QR code
You can also scan QR code with your phone to download the app.
How to activate required documents
As a lender, you have the ability to choose the required documents customers can upload before taking a loan. This is especially useful for verifying their identity, income, or employment status.
For instance, a borrower applying for a business loan may be required to upload their bank statements, tax returns, or proof of business registration. These documents help the lender assess the borrower’s financial health and legitimacy, ultimately reducing the risk of lending to fraudulent or unqualified applicants.
Additionally, document uploads streamline the approval process by enabling lenders to access all necessary information in one place, speeding up decision-making. For example, if a borrower uploads a valid government-issued ID and a recent utility bill, the lender can quickly verify the borrower’s identity and address without requiring back-and-forth communication, enhancing both compliance and customer experience.
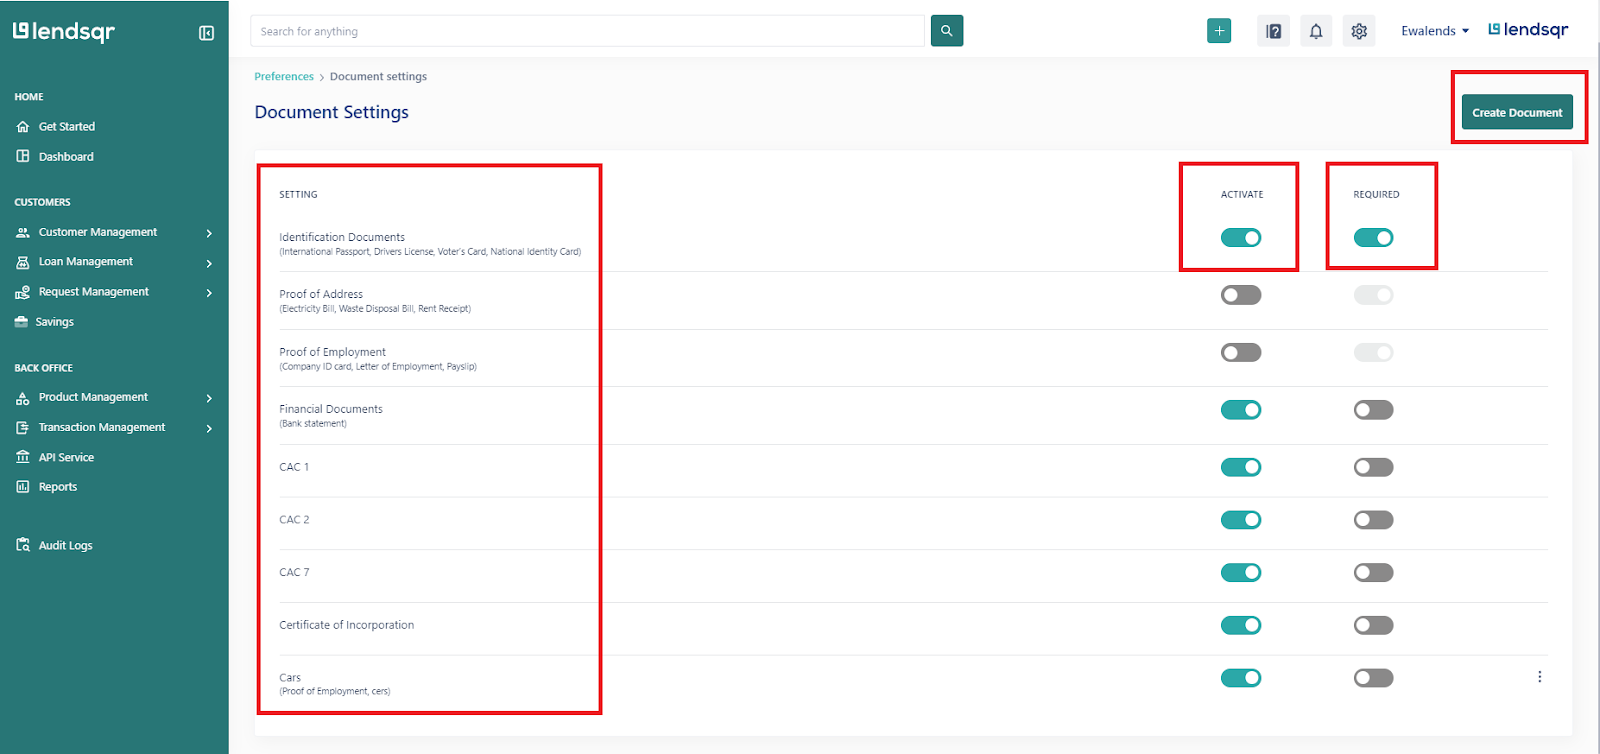
To choose these documents as an admin, you can toggle on or off the “activate” toggle button. When a document is activated, it will be displayed to borrowers on the mobile app under the “Documents” screen as an optional document to be submitted before a loan can be taken.
You are also allowed to toggle on or off the “required” toggle button. When a document is set to required, it is displayed under the “Documents” section of the mobile app as a “required” document to be submitted before a loan can be taken by the borrower and when required field is toggled off, the document does not carry any tag on the mobile app.
In addition, you can create and add a new document to the existing list of documents on the page. This can be done by navigating to the “create document” button and filling the document name and document type fields on the modal displayed.
Viewing the organization documents page
Creating a new document
Watch the video below explaining how to configure required documents for your users


 feature")