Access your Back Office at your fingertips.
Download the app now on Google Play Store.
Scan the QR code
You can also scan QR code with your phone to download the app.
How to onboard customers in bulk with Lendsqr
Introduction
Bulk customer onboarding allows lenders to create multiple customer profiles at once by uploading a single file. Instead of entering each customer manually, you can prepare an xlsx file and upload it to the platform, saving time and ensuring consistent, error-free data entry.
For lenders managing hundreds or thousands of users, manual customer registration becomes slow, repetitive, and prone to mistakes. Lendsqr’s bulk onboarding feature solves this by enabling you to upload an entire list of customers in one action.
This feature is especially useful for lenders who:
already operate offline and want to migrate existing customer records into the system
onboard customers from partner organizations, agents, or field officers
need to accelerate setup before launching new loan programs
want to ensure their data is standardized and ready for automated credit scoring and disbursements
By using the Lendsqr bulk onboarding tool, you can streamline your onboarding workflow, reduce errors, and start lending faster.
Common use cases
Bulk onboarding is ideal for:
Traditional microfinance institutions digitizing their customer records
Agent networks that collect customer data in the field
Cooperatives or thrift groups onboarding members at scale
Fintech startups launching new products and needing all customers pre-registered
Migration of data from an old system into Lendsqr
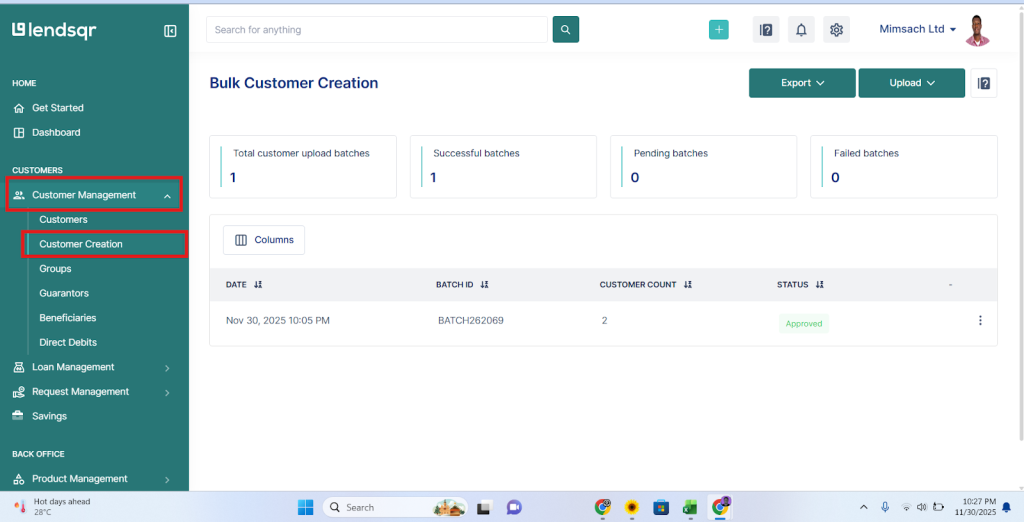
To bulk create customers, follow the steps below:
1. Navigate to the “Customers” section
Go to the Customers tab under Customer Management.
Click on Customer Creation.
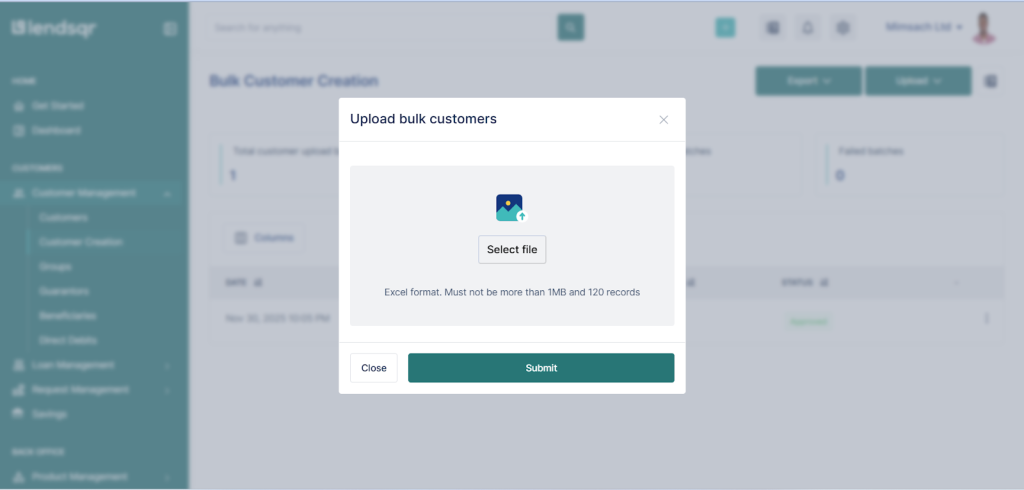
2. Click on the “Upload” button
Once on the Customer Creation page, click the Upload button. A popup appears with two options:
Download Sample – this gives you a sample Excel template.
Upload Customers – used to upload the populated sheet.
3. Download and populate the customer template
Click Download Sample to get the Excel sheet and proper format.
Fill the sheet with your customer data.
Important:
Maximum number of records per upload: 120
Maximum file size: 1MB
4. Upload your populated file
After populating the sheet, click Upload Customers.
Select the Excel file and proceed.
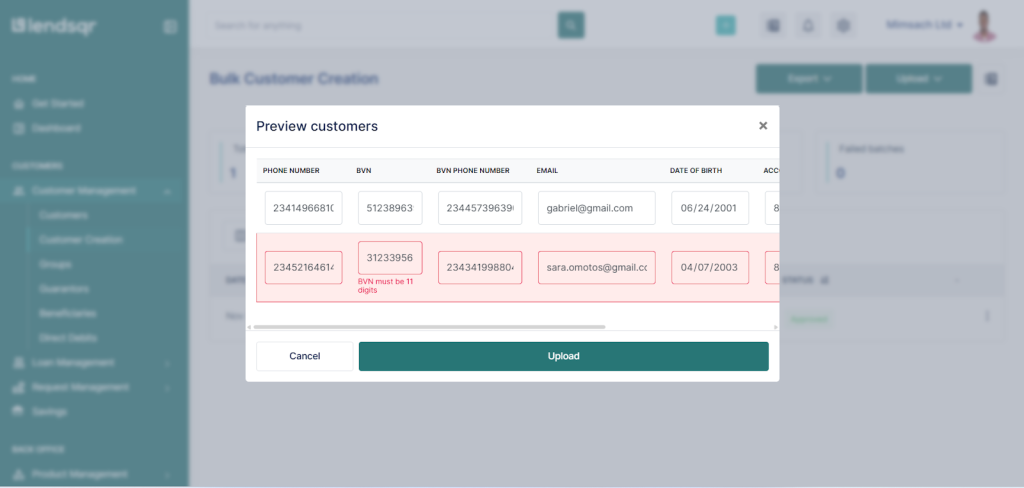
Once uploaded successfully, a preview window will display all customer data from the file.
In this preview window, you can:
Verify all data
Edit incorrect entries
Confirm before final submission.
If any row or column has an issue, it will be highlighted in red for easy identification.
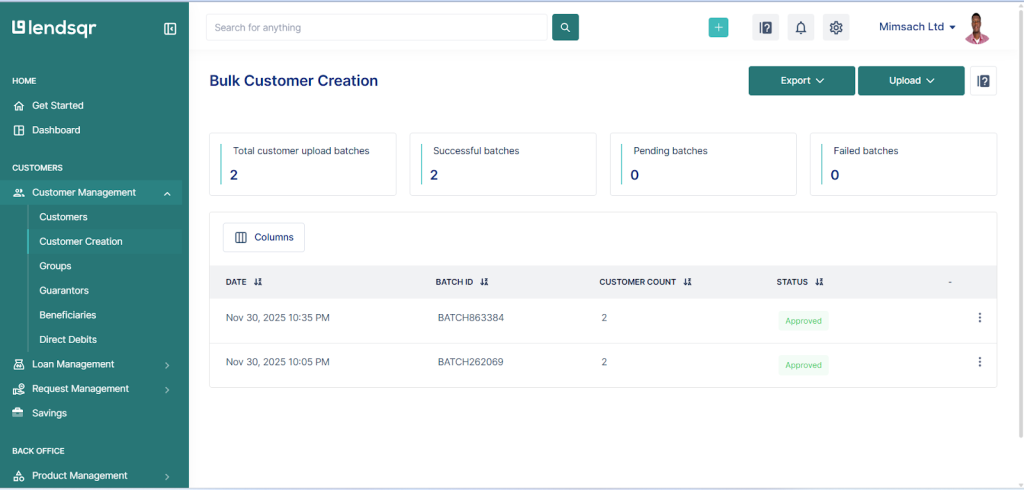
5. Submit your upload
Once everything looks good, click Submit.
The system returns:
Upload date
Batch ID
Number of customers uploaded
Status of the upload
If your organization already has an approval workflow set up, the upload will go through approval. If not, the upload is automatically approved.
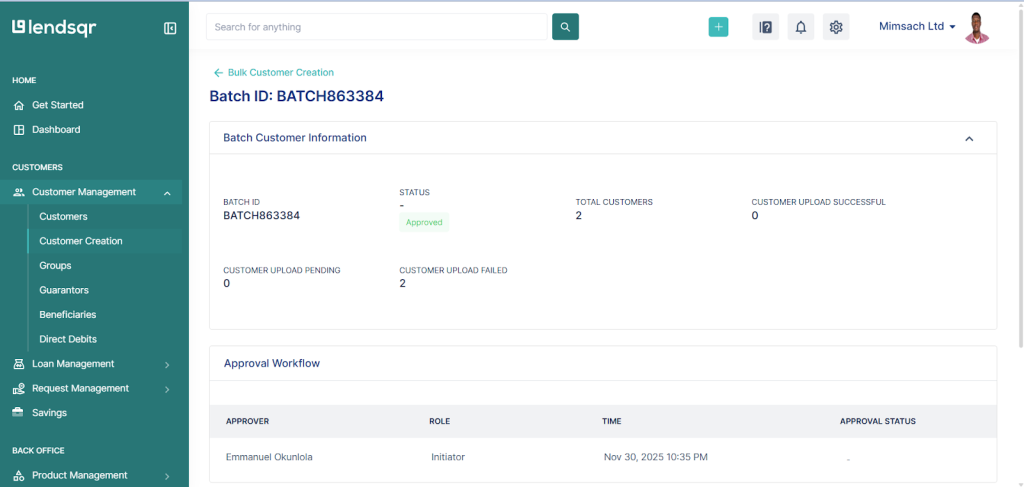
6. View details of your uploaded batch
To see more details:
Click the three dots (⋮) on the upload record.
You will see:
Batch customer information
Approval workflow
Customer information with status for each record
Each customer shows whether they were successfully created or not, along with reasons for failure when applicable.
Template format (xlsx only)
Your upload file must be in xlsx format and must include the following fields:
Field name
Description
email
Customer’s email address.
phone_number
Customer’s phone number in international format (e.g., 234…).


 feature")

