Access your Back Office at your fingertips.
Download the app now on Google Play Store.
Scan the QR code
You can also scan QR code with your phone to download the app.
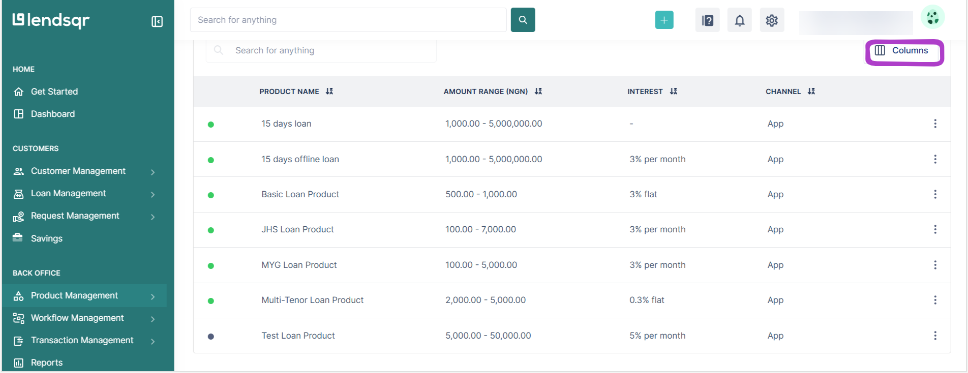
How to use the column filter on every table on the admin console
We’re always improving our tools to make our users’ workflow smoother, faster, and more intuitive, which is why we introduced a Column Filter Feature on every table across the Admin Console, giving you full control over what information you see at a glance.
This enhancement allows you to customize your table view by choosing which columns are displayed, ensuring that you focus only on the data that matters most to you. Whether you’re managing transactions, reviewing user accounts, or tracking funding activities, this feature helps streamline your dashboard experience and reduce information overload.
Imagine you’re reviewing users’ transaction activities. Previously, you might have had to scroll through multiple columns, some of which weren’t always relevant to your immediate task. With the Column Filter, you can now hide non-essential columns and focus only on the ones you need, such as User Name, Transaction ID, Amount Funded, and Date Funded. This makes your analysis cleaner and faster, enabling you to identify trends and resolve issues more efficiently.
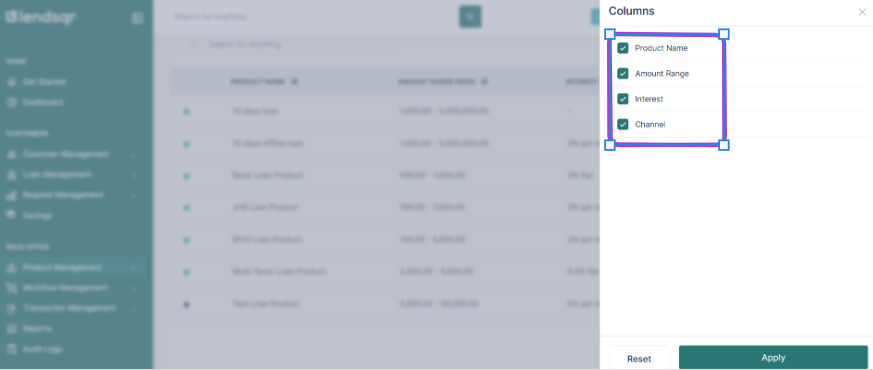
How to Use the Column Filter Feature
Here’s how you can start using the new feature right away:
1. Navigate to a Table Log in to the Admin Console and open any table (for example, Users, Transactions, or Loans).
2. Access the Column Filter Look for the Column Filter icon or menu option usually located at the top-right corner of the table interface
3. Select Columns to Display A list of all available columns will appear, check the boxes beside the columns you want to show and uncheck those you want to hide.
4. Apply Your Changes Click Apply to update your table view instantly.


 feature")


