
Introduction
Custom roles in the Lendsqr Admin Console allow you to control who can access specific features, data, and actions within your system. Instead of assigning broad, one-size-fits-all permissions, you can tailor access levels to match each team member’s responsibilities. This reduces operational risk, protects sensitive data, and keeps workflows focused.
This guide walks you through creating, assigning, and managing custom roles effectively, along with key limitations and best practices to keep in mind.
Also read: How Open Banking will transform Credit in Nigeria
Before you begin
Before creating custom roles, confirm the following:
- Your subscription plan supports role-based access control. If not, you’ll need to upgrade your plan.
- You have administrative privileges or sufficient permissions to manage roles.
- You’ve clearly defined job functions within your team (e.g., Loan officer, Credit analyst, Finance manager).
Without these prerequisites, you may not be able to access or fully utilize the feature.
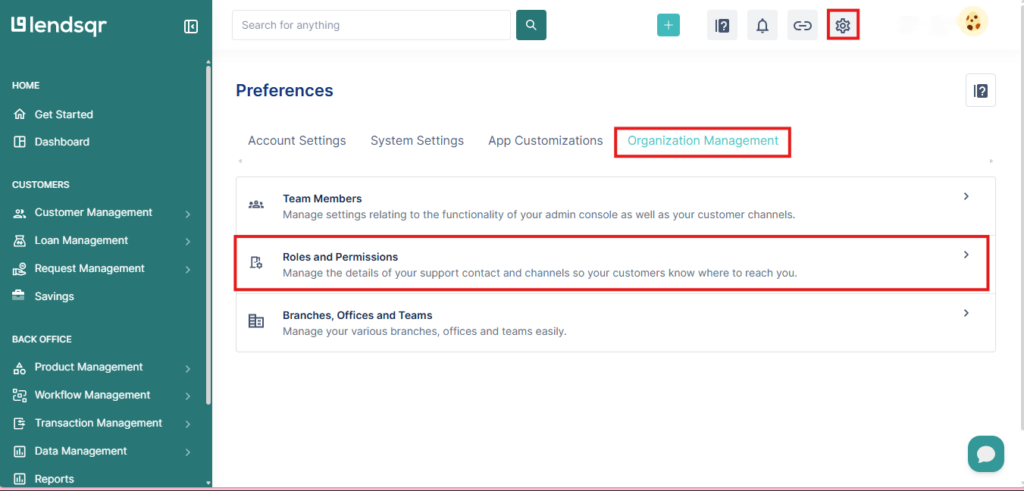
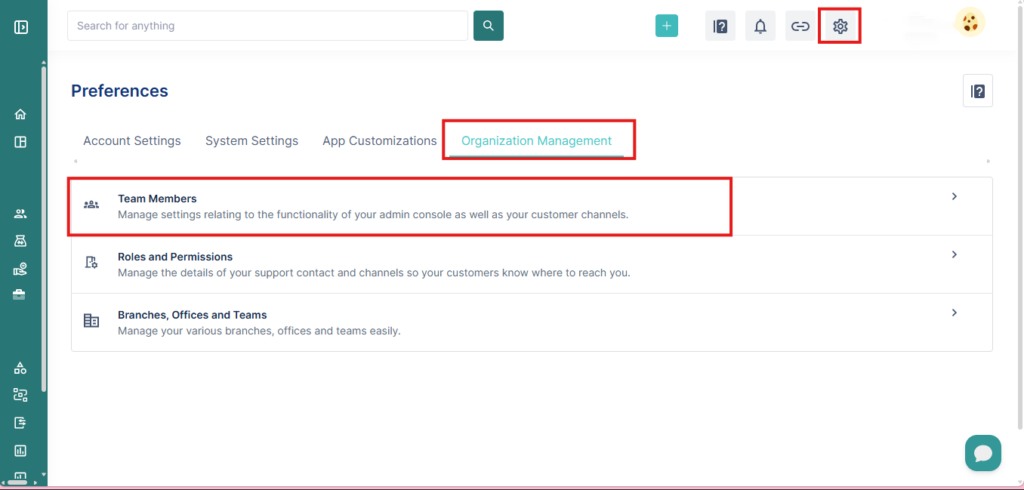
Step 1: Access the Organization Management section
- Log in to your Lendsqr Admin Console.
- Navigate to the “Organization Management” section in settings.
- Select “Roles and Permissions”
This section displays all existing roles and their assigned permissions.
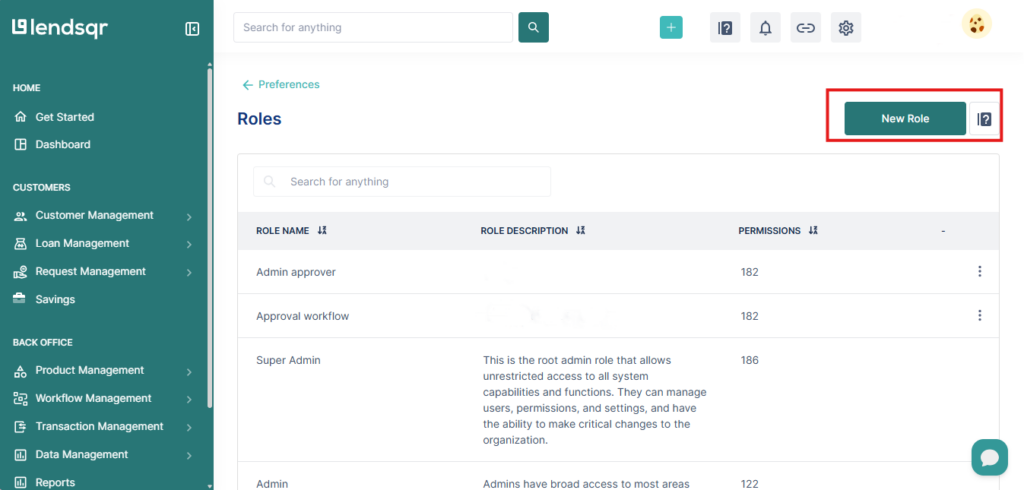
Step 2: Create a new role
- Click on “New Role”
- Enter a clear and descriptive role name (e.g., “Loan Officer”).
- Add a short description to define the role’s purpose.
Be specific with naming. Avoid vague titles like “Staff” or “User,” as these can create confusion when scaling your team.
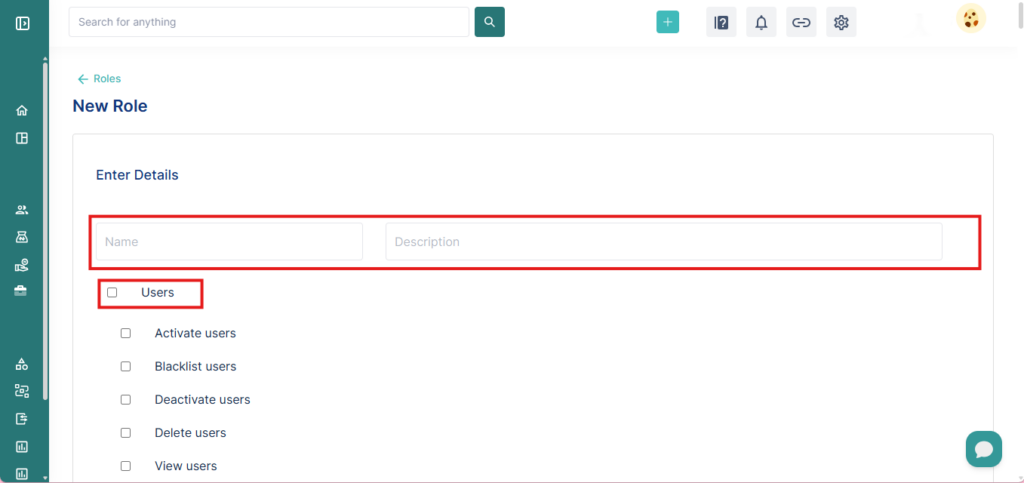
Step 3: Assign permissions
Once the role is created, you’ll need to define what actions users in that role can perform.
Permissions are typically grouped into categories such as:
- Users, where staff can activate, blacklist, and deactivate users.
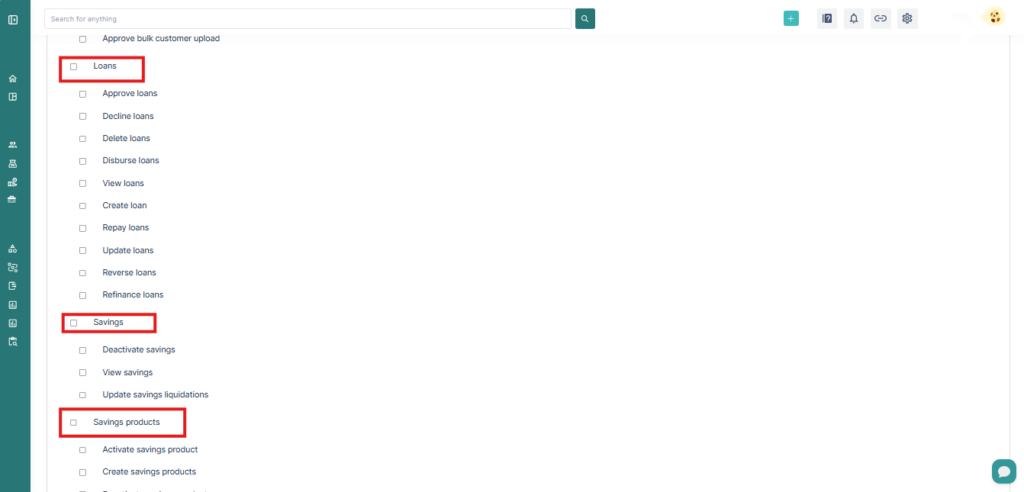
- Loans, where staff can approve loans, decline loans, delete loans, and disburse loans.
- Savings and savings products where staff can activate, create, and deactivate them.
- Loan products where staff can activate loan products, create loan products, and deactivate loan products.
- Audit, where staff can download audit trails, and view audit.
- Team and roles, where staff can activate team members, assign roles, and create roles.
- Transactions, where staff can download transactions, view transactions, and post transfers.
- Whitelist, where staff can view whitelist, download whitelist, and edit whitelist.
- Settlement, where staff can download settlement and view settlement.
- Lendsqr, where staff can start operations transaction and approve operations transaction.
- Guarantors, where staff can view guarantors, blacklist guarantors, and delete guarantors.
- Dashboard, where staff can edit contact details, view contact details, and view dashboard.
- Documents, where staff can delete documents, update documents, and create documents.
- Decision models, where staff can view decision models, create decision models, and delete decision models.
- Disbursements, where staff can view disbursement and transfer funds.
- Adjutor, where staff can view adjutor, generate adjutor keys, and create adjutor apps.
- Services, where staff can view services.
- Reports, where staff can view reports.
- Settings, where staff can view settings, add settings, and update settings.
- Loan invites, where staff can view loan invites, download loan invites, and create loan invites.
- Liquidation requests, where staff can approve liquidation requests, decline liquidation requests, and delete liquidation requests.
- Referral configuration, where staff can create referral configuration, create referral settings, and update referral settings.
- Notification settings, where staff can create notification settings and update notification settings.
- Domain settings, where staff can create domain settings.
- Organization documents, where staff can view organization documents.
- Offer letters, where staff can view offer letters.
- Roles and permissions, where staff can create roles, view roles, and create permissions.
- Tier management, where staff can view tier management, create tiers, and update tiers.
- Web app settings, where staff can view web app settings.
- Messaging, where staff can view messaging.
- Beneficiaries, where staff can view beneficiaries, create beneficiaries, and update beneficiaries.
- Distributed products, where staff can view distributed products.
- Fees and pricing, where staff can view fees, create fees, and update fees.
- Mandates, where staff can view mandates, create mandates, and activate mandates.
- Account, where staff can manage organization, create attributes, and update attributes.
- Approval workflows, where staff can create approval workflows, view approval workflows, and update approval workflows.
- Groups, where staff can create groups, view groups, and update groups.
- Data lookup, where staff can view data lookup and create data lookup.
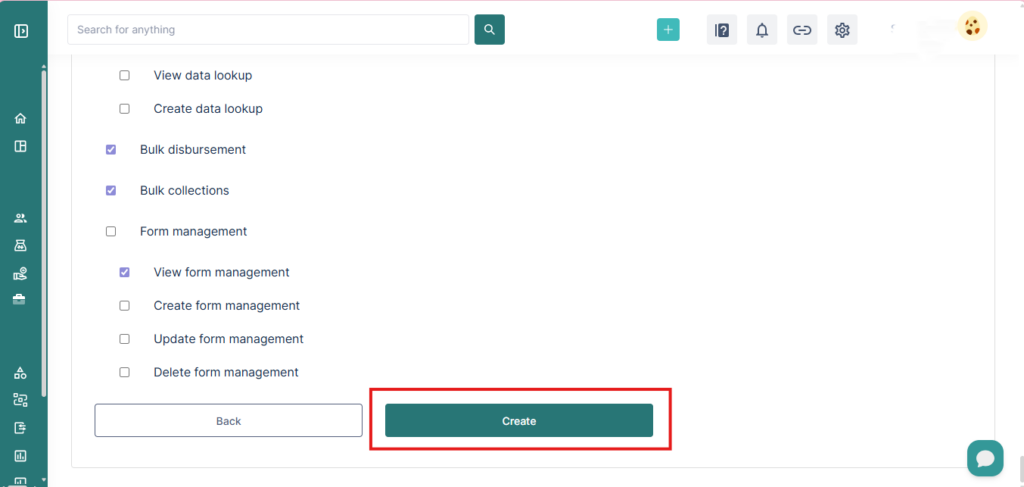
- Form management, where staff can view form management, create form management, and update form management.
To configure permissions:
- Select the relevant permission categories.
- Check the specific actions you want to allow.
- Leave unchecked any actions that should be restricted.
For example, a “Loan Officer” role might include:
- Access to loan applications (view, approve, reject)
- Access to borrower profiles
- Access to repayment schedules
But exclude:
- Financial reporting tools
- System configuration settings
- Administrative user management
Step 4: Save and review the Role
After assigning permissions:
- Click “Create.”
- Review the role configuration to ensure accuracy.
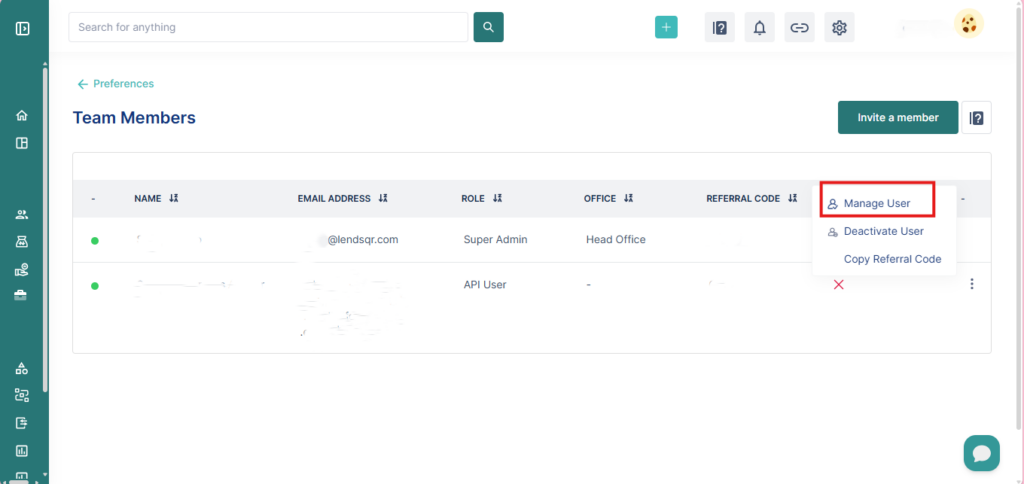
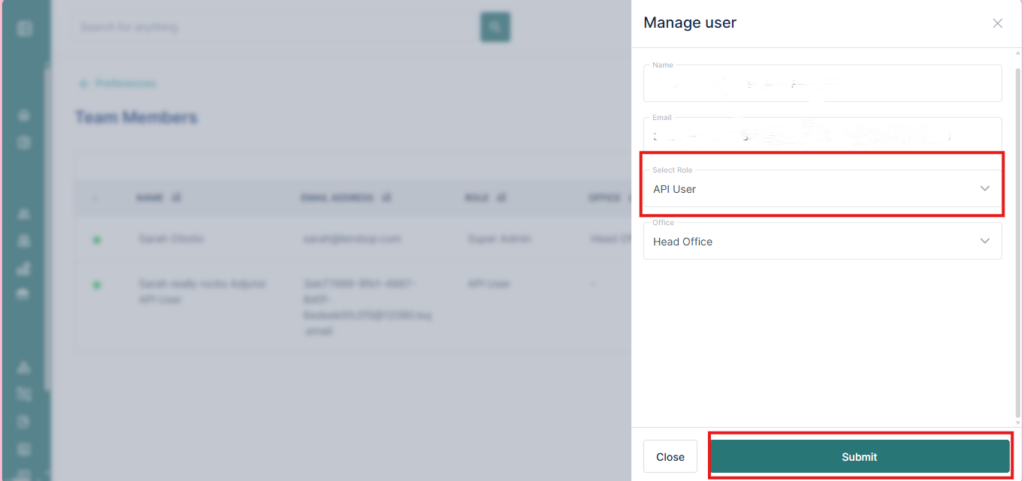
Step 5: Assign roles to team members
To assign a role:
- Go to the “Team Members” or “Users” section.
- Select the user you want to update.
- Choose the appropriate role from the role dropdown.
- Save changes.
The user’s access will update.
Step 6: Edit or Update Roles
As your organization evolves, roles may need adjustment.
To modify a role:
- Return to the “Roles & Permissions” section.
- Select the role you want to edit.
- Update permissions as needed.
- Save changes.
Note that changes to a role will affect all users assigned to that role. Always review the impact before making updates.
Step 7: Delete roles
If a role is no longer needed:
- Locate the role in the roles list.
- Click “Delete”
If users are assigned to that role, you may need to reassign them before deletion.
Also read: How to delete team members
Key constraints and limitations
While custom roles are flexible, there are a few practical constraints to keep in mind:
- Plan restrictions: Lower-tier plans may limit the number of roles or permissions available.
- Permission dependencies: Some actions may require related permissions to function properly (e.g., editing a loan may require viewing it first).
- System-critical roles: Certain default roles (like “Super Admin”) may have non-editable permissions.
Understanding these constraints helps avoid configuration errors and unexpected access issues.
Best practices for role design
To get the most value from custom roles, follow these practical guidelines:
- Grant only the permissions necessary for a role to perform its tasks. Avoid over-permissioning.
- Design roles based on actual responsibilities, not titles alone.
- Avoid creating too many highly specific roles; they can be difficult to maintain.
- Use consistent, descriptive naming (e.g., “Credit Analyst – Read Only”).
- Periodically audit roles and permissions to ensure they still reflect current workflows.
Common mistakes to avoid
- Assigning excessive permissions “just in case”
- Using one role for multiple unrelated job functions
- Failing to update roles as team structures change
- Not documenting what each role is intended to do
- Skipping testing before assigning roles to real users
These mistakes can lead to security risks, inefficiencies, or operational confusion.
Practical example
Suppose your organization has three key roles:
- Loan Officer: Handles loan applications and borrower interactions
- Finance Manager: Oversees financial reports and repayment tracking
- System Administrator: Manages system settings and user access
Instead of giving all three roles full access, you configure:
- Loan Officer: Limited to operational tasks
- Finance Manager: Access to financial data but not system settings
- System Administrator: Full access, including configuration and user management
This separation ensures that sensitive financial and system-level controls are restricted to appropriate personnel.
Watch this video to learn how to assign custom roles and permissions to your team members
Related Guides:

 feature")

