Enterprise Authentication with SSO for Back Office Admins

Introduction

Single Sign-On (SSO) is a secure authentication method that allows users to log in once and access multiple applications without needing to remember separate credentials for each. For Back Office admins, enabling SSO ensures consistent, centralized access control, reduces password fatigue, and enhances security by integrating with your enterprise identity provider.

Use Case:
Organizations using Lendsqr’s Back Office can enforce enterprise-level authentication by requiring all users to authenticate through a trusted identity provider such as OneLogin, Okta, or Azure AD. This is particularly useful for companies that want to:

  • Centralize authentication management
  • Enforce strict security policies
  • Improve user experience with seamless logins

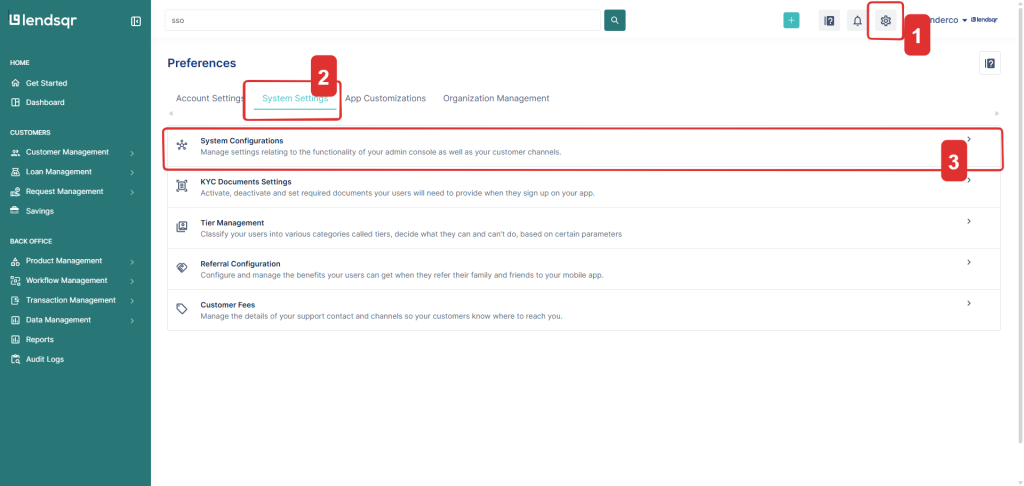
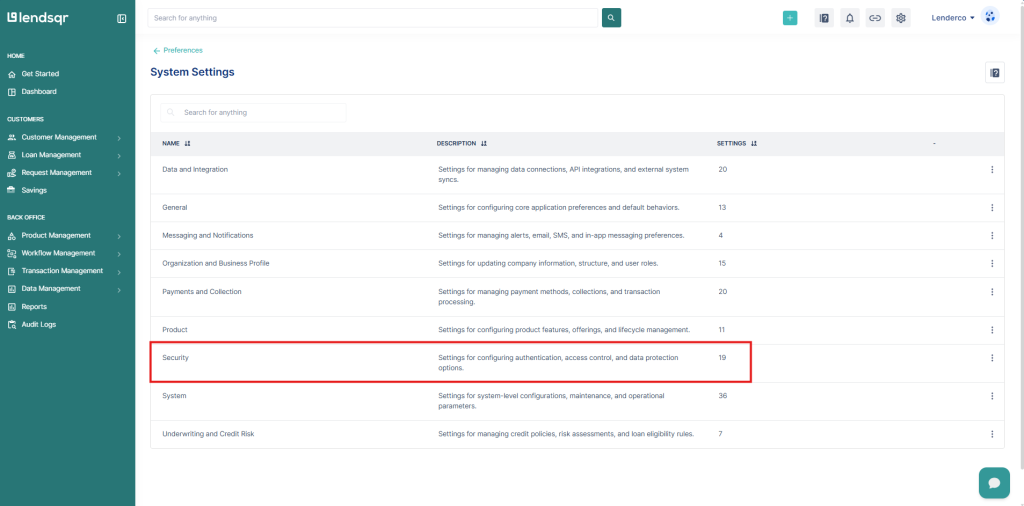
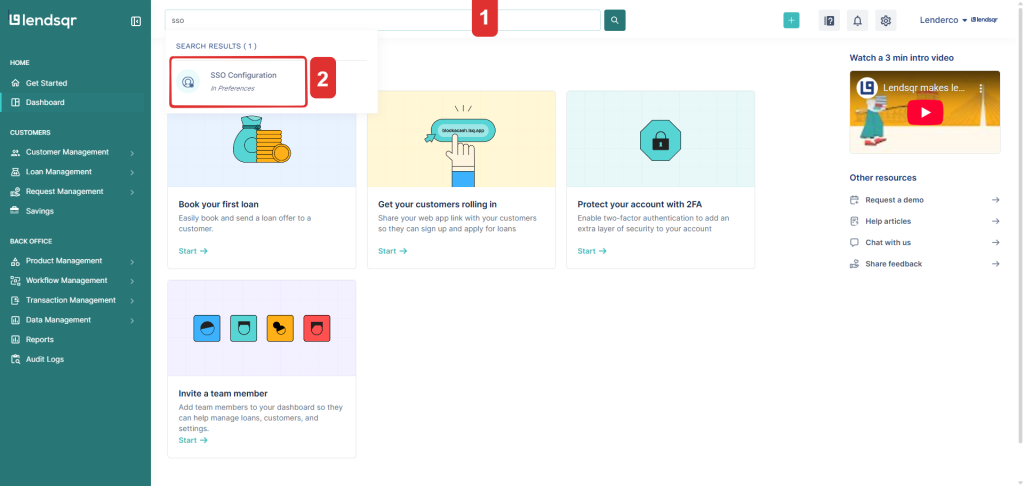
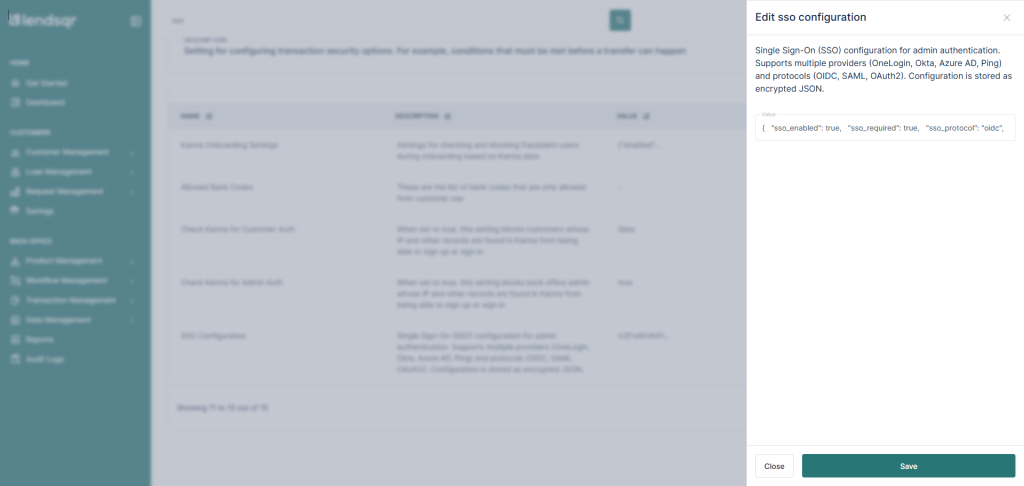
Configuration Overview

To enable SSO, you need a configuration payload. This payload is automatically encrypted when saved in the system to ensure sensitive data like client_secret remains secure.

Here’s an example of the payload:

{
  "sso_enabled": true,
  "sso_required": true,
  "sso_protocol": "oidc",
  "sso_provider": "onelogin",
  "client_secret": "",
  "client_id": "",
  "issuer_url": "",
  "redirect_uri": "https://app.lendsqr.com/sso/ORG_SLUG",
  "scopes": ["openid", "profile", "email"],
  "provider_specific_config": {
    "subdomain": "your-subdomain"
  }
}

Explanation of each Parameter

  • sso_enabled: Enables SSO for your organization. Set to true to activate.
  • sso_required: Enforces SSO login for all users. Set to true to make it mandatory.
  • sso_protocol: Defines the protocol used. Most providers use oidc (OpenID Connect).
  • sso_provider: Specifies the identity provider (e.g., onelogin, okta).
  • client_secret: The secret key from your SSO provider. This should be kept confidential.
  • client_id: The client identifier from your SSO provider.
  • issuer_url: URL provided by your identity provider that issues authentication tokens.
  • redirect_uri: The URI where users are redirected after successful authentication. Replace ORG_SLUG with your organization’s unique slug.
  • scopes: Permissions requested during authentication. Common scopes include openid, profile, and email.
  • provider_specific_config: Additional configuration unique to your provider. For OneLogin, this includes subdomain.

Step-by-Step Setup Guide

1. On the admin dashboard, click on the Settings (Gear) icon from the top navigation bar.

2. Click on the System Settings Tab

3. Select System Configurations

4. Scroll down and Select Security Settings

A quicker route: Use the search bar on the admin console and search for SSO Configuration

5. On the resulting page, scroll down to the bottom of the table and select 2 or the next page (>) button.

6. Click on Edit beside SSO Configuration

7. Replace the encrypted default with the required configuration.

8. Click on Save.

Notes

  • Make sure your identity provider settings (client ID, secret, redirect URI) are correctly configured.
  • Always test the SSO flow with a test user before enforcing it organization-wide.
  • If SSO is misconfigured, users may be unable to log in.

Was this page helpful?