1. Go to organizational settings via the “settings icon” at the top right of the page in the Lendsqr admin console.
2. Select “Team Members” to view all team members in your organization.
3. Search for the team member whose branch or office you wish to edit and click the three dots beside the admin user’s name and select “Manage User “.
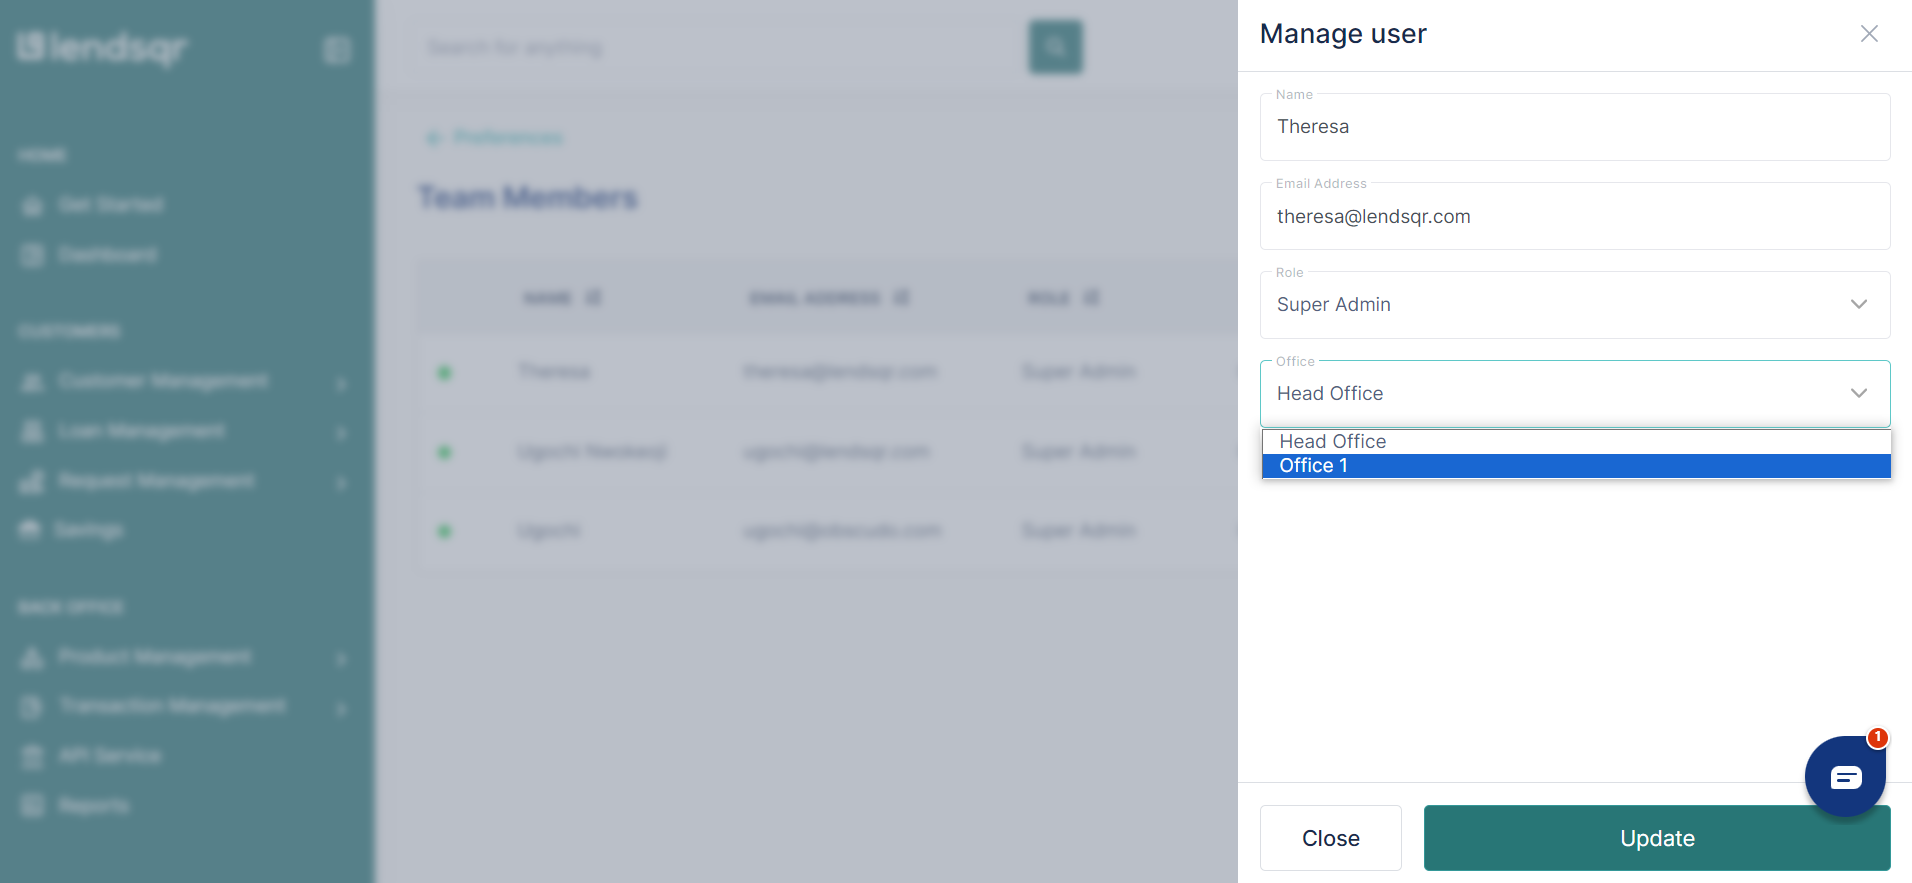
4. This modal will open allowing you to use the office dropdown to change the office of the selected team member. Keep in mind that the dropdown only works when you have already created more than one office.
Having gone through the steps above, this is how you can successfully edit a team member’s branch or office via the admin console.