Access your Back Office at your fingertips.
Download the app now on Google Play Store.
Scan the QR code
You can also scan QR code with your phone to download the app.
How to Initiate Refinancing Requests from the Web App
Users can request loan refinancing directly from the web app. This feature allows them to extend, shorten, or adjust their existing loan terms and even add new capital if needed, without having to fully repay and reapply for a new loan. This guide explains how users can initiate these refinancing requests, which are then sent to the admin for review and approval through the Back Office.
Prerequisites
For a loan to have the Refinancing Request option available on the web app:
The product associated with the loan must have refinancing enabled in the Admin Console.
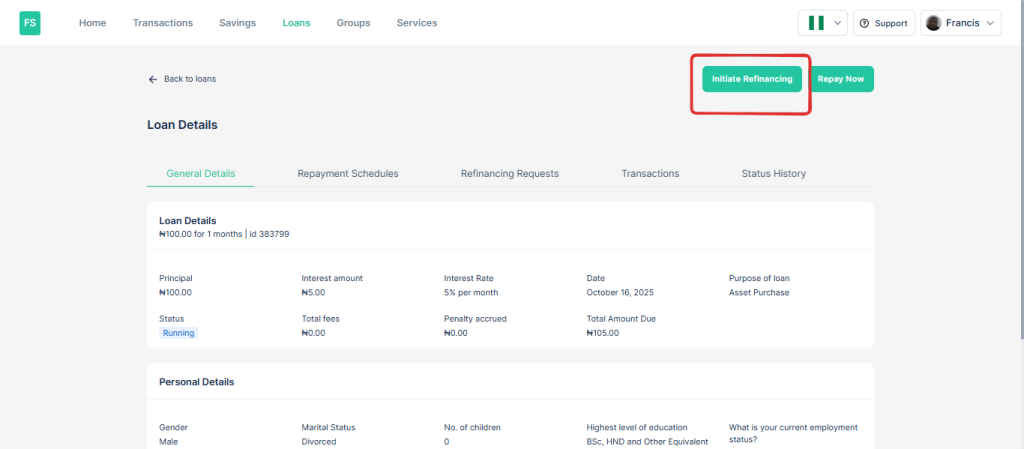
Select a loan that was applied for under a product with refinancing enabled.
Click the Initiate Refinancing button.
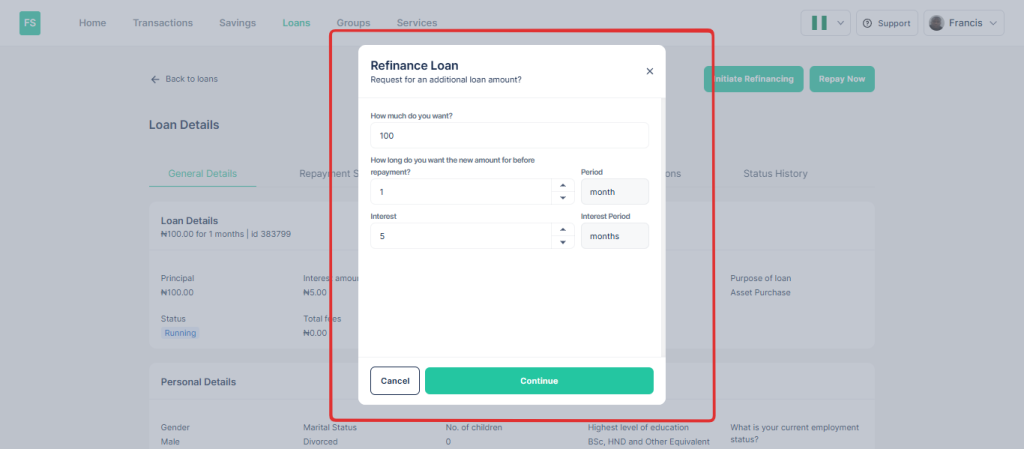
In the Refinancing Modal, specify:
The additional amount you want to request.
The new loan duration.
The desired interest rate (if applicable).
Click Submit to send the request.
Once submitted, the request will be sent to the Admin Console for review.
Steps on the Admin Console
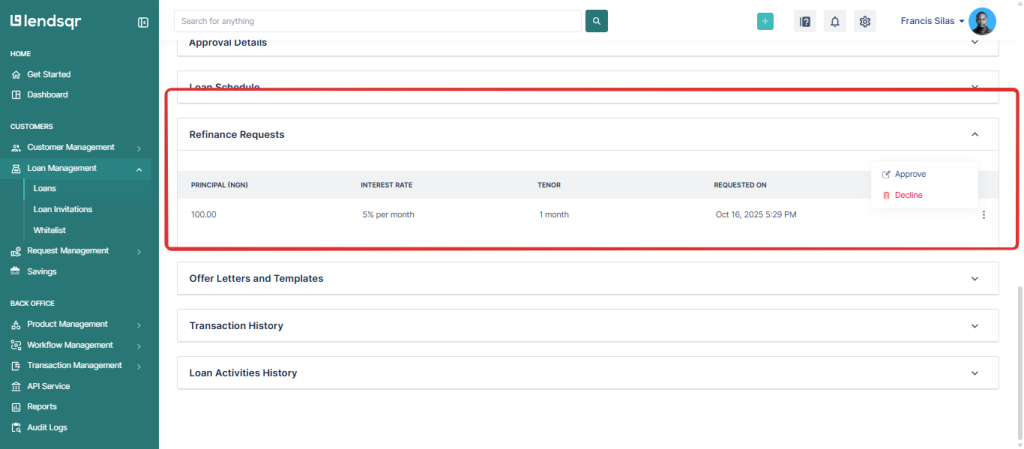
Navigate to the Loans page.
Scroll down to the Refinance Request section.
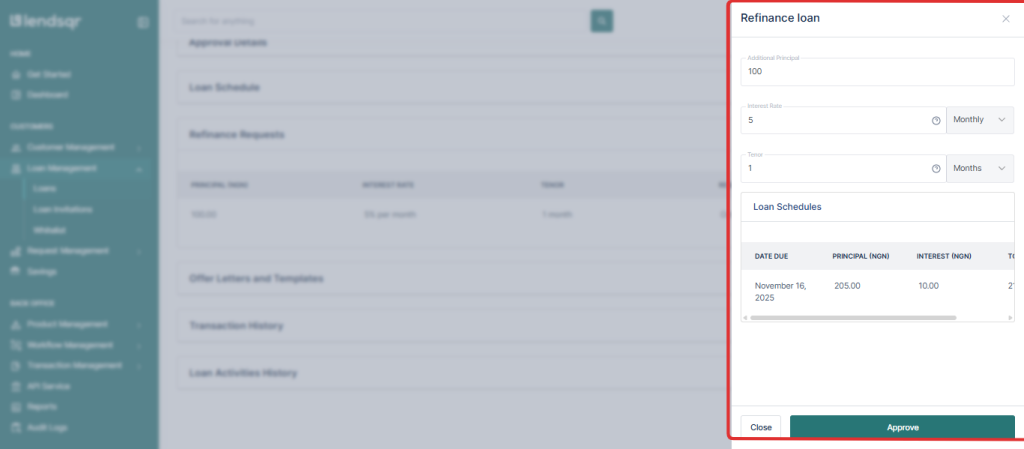
Review the submitted request and either Approve or Decline it.
On approval, any additional requested amount will be disbursed, and the loan schedule will be updated to reflect the new terms alongside existing scheduled payments.

 feature")
