Access your Back Office at your fingertips.
Download the app now on Google Play Store.
Scan the QR code
You can also scan QR code with your phone to download the app.
How to Trace Transaction Details
Tracing a transaction
In digital finance and customer support, the ability to trace a transaction quickly and accurately is crucial. Whether you’re verifying a payment, resolving a customer complaint, or auditing financial records, knowing how to locate a specific transaction saves time and reduces errors.
To learn how to view a transaction read the guide here.
The admin console typically offer multiple ways to search for transactions either by transaction ID, date range, or transaction amount. This guide explains how to use each method effectively so you can streamline your transaction tracing process.
There are three different methods to tracing a user’s transactions. You can trace a transaction by using the transition ID, using a date range and using the a transaction amount.
1. Using transaction ID
The best way to filter a transaction is by using the unique transaction ID as the result would be exact transaction you are looking for.
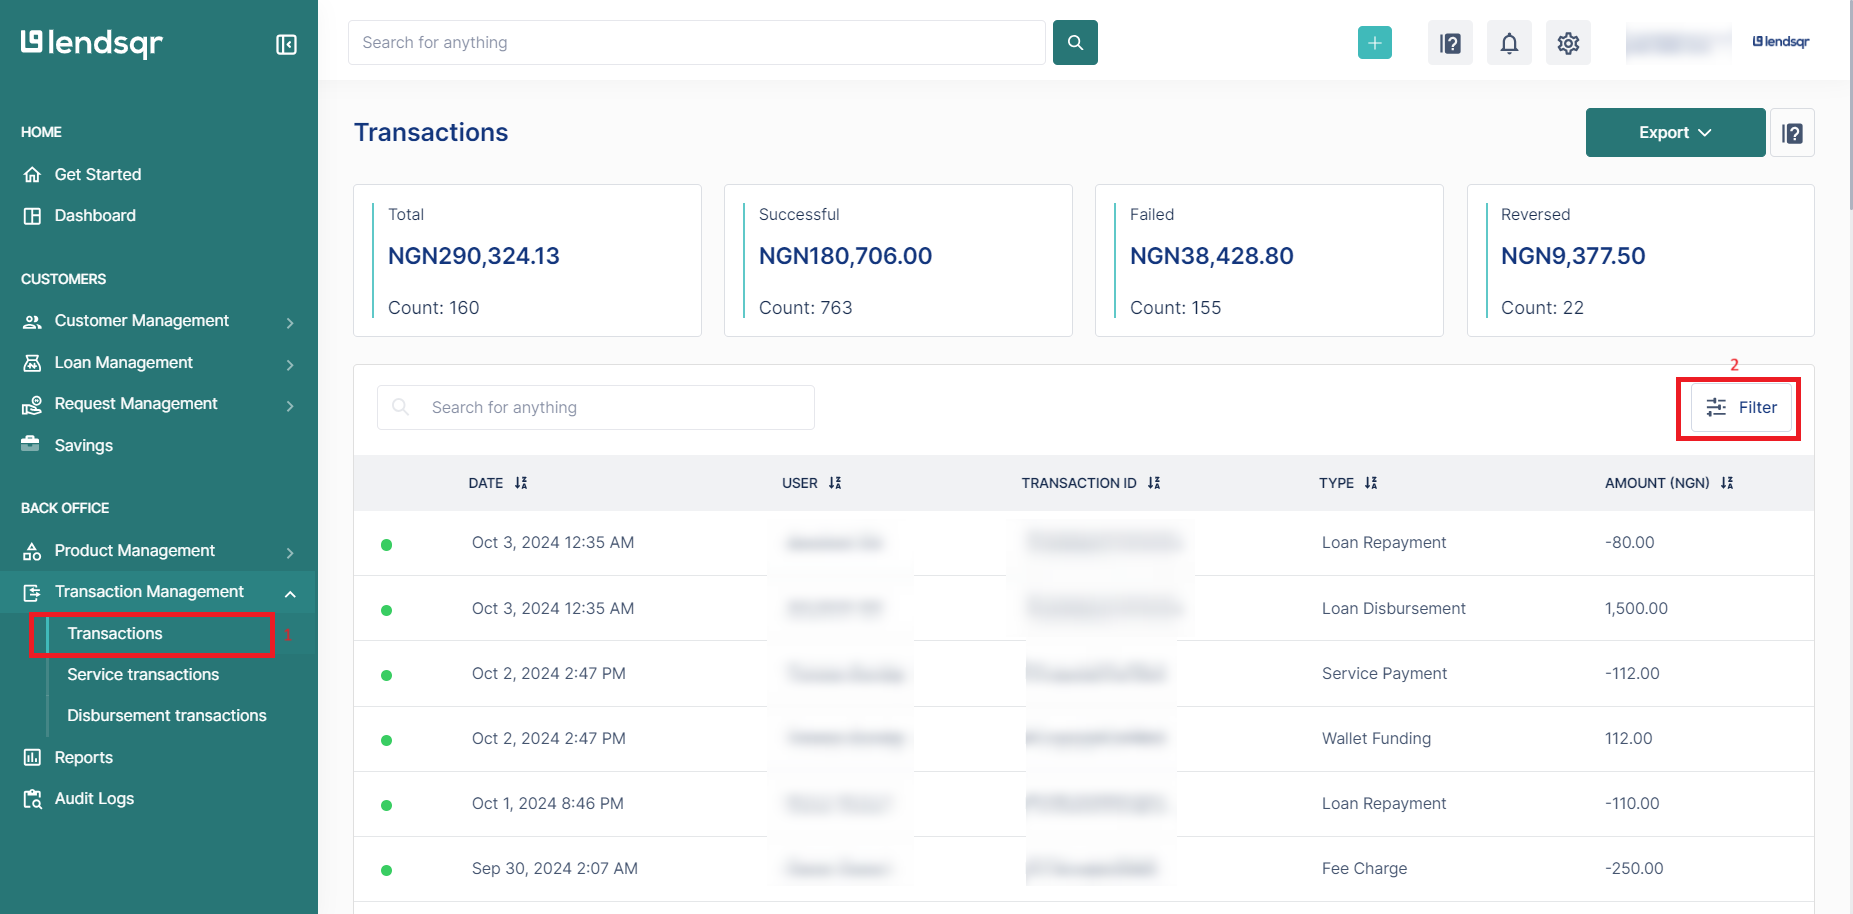
Navigate to ‘Transactions’ on the side navigation pane
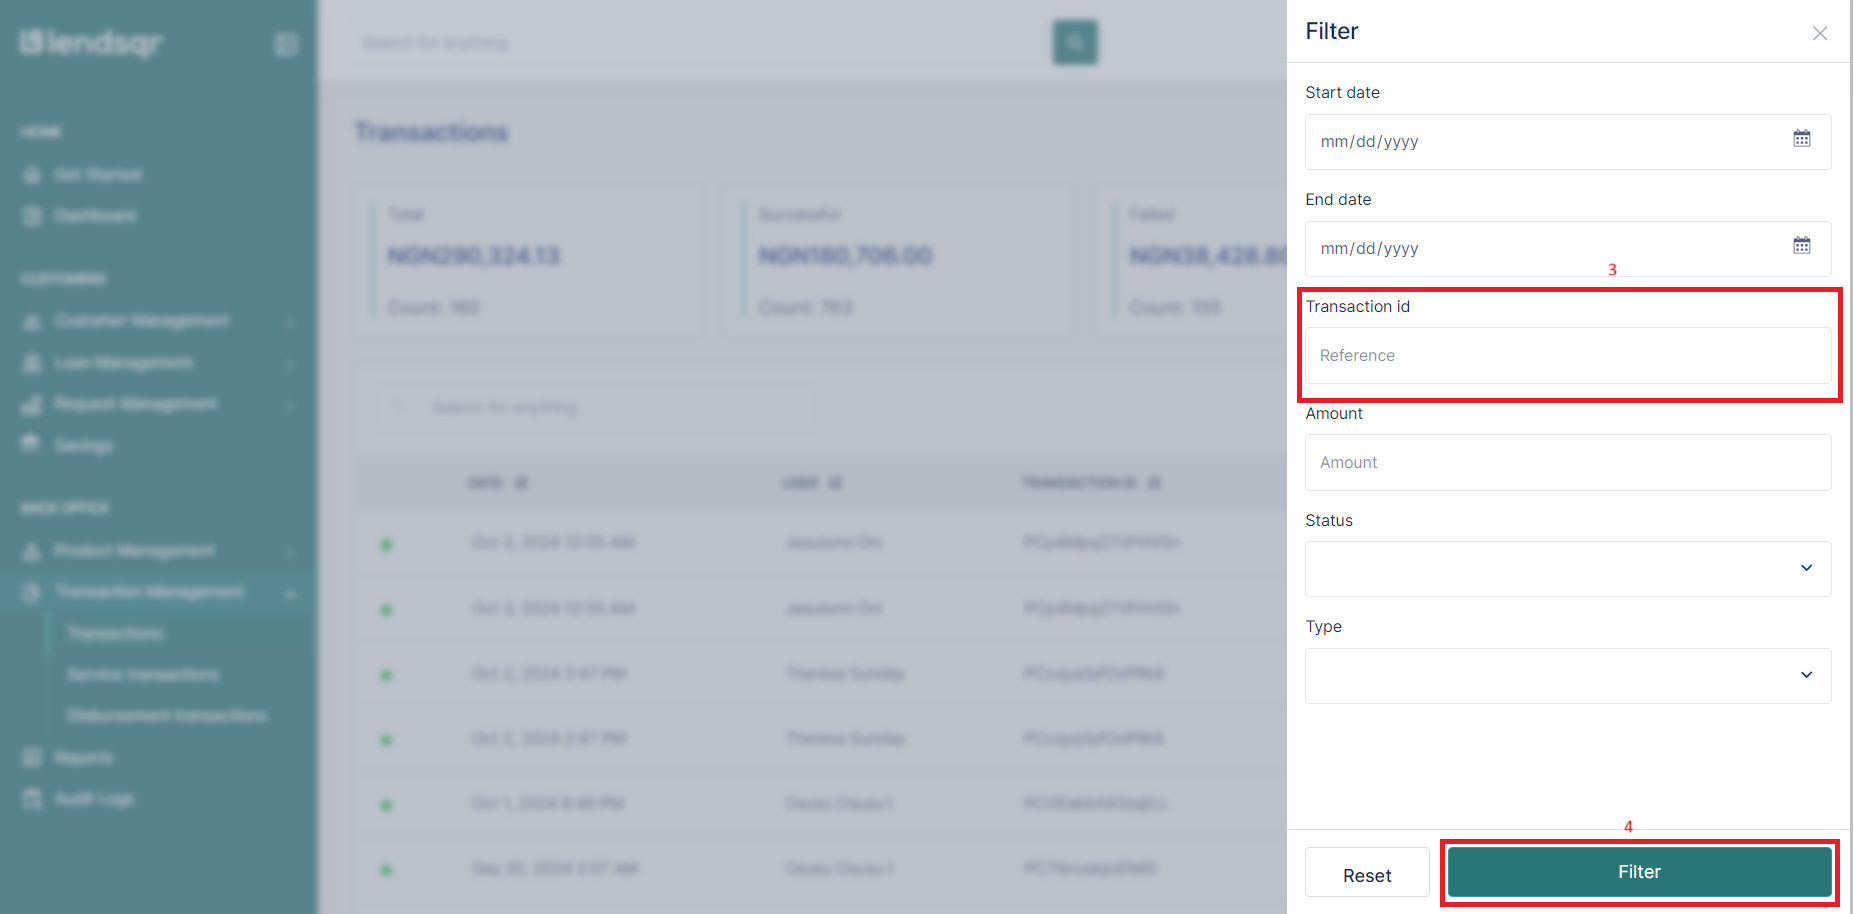
Click on ‘Filter’
Input the transaction ID
Click ‘Filter’
Filtering transaction using transaction ID
2. Using date range
Navigate to ‘Transactions’ on the side navigation pane
Click on ‘Filter’
Enter the start date
Enter the end date
Click ‘Filter’
Filtering transaction using date range
3. Using amount
Navigate to ‘Transactions’ on the side navigation pane
Click on ‘Filter’
Input the transaction amount
Click ‘Filter’
Filtering transaction using amount
Transaction details
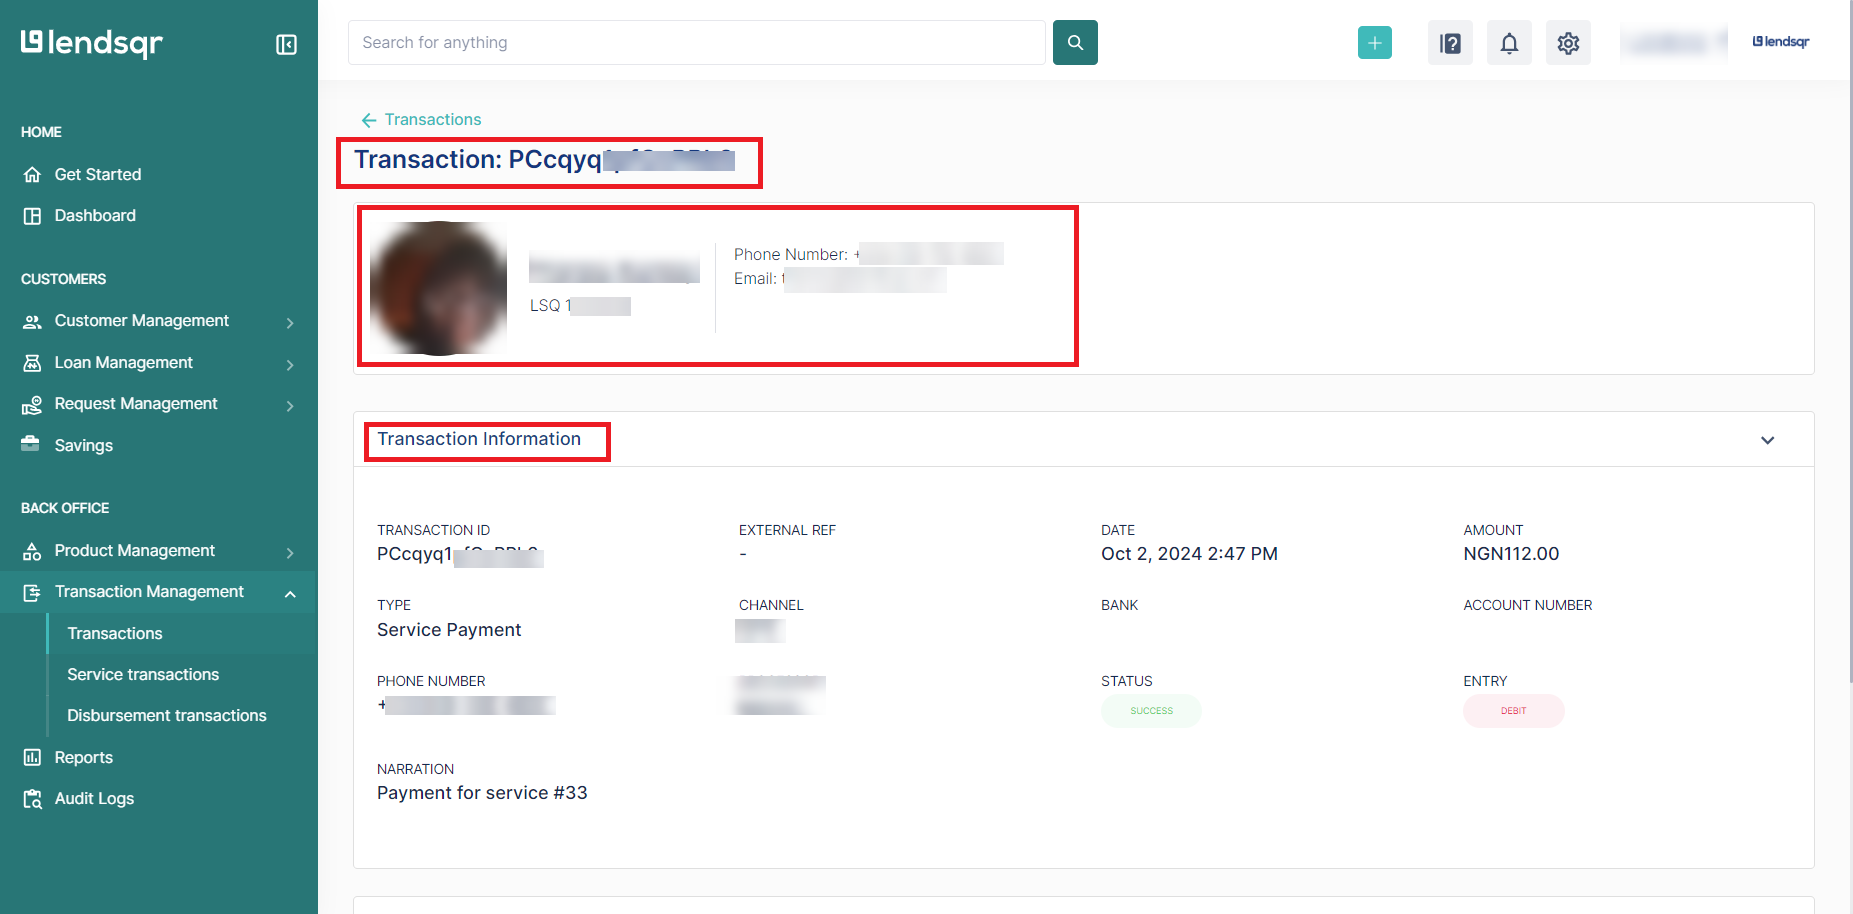
After filtering a transaction, below details are seen:
Transaction ID
User’s Details – full name, selfie, email address, user ID, phone number.
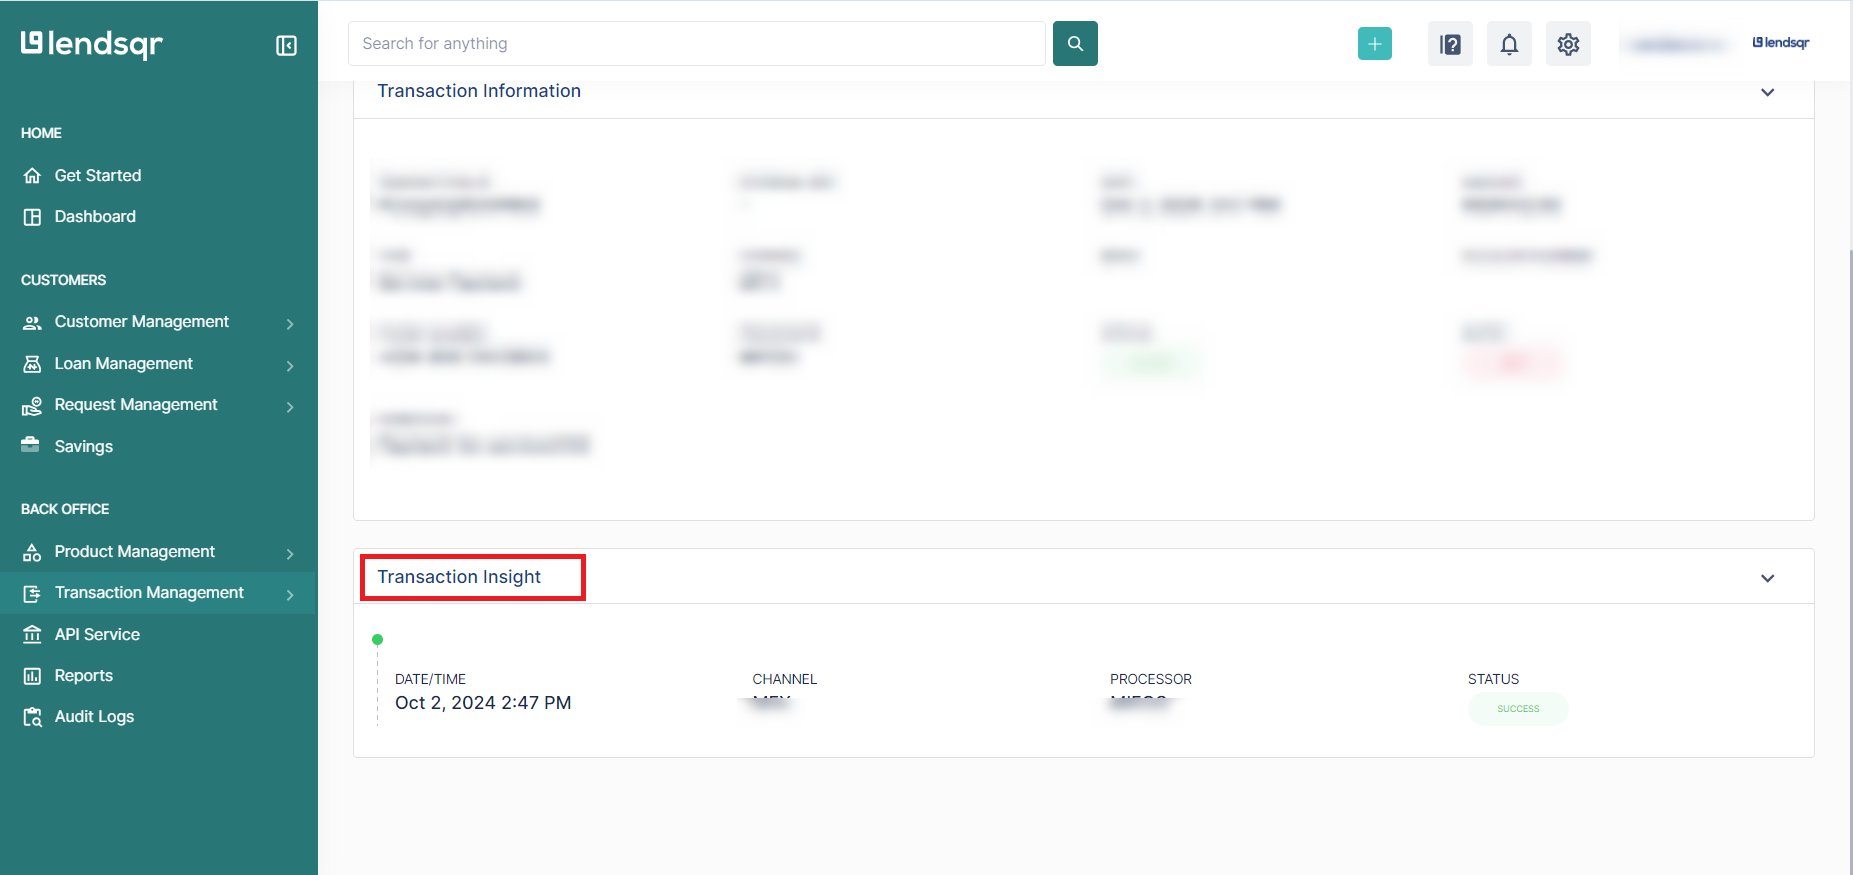
Transaction Information – transaction ID, external reference, amount, type, transaction type, etc.
Transaction Insight – date, time, processor, status.
Clicking on the user’s selfie from here takes you directly to the user’s profile page


 feature")
