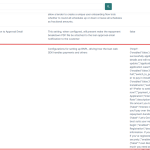
The loan products attributes section lets you adjust specific settings like repayment structure, interest type, and more without creating a new product from scratch. Here’s how to do it:
- Navigate to the “loan products” sub-tab under the “product management” tab in the customer’s section of the side navigation.
- Select an existing loan product and click on the “product attributes” tab
- Select the available attribute on the page and edit accordingly.

You can edit the following attributes:
Guarantor required: When enabled, the system requires borrowers to provide guarantors as part of the loan process. Guarantors can be as many as required and you can use the “number of guarantors” settings to determine how many guarantors should be provided by the borrower.

Guarantor message for borrowers: During a loan request, the system shows this message to inform the borrower that a guarantor is required. It ensures the borrower understands this requirement before proceeding. By setting this upfront, you clarify expectations early in the process.

Guarantor message: The system displays this message to the guarantor when they provide and validate their details.

Guarantor oraculi modules: This setting controls the decision that the system would use to validate a guarantor. Some options include Karma, Ecosystem, Scoring, Statement, Income, etc.

Guarantors required: This is the number of guarantors that a borrower must provide before this loan can proceed to approval.

Channels availability: The channels for which a loan product should be available. For example, when set to Android, the loan products would only show on Android devices

Statement data provider: This is simply a provider of statement data. For example, some options are Oraculi, Fenestra or Mono. Oraculi only works for loan products exclusively on Android devices.

Custom form builder: This configuration drives the configurable loan forms which allow a lender to get additional data from customers during the loan approval process

Card payments provider: This is the setting to select the card payment processor and provider. Examples include: Paystack, Seerbit, etc.

Location required: This setting drives if a product requires location or not. If set, then it would prompt the mobile or web app to request location. If not granted by the user, the request will fail

Loan prequalification: This setting controls if a customer can be prequalified for the loan. When set to true, when a customer signs up, the system can automatically run a loan request for the customer

Loan offer expiry: This setting is the duration in hours after which a loan offer expires. Within this period, a customer can accept a loan offer and turn it into a loan. Defaults to 750 hours, which is a month

Request payment method: This setting defines when the system prompts the customer to add a payment method during the loan request process. If you set it to before-loan-request, the system prompts the customer immediately after they submit their loan request. If set to after-loan-request, the prompt appears once they accept the loan offer.

Repayment methods: This setting determines which payment methods your customers will be asked to use for their loan repayments. When none is selected, the customer will be requried to pick one.

Loan extension setting: This is simply to specify the loan extension settings

Read further: Effective strategies to market your loan products


