Access your Back Office at your fingertips.
Download the app now on Google Play Store.
Scan the QR code
You can also scan QR code with your phone to download the app.
How to create custom forms using Lendsqr’s Drag-and-Drop form builder
Introduction
Lendsqr’s Drag-and-Drop Form Builder allows lenders to easily create, customize, and manage loan application forms without writing any code. With this builder, you can design forms visually, arrange questions in the right order, and preview exactly how borrowers will experience your form before it goes live.
The form builder is ideal for creating:
Loan application forms
Customer onboarding forms
Verification and document upload flows
Any custom data collection required for your lending products
This guide explains what each part of the form builder does and how to use drag and drop to build and arrange your form efficiently.
What Is the Drag-and-Drop form builder?
The Drag-and-Drop Form Builder is a visual tool that lets you design forms by selecting fields and placing them onto a canvas. Instead of manually writing JSON or configuring fields in code, you can:
Drag input fields into your form
Edit field properties like labels, validations, and requirements
Organize questions into sections and multiple pages
Preview the form as borrowers will see it
Save the form and attach it to a loan product
Behind the scenes, the builder automatically generates a structured form definition that Lendsqr uses across its platform.
Accessing the form builder
To open the form builder:
Log in to your Lendsqr Admin Console.
Navigate to Product Management.
Select Loan Products.
Open an existing loan product or create a new one.
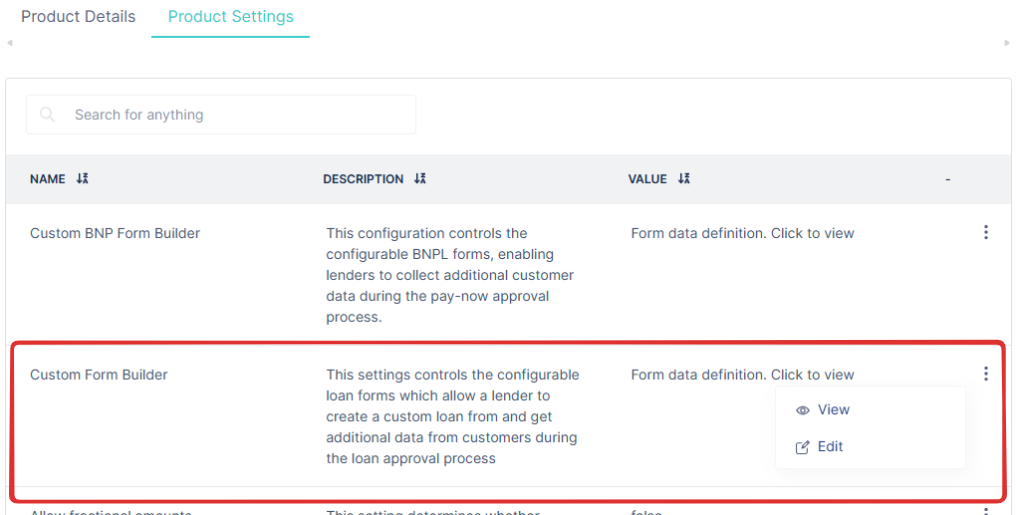
Click on Product Settings and scroll to the Custom Form Builder section.
Click Edit to launch the form builder.
Overview of the form builder interface
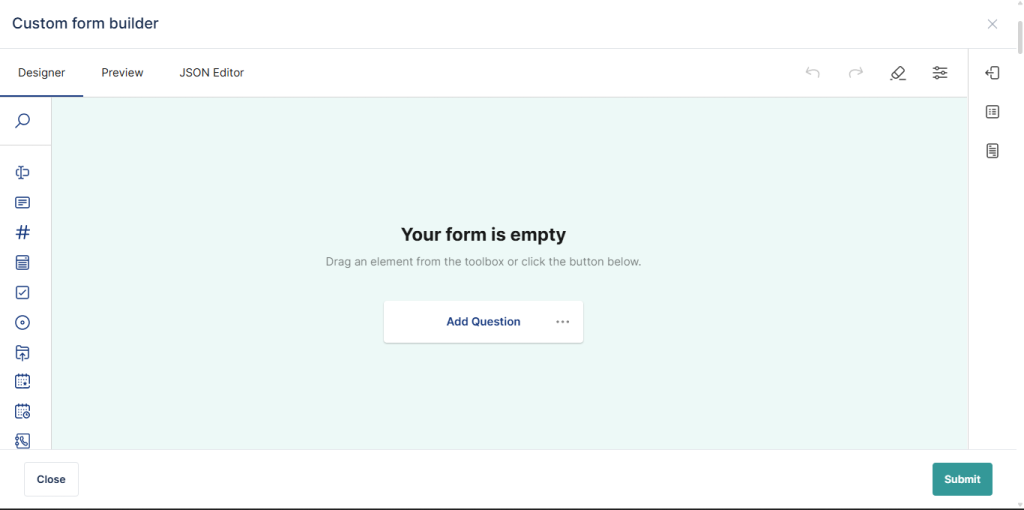
When the builder opens, you’ll see three main tabs at the top:
Designer
Preview
JSON Editor
Each tab serves a specific purpose and stays fully in sync with the others.
Designer tab: Building your form visually
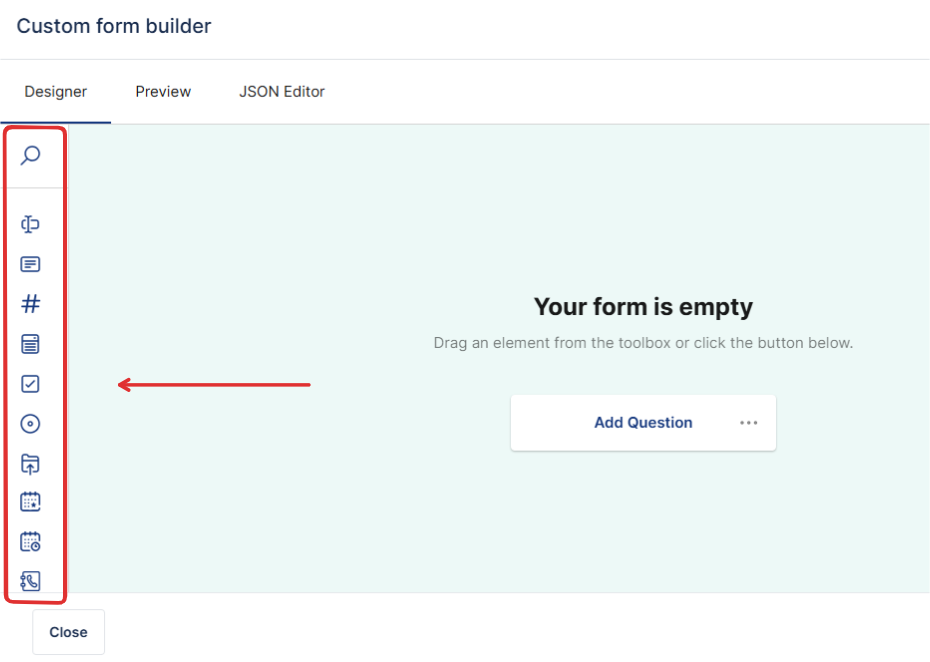
The Designer tab is where most of the work happens. It is divided into three main areas.
1. Left Sidebar – Field Types
The left sidebar contains all available input fields you can use in your form. Examples include:
Short Text
Long Text
Dropdown
Number
Radio Buttons
Date and Date & Time
Phone Number
Email Address
File Upload
Image, Audio, and Video inputs
API Lookup fields
You can use the search box to quickly find a field type.
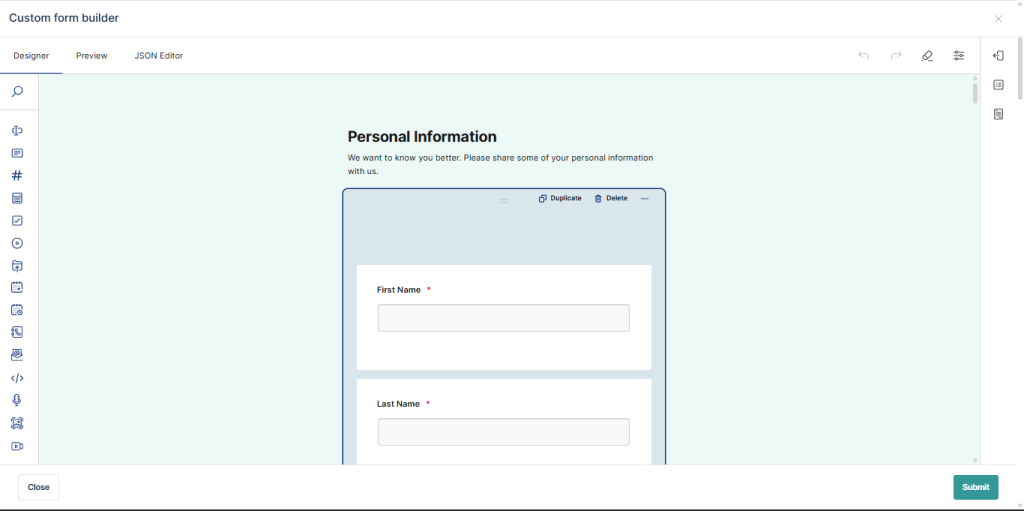
2. Central Canvas – Form Layout
The central area is the form canvas, where you design your form structure.
Here you can:
Drag fields from the sidebar into the form
Reorder fields by dragging them up or down
Group related fields into sections
Create multi-page (step-by-step) forms
Drag fields between pages
Each page represents a step in the borrower’s journey.
3. Right panel – Field Settings
When you click on any field in the canvas, the right panel opens with configurable settings for that field.
Depending on the field type, you can edit:
Field label and description
Placeholder text
Required or optional status
Minimum and maximum values or length
Allowed file types and size (for uploads)
Options for dropdowns and radio buttons
Disabled or read-only state
The settings shown are specific to the selected field type, ensuring only valid configurations are available.
Adding and managing pages (Multi-Step forms)
The builder supports multi-step forms, allowing you to break long forms into manageable pages.
You can:
Add new pages
Rename pages
Reorder pages
Move fields between pages
Delete pages when no longer needed
This helps improve completion rates and user experience for longer loan applications.
Undo, Redo, and Autosave
The form builder includes productivity features to protect your work:
Undo and Redo: Reverse or reapply recent changes.
Autosave: Your work is automatically saved in the browser.
Draft Recovery: If your browser crashes or refreshes, your unsaved changes are restored automatically.
Autosaved drafts are cleared when you explicitly discard changes or after a set period.
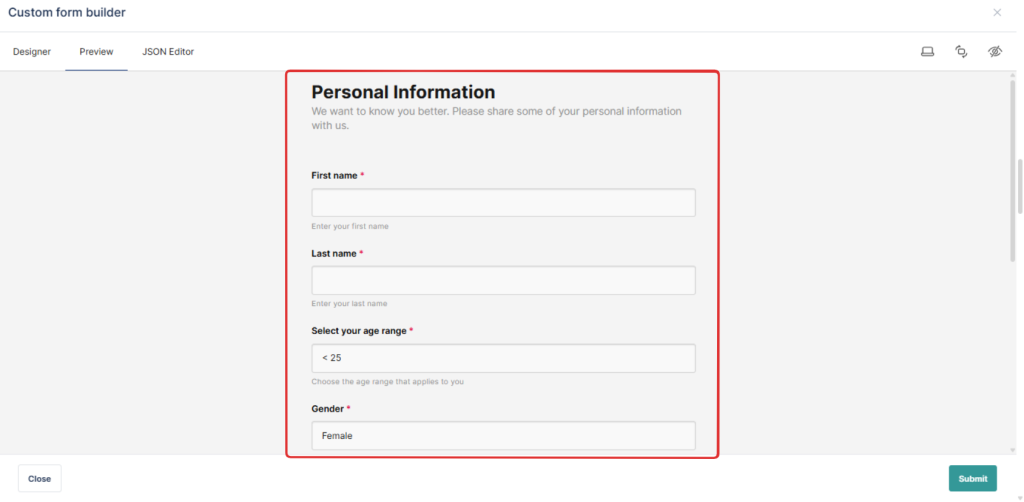
Preview Tab: See what borrowers see
The Preview tab shows a live, interactive version of your form exactly as borrowers will experience it.
You can:
Navigate through pages
Test required fields and validations
Confirm layout and flow
Verify upload and selection fields
This ensures your form behaves correctly before saving.
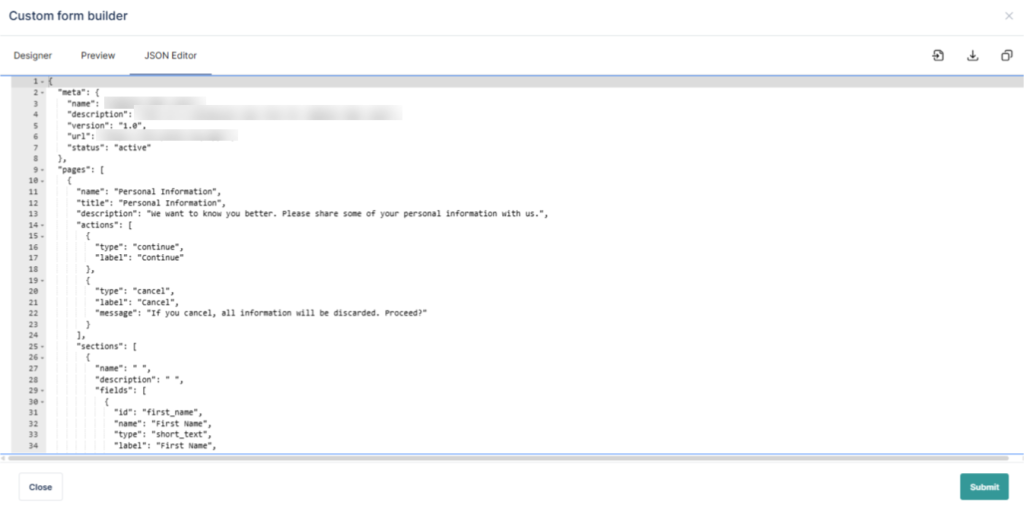
JSON Editor Tab: Advanced configuration
The JSON Editor is designed for advanced users who want direct access to the underlying form definition.
Here you can:
View the generated form JSON
Make fine-grained edits
Validate changes in real time
Instantly reflect valid edits in the Designer tab
Only valid JSON can be saved. Errors are highlighted to prevent broken forms.
Saving and using your form
Once you are satisfied with your form:
Click Submit.
The form is stored and linked to your loan product.
Borrowers or agents will be required to complete the form when applying for that product.
All responses are stored and validated according to your configuration.
Only explicit submit publish the form, autosaved drafts are not applied until you click save.
Best practices for building effective forms
Keep forms concise to improve completion rates
Group related questions into logical sections
Use required fields only when necessary
Break long forms into multiple pages
Always test your form in Preview mode before saving
Conclusion
Lendsqr’s Drag-and-Drop Form Builder gives lenders full control over how data is collected, without complexity or code. By combining a visual designer, live preview, and optional JSON editing, the builder supports both everyday users and advanced configurations.
With this tool, you can build flexible, scalable, and user-friendly forms that adapt to your lending workflows.


 feature")
