Access your Back Office at your fingertips.
Download the app now on Google Play Store.
Scan the QR code
You can also scan QR code with your phone to download the app.
How to create an approval workflow
In large organizations, a single approval often isn’t enough as transactions vary in complexity, risk, and value.
A multi-approval system manages requests like loans and transactions by enforcing structured authorization based on complexity or value. For instance, smaller requests may need one officer’s approval, whereas larger ones require multiple sign-offs. As a result, this ensures proper loan assessment and compliance, with workflows tailored to loan size, risk, and internal policies.
What is an Approval Workflow?
An approval workflow is a structured process that requires one or more designated approvers to review and authorize specific actions before they can be completed. This adds a layer of control and accountability to important operations in your system.
Available workflow types
You can create approval workflows for the following processes:
Loan Management – Approve loan applications and disbursements.
Savings – Authorize savings account withdrawal.
Bulk Disbursement – Review and approve multiple disbursements at once
1. Open your web browser and log into the Lendsqr admin console with your credentials.
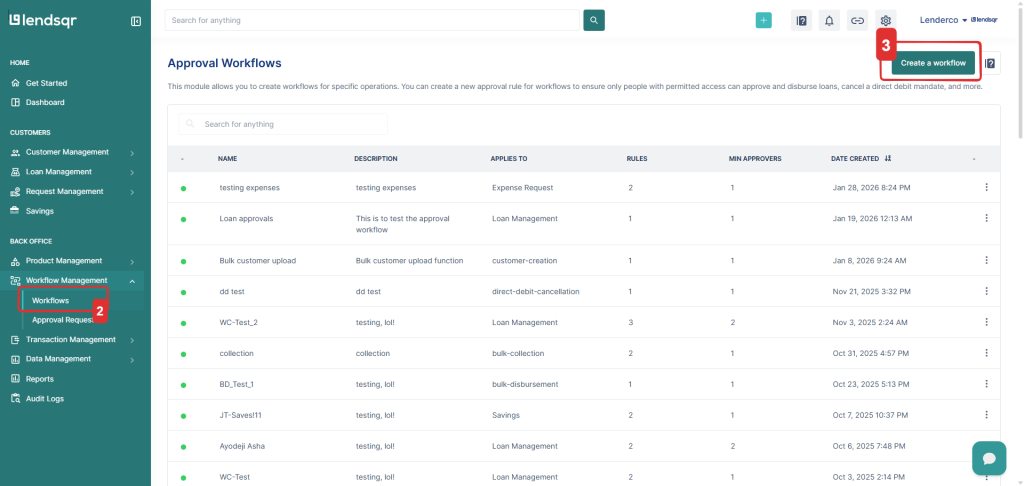
2. Navigate to “Workflows” module in the menu under “Workflow Management“.
3. Click on “Create a workflow” to create a new workflow.
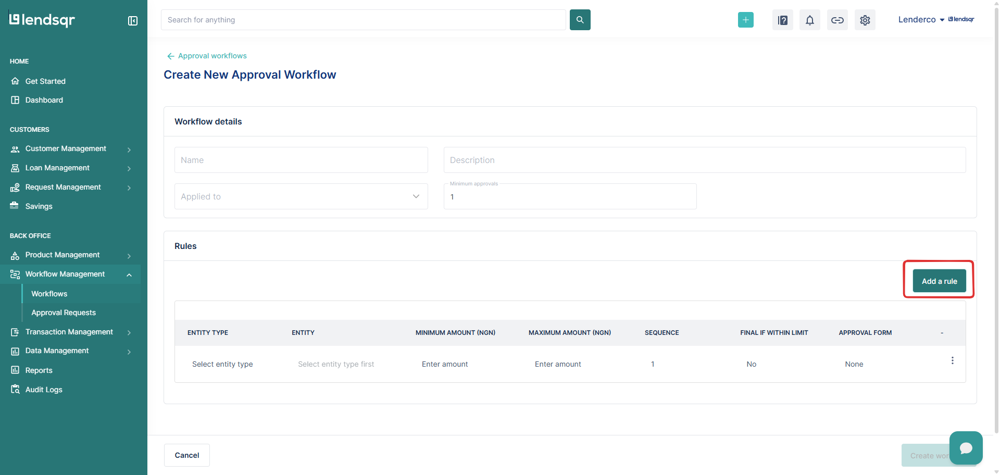
4. Fill the workflow details and click on “Add a rule“.
Name: Enter a unique name for the approval workflow.
Description: Provide details about what the workflow is for.
Applied To: Select the entity (e.g., Loan management) this workflow will apply to.
Minimum Approvals: Set the minimum number of approvals required before an action is finalized.
Note: The system requires at least one rule to define who approves what.
5. Add an approval rule.
Select Entity Type: This is a dropdown menu where you choose who the rule applies to. Options are admin roles (e.g. Super Admin, Admin) or “Specific Admin User“.
Enter Minimum Amount: The lowest amount this approval rule applies to.
Enter Maximum Amount: The highest amount this rule applies to.
Sequence: Defines the order of approvals. Example: A sequence set to 1 means this rule must be approved first before moving to the next step.
Final if within limit: If enabled, this approver’s decision is final as long as the amount is within the set range.
Approval form: Select what form of verification is to be done alongside approvals.
6. Click on the “Submit” button to add the rule.
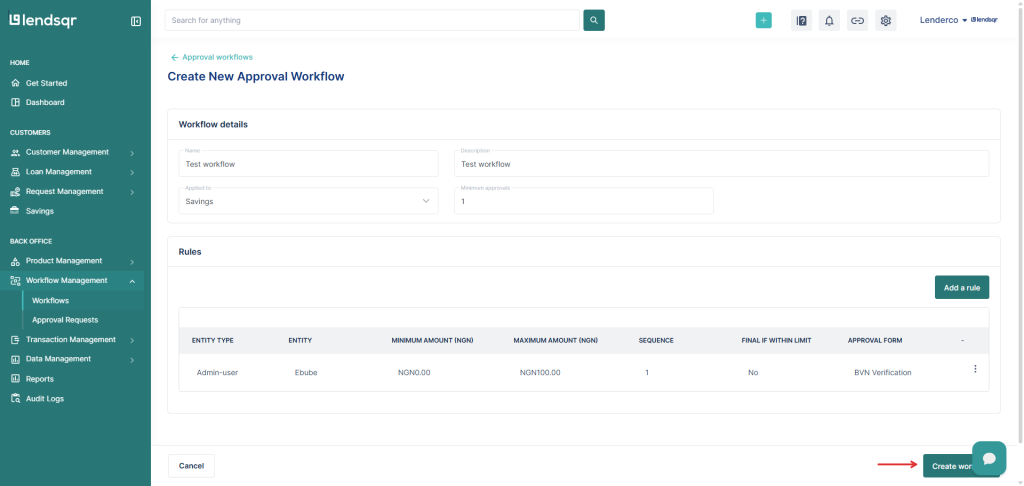
Note: When initially creating the approval workflow, the number of approval rules must not be less than the “Minimum Approvals”.
7. Click on “Create workflow” to create the workflow.
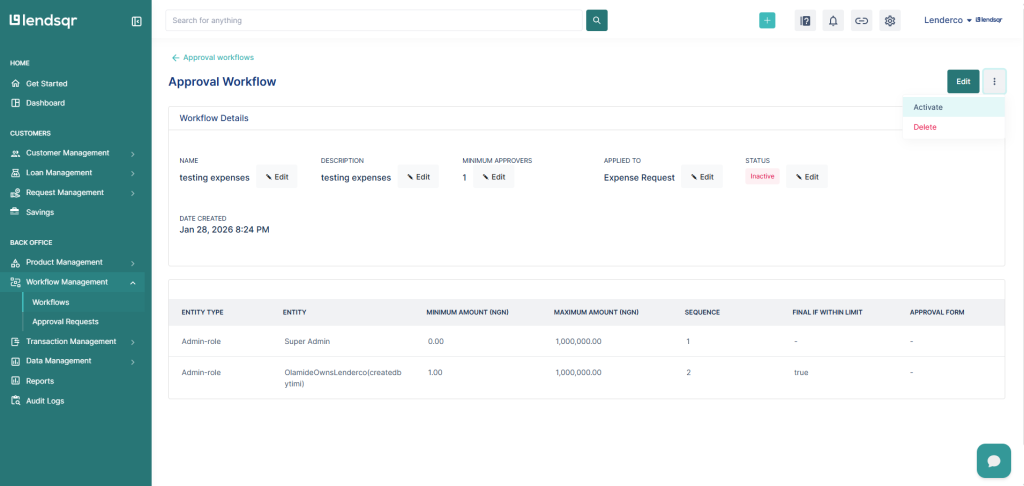
8. By default, the workflow is set to “Inactive.” You need to activate the workflow to make it available in order to be able to add it to a request.
To activate the workflow, click on the three-dot menu (...) at the top right and select “Activate”.
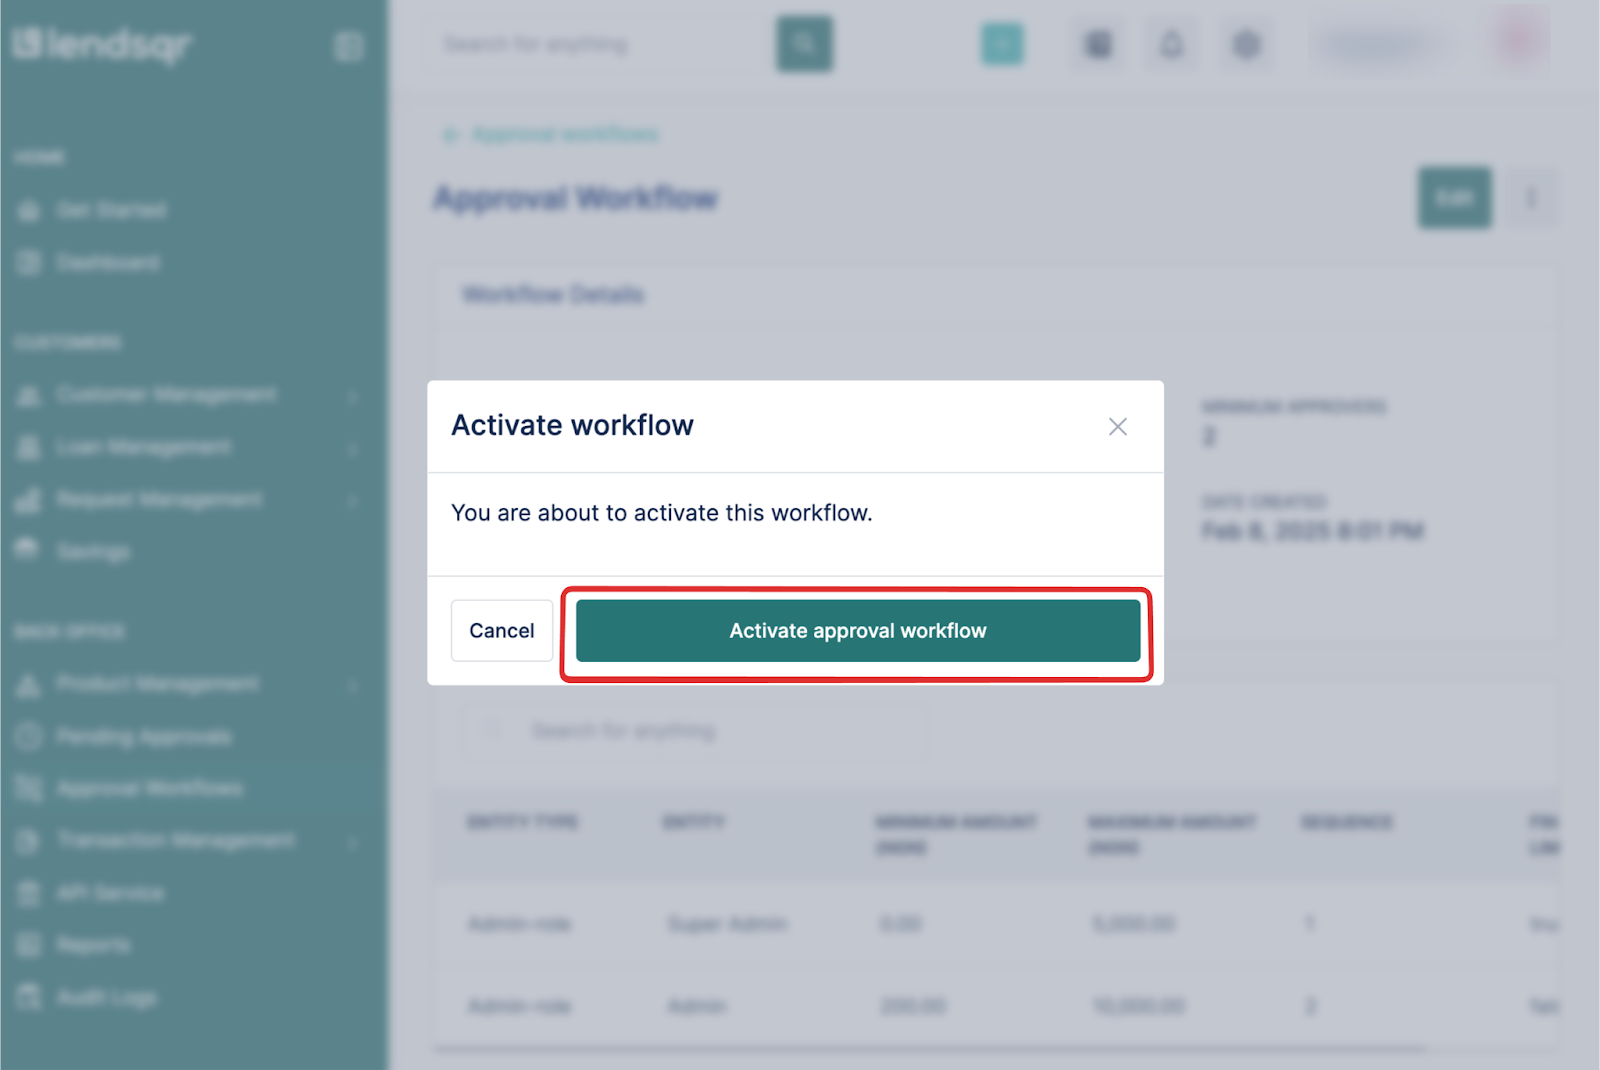
9. When you click “Activate”, a prompt will appear as a second check. To confirm that you want to activate workflow, click “ Activate approval workflow”.


 feature")
