Access your Back Office at your fingertips.
Download the app now on Google Play Store.
Scan the QR code
You can also scan QR code with your phone to download the app.
How to configure offer letter and other templates
In lending, clear documentation is critical. Documents like offer letters, repayment schedules, and statements ensure both lenders and borrowers are aligned on loan terms and obligations.
An offer letter outlines the agreed loan terms such as amount, interest, fees, and repayment schedule.
A repayment schedule shows the borrower exactly when and how much to repay.
A statement or disclosure can provide legal, compliance, or informational content.
By configuring templates in the Lendsqr admin console, lenders can automate how these documents are generated, shared, and signed. This ensures transparency, legal compliance, and efficiency before disbursement.
Use Case Example
Suppose a borrower applies for a ₦100,000 loan to be repaid over 6 months.
The offer letter is generated with the full loan terms for review and acceptance.
Alongside it, a repayment schedule template can also be configured, automatically showing the breakdown of monthly repayments.
If your institution requires additional disclosures, you can upload a custom template so it’s always generated with the loan.
This flexibility means lenders are not limited to default templates — you can add any document type your business or regulators require.
Open your web browser and log into the Lendsqr admin console with your credentials.
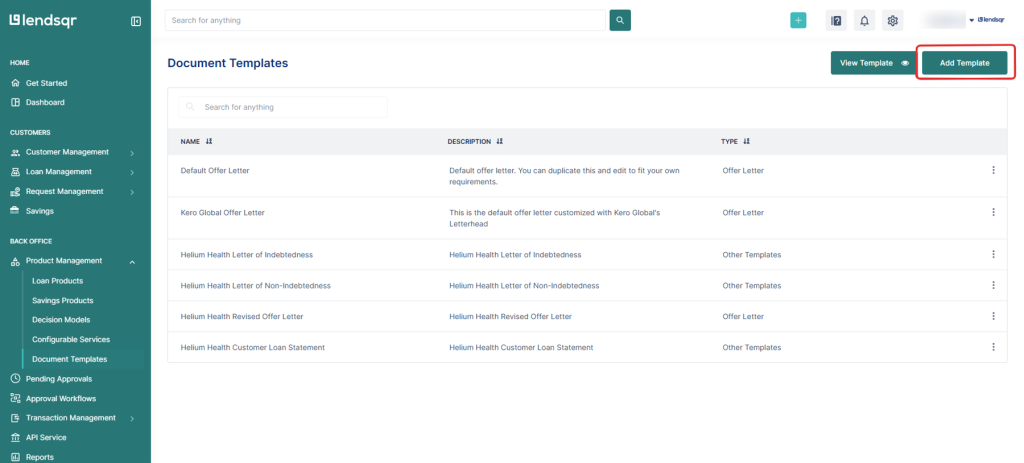
2. Click on “Document Templates” under Product Management
From the main dashboard, go to Product Management and select Document Templates. This will display a list of all the templates you have created.
3. Add a Template To add a template:
Click the Add Template button.
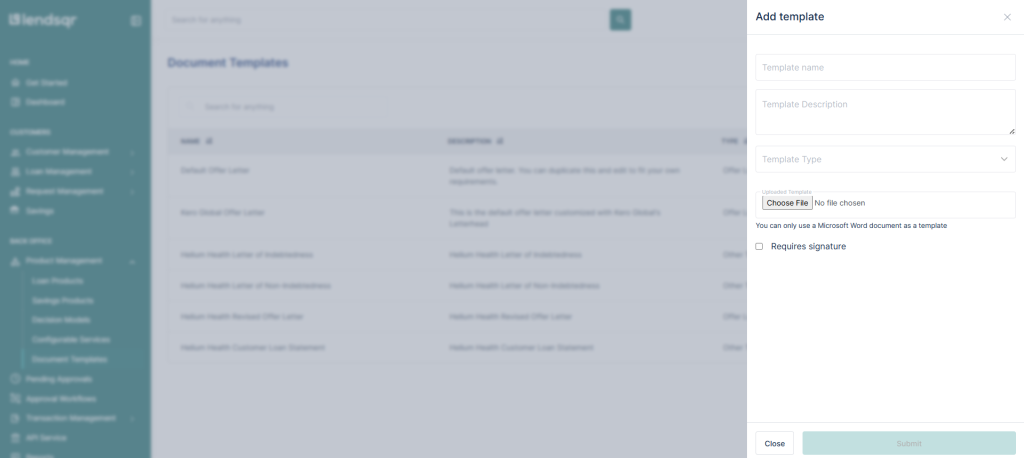
Upload your pre-created Microsoft Word document (.doc or .docx), or start from Lendsqr’s default offer letter template and modify it to suit your business needs. Curly braces represent system-defined variables.
Fill in the required fields:
Template name (e.g., “Loan Offer Letter”, “Repayment Schedule”)
Template description (optional, to help you identify its use)
Uploaded Template (.doc or .docx format)
Template Type (Offer letter, Other Templates)
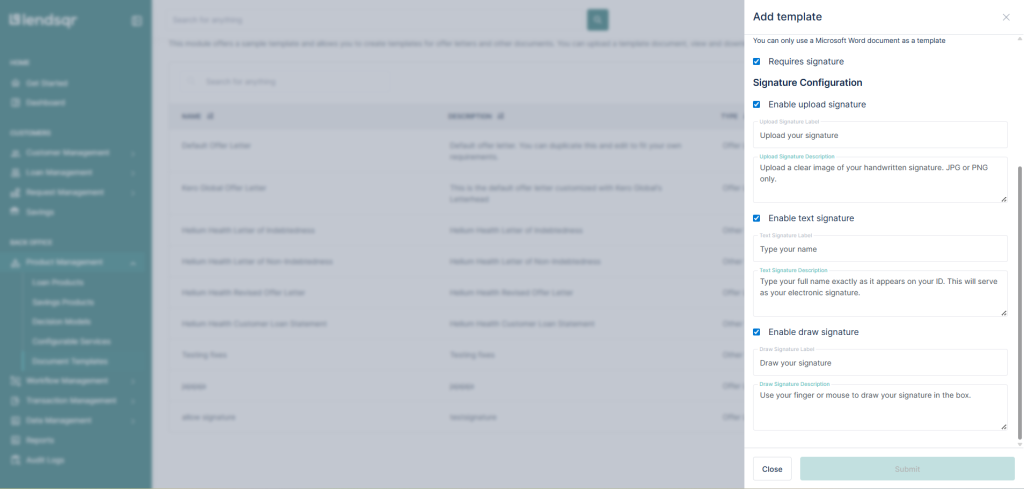
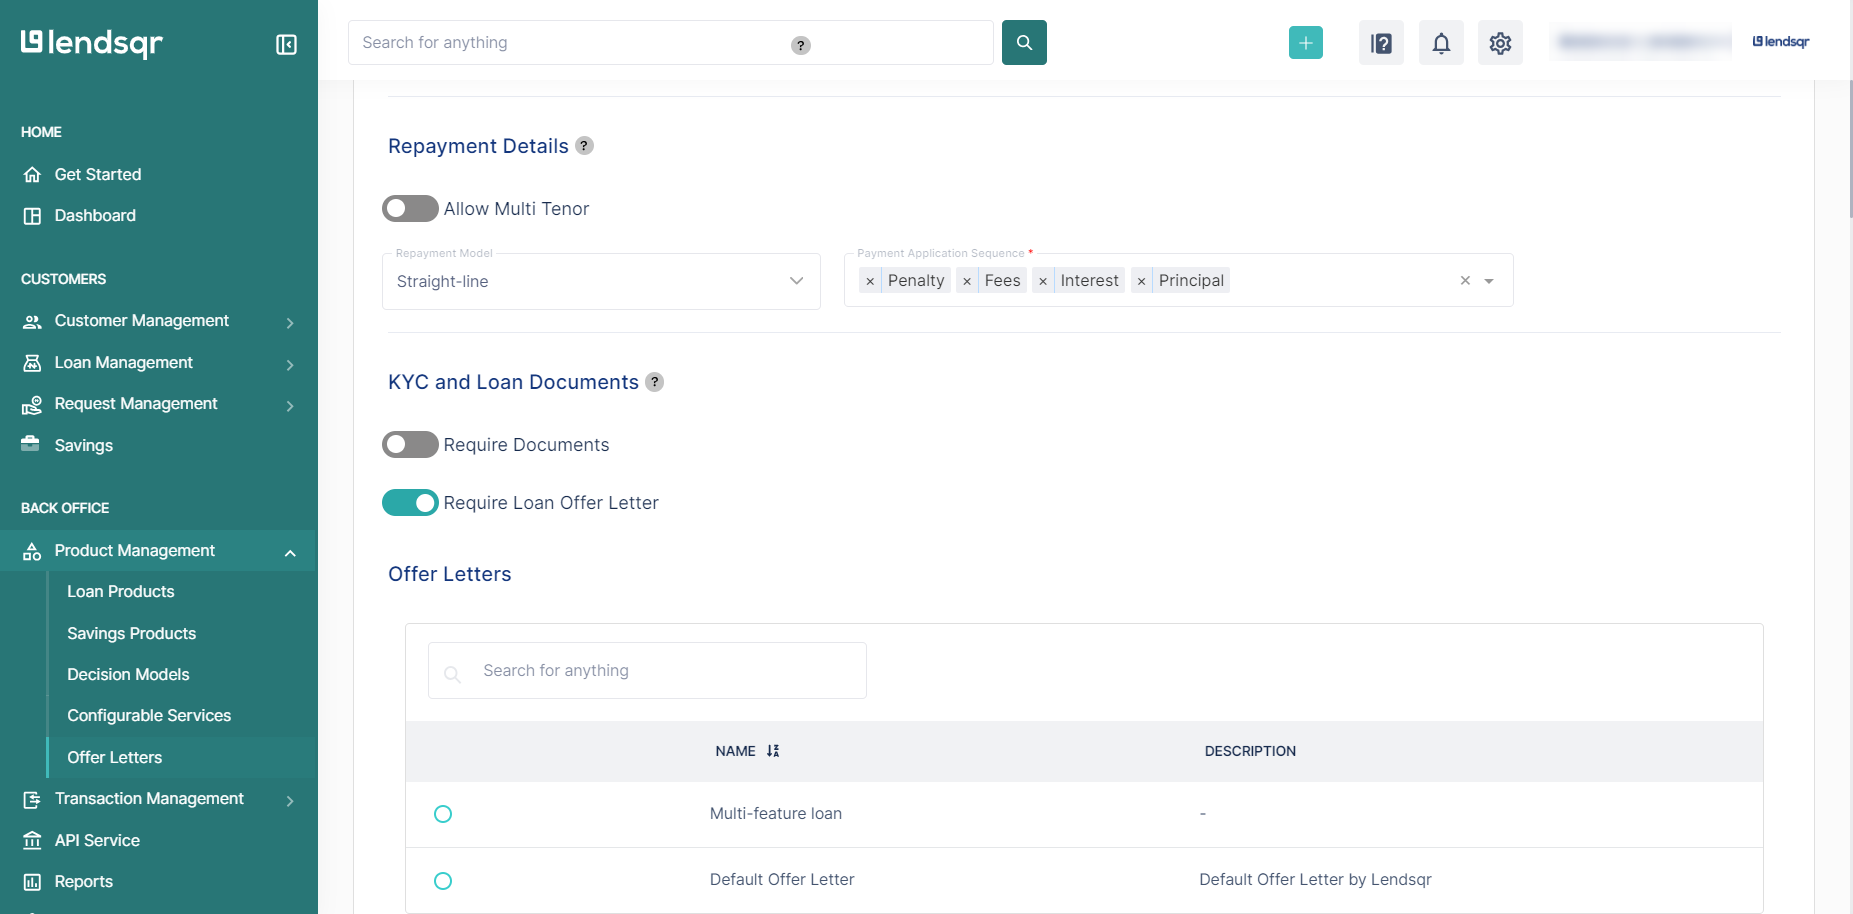
4. Configure signature requirement
If the document requires borrower acceptance or authorization, enable Requires Signature. When this option is selected, additional signature configuration options become available.
You can enable one or more of the following signature methods:
Upload Signature
Allows the borrower to upload an image of their handwritten signature.
Supported formats are JPG and PNG.
Text Signature
Allows the borrower to type their full name exactly as it appears on their valid ID.
The typed name serves as the borrower’s electronic signature.
Draw Signature
Allows the borrower to draw their signature directly on the screen using a mouse or touch input.
NB: Your uploaded template must have the variables {borrower_name} to represent the text signature and {%signature_image} for the uploaded or drawn signature.
Once all fields and signature options are configured, click Submit to successfully add the template.
Configuring offer letter on your loan product
1. Login to the Admin Console
Open your web browser and log into the Lendsqr admin console with your credentials.
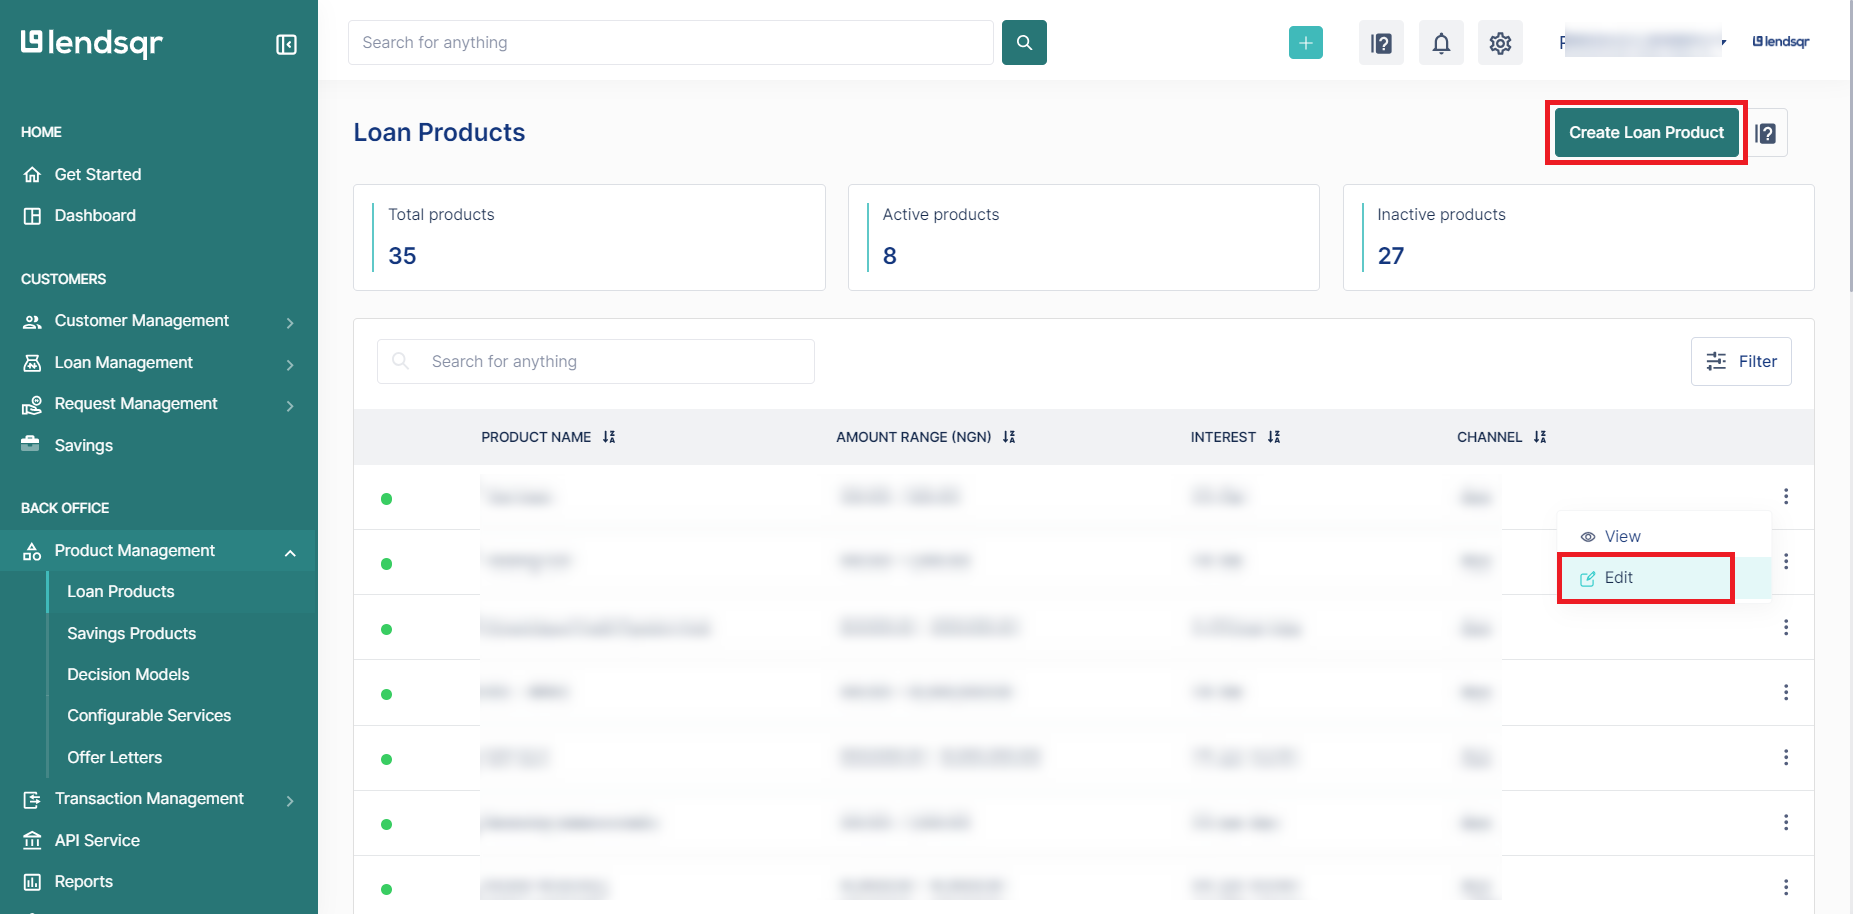
2. Click on “Loan Products” under Product Management
From the main dashboard, go to Product Management and select Loan Products. This will display a list of all the loan products you have created.
3. Create or Edit a Loan Product
To create a new loan product, click Create.
To edit an existing loan product, click the Edit button in the options menu for that product.


 feature")


