Access your Back Office at your fingertips.
Download the app now on Google Play Store.
Scan the QR code
You can also scan QR code with your phone to download the app.
Understanding how disbursement in tranches works on the admin console
Introduction
Some loans, especially project-based ones, require funds to be released gradually rather than in full. To manage this, Lendsqr allows lenders to configure and execute disbursement in tranches directly from the admin console. This approach helps lenders manage risk more effectively by tying disbursement to performance milestones or agreed conditions with the borrower.
For example, a lender can use tranche-based disbursement for construction loans, releasing funds as contractors complete project stages. It’s also ideal for importers who require phased payments for goods and shipping duties.
How tranche disbursement works
Before disbursing a loan in tranches, the loan product must first be configured to allow this option. Once enabled, admins can approve an initial tranche and later disburse additional amounts as the borrower meets pre-agreed milestones.
Step-by-step guide
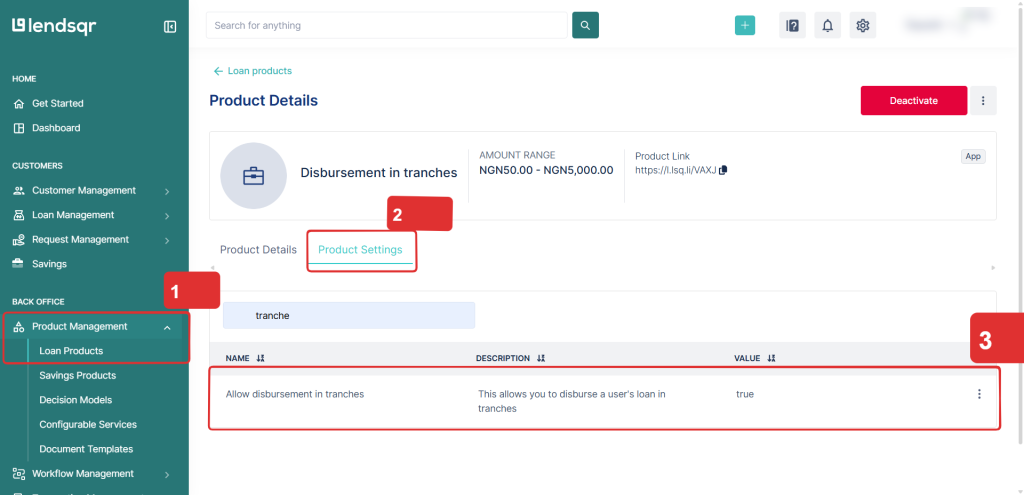
Step 1: Enable tranche disbursement
Log in to the admin console.
Navigate to Loan Products under Product Management.
Open the loan product you want to modify and go to Product Settings.
Enable Allow tranche disbursement. The system will automatically enable refinancing, as tranche-based loans depend on that feature.
Save your changes.
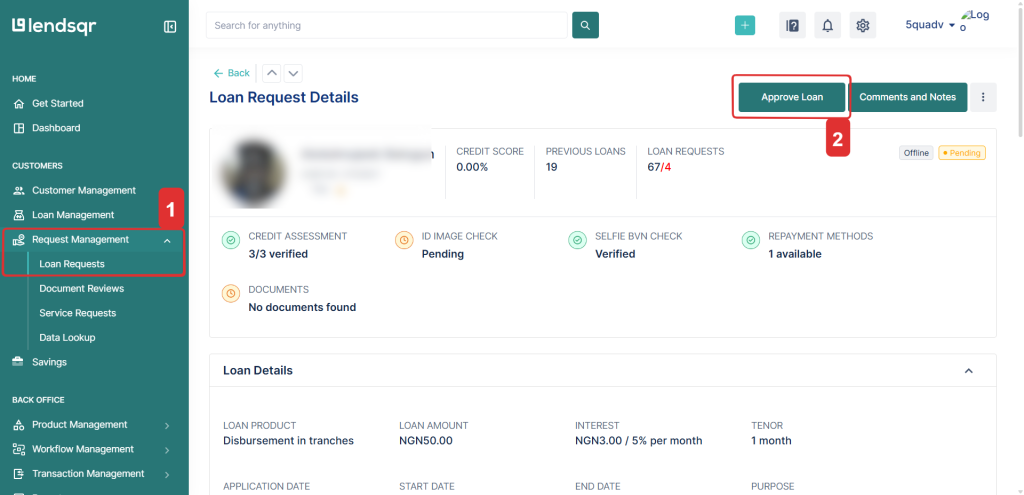
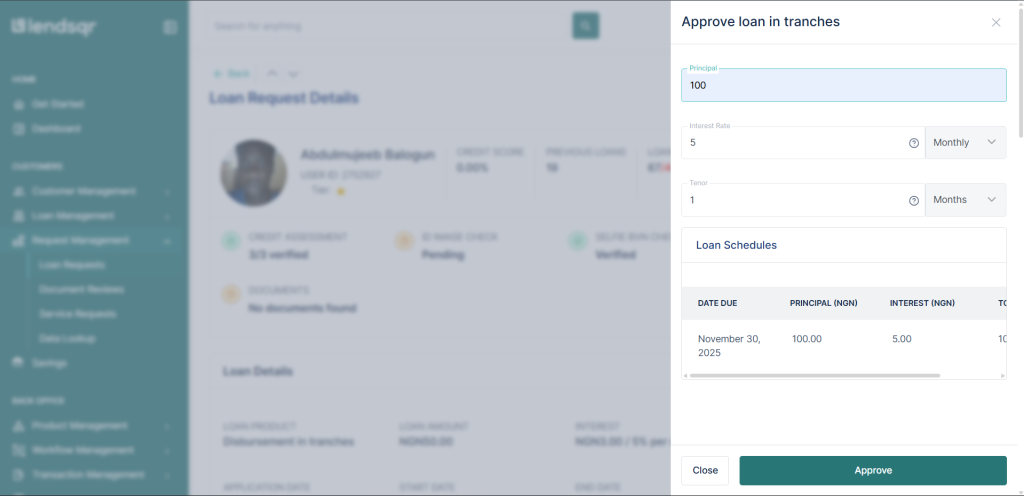
Step 2: Approve and disburse the first tranche
1. Navigate to Loan Requests under Request Management.
2. Select the loan you want to approve.
3. Click the Approve Loan button.
4. Enter the initial tranche amount, interest rate, and tenor.
5. Review and confirm to disburse the first tranche.
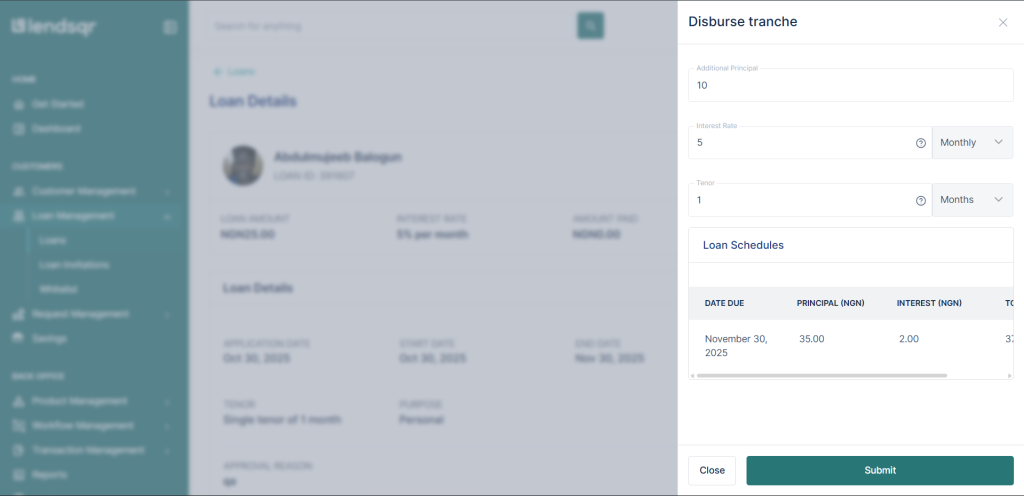
Step 3: Disburse subsequent tranches
1. Navigate to the Loan on the Loans page under Loans Management.
2. Click the Options (⋮) icon.
3. Select Disburse Tranche.
4. Input the tranche amount, interest rate, and tenor for the next phase.
5. Confirm and approve the disbursement.
The system automatically updates the principal, repayment schedule, and loan details to reflect the new disbursement.


 feature")
