Access your Back Office at your fingertips.
Download the app now on Google Play Store.
Scan the QR code
You can also scan QR code with your phone to download the app.
Delete an office, branch, or team
As your lending organization grows and evolves, your internal structure may change. You might close down a branch, merge teams, or reorganize how your staff is grouped. In such cases, having an outdated or unused office, branch, or team in your system can create confusion, misrouting, or unnecessary clutter.
That’s why the delete feature on the Lendsqr admin console is useful. It lets you keep your organization structure clean and up to date. By removing offices, branches, or teams that are no longer in use, you ensure better coordination, easier staff management, and fewer errors in permissions or reporting.
For example, if a lending business shuts down one of it’s branches due to a restructure, keeping that branch and team active on the platform can cause confusion; staff might mistakenly assign borrowers to it, and reports could show inaccurate data. Deleting the unused branch helps keep the system clean, ensures accurate reporting, and prevents operational errors.
Before you delete
Taking a few minutes to check the following before deleting will help you avoid disruptions to your operations.
Check your permissions
Only admins with the appropriate role and permissions can delete an office, branch, or team. If you do not see the delete option when you follow the steps below, contact your system administrator to confirm your access level.
Reassign active team members
Deleting an office, branch, or team does not automatically delete the team members assigned to it. Before deleting, navigate to the relevant office, branch, or team and confirm that all team members have been reassigned to an active office, branch, or team. If team members are left unassigned, they may lose access to certain functions on the platform.
Reassign active borrowers and loans
If any borrowers or active loans are linked to the office, branch, or team you want to delete, reassign them before proceeding. Deleting a branch with active linked data can affect your reports and may cause gaps in your loan records.
Understand the impact on reports
Once an office, branch, or team is deleted, any historical data tied to it may no longer appear correctly in your reports. We recommend exporting a report from Back Office before deleting, so you have a record of the data associated with that office, branch, or team.
Steps to delete an office, branch, or team
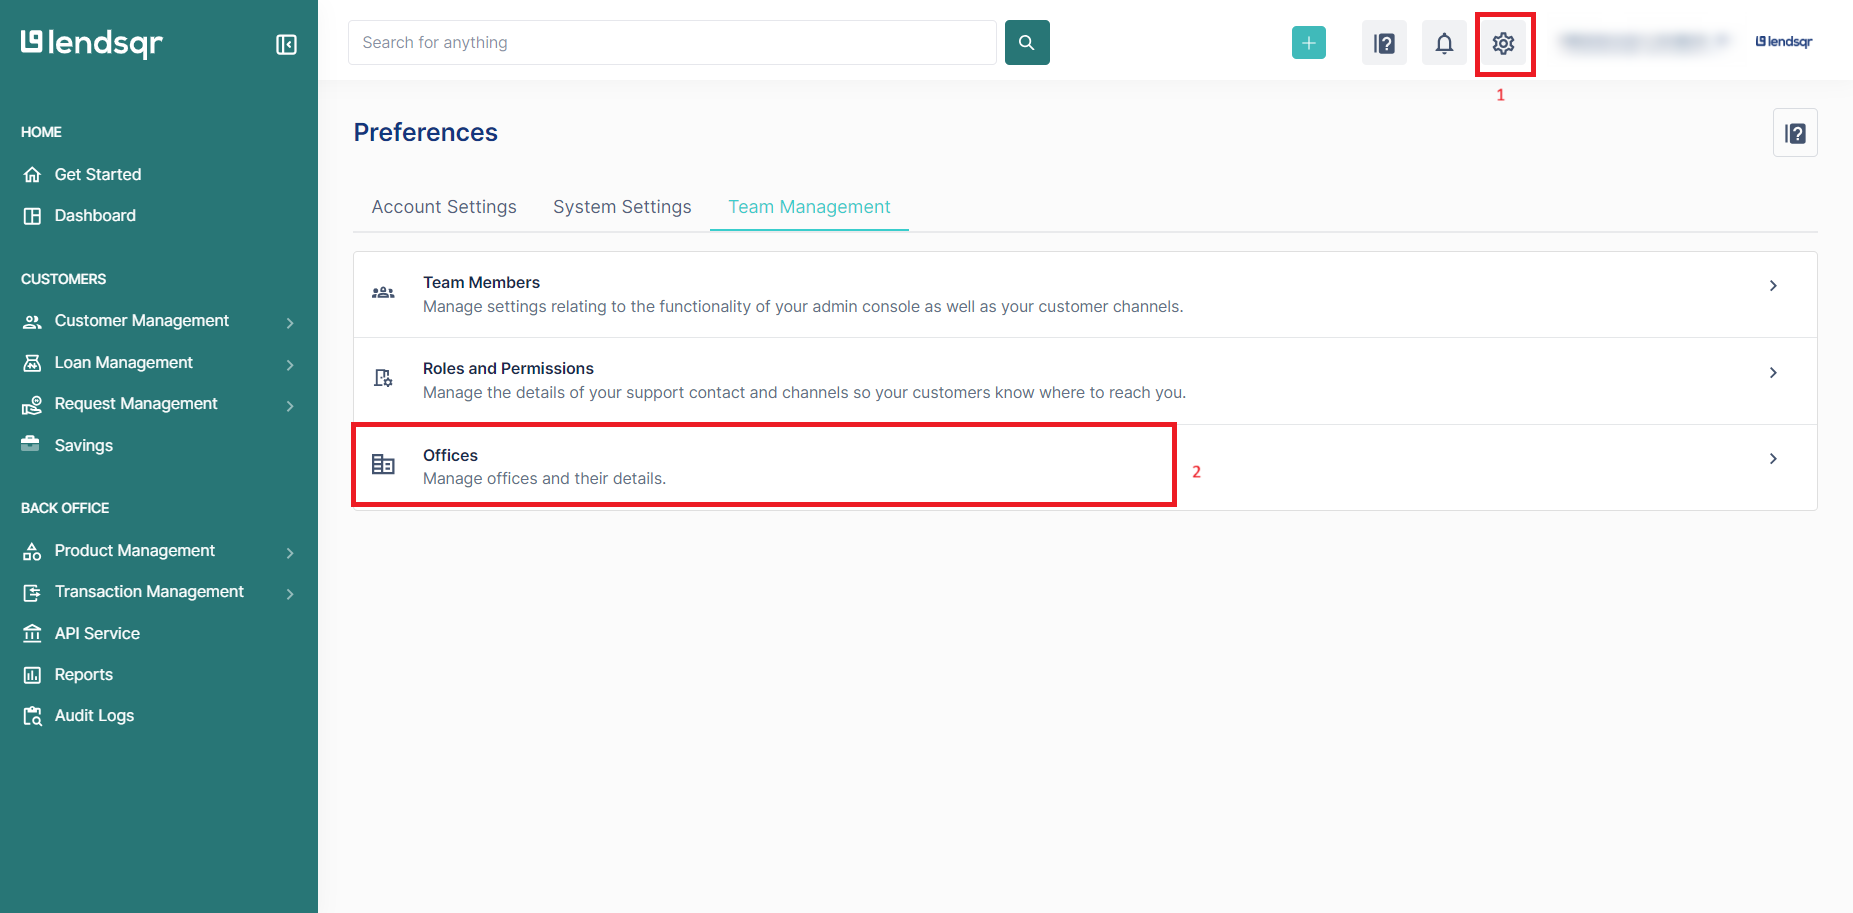
1. Log in to your Lendsqr admin console
2. Click on the settings icon at the top-right corner
3. Click on “Offices” under “Team Management”
4. Locate the desired office and click the “More” icon. Click the delete button after.
5. Confirm the delete request by clicking the “Delete office” button
The office will be deleted successfully from the list of offices.
The ability to delete outdated offices, branches, or teams on the Lendsqr platform helps you maintain a clean, accurate structure. It reduces confusion, improves efficiency, and ensures that your operations reflect the current state of your business, so your team stays organized and focused on what matters most: serving your customers.
NOTE: Deleting an office, branch, or team does not automatically delete the team members in such offices, branches, or teams. Lenders can only delete team members on the team members page. Find out how to do that here.


 feature")