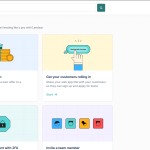
Lendsqr provides you with a free web app designed to give your users easy access to your loan products and solutions. Whether customers need personal, home, car, or business loans, you can create these loan offerings in your Lendsqr admin console, and users will access and apply for them via your web app.
Learn how to build your own web app here
How to access the web app
As a Lendsqr lender, you get a dedicated web app immediately signed up on the Lendsqr admin console.
To access your web app, click the logo at the top right corner on the admin console. Your webapp link is located in the modal that opens.
Once you click on it, you will be redirected to a new page to sign up on your web app. You can also copy the link directly by clicking on the “copy” icon and share it with your customers as needed.

Configurations that need to be done to ensure the web app works
Set up your loan products
Start by creating your loan products on the Lendsqr admin console. These products represent the various loan offerings (e.g. personal, car, home loans) that your users will see and apply for via your web app.
Once a user submits a loan application, you can review, approve, and disburse the loan directly from the admin console. Kindly view the guide here: How to create a loan product
Set up your decision model for each loan product
If you prefer not to use the default decision model, you can configure your own and map it to each loan product. A decision model determines how the system evaluates loan applications, based on the rules and criteria you define. Kindly view the guide here: The Lendsqr Decision Model
Fund your Disbursement account
To disburse loans to your customers, you’ll need to fund your disbursement account. This account is unique to your profile and was automatically created when you registered on the Lendsqr platform.
To better understand your disbursement account and how it works, kindly read the Managing your disbursement account guide.
Bonus Section: Customizing and Personalizing your web app
While personalisation isn’t required for your web app to function, it’s a great way to build trust and reinforce your brand with users.
A good first step is to update your logo. This simple change helps users instantly recognize your platform and builds a sense of familiarity. Learn how to update your logo here: How do I change the logo on my web app.
You can take the customizations a step further by updating the look and feel, to properly represent your company’s brand by changing certain images, colors and texts on your web app.. To learn how to do this, kindly view the user guide here: Customizing your Web app on Lendsqr Admin Console.
Details required to sign up on the web app
To sign up on your Lendsqr web app, users will need to provide a few personal details. Rest assured all information is securely stored and never shared with third parties or used inappropriately.
- Your phone number
- Your BVN details
- A selfie for your profile picture.
- Your bank details which you can transfer money from your web app to.
- A transaction pin: This is created by you to authorize transactions on the app.
What your users can do on your web app
On your web app, your users can perform the following functions,
- View your loan offers which you have created as loan products.
- Upload required KYC documents
- Apply for loans through our seamless loan application process
- Receive loans approved and disbursed by you to their in app wallet.
- Transfer money from their in app wallet to their bank accounts
- Repay their loans from their wallets or with their debit cards.
Requirements for a loan application on the web app.
To apply for loan on the web app, your users will be required to do the following:
- Provide their next of kin details.
- Provide the required KYC documentation based on what you set
- Link a debit card attached to their bank account. (This card will be debited for loan repayments once a loan is due. Also there is a default ₦50 charge collected for card linking.You get settled this amount (less the processor fee e.g Paystack, Seerbit) and you can also specify the amount you want.
- Provide their personal information
- Provide their education and employment information.
- Provide their bank statement data if required.
Your users will also pass through the decision model checks to confirm if they are eligible for a loan based on what has been configured on the decision model. To understand why users may fail these checks, kindly view the guide here: Top 10 reasons the system auto-decline loans.
Once a user has been able to successfully apply for a loan, the loan will be displayed on the loan request page.
After the loan is approved, the loan amount will be disbursed to the user’s wallet and the user can then make a transfer from their in-app wallet to their bank account.
Once the loan is due, your user’s wallet or card will be automatically debited for the loan repayment or they can repay by themselves via the web app.
Who to reach out to if you need some assistance
At Lendsqr, we genuinely care about you and your business. If you need more information or assistance, please reach out to us via email at support@lendsqr.com or call us on +234 1 700 5282.
If you love to chat, we are right there within the admin console, just click on the chat icon on the bottom right and send us a message – someone is usually available to provide assistance.


