Access your Back Office at your fingertips.
Download the app now on Google Play Store.
Scan the QR code
You can also scan QR code with your phone to download the app.
How to configure post-disbursement fees in Lendsqr
In response to user feedback regarding fee transparency, we’ve introduced a feature that allows you to configure post-disbursement fees to be charged separately after loan disbursement. These fees will be automatically added to the loan repayment schedule with complete transaction records, ensuring clear and transparent communication with your users.
Step-by-Step Guide
1. Login to the Admin Console
Login to the Lendsqr admin console with your credentials. From the main dashboard, navigate to Product Management and select Loan Products to view all your existing loan products.
2. Click on “Loan Products” under Product Management
Create a new loan product by clicking the Create button, or edit an existing product by selecting the more options button and choosing edit beside the product name.
3. Create a Loan Product or Edit an Existing One
If you need to create a new loan product, click on the Create button. If you want to edit an existing loan product, click on the more options button and select edit beside the product name.
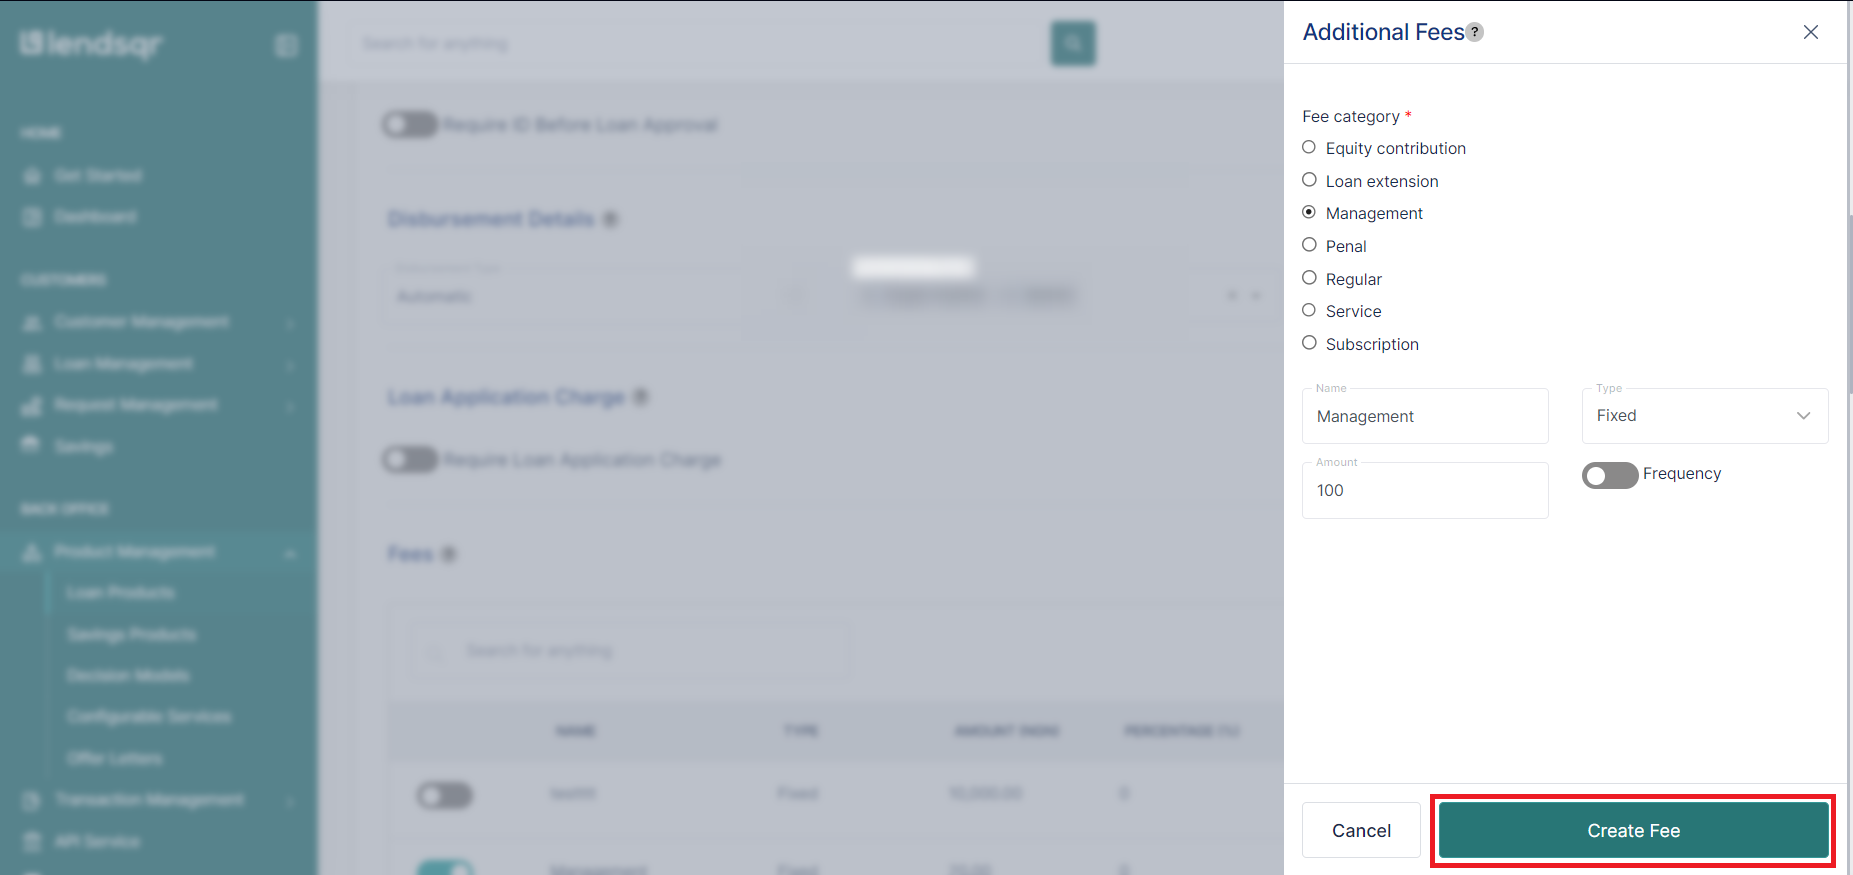
4. Create a Management Fee
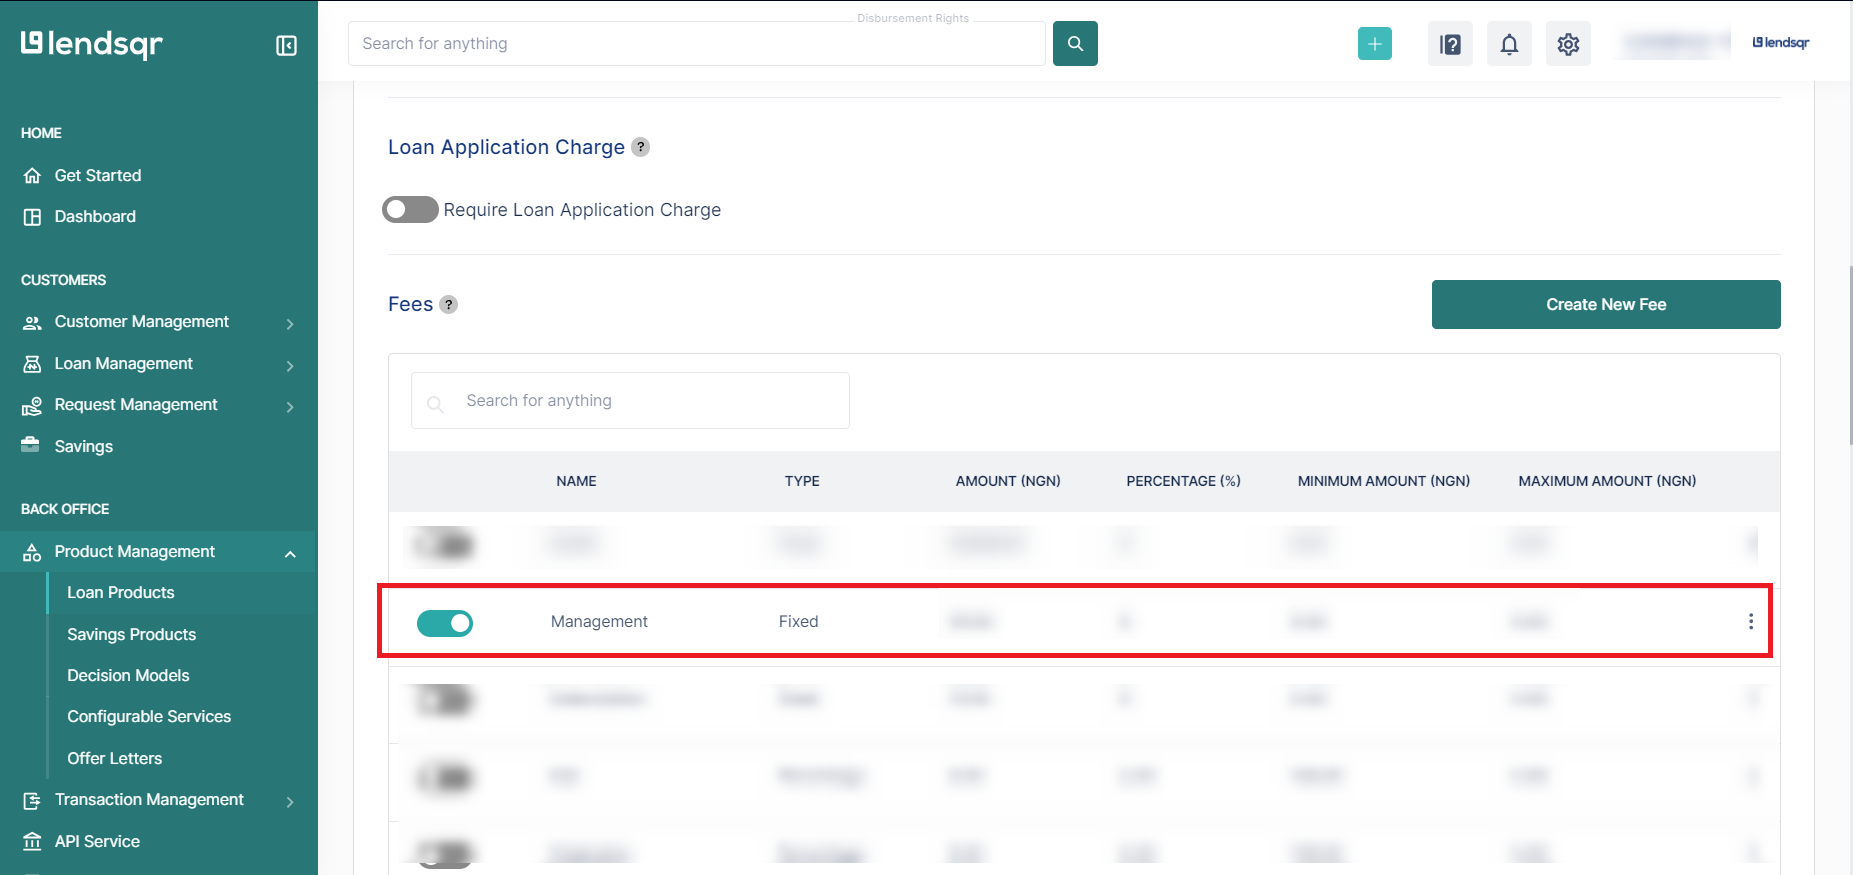
While editing or creating your loan product, scroll to the Fees section and click “Create New Fee.” Select the “Management” fee type, enter the fee name, charge type, and amount. Click Create Fee, then activate this fee by shifting the toggle to the right.(Learn more)
5. Save and view your loan product
Save your loan product changes by clicking Create or Update. Navigate to the Product Attributes tab in your loan product settings to manage various loan attributes.
6. Click on the “Product Attributes” Tab on the Product Page
In the loan product settings, navigate to the Product Attributes tab. Here, you can manage various attributes of the loan product.
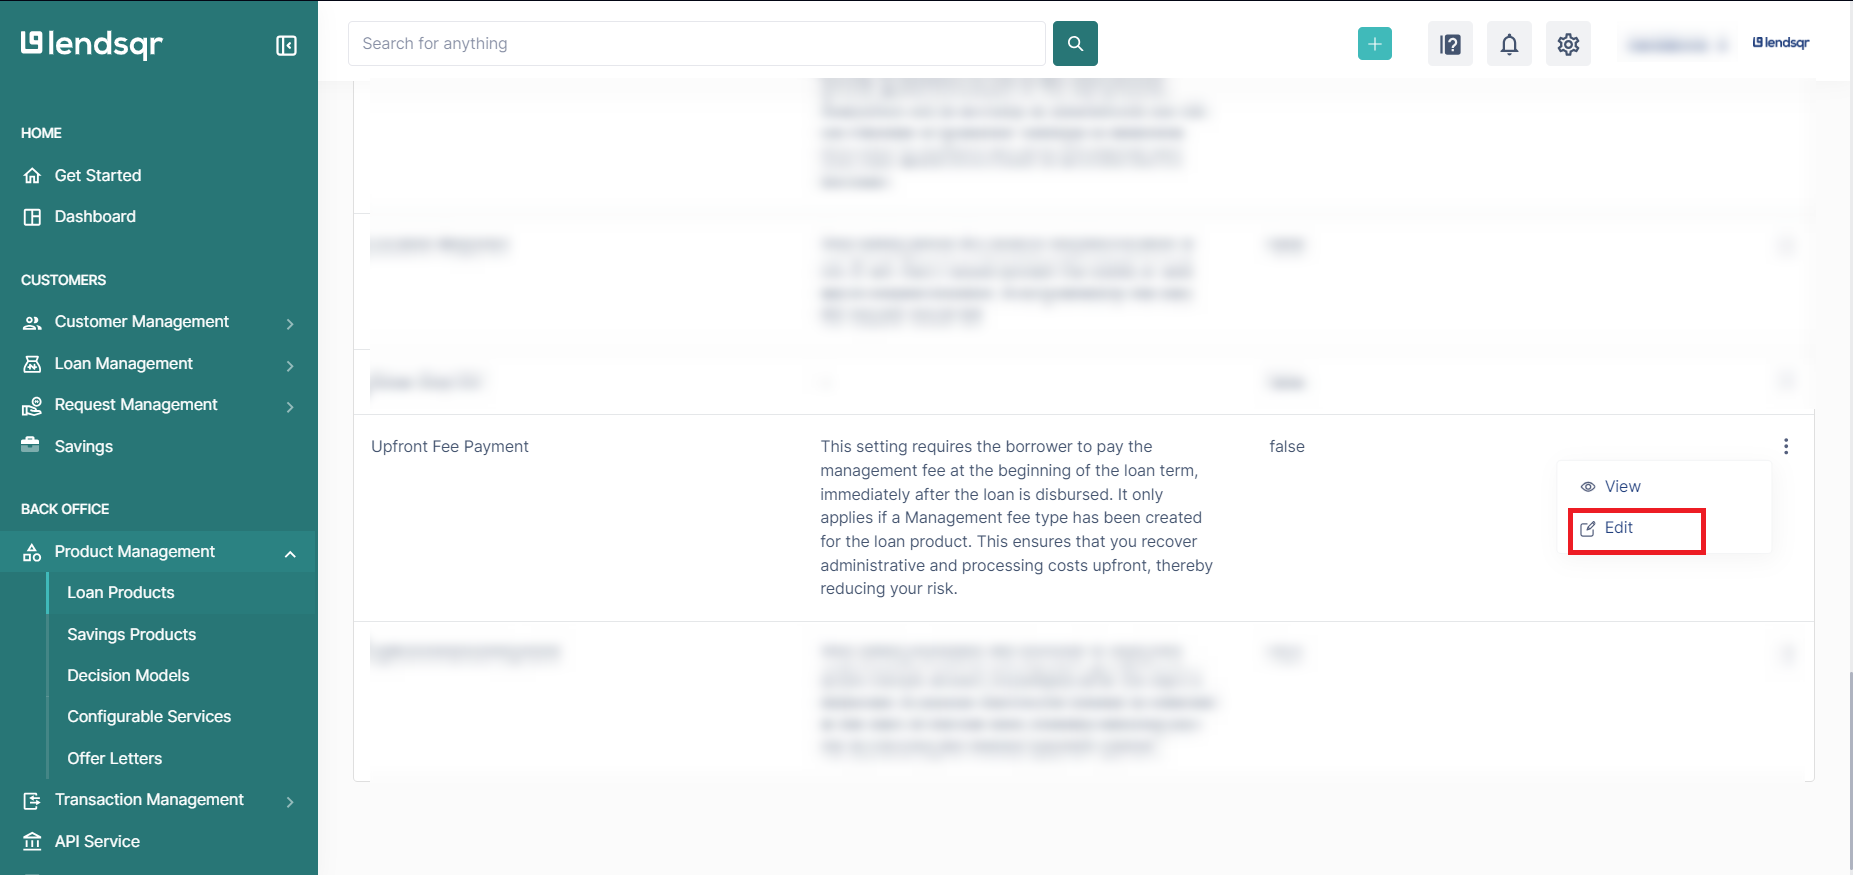
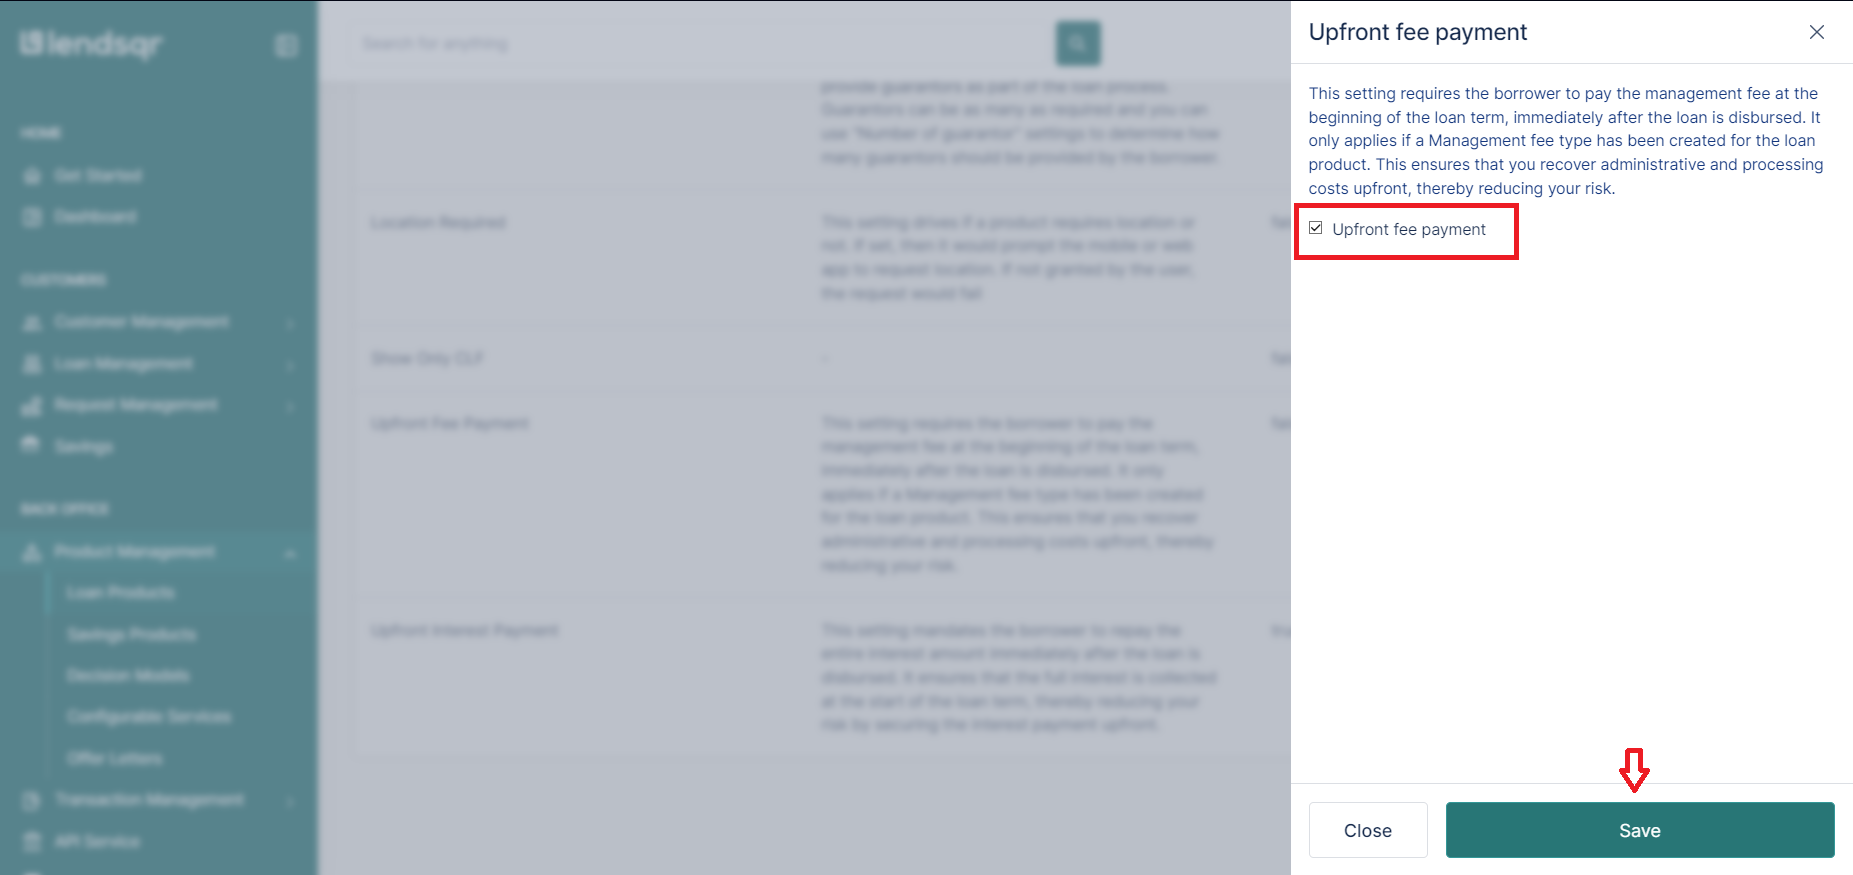
7. Locate the “Upfront Fee Payment” Attribute
Locate the “Upfront Fee Payment” attribute in the attributes list. Click the more options button and select “Edit” beside this attribute. Check the box next to the Upfront Fee Payment attribute to enable post-disbursement fee collection.
8. Check the Box Next to the “Upfront Fee Payment” Attribute
To enable upfront interest payment, check the box next to the Upfront Fee Payment attribute to make it true.
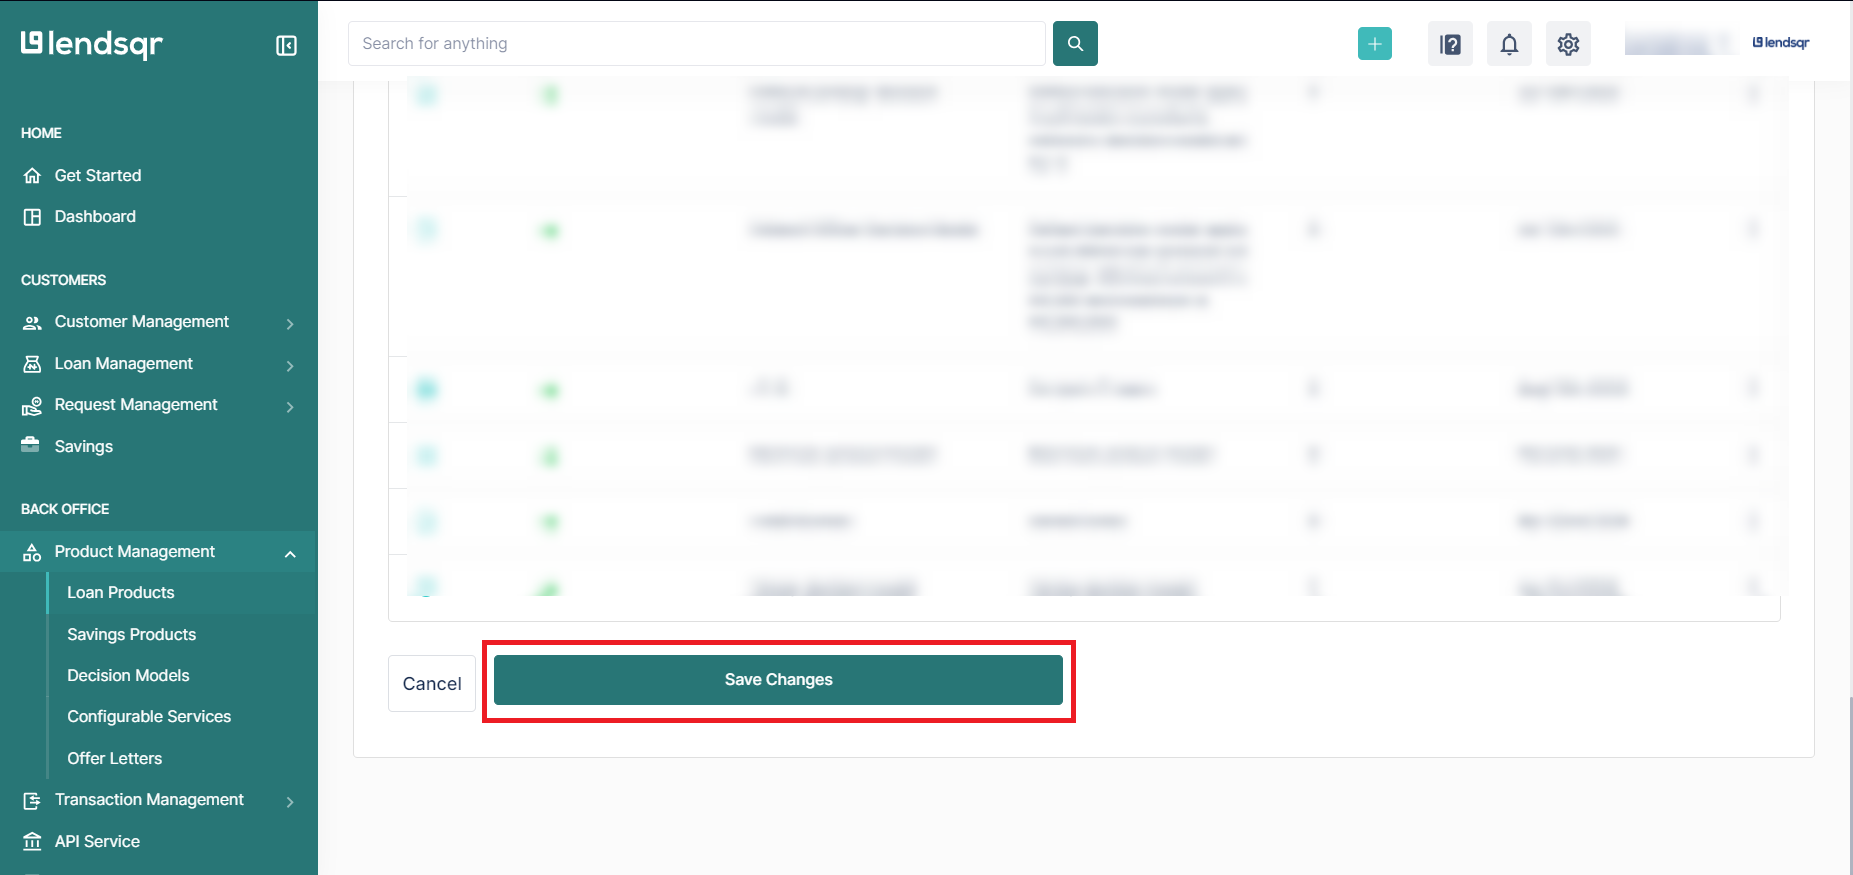
9. Click on “Save”
Once you have enabled the upfront interest payment, click on the Save button to apply the changes to the loan product.
NB: You have to set up the Management Fee and also ensure the Upfront Fee Payment attribute is set to true for this to work correctly.
Watch this video to learn how to set up and manage post-disbursement fees


 feature")

