Access your Back Office at your fingertips.
Download the app now on Google Play Store.
Scan the QR code
You can also scan QR code with your phone to download the app.
How to configure multiple mandates creation on your loan product
The multiple mandates feature allows lenders to configure their loan products to require borrowers to link multiple bank accounts for direct debit mandate creation. This enhances repayment flexibility and reduces default risks.
For example, if a borrower has irregular income and receives payments into different bank accounts from various clients, by linking multiple bank accounts to their loan, the lender can attempt debit from more than one account, increasing the chances of successful repayment even if one account has insufficient funds. This reduces the likelihood of default due to low balance in a single account and offers greater repayment flexibility for borrowers with complex or variable income streams.
In this guide, you’ll learn how to enable and customize the multiple mandates setting in the Lendsqr admin console, ensuring it aligns with your business model. Follow the steps below to get started.
1. Login to the Admin Console
Open your web browser and log into the Lendsqr admin console with your credentials.
2. Click on “Loan Products” under Product Management
From the main dashboard, go to Product Management and select Loan Products. This will display a list of all the loan products you have created.
3. Create a Loan Product or Open an Existing One
If you need to create a new loan product, click on the Create button. If you want to an existing loan product, click on the product name to open it.
4. Click on the “Product Attributes” Tab on the Product Page
In the loan product settings, navigate to the Product Attributes tab. Here, you can manage various attributes of the loan product.
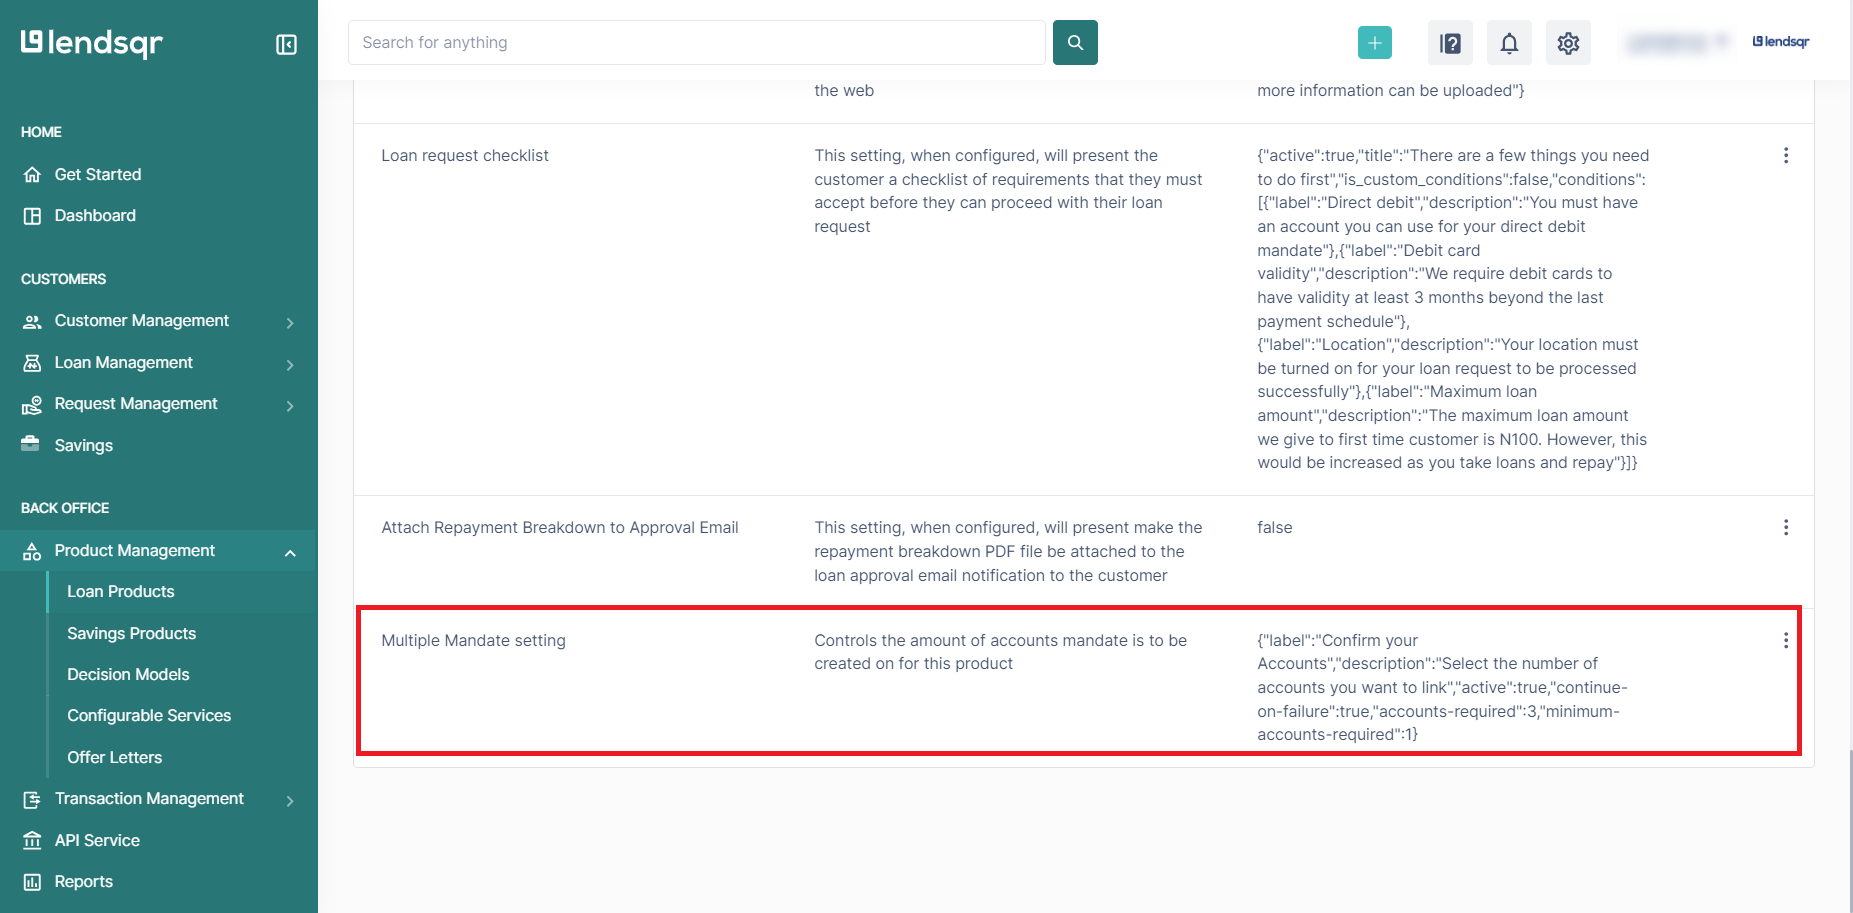
5. Locate the “Multiple Mandate Setting” Attribute
Scroll through the list of attributes until you find the Multiple Mandate Setting attribute.
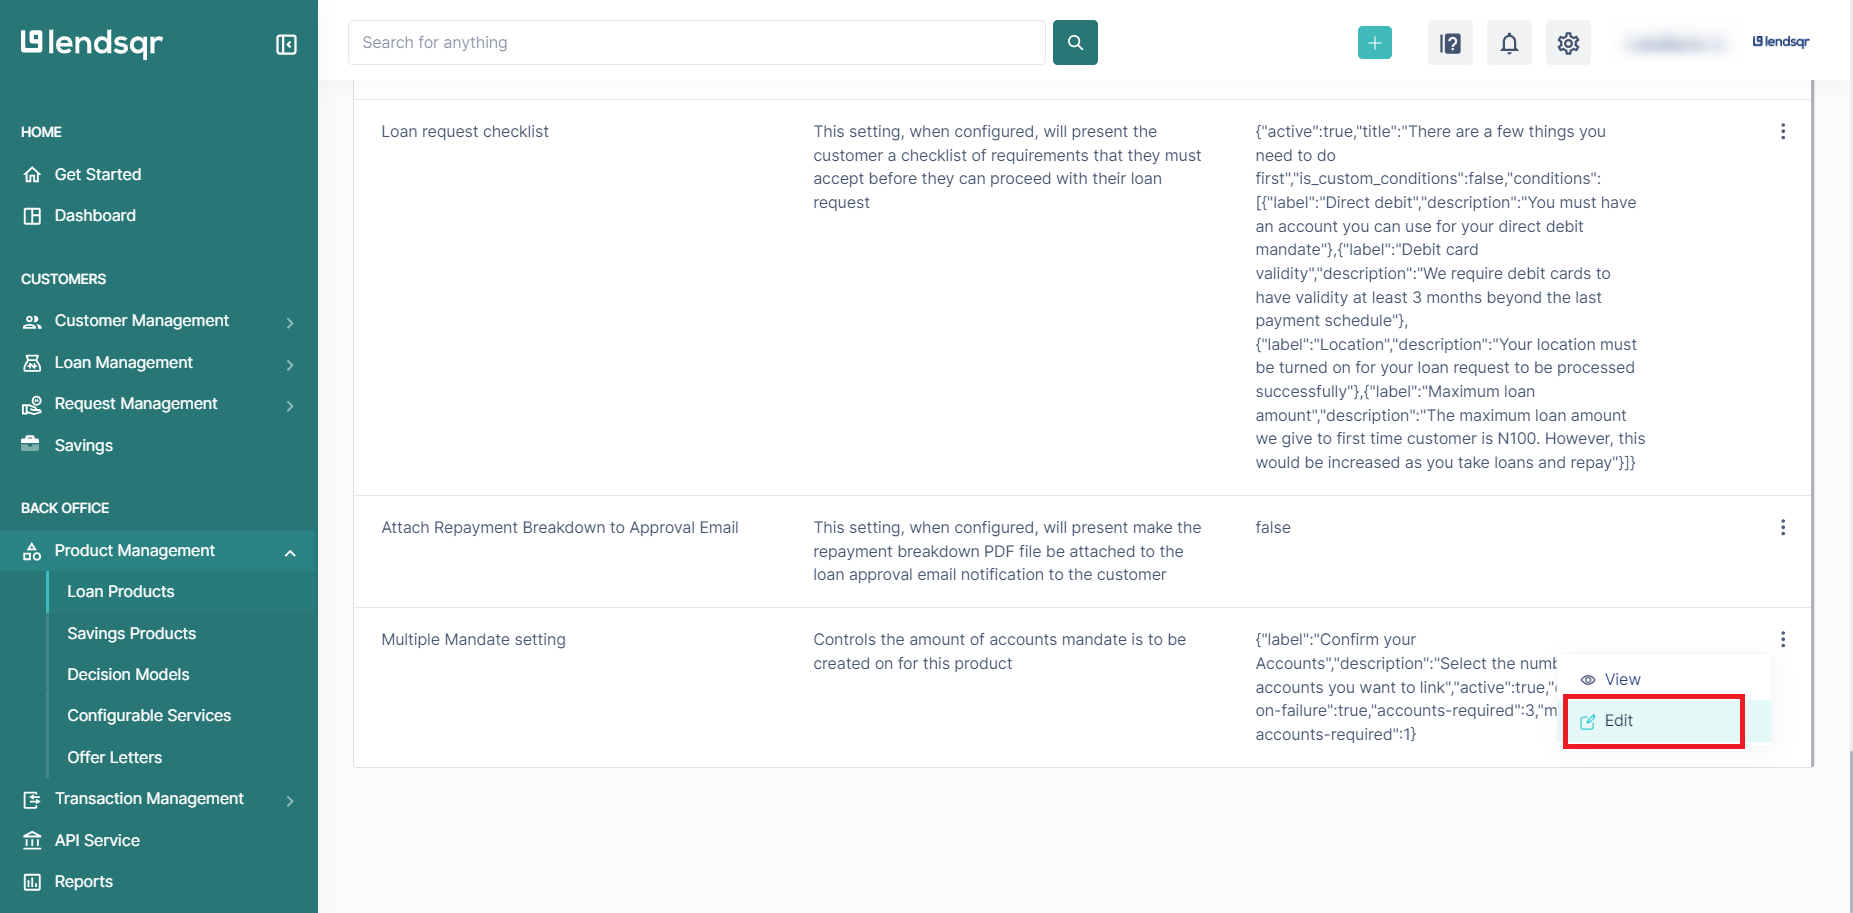
Click on the more options button and select “Edit” beside this attribute.
5. Update the “Multiple Mandate Setting” Attribute
On default, the setting is inactive and accounts required is set to 1 and the minimum accounts required is just 1
Check the box beside “Active” to activate the setting.
Increase the value of accounts and minimum accounts required to fit your business model.
Only activate Continue on Failure if you want your customers to be able to complete the loan application if they don’t meet the minimum accounts required.
You can also edit the label and description shown to your customers during the application process.
Click on the save button once you have confirmed your changes.
Here is a video recording of how to do this on the admin console