Introduction
A restricted wallet allows you to control how customers use the loan funds disbursed to their wallets. With this feature, you can manage actions like transfers, payments, bills, airtime purchases, and more. This ensures that loan funds are used as intended, offering a higher level of control and security for lenders.
Default Configuration
To set up the restricted wallet, you first need to configure it within your transaction settings. Here’s an example of a default payload that you can implement:
{ "savings": true, "bills": true, "airtime": true, "transfer": true, "data": true, "payments": true, "withdraw": true}Explanation: When a setting is set to true, that action is restricted, meaning your users will not be able to perform that activity within their app.
Advanced Configurations
Beyond the basic settings, you can create more complex configurations to meet specific requirements. For example, you can limit transfers only when the user has an outstanding loan or restrict QR payments:
{ "savings": false, "bills": true, "airtime": true, "transfer": { "if": [{ ">": [{ "var": "loan.outstanding_balance" }, 0] }, false, true] }, "data": false, "payments": false, "withdraw": true, "qr-payments": false}Key Configurations:
- Transfer: Allowed only if the user has no outstanding loan balance.
- QR payments: Completely restricted.
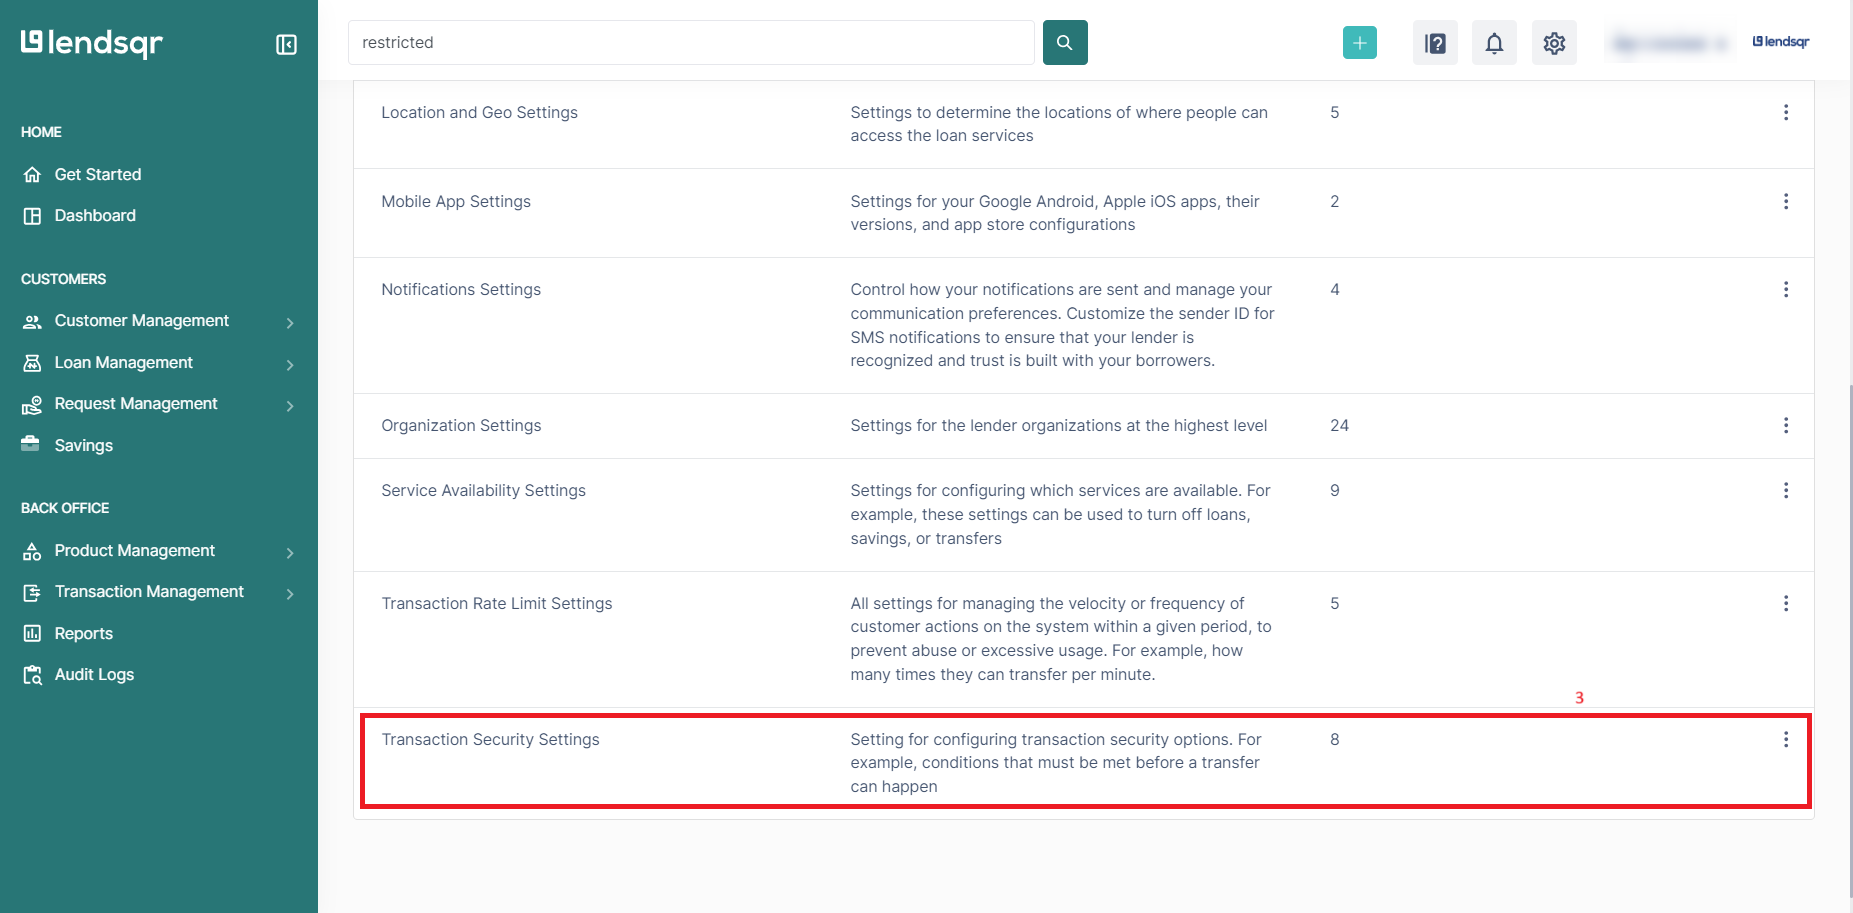
Setting up Restricted Wallet in the Admin Console
- Click on the “Settings” icon at the top right corner of your screen.
- Select “System Configurations” under “System Settings” in the resulting page.
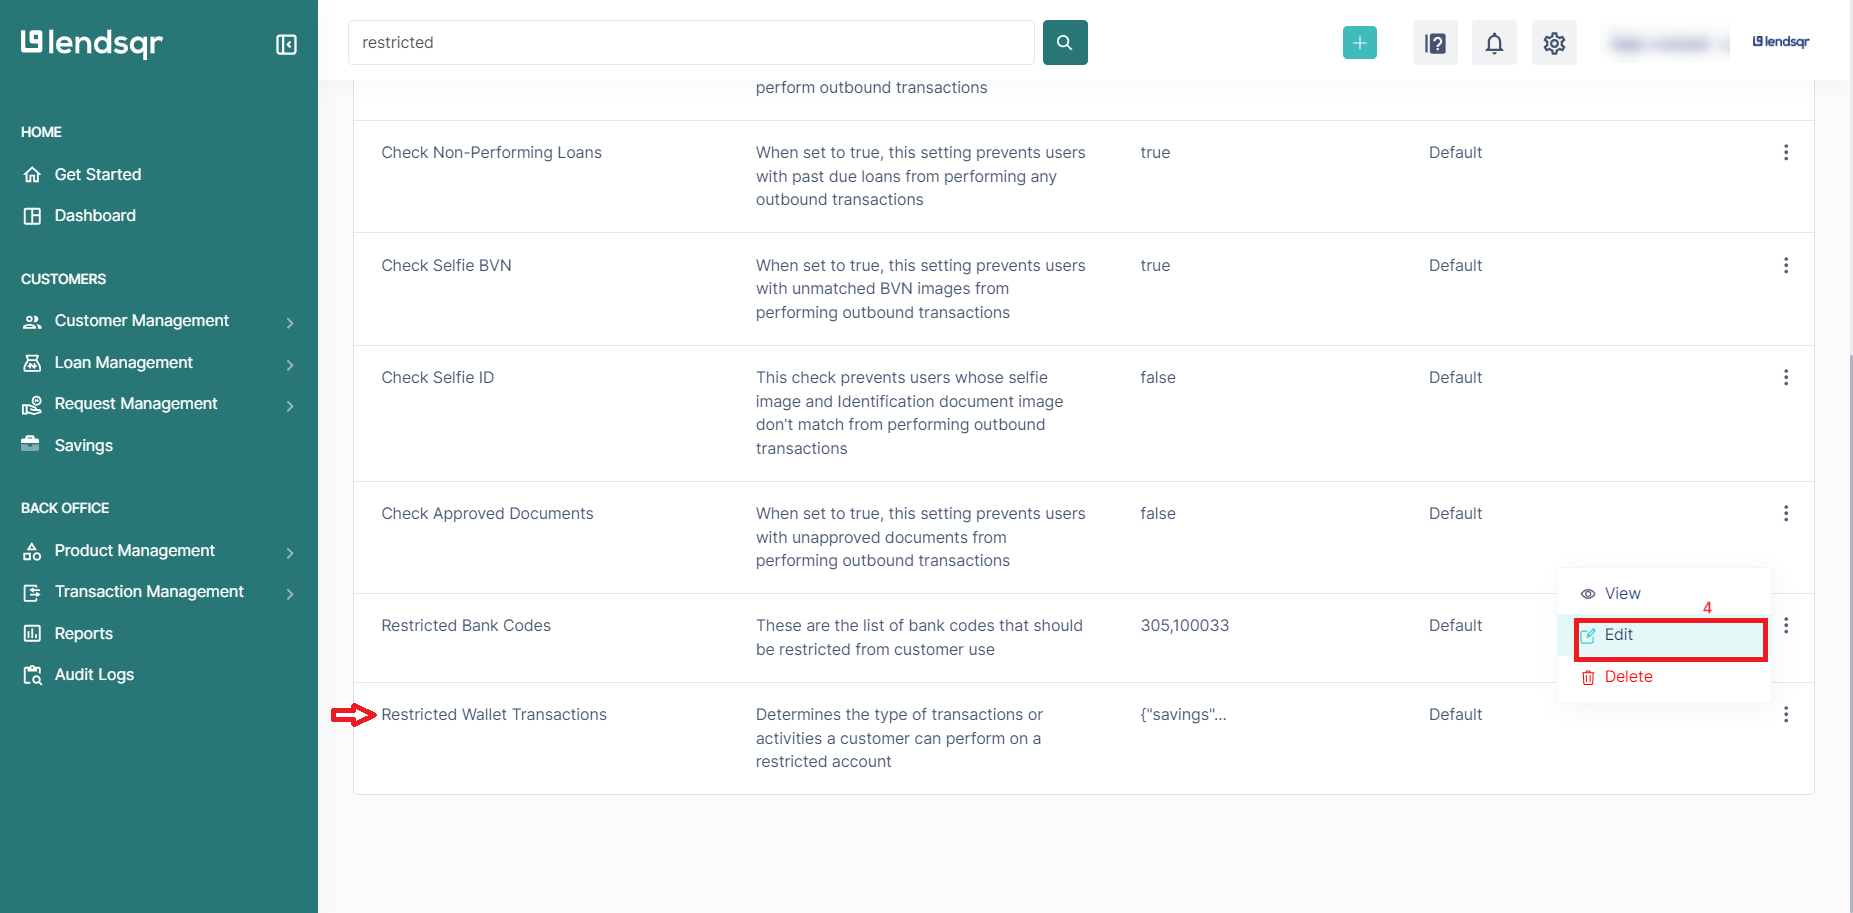
- Click on “Transaction Security Settings”
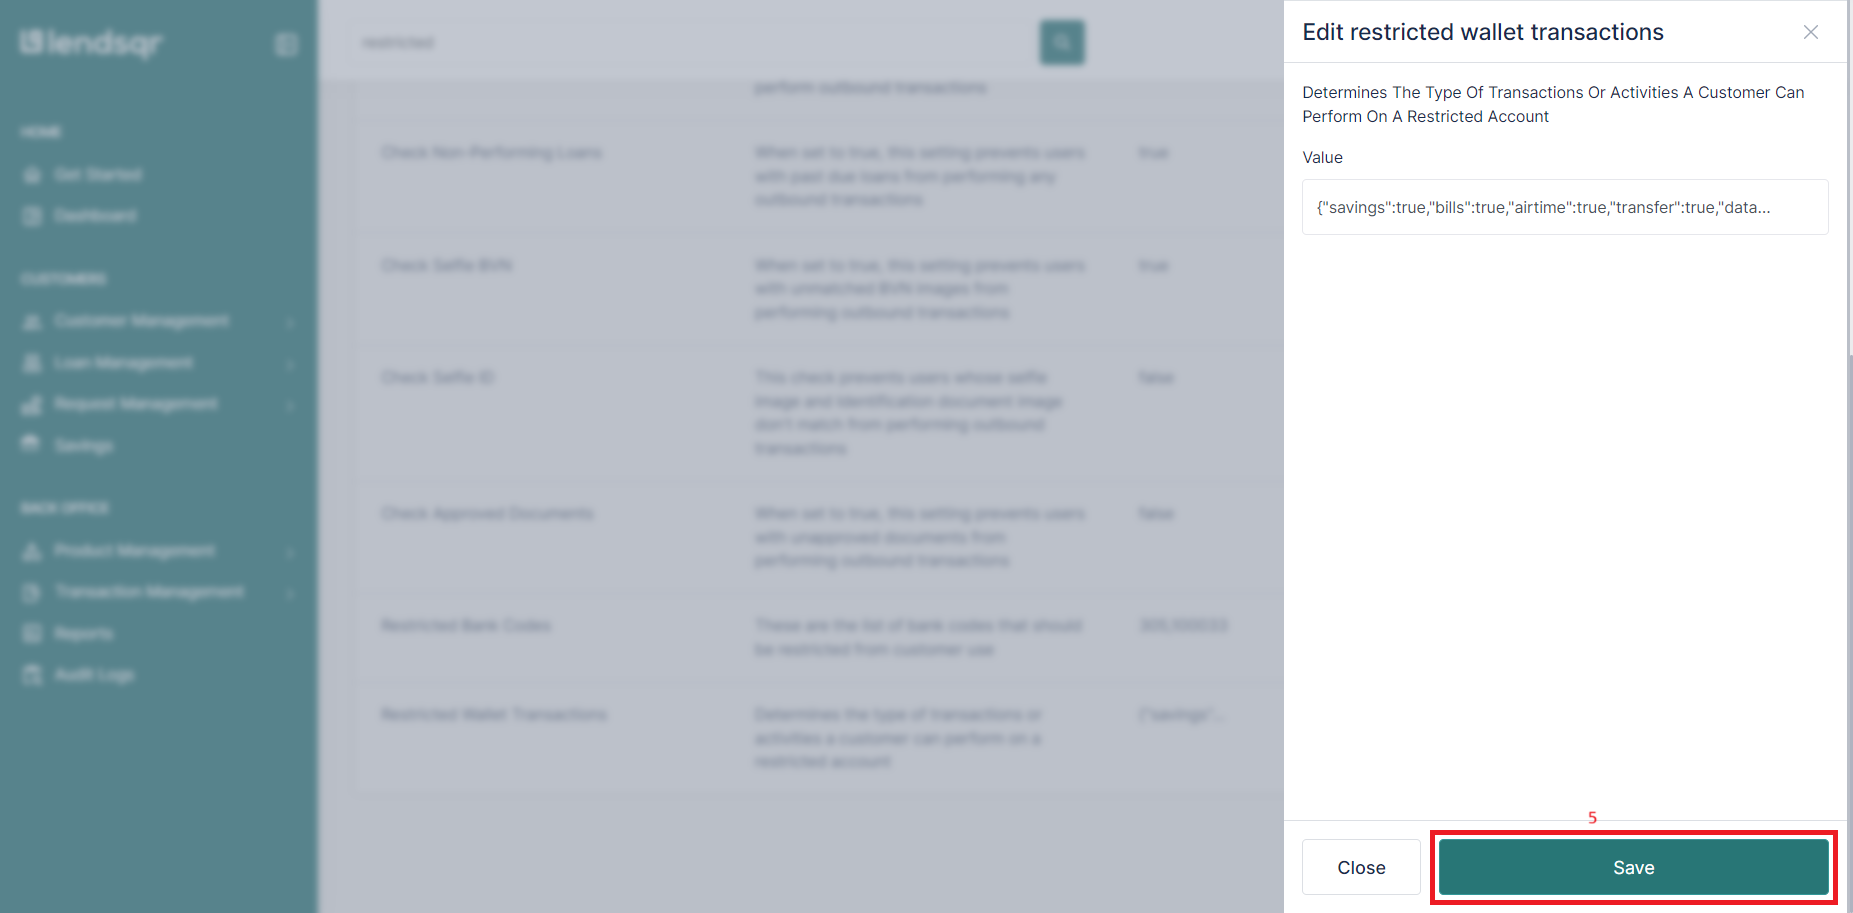
- Locate the Restricted Wallet Transactions Settings and click on Edit in the more options dropdown to modify the current settings.
- After editing the restricted wallet settings to match your preferences, click on Save to apply the changes


Configuring the Restricted Wallet on Loan Products
- Login to the admin console
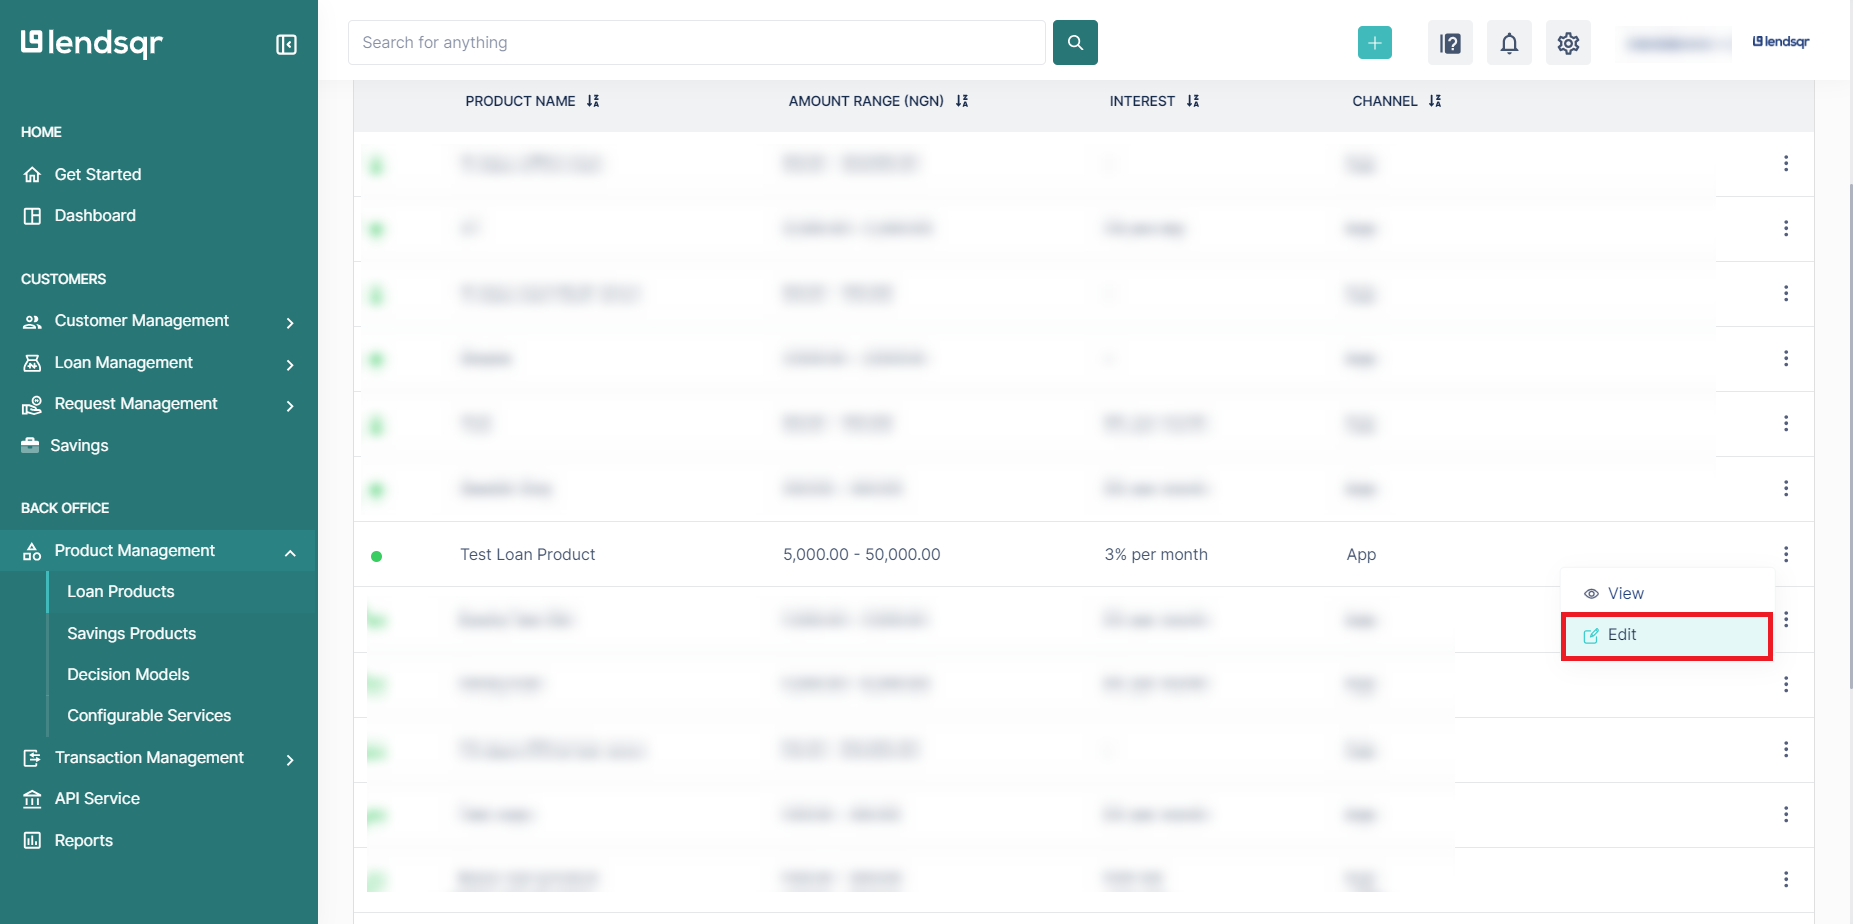
- Navigate to “Loan Products” under “Product Management”.
- Once logged in, locate the side navigation and click on “Product Management.”
- In the dropdown menu, select “Loan Products.”

3. Create or Update a Loan Product
- To create a new loan product, click on the “New Loan Product” button.

- To update an existing product, find the product in the list and click on the “Edit” button next to it.
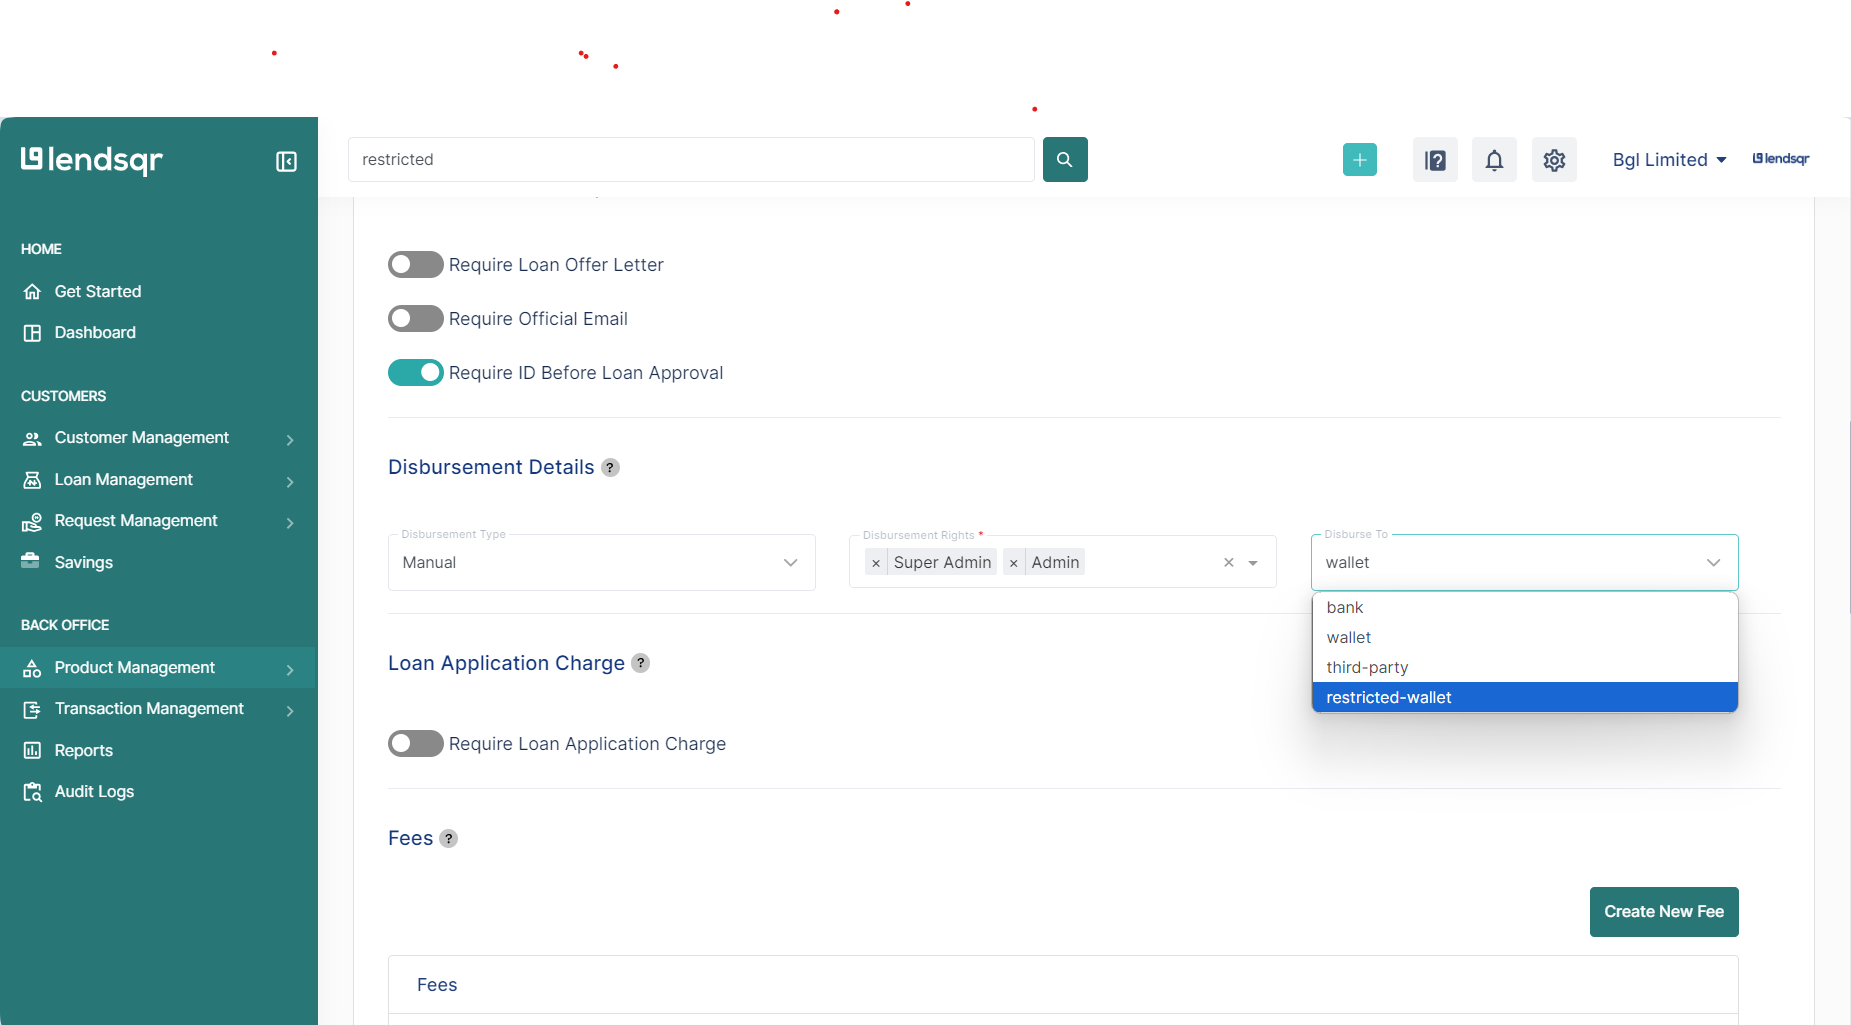
4. Access the Disbursement Details Section
- Scroll down to the “Disbursement Details” section of the loan product form.
- Here, select Restricted Wallet from the Disburse To field.
5. Save Changes
- Scroll to the bottom of the loan product form.
- Once the configuration is set, click on Save Changes or Create Loan Product if creating a new product