Introduction
Liveliness checks help verify customer identities by ensuring they are physically present during onboarding. Enabling this feature enhances security and prevents fraudulent activities. Follow the steps below to enable liveliness checks in your system.
Steps to Enable Liveliness Checks
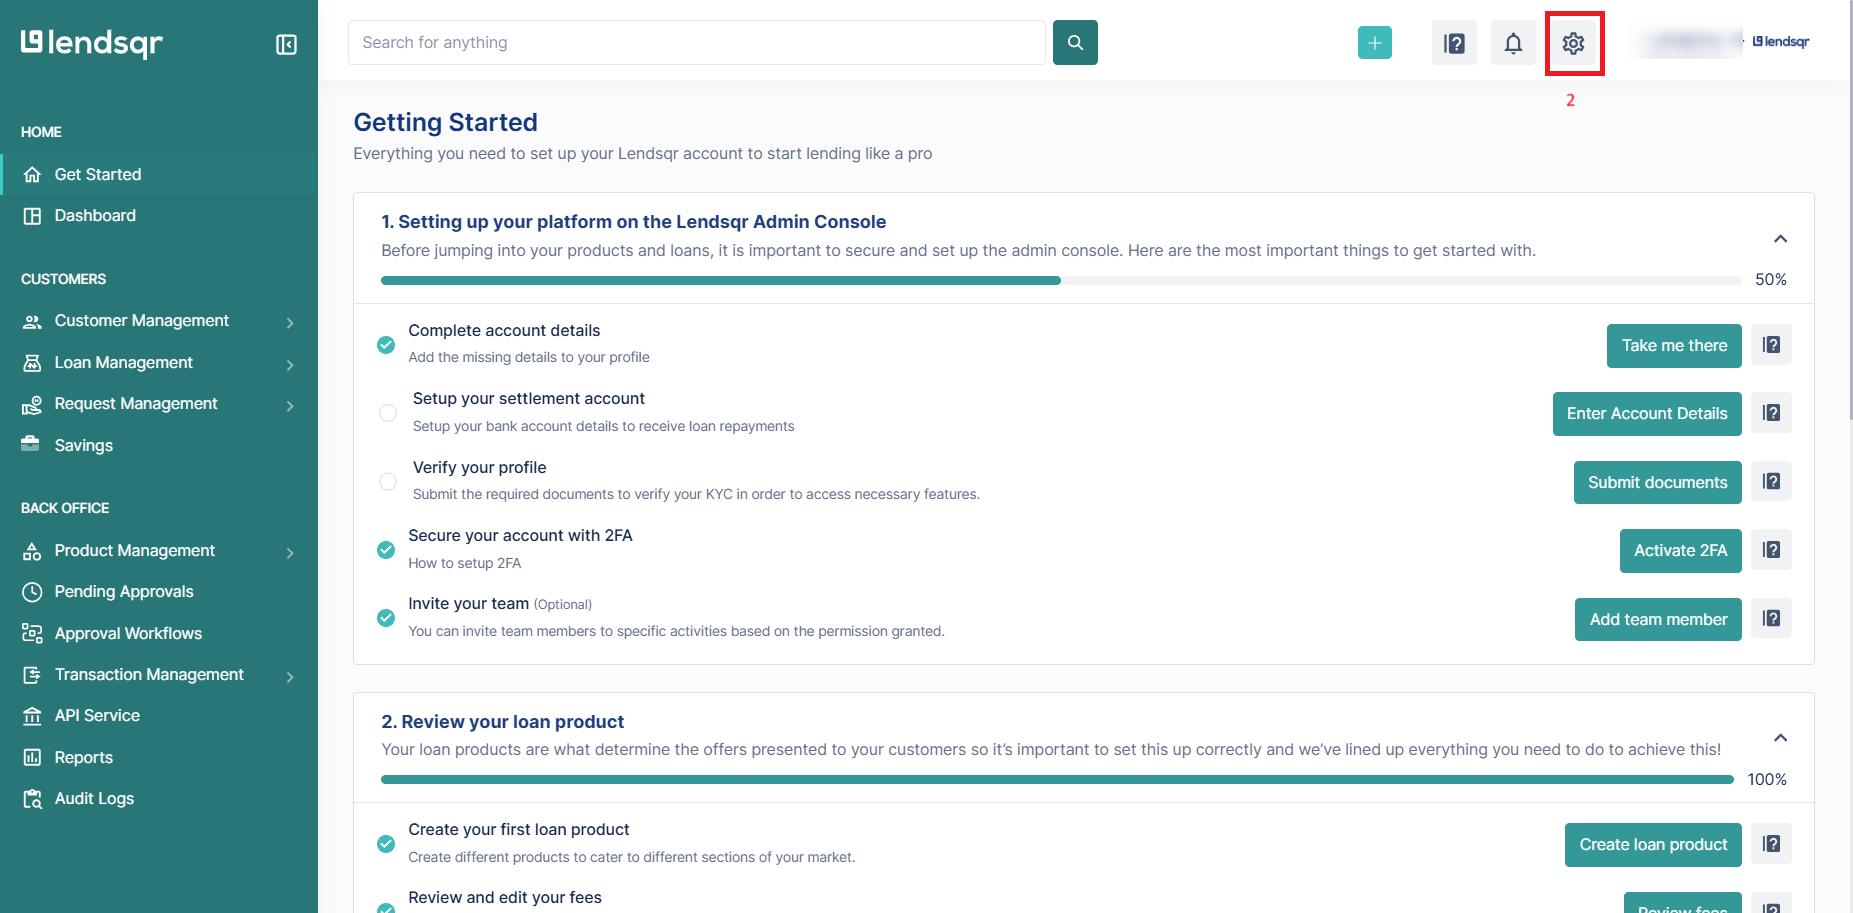
1. Log in to the Admin Console
2. Click on the Settings icon at the top right corner of your screen.
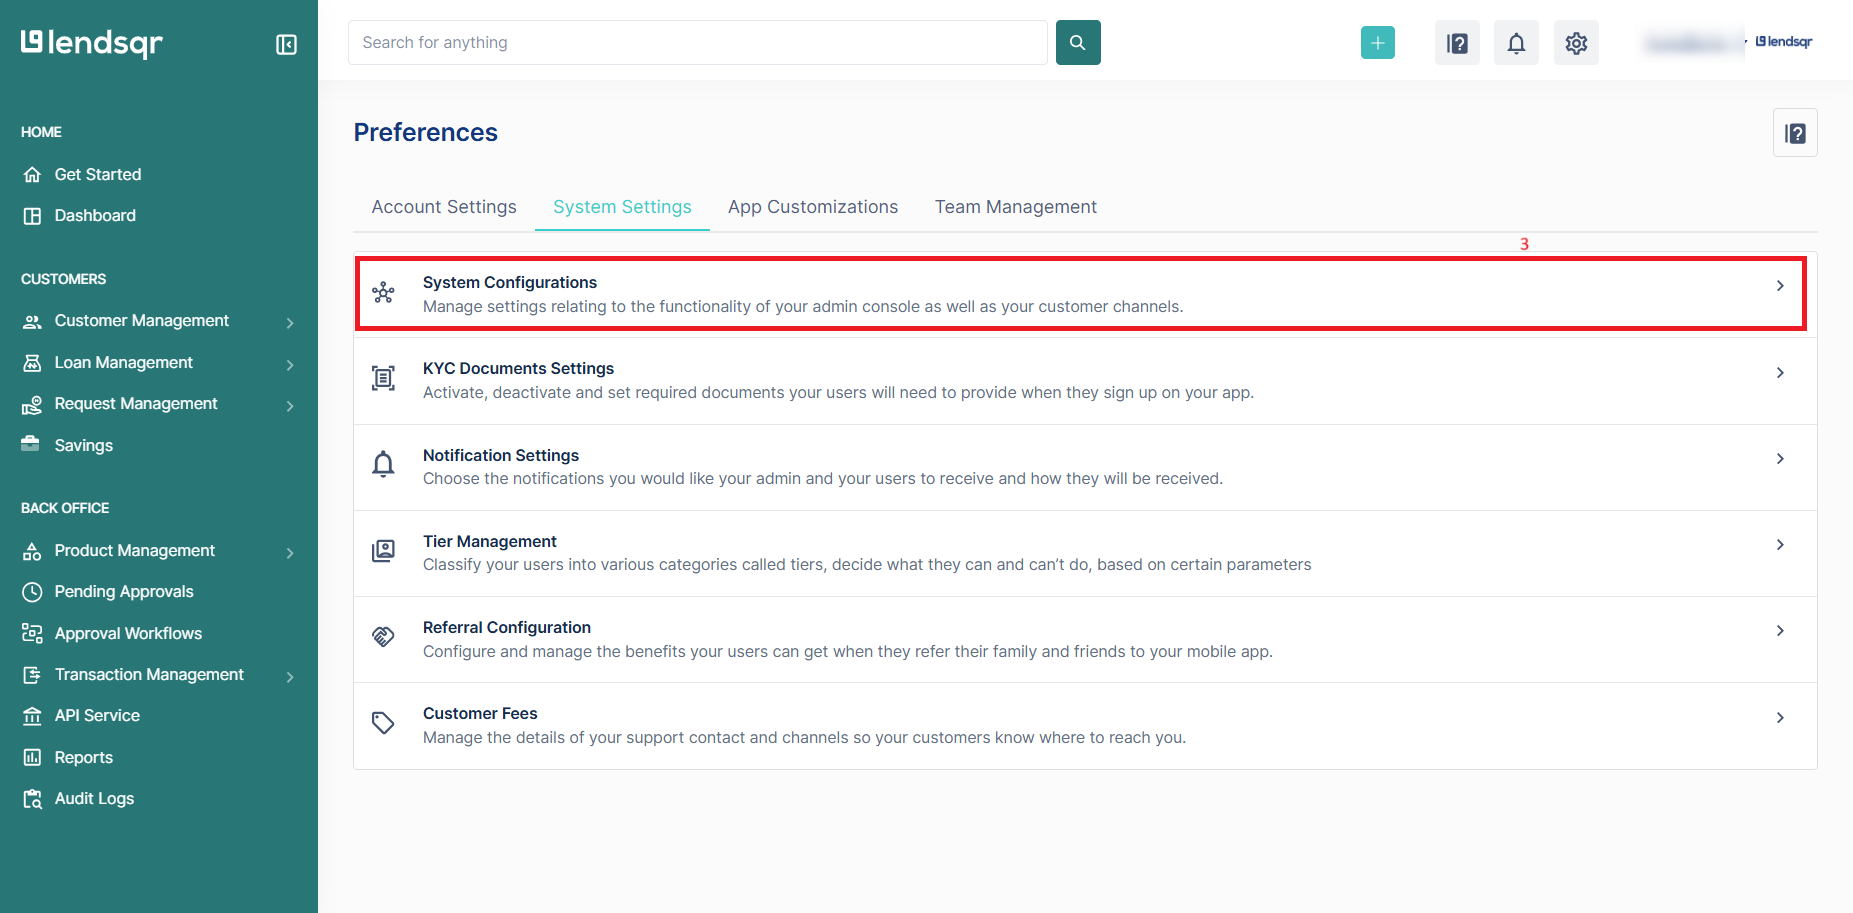
3. Under System Settings, select System Configurations.
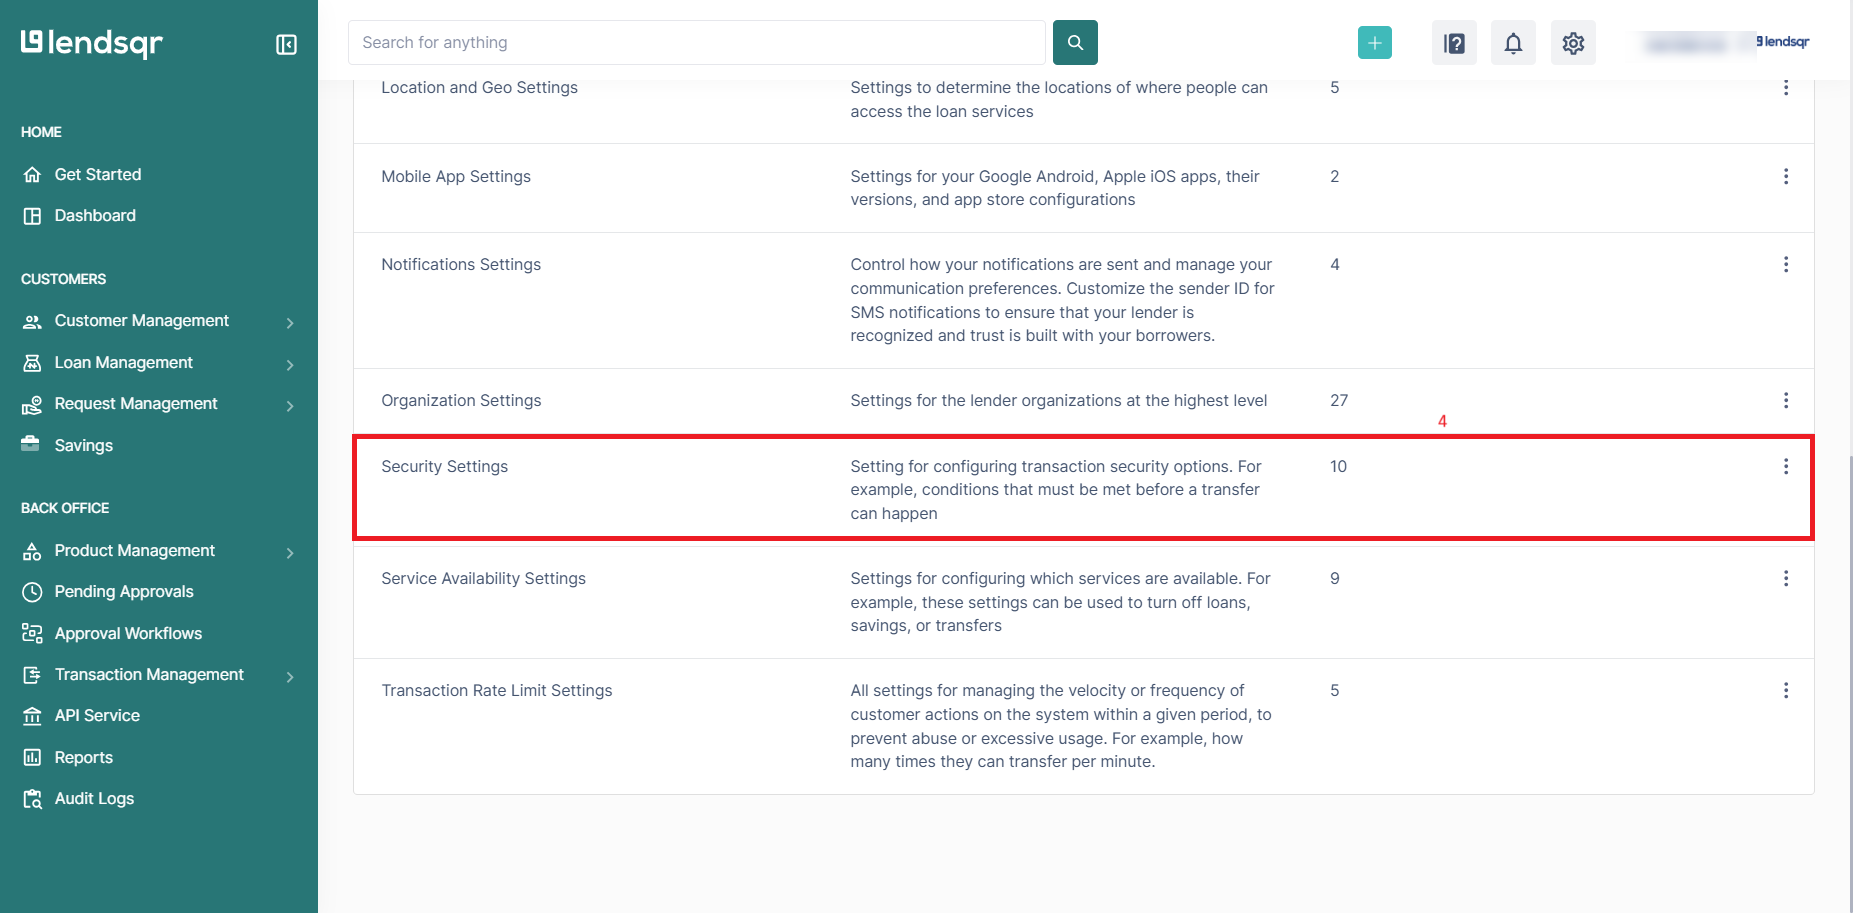
4. Click on Security Settings in the System Configurations menu.
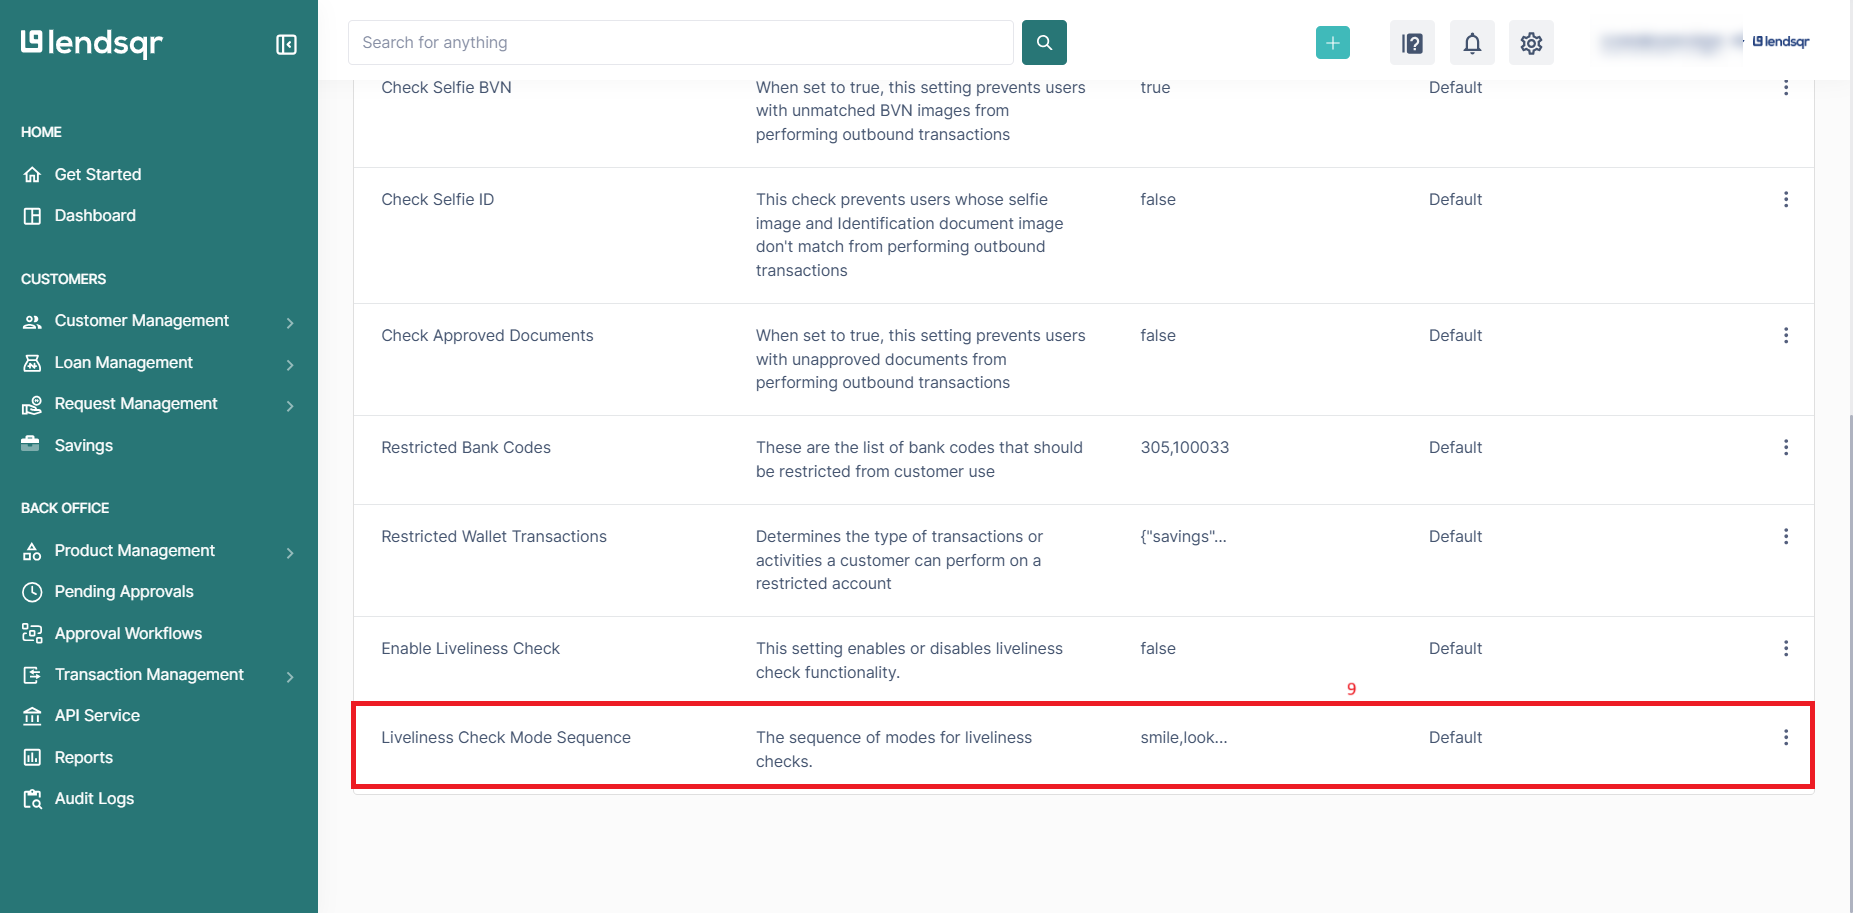
Enabling Liveliness Check
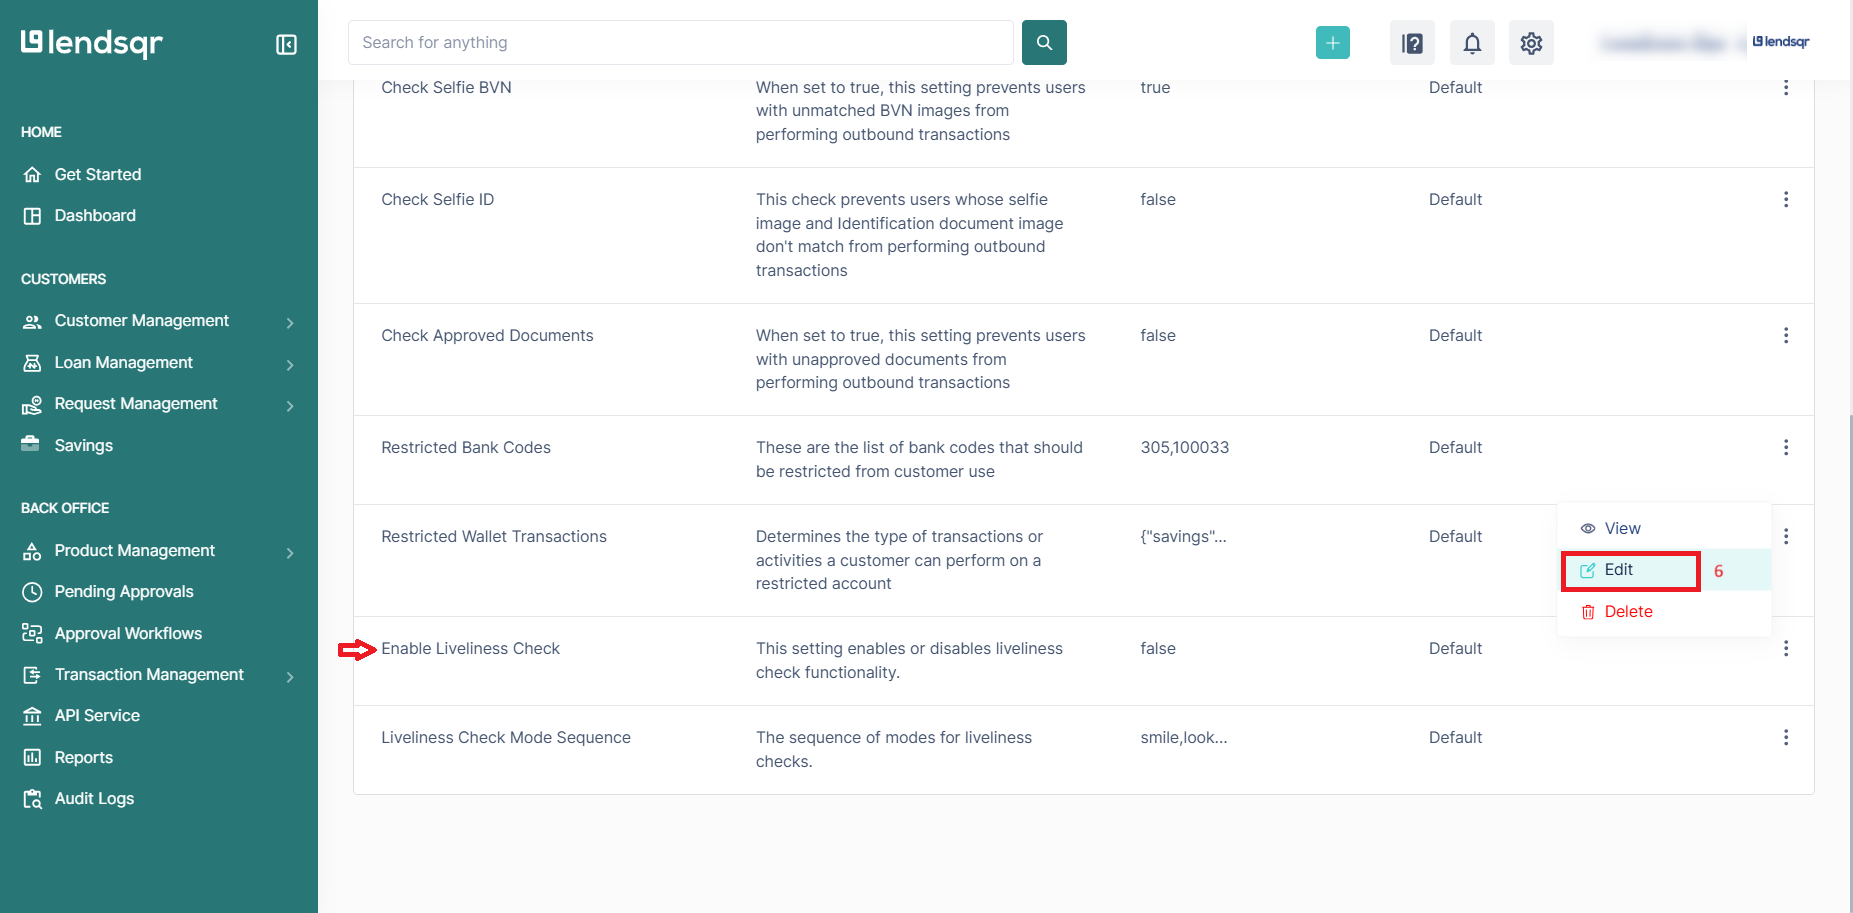
5. Locate the Enable Liveliness Check option. By default, this setting is disabled.

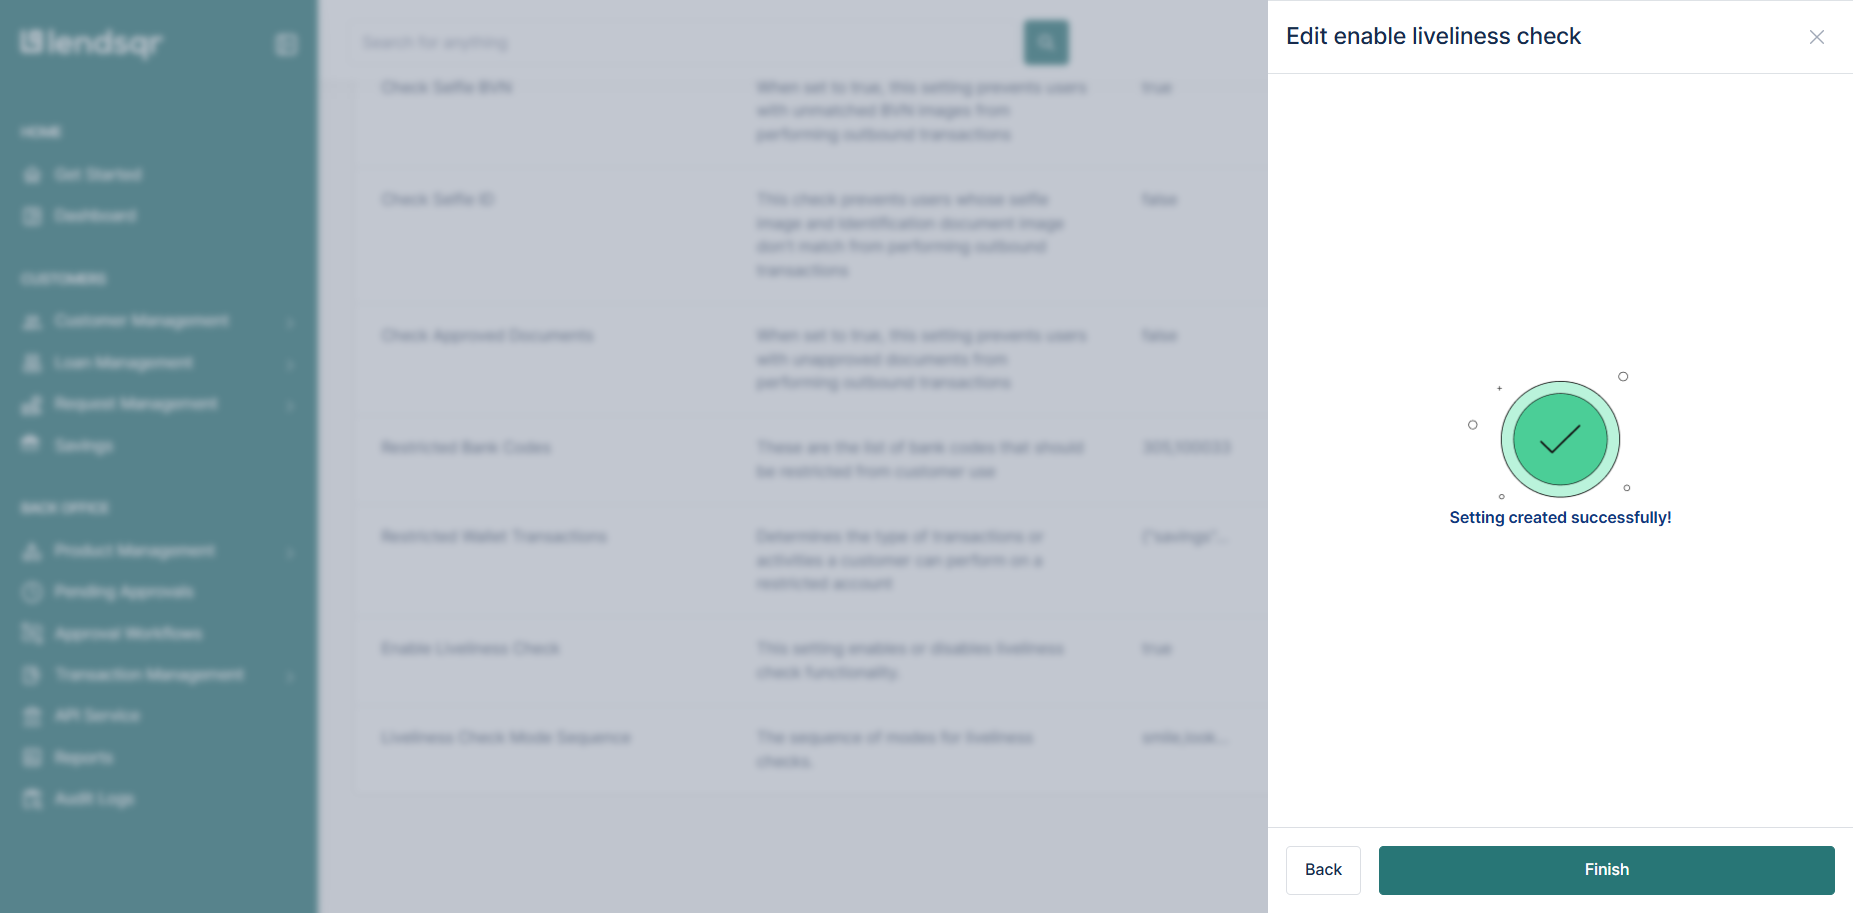
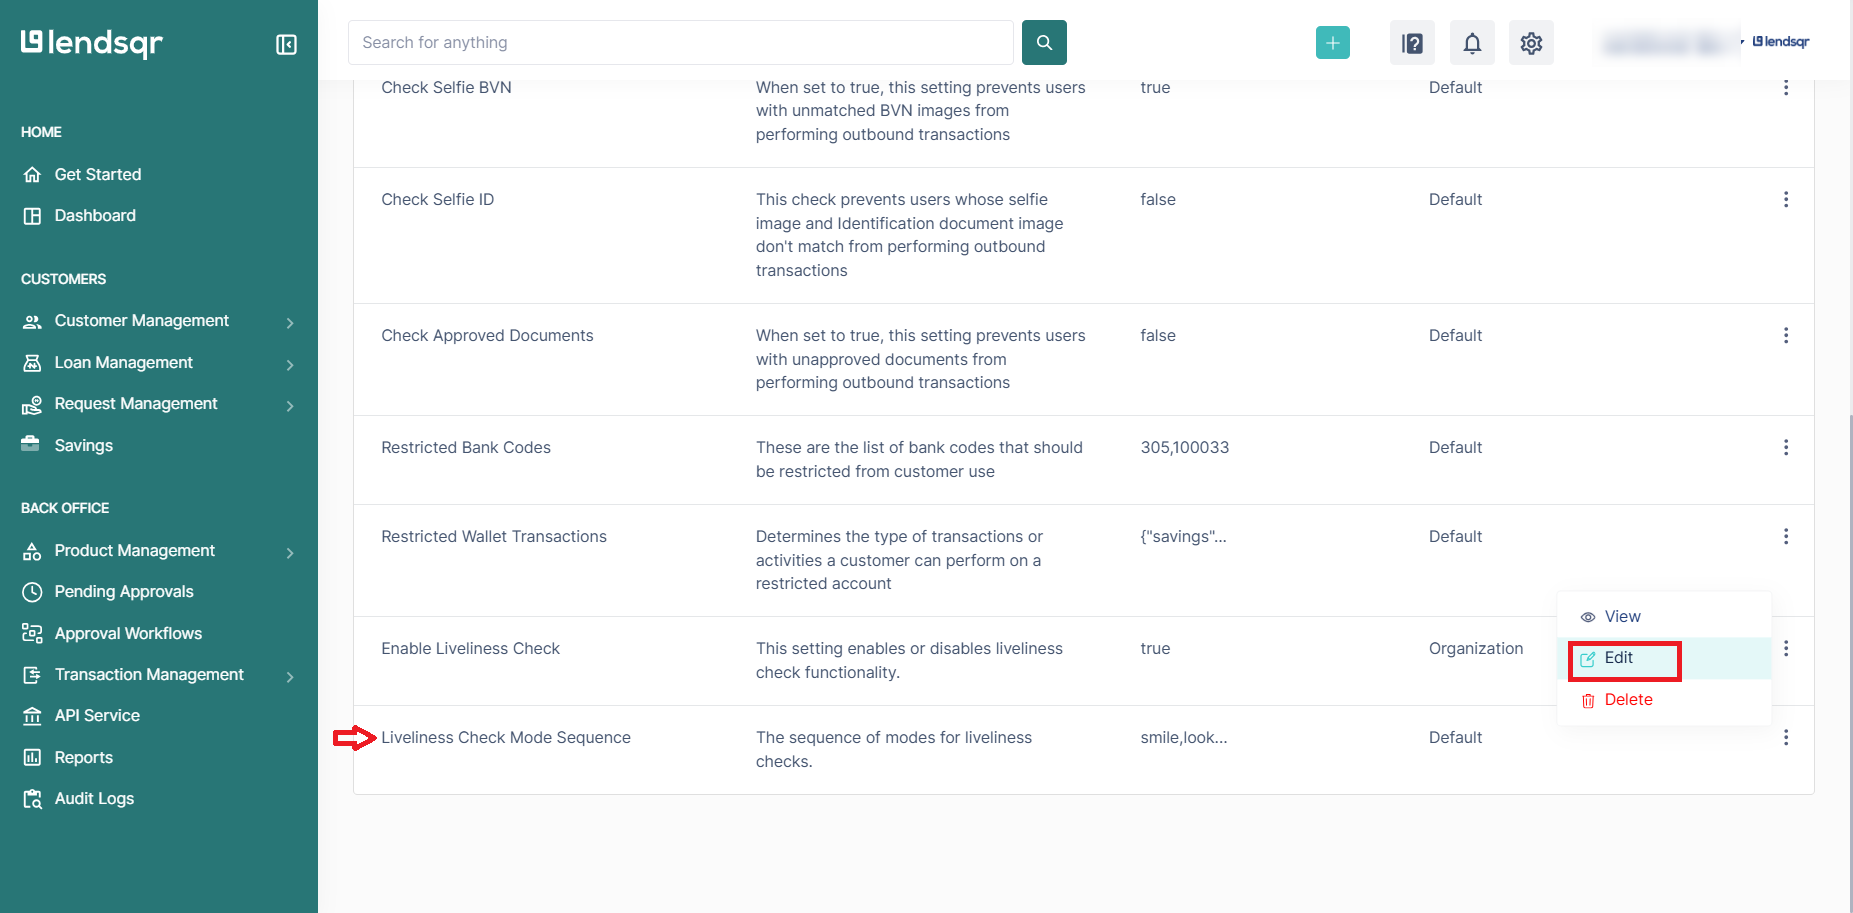
6. Click on the Edit button in the resulting dropdown after clicking the more options button beside the setting
7. Check the radio button beside True and click Save

8. Click on Confirm then Finish to complete activation.

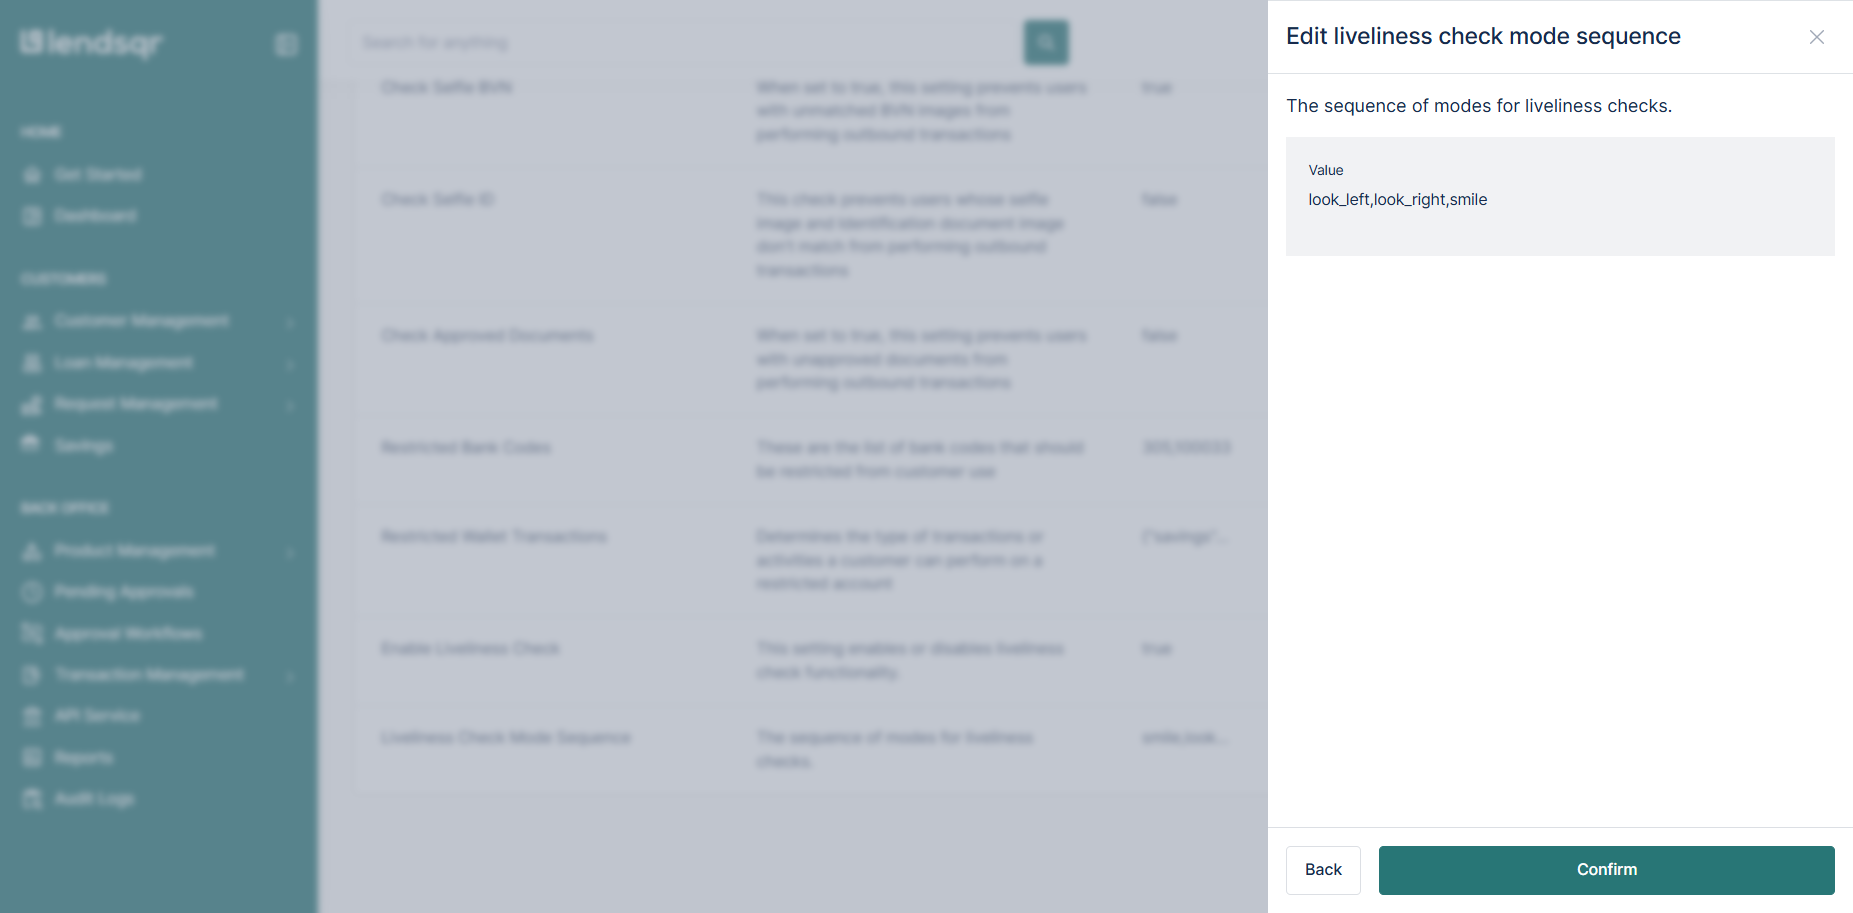
Set the Liveliness Check Mode Sequence
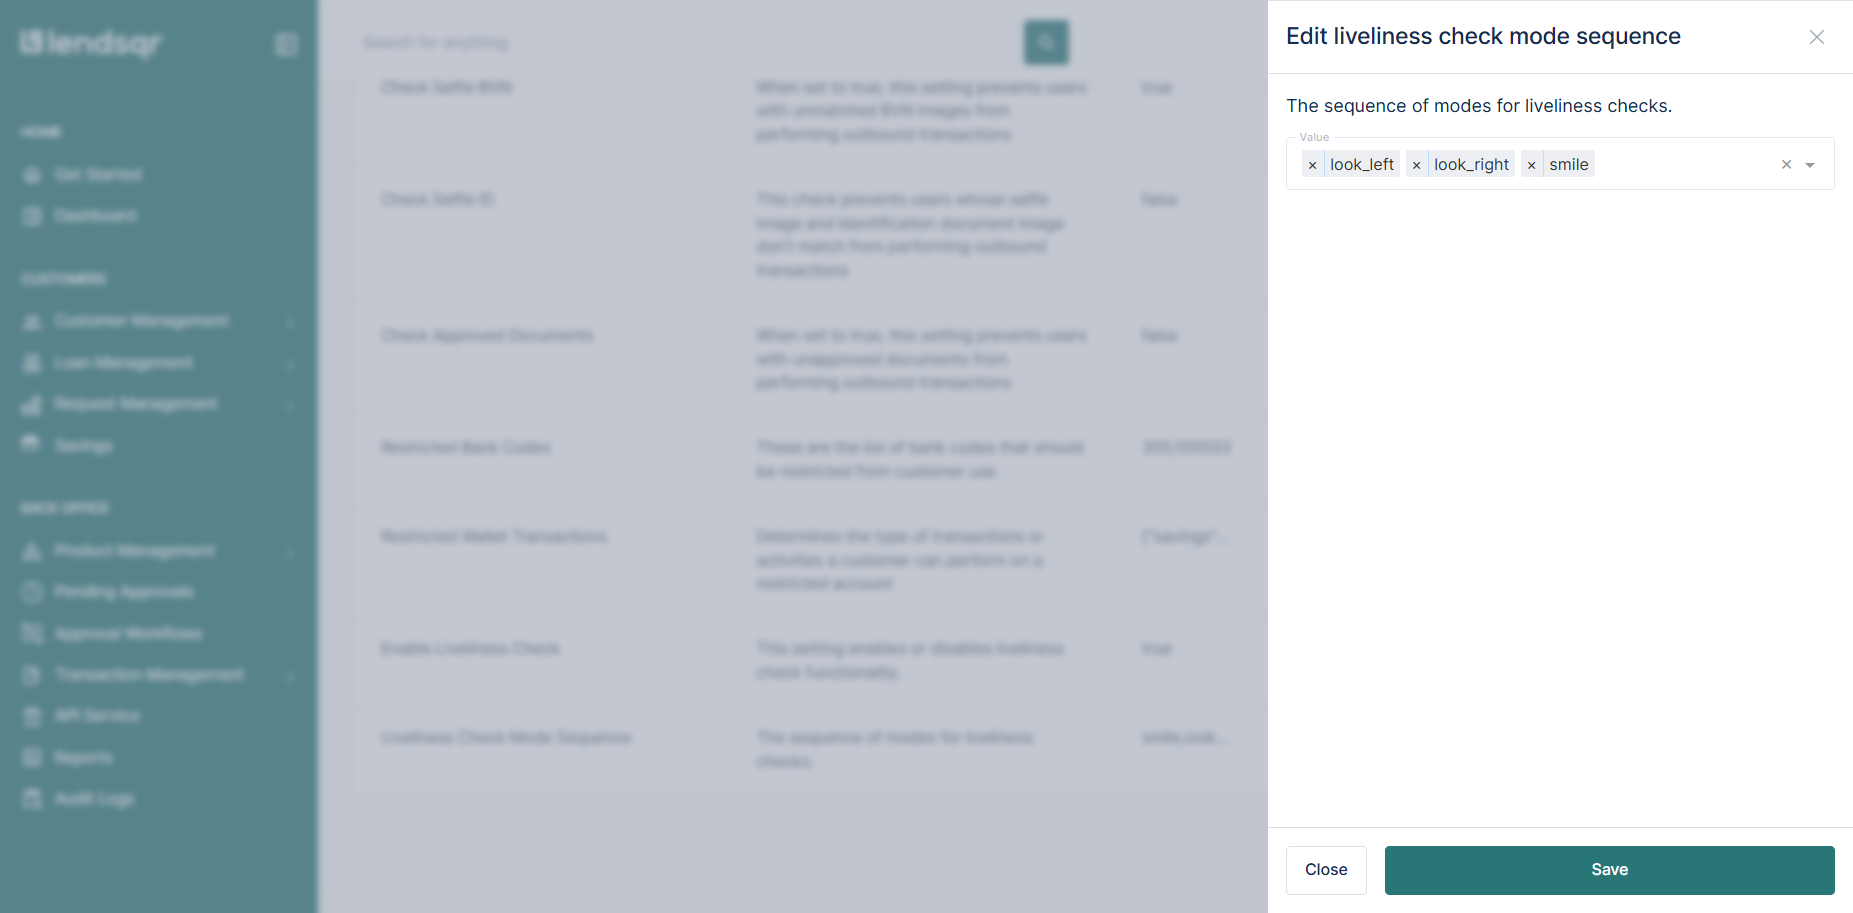
9. On the same Security Settings page, adjust the Liveliness Check Mode Sequence.
10. Choose the sequence in which users will complete the check Available options:
- Look Left
- Look Right
- Smile
11. Arrange them in your preferred order and Save
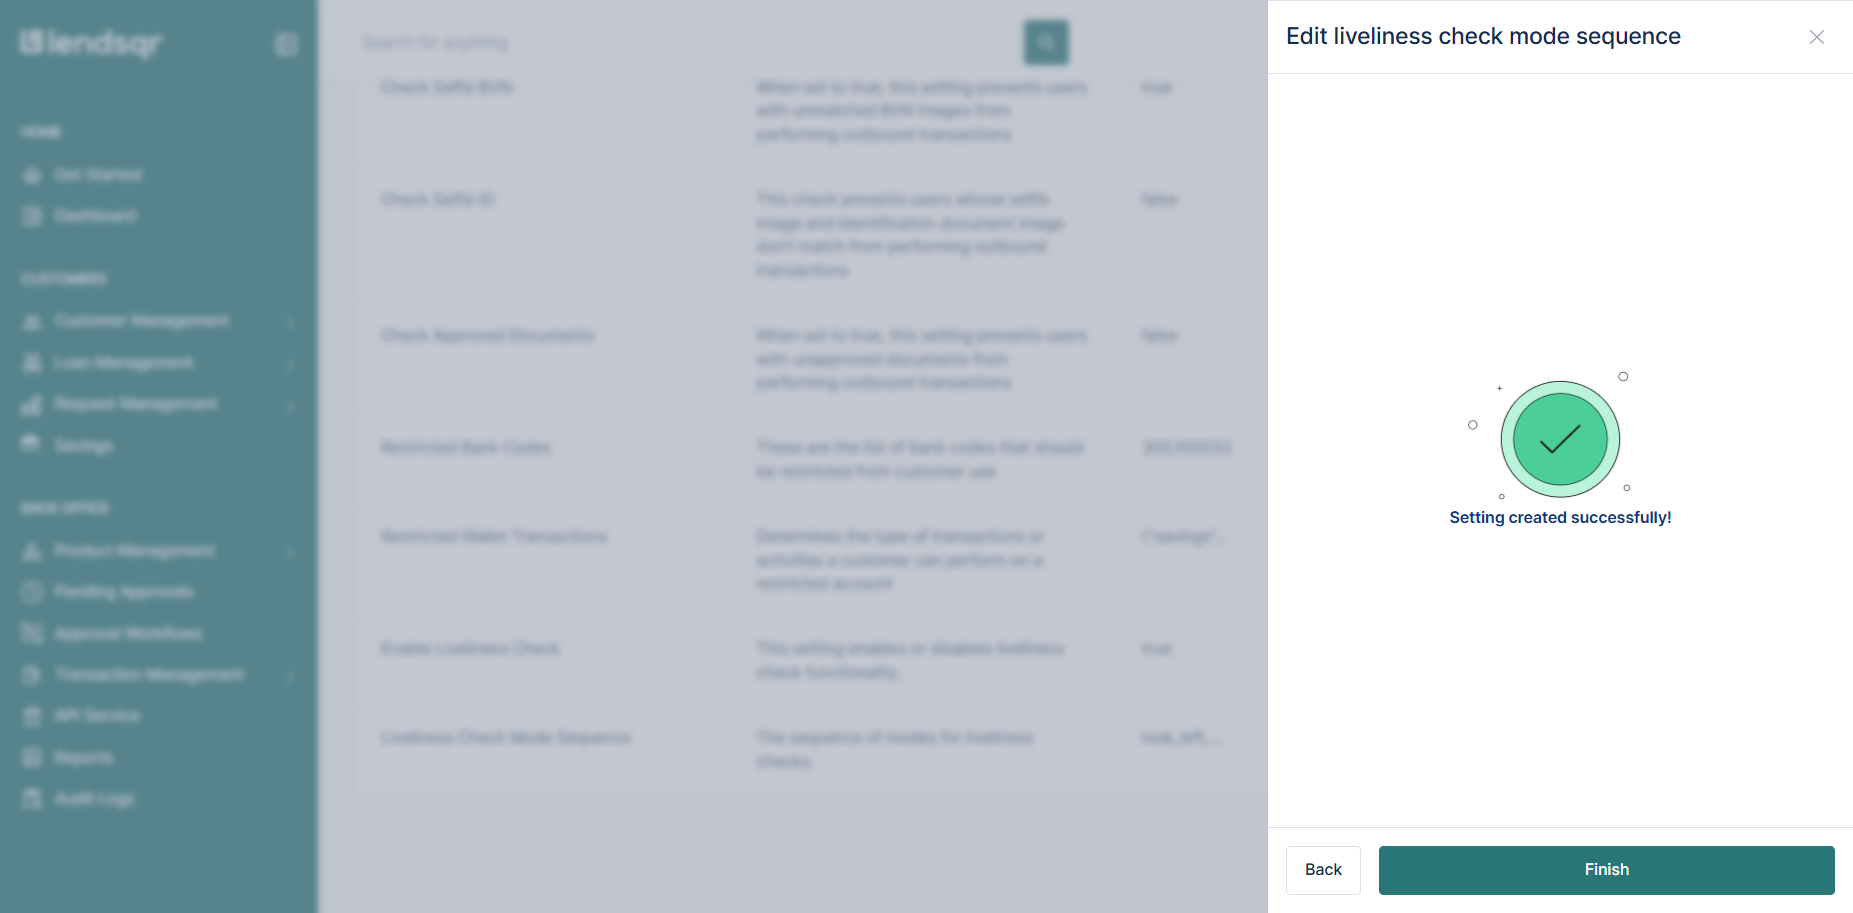
What Happens Next?
- Once enabled, all new customers will be required to complete the liveliness check during onboarding in the sequence you have selected.
- Existing customers who have not completed the check will be prompted to do so by the system.
Viewing Liveliness Check Videos & Status
To review customer liveliness check videos and statuses:
- Navigate to the Customer Page within the admin console.
- Locate and review the recorded verification process.
By following these steps, you can enhance security measures and ensure a more reliable customer verification process.