National Identification Number (NIN) verification is a crucial step in the loan application process, ensuring compliance and data accuracy. However, errors during NIN registration can sometimes result in mismatched or incorrect customer details, creating friction. To address this, this update allows you to tailor how NIN verification is performed. You can now define which data fields are cross-checked with your customer’s Bank Verification Number (BVN) data, providing flexibility while maintaining regulatory compliance.
Here’s how to set up and customize NIN verification for your loan products.
Why Customize NIN Verification?
- Adaptability: Adjust the verification process to account for minor discrepancies in registration data, such as name spelling errors or date format variations.
- Customer Experience: Simplify the application journey, reducing unnecessary rejections due to mismatched data.
- Compliance: Stay aligned with regulatory standards while providing a more seamless process for customers.
How to Configure NIN Verification
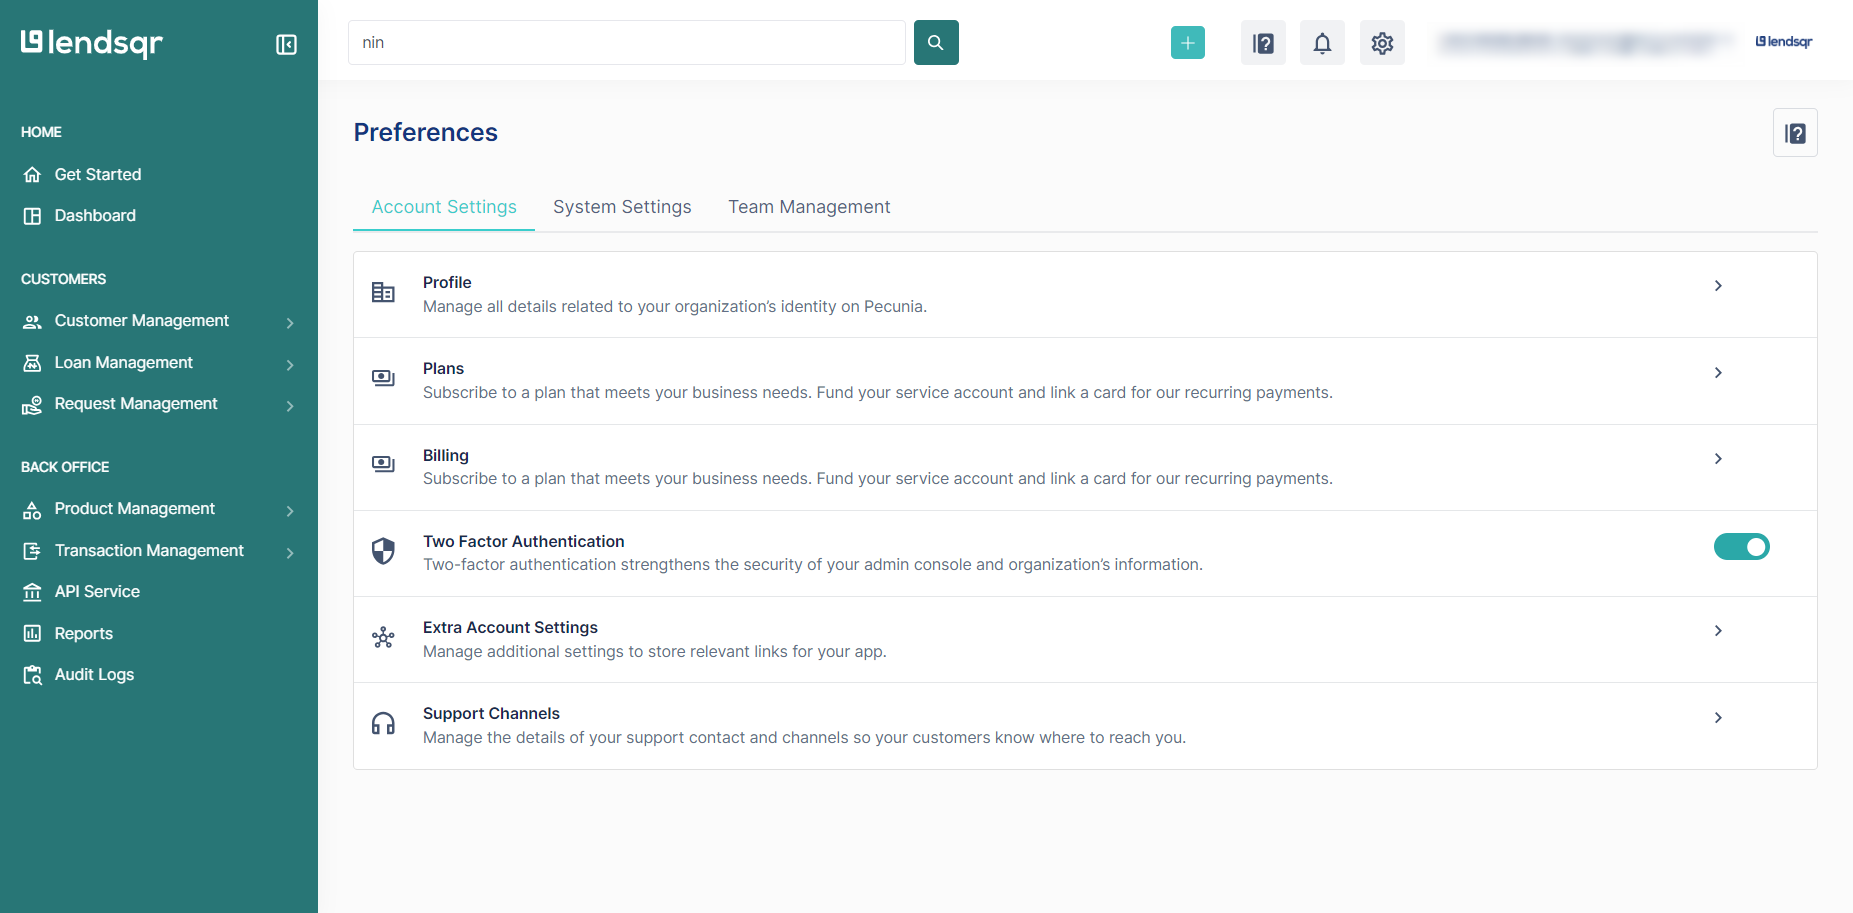
- Click on the “Settings” icon at the top right corner of your screen.
- Click on the System Settings tab
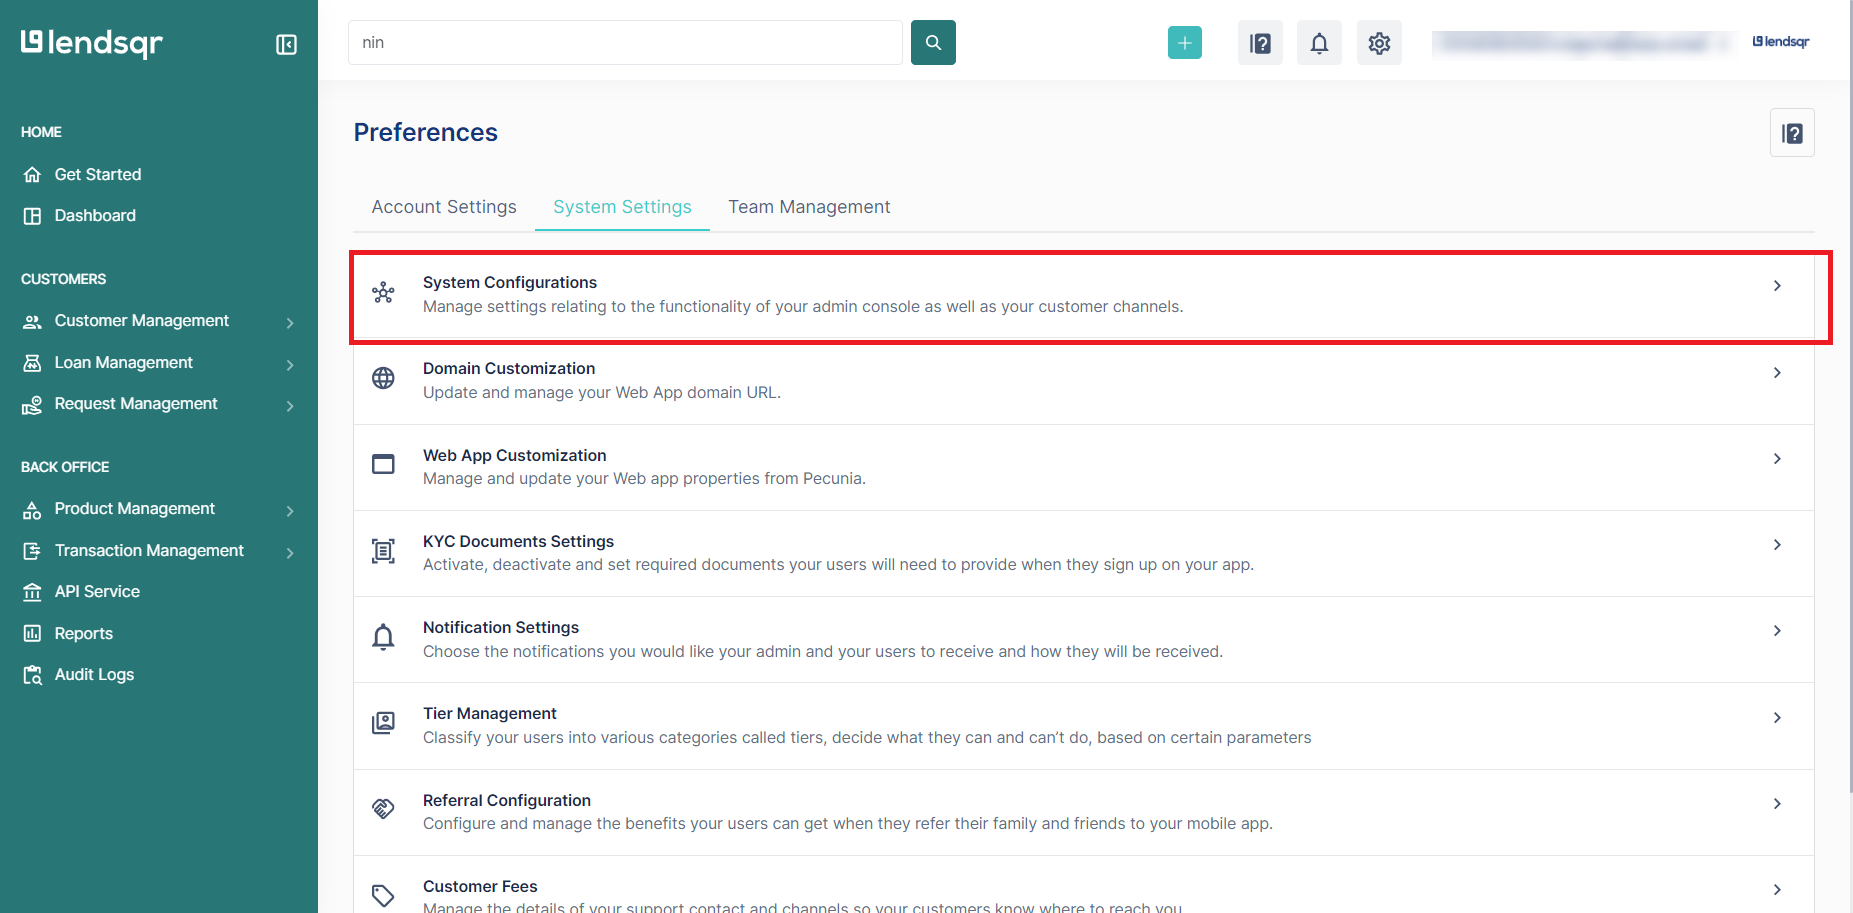
- Click on “System Configurations” in the resulting page.
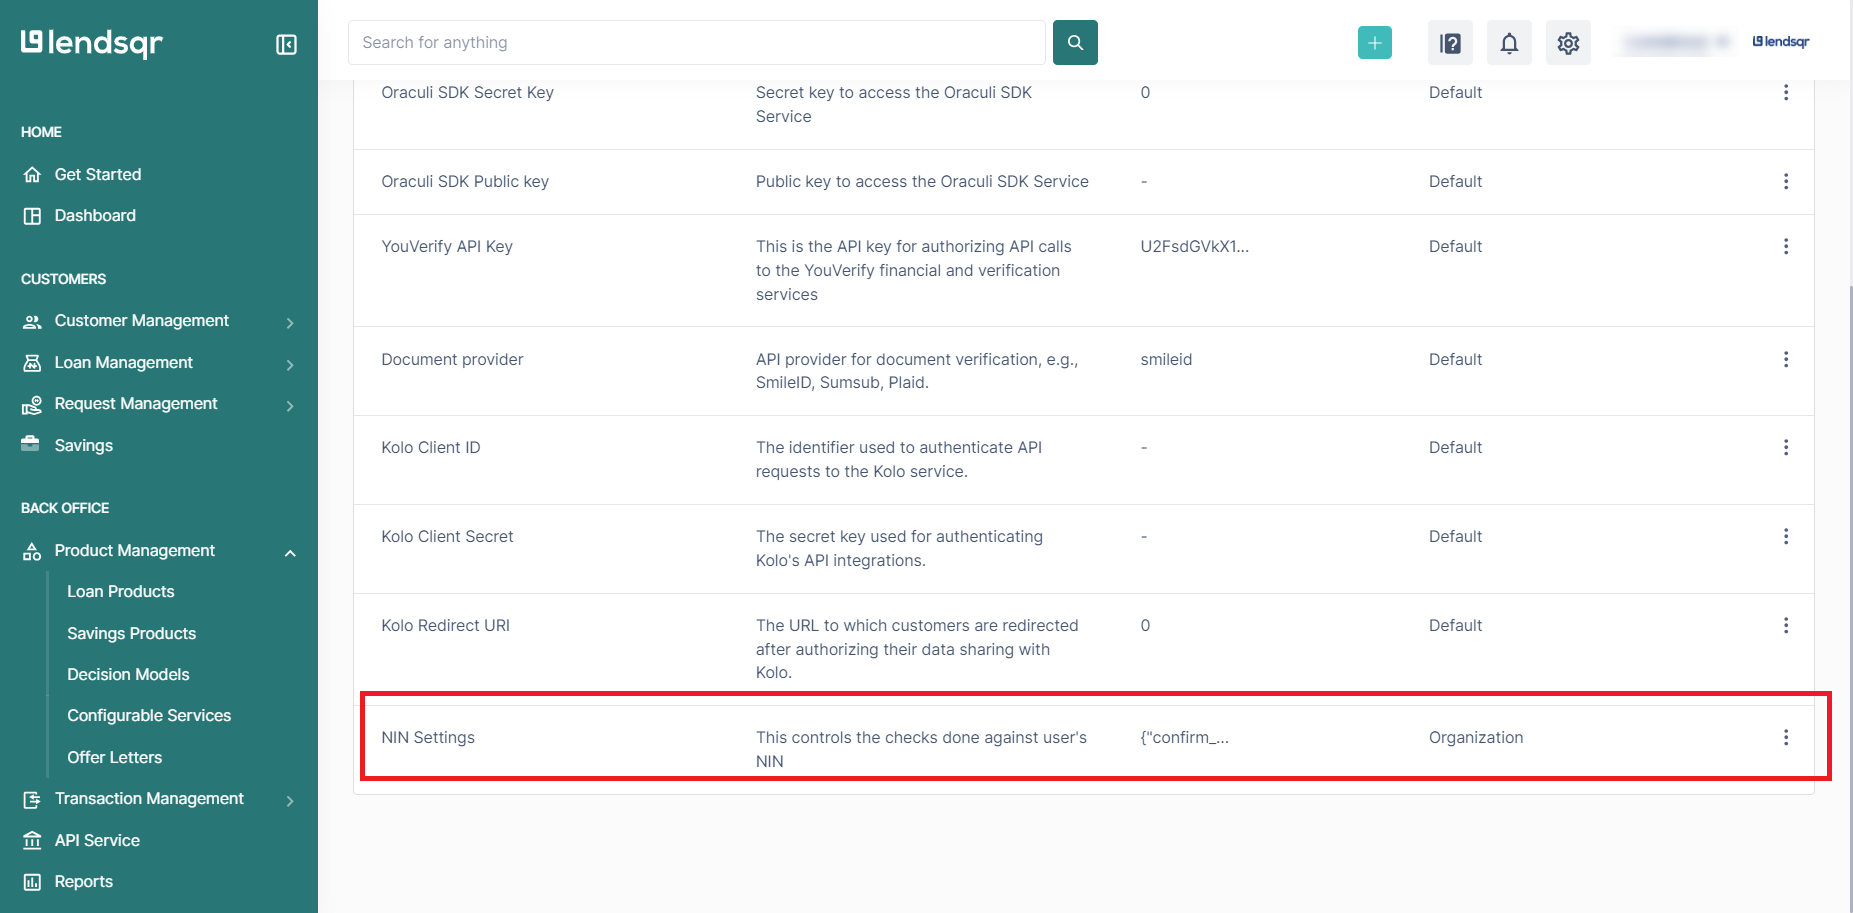
- Click on “Data Provider Settings”
- Scroll down until you see the NIN settings


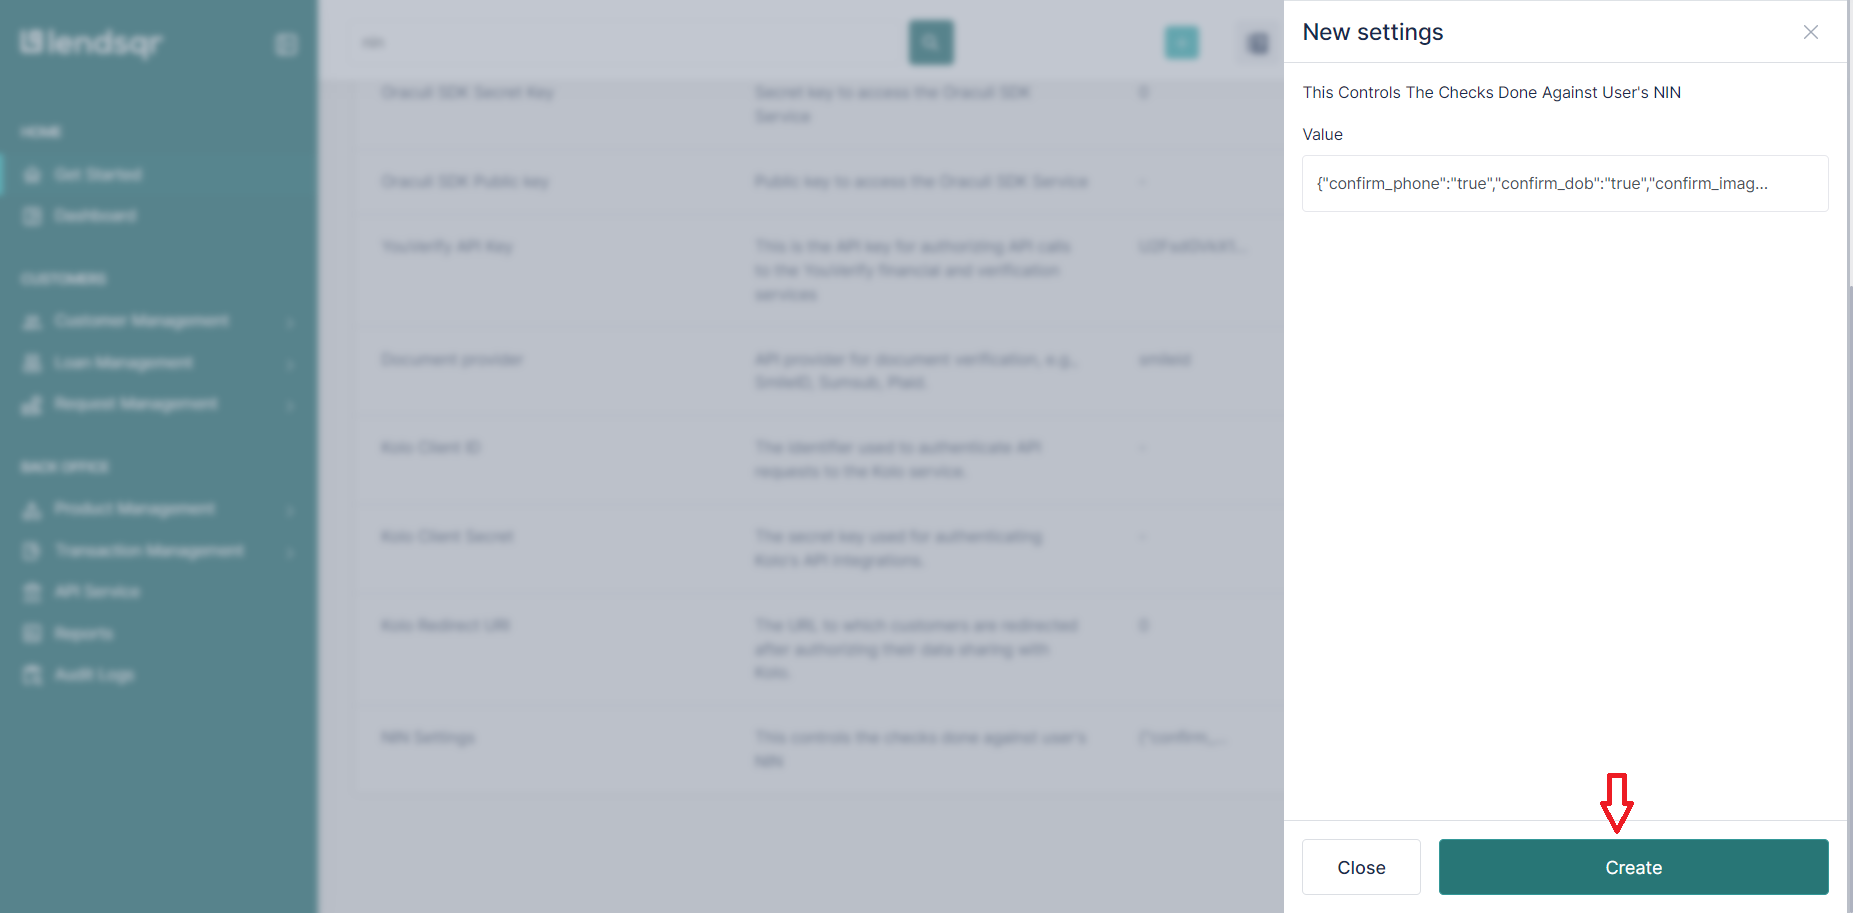
5. Click on the more options button on the “NIN Settings” and select “Edit”

6. This setting has the below saved on default i.e only the customer’s phone number and date of birth is verified.
{"confirm_phone":"true","confirm_dob":"true","confirm_image":"false"}You can update the setting by changing the value (true or false) attached to each data to be verified. 7. Click the “Save” button or Create if you are just editing the setting for the first time.