To set up tiering on the admin console, follow the steps below:
- Click the settings button at the top right corner of the screen.
- Select “Tier Management”.
- Navigate to the “New Tier” button to create a tier.
- If you already have existing tiers, you can select “Edit” to modify the tiers.
- View the required fields and input the appropriate data then click on create to save the changes that have been made.
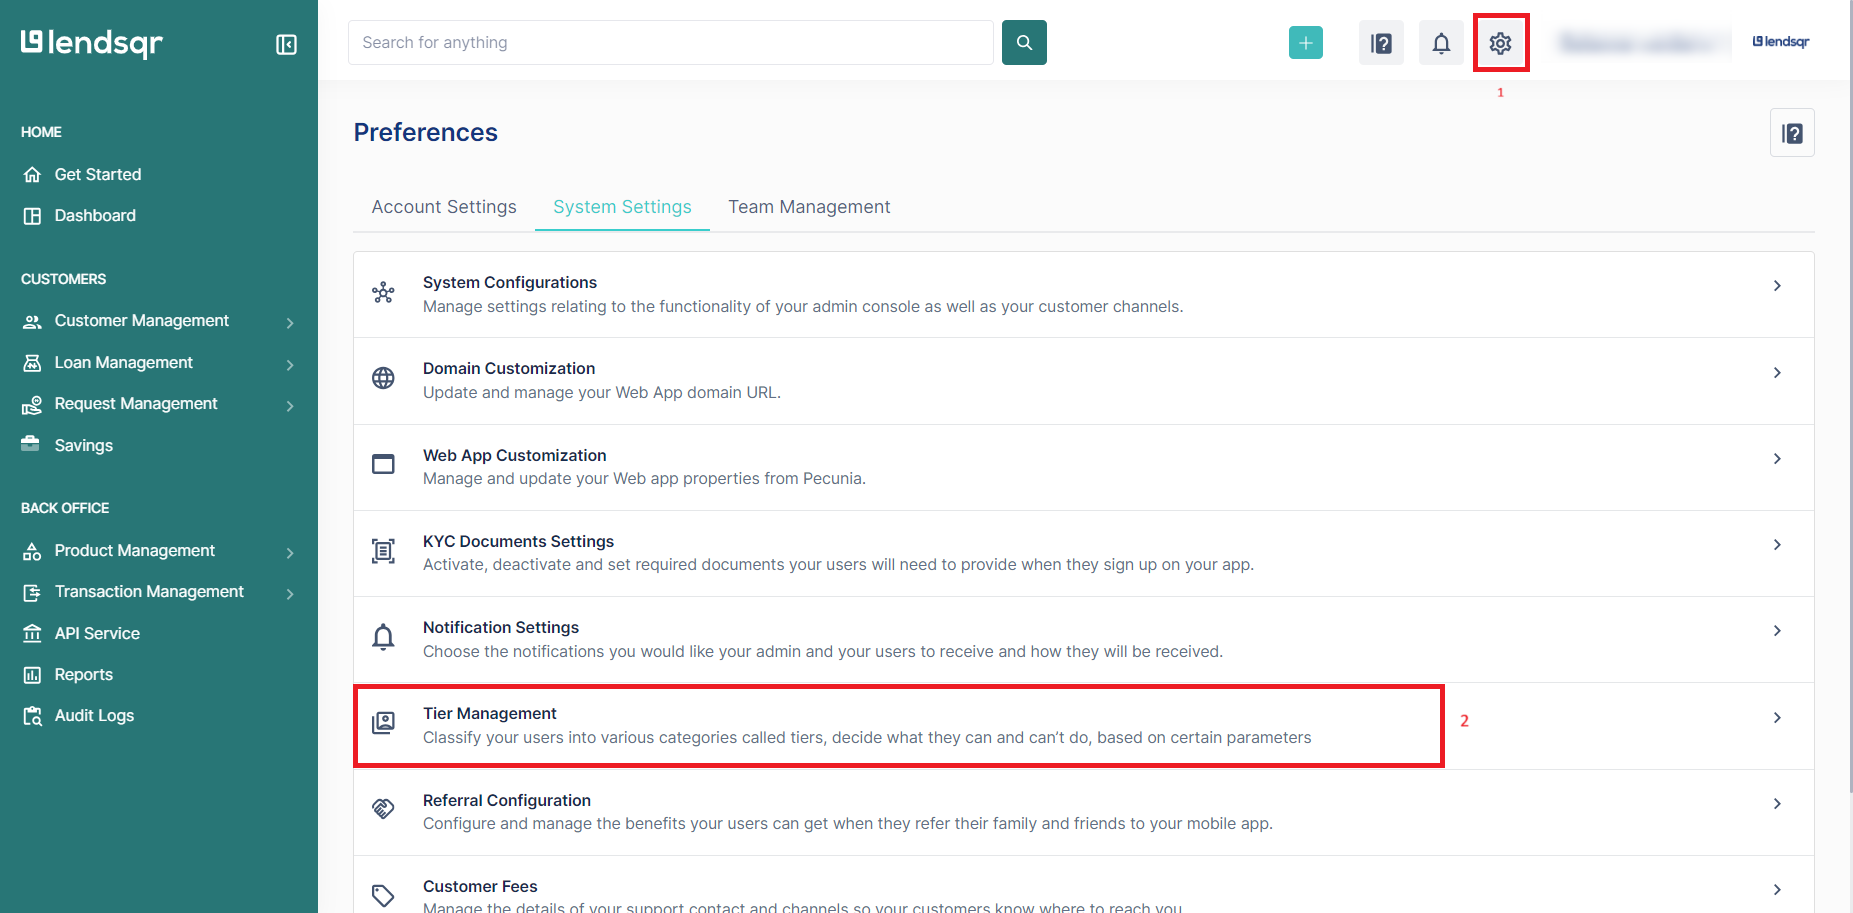
Locating Tier Management on the Lendsqr Admin console
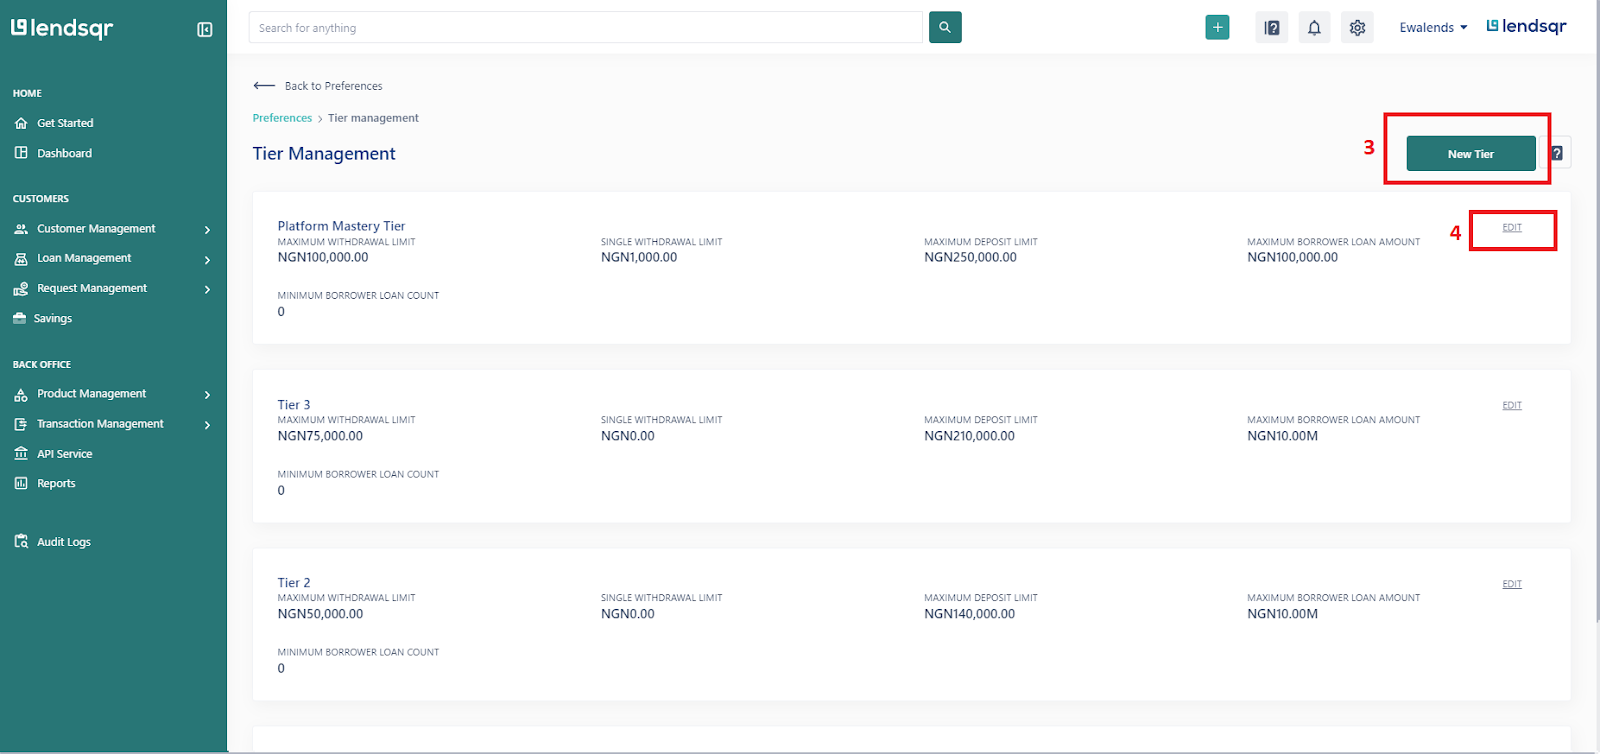
Creating or modifying tiers
Whether you are creating a new tier or editing an existing one, a page with the relevant tiering fields will be displayed to you. On this page, you can specify the tier limits, tier requirements, required KYC documents and as well as the loan requirements for each tier. For example, you can:
- set the maximum amount a user can withdraw;
- the maximum loan count and so on.

If you have completed the steps mentioned above, then you have successfully created a new tier that can be assigned to your users.