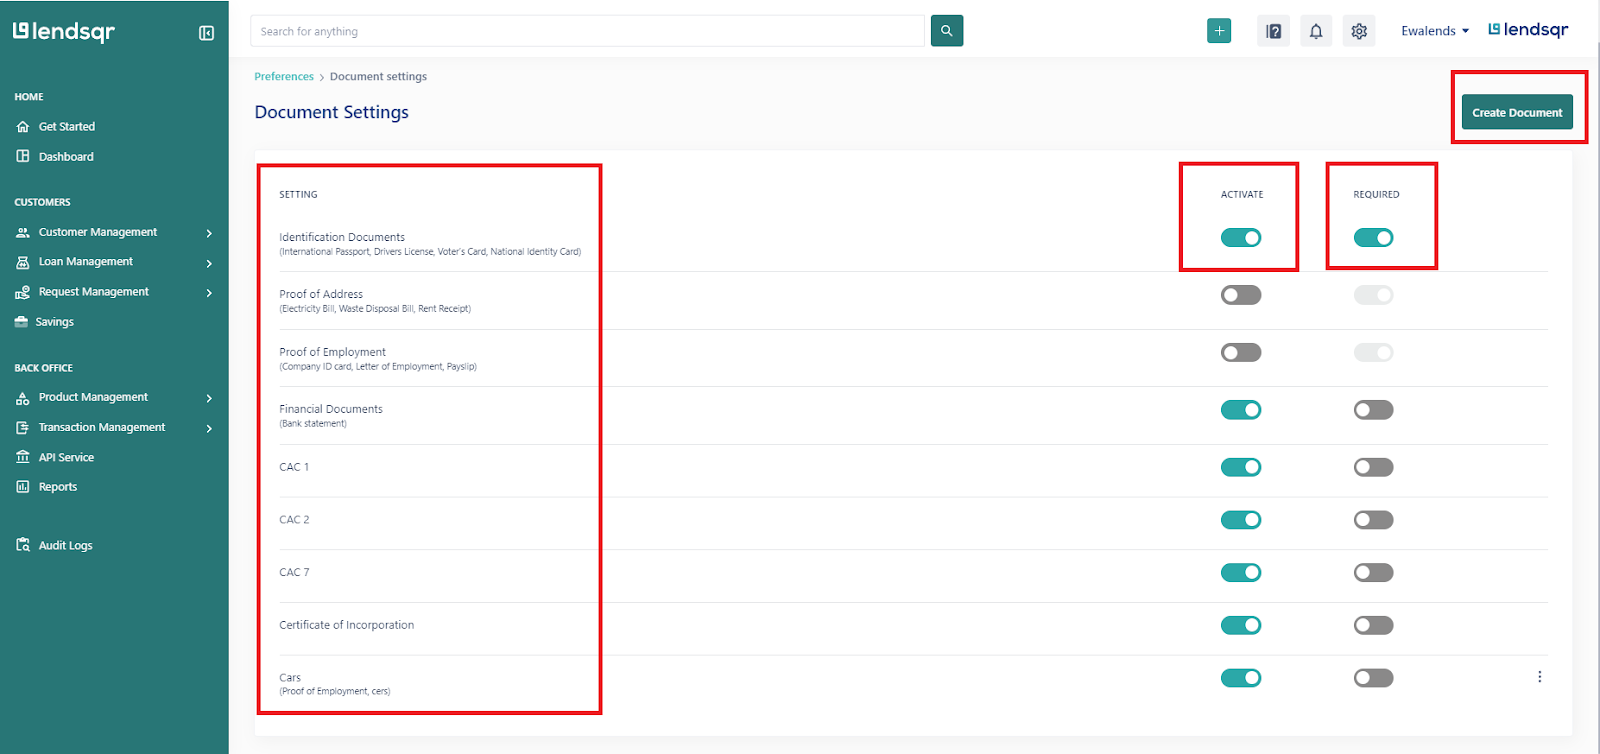
As a lender, you have the ability to choose the documents customers can upload before taking a loan.
To choose these documents as an admin, you can toggle on or off the “activate” toggle button. When a document is activated, it will be displayed to borrowers on the mobile app under the “Documents” screen as an optional document to be submitted before a loan can be taken.
You are also allowed to toggle on or off the “required” toggle button. When a document is set to required, it is displayed under the “Documents” section of the mobile app as a “required” document to be submitted before a loan can be taken by the borrower and when required field is toggled off, the document does not carry any tag on the mobile app.
In addition, you can create and add a new document to the existing list of documents on the page. This can be done by navigating to the “create document” button and filling the document name and document type fields on the modal displayed.
Viewing the organization documents page

Creating a new document
Watch the video below explaining how to configure required documents for your users